Blog
Insulating Sill Plates: A South Florida Guide for 2026
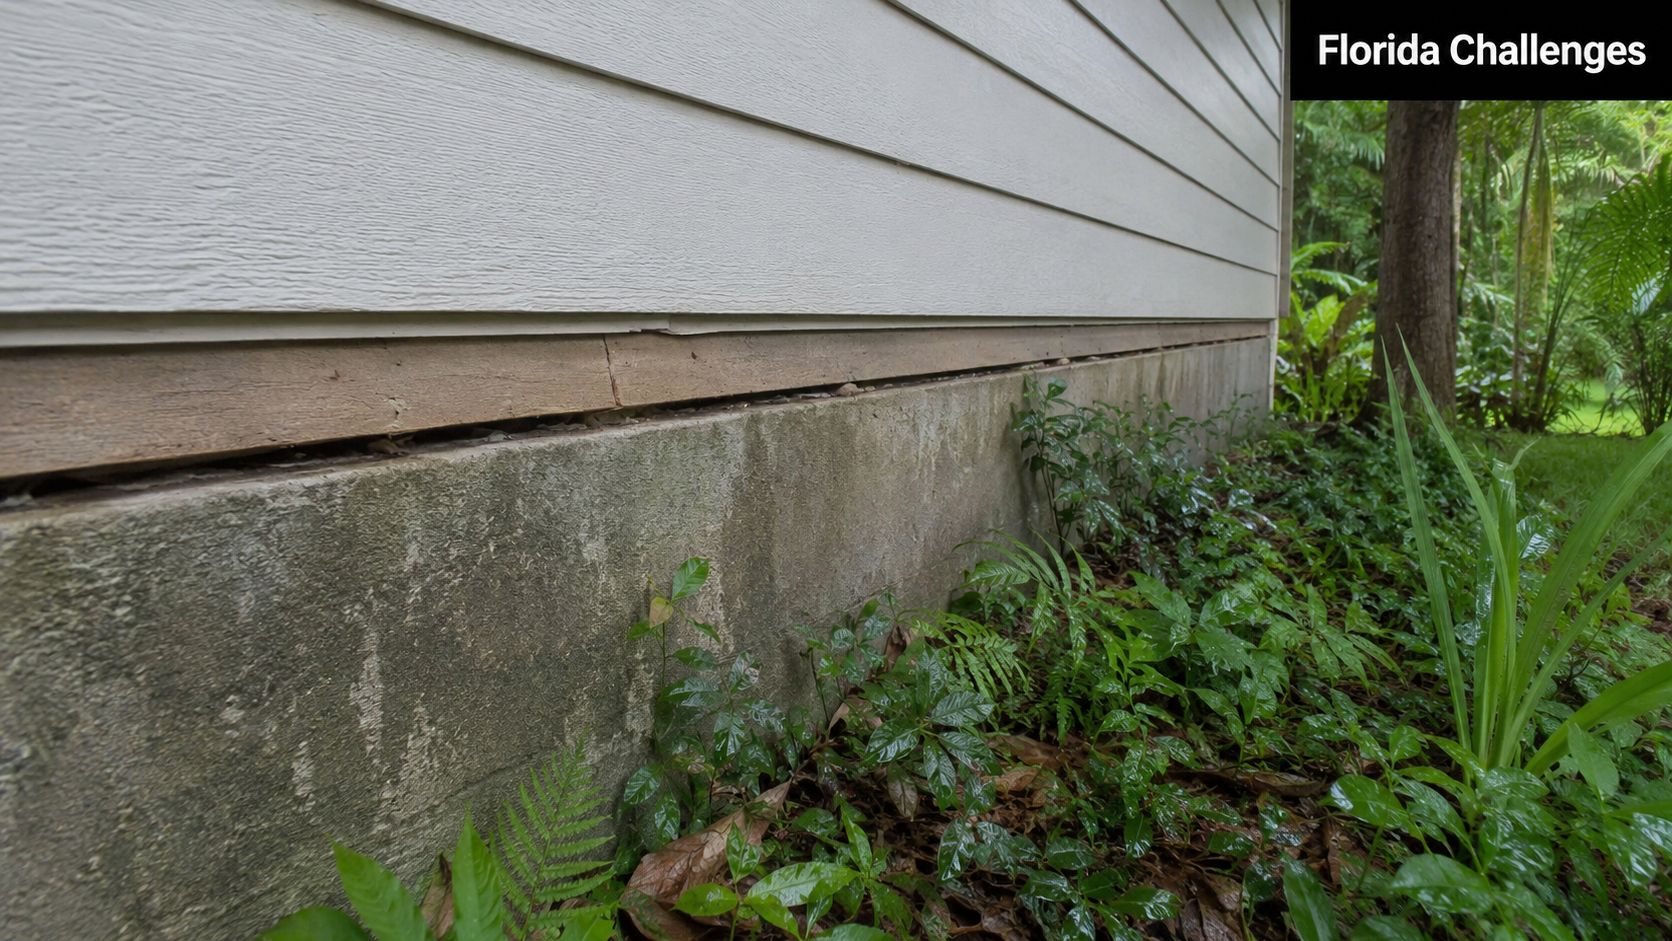
If your floors feel slightly warm near the exterior walls, your A/C seems to run longer than it should, or you catch a musty smell that never quite goes away, the problem may be at the very bottom of the wall system. In South Florida, one of the most overlooked trouble spots is the sill plate area where the wood framing meets the concrete foundation.
A lot of homeowners have never heard the term sill plate until a contractor points at it in a crawl space, garage perimeter, or the top of a stem wall. But when you're insulating sill plates, you're dealing with one of the most leakage-prone joints in the house. Done right, this work helps slow humid air, protects framing, and closes off a path that insects and moisture both like to use.
Why Your Sill Plate Is a Hidden Energy Drain
The sill plate is the horizontal piece of lumber that sits directly on top of the foundation and supports the wall framing above. In many homes, it ties into the rim-joist area at the perimeter. That joint sounds minor. It isn't.
At that foundation-to-floor connection, you often have tiny cracks, irregular concrete, fastener penetrations, and seams between different materials that expand and contract differently over time. In South Florida, those gaps don't just leak conditioned air out. They pull hot, damp air in.

Where homeowners usually notice it
Individuals typically don't identify the sill plate first. They notice symptoms.
- Persistent humidity indoors because outdoor air is sneaking into the lower wall assembly
- Musty odor near baseboards or closets because damp air keeps reaching cooler materials
- Uneven comfort with some rooms feeling harder to cool than others
- Pest activity near the perimeter because openings at the slab or stem wall give access points
In older homes, the area may have little more than fiberglass stuffed into cavities, or nothing at all. Fiberglass can slow heat transfer, but it doesn't stop airflow. If air is moving through the assembly, the insulation isn't doing the full job.
Why air leakage matters more than most people think
Modern guidance treats the sill plate as part of the broader rim-joist air-sealing zone, not as an isolated strip of wood. The U.S. Department of Energy's rim-joist guidance tells installers to fit rigid foam or wrapped/faced batts tight to each cavity and then seal all edges with one-part foam, caulk, or mastic. It also says openings larger than 1/4 inch should be filled with pest-proof material before air sealing, and notes that foam insulation thicker than 3.25 inches or permanently habitable space may require a thermal barrier, according to the DOE rim-joist insulation guidance.
Practical rule: If the sill area leaks air, it can also move moisture.
That point matters more in this climate than the average homeowner realizes. Penn State's durability research on rim-joist assemblies, which include the sill plate, emphasizes that insulation placement is a primary method for controlling condensation and that the assembly needs to prevent moisture buildup while still preserving drying potential, as outlined in the Penn State durability evaluation of insulated rim joists.
What a proper fix looks like
A proper sill-plate job isn't just “add insulation.” It means:
- Find the leakage paths
- Seal the cracks and transitions
- Install insulation that fits the moisture risk
- Avoid trapping dampness against wood or concrete
That last point is where a lot of generic advice falls apart. In South Florida, you're not just trying to raise R-value. You're trying to build a perimeter assembly that can resist humid air and stay dry enough to last.
Insulation Options Foam Board vs Spray Foam
When people ask about insulating sill plates, they're usually comparing four categories: fiberglass batts, rigid foam board, open-cell spray foam, and closed-cell spray foam. These aren't interchangeable. Each behaves differently when air and moisture are involved.
The quick comparison
| Material | Air Seal Quality | Moisture Barrier | Avg. R-Value per inch | Recommended for S. Florida |
|---|---|---|---|---|
| Fiberglass batt | Poor unless paired with separate air sealing | No | Qualitatively lower than foam options in real-world leaky assemblies | Usually no for this detail |
| Rigid foam board | Good when cut tight and edge-sealed | Can act as a moisture-control layer when detailed correctly | Varies by product | Yes, often a strong option |
| Open-cell spray foam | Good air seal | Less moisture-resistant than closed-cell | Varies by product | Sometimes, depending on assembly |
| Closed-cell spray foam | Excellent when properly installed | Strong moisture resistance | Varies by product | Often the preferred choice |
What works and what doesn't
Fiberglass batts are the material I see misused most often in sill areas. They fill space, but they don't stop moving air. In a humid market, that means the batt can sit there while damp air slips around it or through it. That's one reason generic “stuff a batt in the cavity” advice doesn't hold up well at the perimeter.
Rigid foam board works well when it's cut accurately and sealed at the edges. That hybrid method, rigid foam fitted into each bay and then sealed around the perimeter with canned foam, has become common because it gives you insulation and air sealing in one assembly if the detailing is clean. If you want to see that type of perimeter detail in related framing areas, this guide to spray foam insulation for floor joists is a useful companion.
If the board is sloppy, undersized, or left with open edges, the whole assembly loses value fast.
Open-cell spray foam can work in many climates, but material choice should follow climate risk, not habit. Green Building Advisor notes that open-cell spray foam generally works in most climate zones, while closed-cell spray foam is preferred in Climate Zones 7 and 8, and the discussion emphasizes preserving the sill plate's ability to dry. The same discussion also references 1.5 inches of rigid foam as a level that creates a vapor barrier, with 2 inches described as better for performance and comfort, in the Green Building Advisor discussion on rim joist insulation.
Why closed-cell usually wins here
For South Florida, the key issue isn't just insulating value. It's controlling humid air at a vulnerable joint while reducing the chance of moisture problems. That's where closed-cell spray foam usually separates itself from the pack.
It adheres to irregular substrates better than board stock, handles awkward transitions well, and doesn't depend on perfectly square cavities. In homes with uneven concrete, anchor bolts, pipes, wiring, and termite treatment penetrations, that matters.
Closed-cell isn't automatically the answer for every single house. If the foundation is already damp, if the wood shows damage, or if the assembly needs to preserve more drying potential, the detail has to be adjusted. But as a material class for this climate and location, it solves more perimeter problems than fiberglass ever will.
The real trade-off
The trade-off is precision. Foam products only perform the way they're supposed to when the installer manages thickness, substrate condition, edge sealing, and code requirements properly. That's why a bad spray foam job can be worse than a careful rigid-board job.
The Complete Sill Plate Insulation Process
A sill-plate retrofit should be treated as an air-sealing job first and an insulation job second. If the perimeter joint is still leaking after the insulation goes in, the project is only half done.
Start with inspection, not foam
Before any sealant or insulation goes in, inspect the whole perimeter carefully. Look for rot, staining, insect activity, crumbling concrete edges, previous patch materials, and signs that bulk water has been entering. If the wood is compromised, insulation doesn't solve the underlying problem.
Natural Resources Canada lays out the sequence well: inspect and repair the foundation and wall interface, air-seal leakage paths and penetrations, then install snug rigid board with moisture-resistant properties such as XPS or Type IV EPS, sealing joints and intersections with foam-compatible caulking and tape. That guide recommends a minimum of RSI 2.1 (R-12) and notes that at least RSI 1.76 (R-10) rigid board installed around the perimeter can create an air and moisture barrier comparable to spray foam when detailed correctly. It also warns that polyethylene in this assembly can create a double-vapor-barrier risk, as explained in Natural Resources Canada's basement insulation guidance.
Seal the leakage paths first
Many DIY jobs commonly fail because people start with insulation and treat air sealing like touch-up work. The U.S. Department of Energy's guidance says the opposite. Gaps must be sealed before insulation goes in, especially openings larger than 1/4 inch, which should be filled with pest-proof material first.
That matters in South Florida for two reasons:
- Humidity control because moving air carries moisture into framing cavities
- Pest control because open joints at the foundation edge are access routes
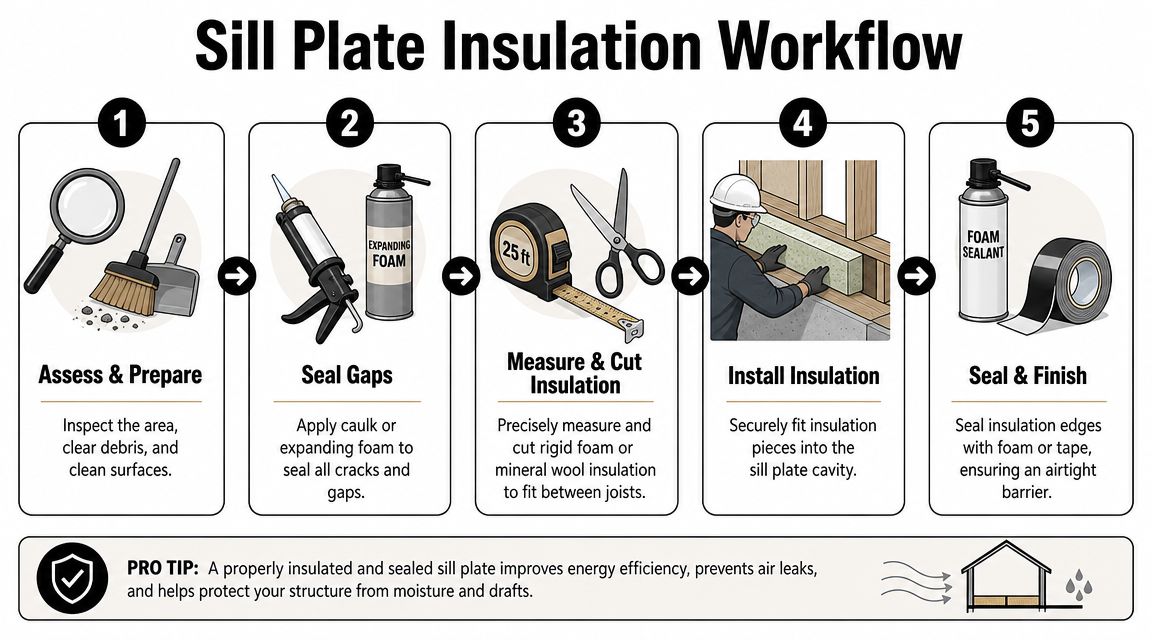
For many assemblies, the workflow looks like this:
- Clean the area so foam or sealant can bond properly.
- Seal cracks and penetrations at the sill-to-foundation joint and around pipes, wires, and fasteners.
- Address larger gaps first with appropriate backing or pest-resistant filler before final sealing.
- Only then install the insulation layer.
For homeowners comparing products and methods in this exact area, this guide on how to insulate rim joists is worth reading alongside this process.
Here's a visual overview of the workflow:
Install the insulation as a system
There are two common approaches that hold up when done correctly.
Rigid foam cut-and-seal method
Each piece is cut to fit tightly in the cavity. The board should sit snug to reduce edge convection, then the perimeter gets sealed with compatible foam, caulk, or tape. This approach is detail-heavy. It works best when the installer is patient and accurate.
Spray foam method
Closed-cell spray foam is applied directly to the target surfaces to create a continuous layer over joints, corners, and irregular framing. It works especially well where the cavity geometry is messy and the goal is an uninterrupted air barrier.
A clean perimeter seal beats a thicker but leaky insulation layer.
Finish work matters
After the main installation, the job still isn't over.
- Trim irregular cured foam edges if another layer or finish needs to sit flat
- Check every bay for missed corners
- Confirm code requirements for ignition or thermal barriers if applicable
- Keep termite inspection visibility in mind where local practice requires it
Small misses at the perimeter can undo the value of an otherwise solid installation. The houses that stay drier and tighter are usually the ones where someone took the time to treat the sill plate as a precision detail, not filler work.
South Florida Specifics Moisture Termites and Code
South Florida changes the equation. A sill plate detail that performs acceptably in a drier climate can become a moisture trap here if it's designed without respect for humidity, wet foundations, and insect pressure.
Moisture comes first
In this region, the main question isn't “How much insulation can I cram into the cavity?” The main question is whether the assembly can dry safely after you tighten it up.
Green Building Advisor's discussion of air sealing around the sill plate makes that point clearly. Moisture-sensitive materials can increase condensation risk if the foundation is damp, fiberglass batts are air-permeable, and in some cases foam or caulk alone may be enough if adding more fill would raise moisture accumulation risk, according to the Green Building Advisor discussion on air sealing and insulating around the sill plate.
That warning is especially relevant in homes with:
- Damp crawl spaces
- History of minor flooding
- Poor drainage at the foundation
- Visible mildew or staining at the base of walls
If your property also deals with stormwater management concerns, these home flood protection tips are a practical complement to insulation planning because drainage and envelope work need to support each other.
Termites change how you detail the job
South Florida contractors can't ignore termites at the sill plate. The same narrow gap that leaks air can also give subterranean termites a hidden route from soil or foundation into the framing.
That doesn't mean you leave the perimeter open. It means you seal and insulate with inspection access, treatment history, and local pest-control practice in mind. If there are signs of tubes, frass, damaged wood, or old activity, fix that before you bury the detail behind new material.
In this climate, a tight sill plate detail should block humid air without hiding an active termite problem.
Material choice has to fit local conditions
Product selection is now a practical, not theoretical, matter. A dry, clean foundation perimeter may be a good candidate for rigid board plus edge sealing or for closed-cell spray foam. A perimeter with damp masonry, visible staining, or unresolved drainage may need foundation corrections first.
For homeowners sorting through those moisture-control decisions, this overview of moisture barrier insulation gives useful context on assemblies that aim to limit air and water vapor movement together.
Code isn't a footnote
Foam insulation at the sill plate isn't just a comfort upgrade. Code issues can include fire protection requirements, habitable-space conditions, and product-specific installation limits. In hurricane country, tight envelope work also contributes to a more resilient building shell. Good code compliance starts long before inspection day. It starts with choosing a material and installation method that belongs in this climate.
DIY Sill Plate Insulation vs Hiring a Professional
Some sill-plate work is within reach for a careful homeowner. Some isn't. The difference usually comes down to access, moisture conditions, material choice, and how much risk you're willing to carry if the assembly is sealed wrong.
When DIY can make sense
If the perimeter is dry, visible, and easy to reach, a DIYer may be able to handle a limited rigid-foam cut-and-seal project. That kind of work rewards patience more than speed. Measure carefully, cut tight, and seal every edge cleanly.
DIY also makes more sense when you're dealing with a small section, not the entire perimeter of a house with multiple penetrations and inconsistent framing.
Where DIY usually breaks down
Spray foam changes the risk profile. Product handling, curing conditions, thickness control, and safety become much more important. Manufacturer and instructional guidance also note practical details that many homeowners miss, including material temperature ranges for proper curing and maximum cured depth for fire-rating compliance, as highlighted in this professional sill-plate spray foam video reference.
Here are the biggest trouble spots I see with homeowner installs:
- Missed air leaks because the focus stayed on filling cavities instead of tracing actual leakage paths
- Wrong product for the moisture condition which can trap dampness where the wood needs drying potential
- Poor adhesion caused by dirty surfaces or bad application conditions
- Messy finishing that leaves voids, uneven edges, or incomplete coverage around penetrations
What a professional adds
A professional isn't just bringing foam. A competent installer is bringing a process.
That includes checking substrate condition, deciding whether a hybrid rigid-board assembly makes more sense than full spray, knowing when termite evidence changes the scope, and understanding when a code-required thermal barrier may apply. It also means recognizing when insulation should wait until drainage, dehumidification, or repairs are handled first.
The practical decision
Choose DIY if all of these are true:
- The area is small and accessible
- The foundation is dry
- You're using a straightforward cut-and-seal method
- You can work carefully around pest and moisture concerns
Hire a professional if any of these apply:
- You want closed-cell spray foam
- The sill area has visible dampness or odor issues
- There are termite concerns
- The assembly includes multiple penetrations, irregular concrete, or questionable old materials
The cheapest route upfront isn't always the least expensive fix overall. If a partial or sloppy job leaves air leakage, moisture risk, or concealed insect access behind, you may end up reopening the same perimeter later.
The Airtight Solution for a Healthier Home
Insulating sill plates in South Florida isn't a box-checking exercise. It's one of those details where the material, the sequence, and the local conditions all matter at the same time.
A good sill-plate assembly does three things well. It limits air leakage, manages moisture realistically, and respects the fact that this region puts unusual pressure on wood framing at the foundation edge. That's why fiberglass alone so often falls short and why closed-cell foam or a carefully executed rigid-board system usually makes more sense.
Homeowners who stay on top of perimeter details also tend to stay ahead on the rest of the house. If you're building out a broader maintenance checklist, this collection of essential home care guidance is a helpful resource for keeping the whole property in better shape between major projects.
If you're in Jupiter, Palm Beach Gardens, West Palm Beach, Wellington, or Stuart, and you're seeing signs of lower-wall humidity, musty air, uneven cooling, or perimeter leakage, it's worth getting the sill plate evaluated by someone who understands hot-humid assemblies. Airtight Spray Foam Insulation is one option for that kind of work, particularly when the job calls for a sealed spray-foam perimeter detail rather than a basic cavity fill.
The right fix at the foundation edge can make the whole house feel tighter, drier, and easier to cool.
If you want a clearer answer on whether your home needs air sealing, rigid foam, closed-cell spray foam, or foundation corrections before any insulation goes in, contact Airtight Spray Foam Insulation for a free, no-obligation quote. They serve homeowners and builders across South Florida and can assess the sill plate area with the moisture, termite, and code concerns of this region in mind.