Blog
Roof Baffle Installation: A Pro Guide for Florida Homes
If you're in South Florida staring at a hot attic, stained roof decking, or insulation piled tight against the eaves, you're usually dealing with the same root problem. Air isn't moving where it needs to move. The attic traps heat, humidity hangs around too long, and the roof system starts paying the price.
That's where roof baffle installation matters. Done right, it keeps a clear path from soffit intake to the upper exhaust path, protects the insulation layer from blocking that route, and helps the whole attic work like a system. Done wrong, baffles turn into wasted plastic stapled under the roof deck.
The part most guides miss is this. Baffles are not automatically correct on every attic job in Florida. If you're working with a vented attic, they can be mandatory. If you're building an unvented attic with spray foam at the roof deck, adding baffles can create the exact moisture problem you're trying to avoid.
Why Roof Baffles Are Your Attic's First Defense in Florida
You open the attic hatch in August and the first thing you feel is trapped heat. Then you see dark roof decking near the eaves, insulation pushed tight into the soffits, and maybe a little mildew smell. In South Florida, that usually means the intake side of the attic was blocked long before anyone noticed the comfort problem inside the house.
A roof baffle protects that intake path. In a vented attic, it holds open the space between the roof deck and the insulation at the eaves so outside air can enter through the soffits and keep moving. If that lower path gets choked off, the rest of the vent system underperforms, no matter how many ridge vents, box vents, or gable vents are up top.

What baffles actually protect
The first area that fails is usually the perimeter.
Loose-fill insulation drifts. Batt insulation gets shoved too far outward. Storage boards and service work crush the insulation line. Once soffit intake is blocked, humid air lingers longer under the roof deck, and that is when you start seeing condensation stains, musty odors, and rooms below that are harder to keep even.
Baffles help prevent that by preserving a defined air channel where the roof meets the exterior wall. In a standard vented attic, that simple detail protects more than airflow. It helps the roof deck dry more consistently, keeps insulation from losing effectiveness at the eaves, and reduces the chance that moisture sits in the same spot day after day.
One caution matters here, especially in Florida. Baffles are for vented attic assemblies. If the plan is an unvented attic with spray foam applied directly to the roof deck, you do not want to create a vent channel above or behind that foam. That setup changes the assembly you are building, and in many cases it works against the point of a sealed attic. Homeowners trying to sort that out should review the different types of attic ventilation before deciding whether baffles belong in the job at all.
Practical rule: If the attic is vented, baffles keep the soffit path open. If the attic is being converted to an unvented spray foam assembly, adding baffles at the roof deck can be the wrong move.
Why this matters beyond traditional attics
The same principle shows up in tougher assemblies. Metal framing, low-slope transitions, and tight roof-to-wall connections all punish sloppy airflow and insulation details. That is one reason the article on insulation tricks for steel homes is worth a look. It reinforces a point good insulation contractors already know. Air control and insulation continuity have to work together, or the weak spot shows up fast in Florida heat and humidity.
Baffles are a small part, but they often determine if a vented attic vents.
Choosing Your Baffles and Gathering the Right Tools
Not all baffles hold up the same in a humid attic. Some are rigid and keep their shape when insulation presses against them. Others sag, tear, or shift during install. The right pick depends on the roof layout, access, and the type of insulation going in around them.
For most vented Florida attics, rigid products are easier to trust long term than flimsy pieces that deform when the bay gets tight. Cardboard can work in dry conditions, but humidity and rough handling are not kind to it. Plastic and rigid foam usually give you a cleaner install.
What material fits the job
Here's the practical tradeoff.
| Material | Durability (Humid Climate) | Average Cost (Per Baffle) | Best For |
|---|---|---|---|
| Rigid foam | Good | Varies by supplier and size | Standard vented attics where you want a stable air channel |
| Plastic | Good | Varies by supplier and size | Areas with tighter bays, humid conditions, and long-term durability |
| Cardboard | Lower than rigid plastic or foam in damp conditions | Usually budget-oriented | Short-term budget installs where moisture exposure is limited |
| PVC-style systems | Durable | Varies by system | Hard-to-reach assemblies and specialty applications |
I don't recommend choosing by price alone. If the product crushes when insulation is pushed against it, you lose the channel you were trying to create.
A specialty option exists for difficult cavities. The V-Baffle installation method describes a push-in approach from the soffit side for long cathedral areas with limited access. That kind of product can solve a very specific access problem, but it doesn't replace careful layout and sealing.
The tool list that actually matters
A basic roof baffle installation doesn't need a truck full of gear, but the wrong tools slow the job down and make the result sloppy.
- Heavy-duty staple gun: Use a real construction stapler, not a light office stapler. You need staples that will hold the baffle tight to the framing or deck.
- Staples sized for attic work: Match the staple to the material so it bites cleanly without tearing through.
- Utility knife: Useful for trimming edges and shaping around odd framing.
- Tape measure: Needed to check bay width, top-plate location, and extension length.
- Flashlight or headlamp: You need to see the soffit edge, not guess where it is.
- Gloves, eye protection, and mask: Attics are full of dust, fibers, and sharp edges.
- Spray foam can or sealant where appropriate: Helpful when the install approach calls for sealing edges or transitions.
- Small amount of loose fiberglass: Useful for the insulation plug detail at the bottom of the baffle when you're protecting the channel from blown insulation.
Cheap baffles and weak staples create the same callback. The channel collapses or the piece drops out of place after insulation is installed.
Match the product to the attic
A simple gable attic with open access gives you more product flexibility. Tight hips, low slopes, and messy retrofit jobs don't. In those spaces, rigidity matters more than saving a little on material.
If you're also deciding between vented insulation methods and a roofline foam approach, make that call before you buy baffles. That one decision changes whether the baffles belong there at all.
The Complete Roof Baffle Installation Process
A lot of bad baffle jobs look fine from the attic hatch. Then August hits, the attic gets brutally hot, and you find out half the soffit air never made it past the top plate. That usually comes from one of three mistakes: the chute started too high, it was fastened loosely, or blown insulation later buried the intake.
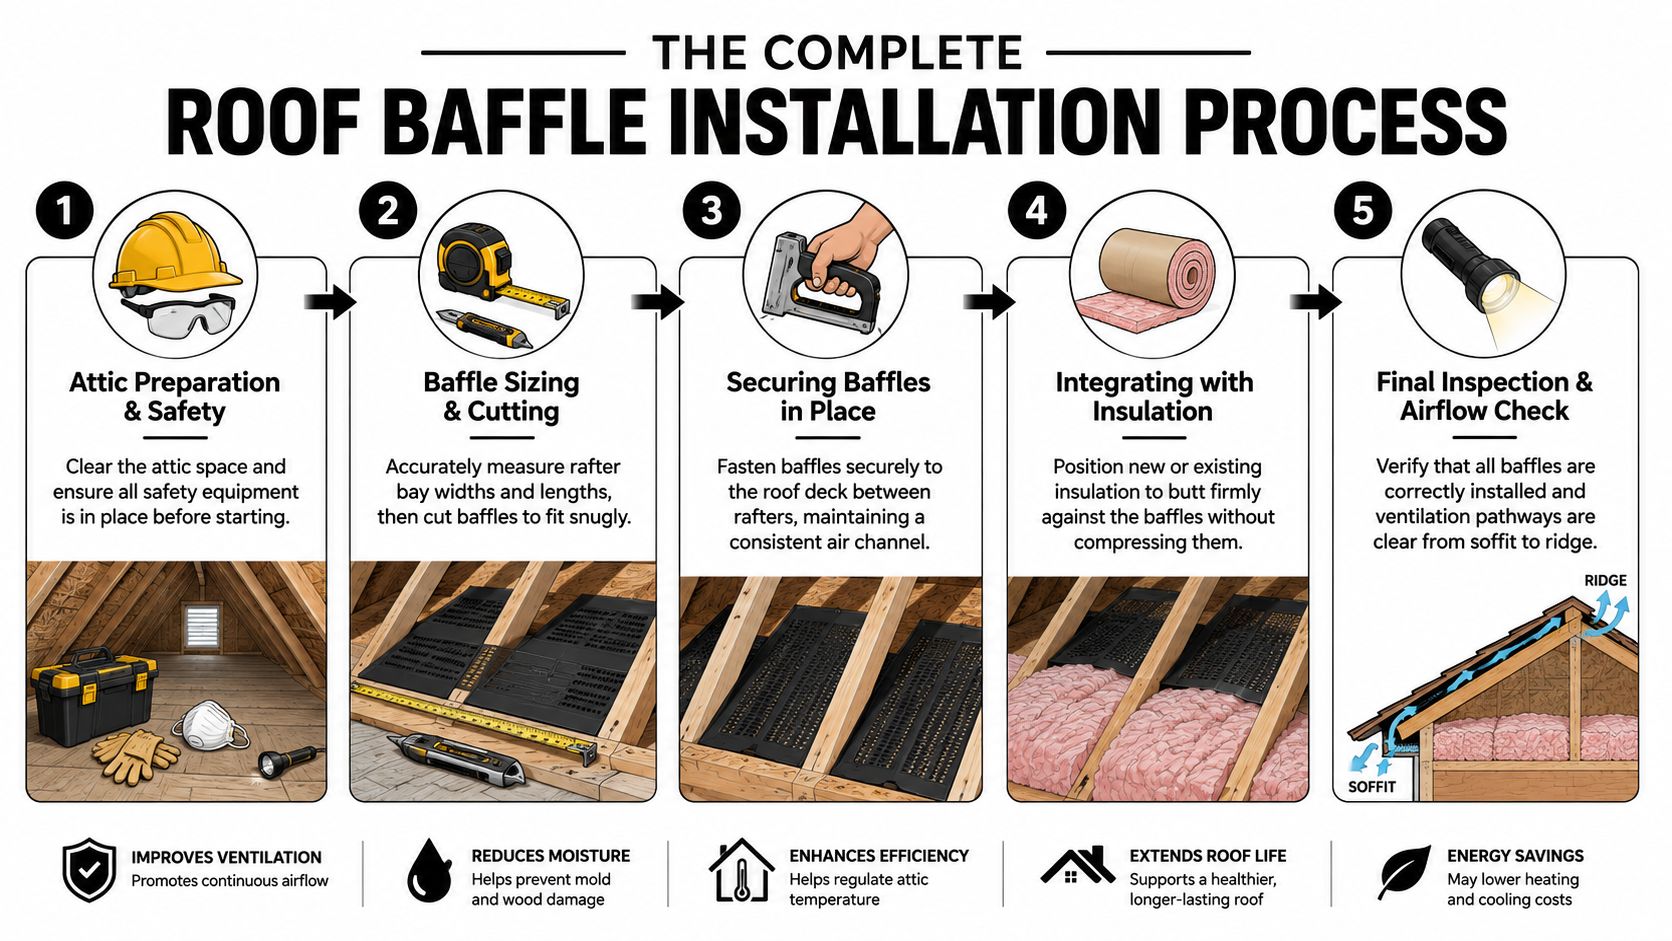
Start by exposing the eave properly
Pull back the existing insulation until you can clearly see the soffit path, the top plate, and the full rafter bay. In a retrofit, this part takes longer than homeowners expect, especially in low-slope South Florida roofs where the work area tightens up fast.
Do not install by feel. If you cannot see where outside air enters, you cannot place the baffle correctly.
The basic sequence is straightforward: inspect the bay, clear the eave, fit the baffle full width, fasten it securely, and make sure the air path stays open from the soffit into the attic. That matters even more if this attic will later be part of a spray foam discussion, because a sloppy vented assembly often gets mistaken for a foam fix when the underlying problem is bad airflow control. If you are troubleshooting comfort or moisture complaints, review these attic spray foam insulation problems before assuming foam alone will correct a bad intake detail.
Set the baffle low enough to catch intake air
The bottom of the baffle needs to reach the intake zone at the eave and extend past the top plate so air can turn and move upward. If it stops short, the channel may exist on paper but not in practice.
That missed detail is common on rushed installs. The installer stays higher in the bay because it is easier to reach, then staples the piece where it looks straight. From below, the soffit vent is open. Above it, the chute never connects to that air source.
As shown in this roof vent chute installation demonstration, the baffle should continue a few inches past the top plate. That small extension is what turns the piece into an actual air chute instead of attic decoration.
Fasten the sides so the channel keeps its shape
Staple the baffle to the framing so it stays tight to the bay and does not sag when insulation goes back in. A loose staple pattern causes callbacks. Once blown insulation pushes against a weak install, the chute can shift, fold, or drop away from the deck.
In clean framing, the workflow is simple:
- Clear the bay: Remove enough insulation to see the soffit opening and top plate.
- Dry-fit first: Check width, confirm the chute is not twisted, and trim only if framing forces it.
- Place it at the intake: Keep the lower end down where outside air enters.
- Fasten top and bottom: Secure both ends so the baffle cannot walk out of place later.
- Look up the run: Confirm the air channel remains open and continuous.
For continuous soffit vents, install a baffle in every rafter bay that needs intake airflow. With individual vent openings, line the chute up with the actual vent locations. The point is not to fill the attic with plastic. The point is to preserve a real air path where intake air is available.
A visual reference helps if you want to see the sequence in motion:
Keep blown insulation out of the opening
Before insulation goes back, protect the bottom of the chute so loose-fill does not spill into the intake path. A small fiberglass plug at the lower end is a common field detail for that reason.
It does not need to be overstuffed. The goal is to block insulation drift while keeping the ventilation path open. Pack it too tight and you create the same restriction you were trying to prevent.
Handle retrofit obstructions without crushing the chute
Older attics rarely give you perfect bays. You run into wiring, diagonal bracing, fire blocking, nail points, and framing that pinches down near the eave. In those spots, forcing a standard baffle flat against the deck usually ruins the channel.
Trim carefully around the obstruction and keep the center air space intact. If the bay is too irregular for the product to hold its shape, switch methods or materials instead of jamming in a damaged piece.
That trade-off matters. In a vented attic, an imperfect-looking chute that preserves airflow is better than a neat install that blocks it. In an attic that may later become an unvented spray foam assembly, stop and confirm the design before going further. Baffles help only when the roof assembly is supposed to stay vented.
Integrating Baffles with Spray Foam Insulation
Many Florida attic projects falter at this point. People hear that baffles are good for attics and assume they belong in every roof assembly. They don't.
The first question is whether the attic is vented or unvented. That decision controls the whole assembly. In a vented attic, baffles preserve an air channel above the insulation line. In an unvented attic, the insulation strategy changes completely.

When baffles belong with spray foam
If you're insulating a vented roof assembly and maintaining airflow under the roof deck, baffles can work with spray foam as part of that design. The point is to keep a defined ventilation gap between the roof deck and the insulation layer so intake air can still move.
That setup needs discipline. The foam application can't choke the channel, and the baffle layout has to be consistent from soffit upward. This is not the place for vague planning between trades.
When baffles should not be installed
In South Florida, many high-performance attic projects use an unvented approach with code-compliant spray foam applied directly to the underside of the roof deck. In that assembly, baffles are unnecessary and can be detrimental because the insulation must be air-impermeable and directly adhered to the roof deck. Adding baffles creates an air pocket that can increase condensation risk, as discussed in this Spray Foam Magazine forum discussion on roof baffles.
That's the distinction many DIY guides skip. They treat every attic like a vented fiberglass attic, then tell people to add baffles across the board. That advice breaks down fast when the project is a conditioned attic with foam at the roofline.
If the design is unvented, don't create a vent cavity by habit. That extra space can work against the assembly.
The mistake that causes confusion
Homeowners often mix two different systems together because parts of each sound familiar. They want the tight air seal of spray foam but also the vent chute they saw used with loose-fill insulation. In a vented attic, those pieces can be coordinated. In an unvented attic, they conflict.
If you're sorting through warning signs before committing to a foam strategy, this guide to attic spray foam insulation problems is useful because it highlights how moisture issues usually come from assembly mistakes, not from foam by itself.
Keep the assembly consistent
A vented attic needs a protected air path. An unvented attic needs direct, continuous air-impermeable insulation at the roof deck. Pick one system and build it correctly.
The expensive problems show up when someone starts with one approach, then borrows details from the other.
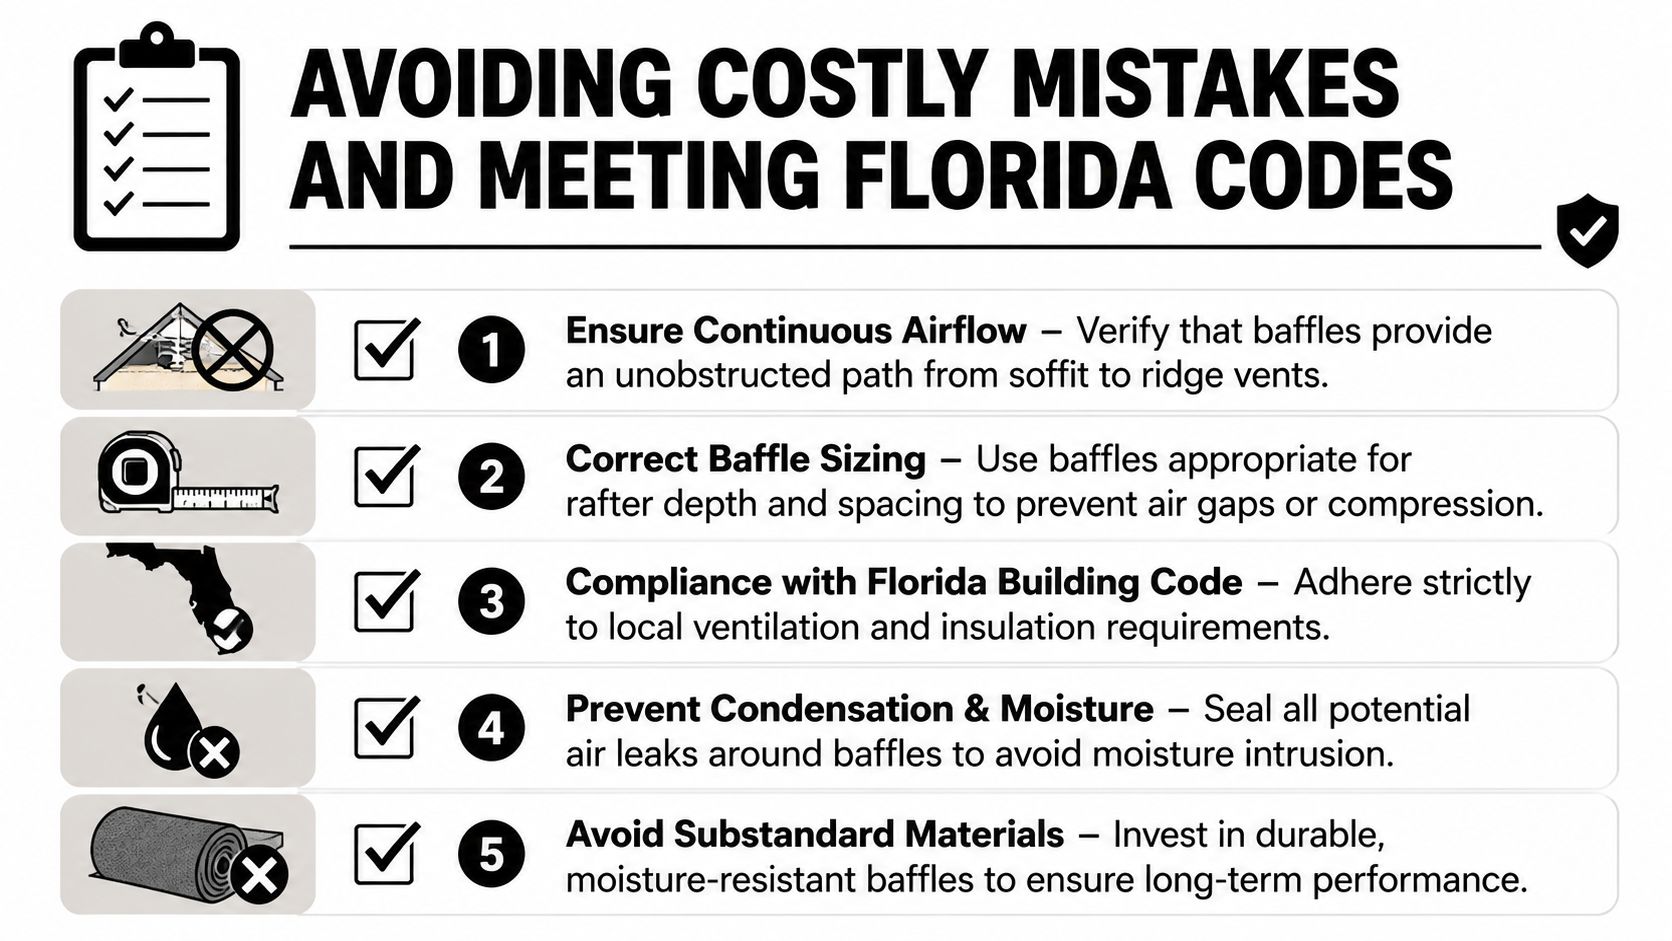
Avoiding Costly Mistakes and Meeting Florida Codes
A lot of attic failures start the same way in South Florida. The soffit vents are in place, the insulation crew says the attic is ventilated, and everything looks finished from the access hatch. Then the eaves get checked and the air path is pinched off, half the baffles stop short of the soffit, or the roof assembly was set up like a vented attic when the plan really called for an unvented foam system.
That is the expensive part. The job can pass through one trade after another and still be wrong.
Florida code work on attic ventilation comes down to a simple question. Can outside air enter at the soffit, stay open past the insulation line, and move into the intended vent channel? Inspectors are looking for that physical path, not just vent components on a material list.
Where installations go wrong
The biggest mistake is treating baffle count and placement like a rough guess. Vented attics need enough open intake area, spread in a way that feeds the attic ventilation design. If too many rafter bays are skipped, or only the easy bays get baffles, the intake side stops doing its share even though the attic still has visible vents.
I see the same field errors over and over:
- Baffles installed above the actual soffit opening: air never gets captured at the eave.
- Short or narrow baffles: insulation spills into the sides and chokes the channel.
- Loose fastening: the chute sags after insulation is blown or packed nearby.
- Random skipped bays: the ventilation layout no longer matches the roof framing.
- Blocked lower ends after insulation work: the baffle was installed correctly, then buried.
Each one cuts airflow. A couple of them together can make the whole vent strategy weak.
The code issue contractors miss
Code compliance is not just about hitting a vent ratio on paper. The intake and exhaust layout has to work as a system, and the field installation has to match the design. If the plans call for a vented attic, the baffles have to preserve a clear path at the eaves. If the plans call for an unvented conditioned attic with spray foam at the roof deck, adding baffles out of habit can create a detail that does not belong there.
That distinction matters in South Florida because heat and humidity punish mixed assemblies fast. A vented attic with blocked intake runs hot and underperforms. An unvented foam attic with an unintended vent channel can undermine the control layer you were trying to build in the first place.
What a clean inspection-ready job looks like
A code-ready vented attic has continuous intake at the soffits, clear baffle paths where they are needed, and insulation that does not crowd the eave shut. The layout should make sense to anyone who looks at it. An inspector should be able to trace the path without guessing.
For builders and homeowners who want that checked before insulation gets covered up, it helps to bring in attic insulation contractors who understand vented and unvented roof assemblies. That is usually where costly corrections are avoided.
One last point matters here. Do not let one crew install baffles everywhere just because another crew mentioned spray foam. The code path depends on which attic system you are building. Get that decision right first, then install the details that belong to that assembly.
DIY Installation vs Hiring a Professional
Some attic jobs are reasonable for a careful DIYer. If the attic is open, the framing is simple, the soffit path is easy to see, and you're only dealing with a basic vented assembly, you can handle baffle placement if you're patient and willing to work carefully.
Other jobs are not good DIY candidates. Low-clearance eaves, hip roofs, blocked soffits, old moisture staining, mixed insulation layers, and any project involving spray foam design decisions all raise the stakes. In those cases, one wrong assumption can leave you with trapped moisture or an attic that still underperforms after the work is done.
A general contractor should also pause before handing this off as a casual labor task. Roof baffle installation affects ventilation, insulation performance, and roof durability. It's not just cleanup before insulation day.
If you're trying to decide who should take the job, review what experienced attic insulation contractors typically evaluate before work starts. The key difference isn't just labor. It's whether the person doing the work understands the assembly well enough to know when baffles help and when they don't belong there at all.
For a straightforward vented attic, DIY can work. For anything involving roofline foam, moisture history, or complicated geometry, professional judgment is usually worth more than the labor savings.
If you need help sorting out whether your Florida attic should be vented, unvented, baffled, or foamed at the roof deck, Airtight Spray Foam Insulation can evaluate the assembly and recommend the approach that fits the structure instead of forcing a one-size-fits-all fix. Their team serves South Florida with attic and roof insulation solutions designed to control heat, air leakage, and humidity where those problems hit hardest.