Blog
Blown In Insulation Removal: A South Florida Guide
If you're in South Florida and your attic smells musty after a hard rain, your upstairs feels sticky, or you've found droppings around the access hatch, you're probably not asking whether your insulation is old. You're asking whether it's still safe to leave in place.
That's the right question. In this climate, blown in insulation removal isn't about chasing perfection. It's about knowing when the material in your attic has crossed the line from helping your home to contaminating it. Heat is one problem here. Humidity, roof moisture, and pest activity are the bigger ones.
A lot of homeowners assume old insulation automatically needs to come out. It doesn't. But when loose-fill insulation has taken on moisture, mold, or animal waste, leaving it in place usually means carrying the problem forward. The attic may be out of sight, but the air moving through ceiling penetrations doesn't stay there.
When Blown In Insulation Removal Becomes Essential
A South Florida attic can look fine from the hatch and still be holding moisture, odor, and pest contamination. By the time a homeowner notices a musty smell after rain or catches urine odor in the afternoon heat, the loose-fill insulation has often already crossed the line from insulation to debris.
My rule on removal is straightforward. Age does not decide this. Condition does. That lines up with what Polk County Insulation says about when blown-in insulation removal becomes necessary. Their guidance points to the same triggers we see in the field: mold, pest activity, and water intrusion.
In South Florida, those triggers show up faster than they do in drier markets. Hot attic air meets outdoor humidity. Wind-driven rain finds weak roof details around valleys, vents, and flashing. Palmetto bugs, rodents, and other pests use loose-fill insulation as cover. Once that material gets damp or contaminated, leaving it in place usually means the attic keeps feeding the same problem.

Moisture changes the job
Dry blown-in insulation can still do useful work even when it looks old. Wet insulation is different.
Once loose-fill material takes on repeated moisture, it starts to mat down, settle unevenly, and lose the air pockets that make it insulate. Especially in this climate, it can hold odor and support microbial growth on surrounding surfaces. If you already suspect that issue, review whether mold can grow on insulation in humid conditions. That question comes up often in coastal and inland South Florida homes where attic dampness lingers longer than homeowners expect.
The warning signs are usually practical, not dramatic:
- Musty or sour attic odor after rain
- Dark staining on roof decking or framing
- Insulation that looks crusted, clumped, or compressed
- Water marks near penetrations, boots, or roof transitions
- Second-floor rooms that stay humid even with the AC running
One caution matters here. Fix the roof or moisture source before removal starts. If the leak, condensation problem, or duct sweating is still active, new insulation goes back into the same bad environment.
Pest contamination usually means replacement, not spot cleaning
Loose-fill insulation hides pest activity well. It also spreads contamination farther than homeowners expect.
A rat or mouse problem is rarely limited to the one nest you can see near the eaves. Droppings shift into the material. Urine soaks downward. Tunneling compacts the insulation and leaves dirty pathways that are almost impossible to clean selectively. Insect activity tends to follow the same pattern, especially where damp insulation and roof moisture already exist.
These are the signs that usually push the job into full removal:
| Warning sign | Why it matters |
|---|---|
| Droppings near the attic hatch or top plates | Shows active or recent movement through the attic |
| Nesting material mixed into insulation | Confirms direct contamination of the loose-fill layer |
| Sharp urine odor during hot afternoons | Points to deeper saturation, not just surface debris |
| Heavy insect activity in damp areas | Suggests both moisture and insulation breakdown |
Under attic conditions, disturbing that material can put dust, fecal matter, and other particulates into the air quickly. That is one reason homeowners should be careful about treating contaminated insulation like a simple cleanup job. Even outside the insulation trade, Neat Hive Cleaning's insights on home care reflect the same basic point. Once contamination is involved, DIY work often spreads the mess instead of containing it.
When removal is not the right call
Some attics need correction, not a full cleanout.
If the insulation is dry, stable, and free of pest or moisture contamination, removal may add cost without solving anything. In those cases, the better move may be air sealing, localized repairs, or preparing the attic for a different insulation strategy only where needed. That judgment matters in South Florida because the goal is not to make the attic look cleaner. The goal is to stop moisture problems, improve performance, and avoid trapping old contamination under new material.
Old insulation can be unattractive and still serviceable. Damp, mold-affected, or pest-soiled insulation is part of the house problem, and that is the point where removal makes sense before spray foam goes in.
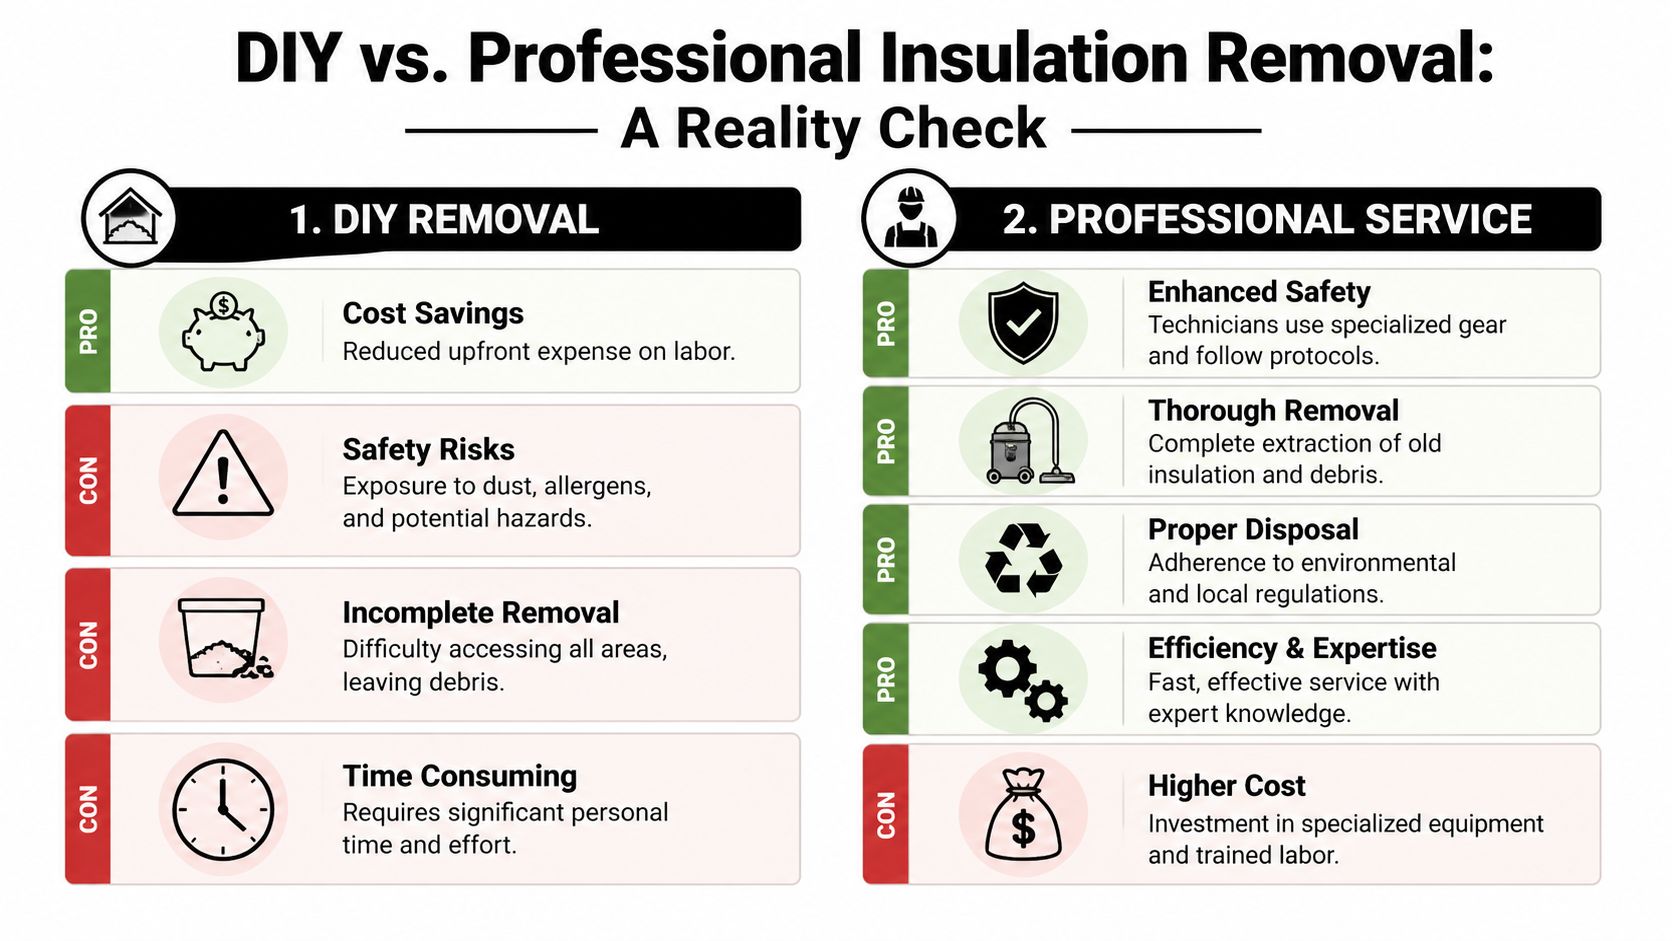
DIY vs Professional Insulation Removal A Reality Check
Homeowners usually compare DIY and professional removal as a price question. In practice, it's a control question. Do you want to manage containment, extraction, cleanup, hauling, and disposal yourself in a hot attic with limited access, or do you want a crew that does that work with the right equipment from the start?
The sticker price doesn't tell the full story. According to Angi's attic insulation removal cost guide, professional blown-in insulation removal in a typical home ranges from $600 to $1,000, and a 1,500-square-foot attic takes about 4 to 6 hours using high-powered commercial vacuums with 150-foot hoses. The same source notes labor costs of $35 to $85 per hour. Those numbers help frame the decision, but the bigger difference is what that equipment and labor prevent.
What DIY looks like in the real world
DIY removal sounds straightforward until the attic access opens and the work starts. Loose-fill insulation doesn't lift neatly. It breaks apart, dusts up, hides around wiring, settles behind framing, and packs into corners where a homeowner can't reach comfortably.
The common DIY mistakes are predictable:
- Using the wrong vacuum. A shop vac isn't built for full attic extraction.
- Underestimating containment. Dust doesn't stay where you want it.
- Missing hidden areas. Eaves, tight corners, and low-clearance sections get skipped.
- Treating contaminated insulation like regular debris. That's where health and disposal issues start.
Homeowners also tend to count only the obvious cost. They count bags, rental time, maybe protective gear. They usually don't count extra cleanup inside the house, missed work, repeated trips for disposal, or the cost of doing the removal twice because the first pass wasn't complete.
A useful parallel shows up outside the insulation trade. Neat Hive Cleaning's insights on home care make a point that's just as true here. DIY can look cheaper up front, but once labor, tools, time, and quality of results enter the picture, the comparison changes fast.
What professional removal solves
Professional crews don't just remove material. They control the jobsite.
With proper equipment, insulation is extracted through long hose runs into sealed collection systems instead of being raked, dragged, and scattered. That changes the job in three ways. It reduces airborne dust, speeds up removal, and leaves the attic ready for inspection and prep work instead of looking half-finished.
Here's the side-by-side reality:
| Factor | DIY removal | Professional removal |
|---|---|---|
| Equipment | Often undersized or improvised | Commercial extraction equipment designed for loose-fill removal |
| Dust control | Hard to maintain in occupied homes | Better containment and cleaner extraction |
| Access to tight attic areas | Limited by reach and fatigue | Managed with hose systems and crew workflow |
| Removal quality | Often uneven | More complete and consistent |
| Disposal handling | Homeowner must figure it out | Usually handled as part of the service scope |
The biggest DIY risk isn't just mess. It's leaving contaminated material behind in the hardest parts of the attic and then installing new insulation over it.
That happens more often than people think. A homeowner clears the center field of the attic, leaves the perimeter dirty, then assumes the problem is solved because the visible portion looks better.
The smarter investment in South Florida
South Florida adds another layer to this choice. Heat load is high, attics are punishing to work in, and moisture problems don't improve while a weekend project stretches into another weekend. If the insulation is contaminated, every delay leaves that attic in the same compromised condition.
Professional removal also creates a cleaner handoff to the next phase. Once the loose-fill is out, you can inspect the attic floor, identify air leakage points, check for moisture staining, and make decisions based on the structure instead of guessing through debris.
If you're evaluating the scope of a project, this is the point where a dedicated insulation removal service earns its keep. Not because every attic is dramatic, but because even ordinary attics hide enough access, dust, and disposal problems to punish shortcuts.
The Professional Blown In Insulation Removal Process
A professional blown in insulation removal job should look controlled from the first setup step to the last cleanup pass. If the crew starts pulling material without a containment plan, that's a red flag.
The method matters because loose-fill insulation doesn't come out cleanly on its own. Cellulose and fiberglass both travel, break apart, and migrate into living space if vents, pathways, and hose connections aren't managed correctly.

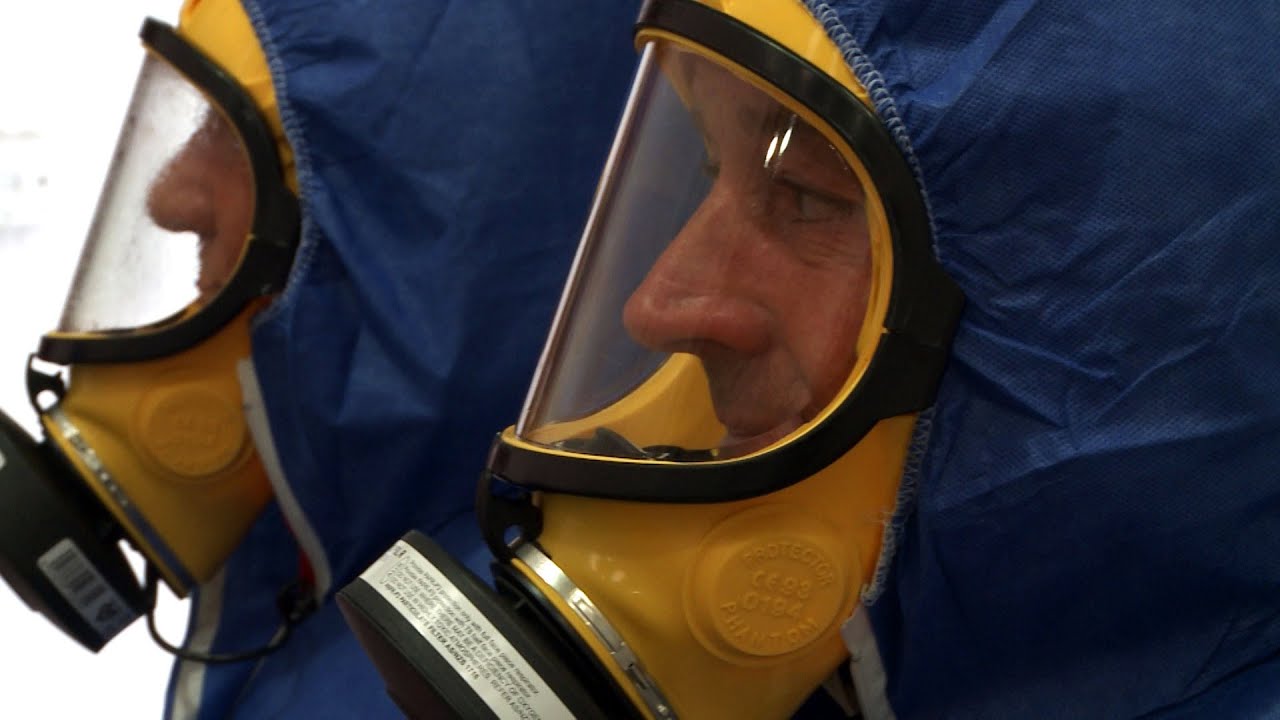
Containment comes first
Before extraction starts, the crew has to isolate the work area. That means protecting the occupied parts of the house from dust migration and making sure attic vents and openings are addressed so disturbed material doesn't move where it shouldn't.
According to Crawl Pros' guidance on cellulose insulation removal, professional removal requires industrial vacuums with over 1500 HP, and the process includes sealing vents, securing hose connections, and using specialized collection bags. The same source notes that a full attic removal can take 8 to 10 hours, and that undersized equipment often leads to incomplete extraction and widespread dust contamination.
That sequence matters more in South Florida than many homeowners realize. Humid attics already carry a heavier load of dust, organic residue, and moisture-related contamination. If a crew doesn't isolate the work properly, the house can end up needing a second cleanup beyond the attic itself.
A clean setup usually includes:
- Protected access path from the attic opening to the exterior staging area
- Sealed or managed vents and openings to limit dust movement
- Secure hose routing so the equipment doesn't damage wiring or framing
- Collection setup that can handle a sustained extraction pace without constant stoppage
Extraction isn't just vacuuming
People hear "vacuum removal" and imagine a simple suction job. It's more technical than that.
A professional crew works systematically across the attic so they don't leave a patchwork of removed and compacted areas. Hose positioning matters. Suction settings matter. Bag handling matters. With cellulose in particular, the equipment has to pull consistently enough to remove material thoroughly without creating unnecessary blowback or clogging the line.
Field note: The hardest parts of an attic aren't usually the middle. They're the low-clearance edges, the areas around framing intersections, and the places where older insulation has compacted around obstacles.
When crews use undersized equipment, the job bogs down. Material gets left behind in corners and along framing, and the dust burden climbs because the extraction isn't strong enough to keep pace with disturbance. That's one of the main reasons DIY attempts often stall out halfway.
For readers who want to see what proper extraction looks like in action, this walkthrough gives a useful visual reference:
Final prep determines what happens next
A good removal job doesn't end when the bags are full. The attic needs a final review before anyone talks about replacement insulation.
That review should answer a few practical questions:
- Is the attic floor clean enough to inspect?
- Are there visible signs of past or active moisture?
- Did pests leave damage that was hidden under the loose-fill?
- Are penetrations, top plates, and transitions exposed clearly enough for sealing work?
At this stage, the attic goes from "insulated" to "diagnosable." That's the primary value of proper removal. You can finally see what condition the space is in.
Some jobs reveal minor corrections. Others expose roof leaks, disconnected ductwork, staining around penetrations, or signs that humid air has been moving through the ceiling assembly for a long time. In South Florida, those findings aren't unusual. They're the reason thorough removal has to be methodical instead of rushed.
Handling Insulation Disposal and South Florida Regulations
Removal is only half the job. The other half is what happens after the insulation leaves the attic.
Generic online advice often falls short. Many guides explain how to pull insulation out, bag it, and move it aside. They stop there. For homeowners, that creates confusion. For contractors and property managers, it creates liability.
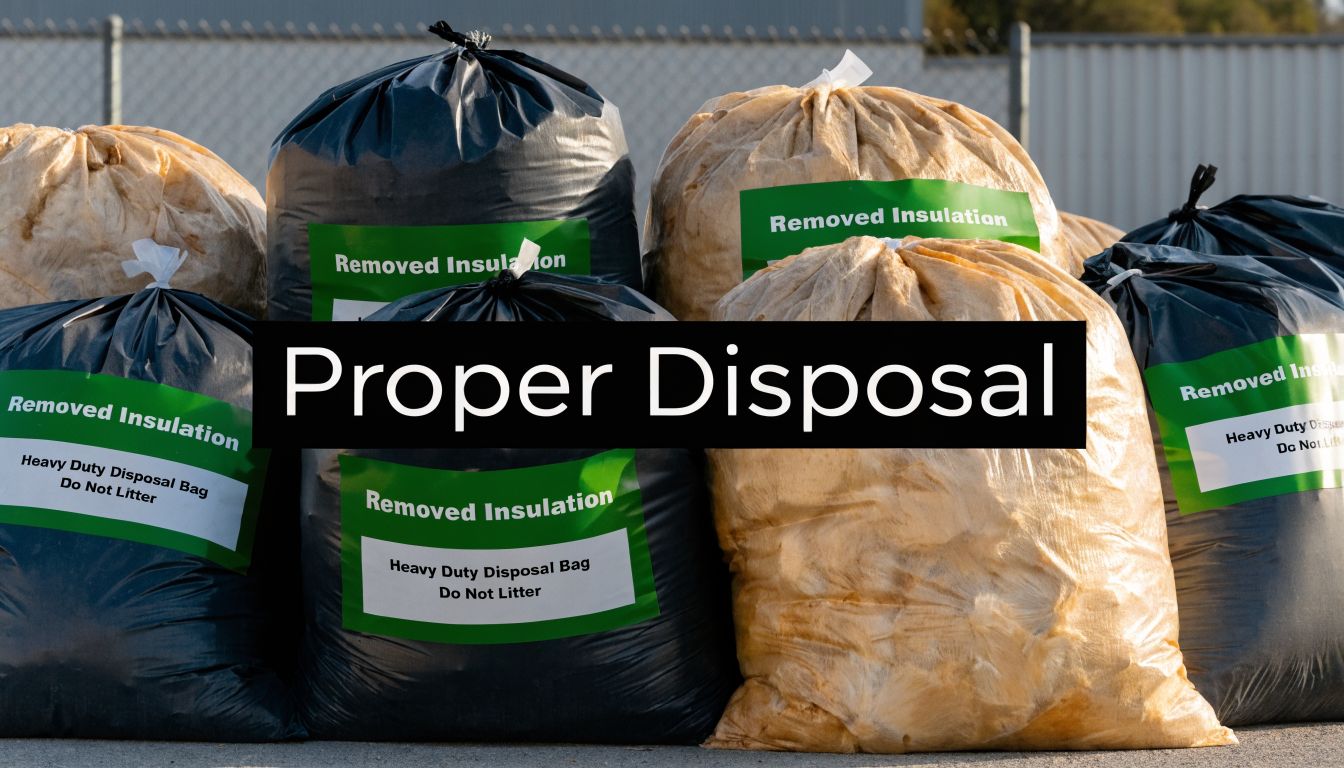
Disposal isn't one-size-fits-all
The disposal path depends on what came out of the attic and what condition it's in. Fiberglass and cellulose aren't always handled the same way, and contamination changes the equation again.
Angi's overview of blown-in insulation removal guidance gaps points out a major problem. Many online guides don't address proper disposal at all, even though fiberglass and cellulose can have different disposal requirements, local jurisdictions have specific rules, and improper disposal can create legal liability for South Florida contractors and property managers. The same source also notes that compliant waste removal, including required permits when applicable, is a significant cost factor often left out of basic square-foot estimates.
That's especially relevant in South Florida, where project stakeholders often include homeowners' associations, multifamily managers, builders, and commercial operators. Once you're dealing with multiple units, shared dumpsters, or third-party jobsite oversight, "just bag it and toss it" stops being a workable answer.
Why this matters more in humid coastal markets
Moisture makes disposal more complicated because damaged insulation is often heavier, dirtier, and more likely to be mixed with debris. Pest contamination adds another layer. Wet cellulose, rodent waste, roofing residue, and general attic dust don't create a clean waste stream.
For property managers and contractors, the risks aren't abstract:
- Improper dumping can create documentation problems if a project is later questioned
- Mixed waste loads can be rejected depending on how material was handled and where it was taken
- Contaminated attic debris can expose workers and occupants if it isn't contained and transported correctly
If disposal isn't discussed clearly before removal starts, the estimate isn't complete.
That doesn't mean every job requires the same permit path or disposal destination. Local rules vary. That's exactly why disposal planning needs to be part of the scope, not an afterthought when bags are piled in the driveway.
What responsible disposal planning includes
A professional approach usually covers more than hauling. It starts with identifying the insulation type, then considering contamination, then matching the removal and disposal method to local requirements.
A solid disposal plan should account for:
| Disposal concern | Why it needs attention |
|---|---|
| Insulation type | Cellulose and fiberglass may not follow the same disposal path |
| Contamination level | Mold, pests, or moisture can change handling requirements |
| Local facility rules | Waste sites may have different acceptance standards |
| Permit needs | Some jurisdictions require added documentation or approvals |
| Transport containment | Loose debris has to stay contained from site to disposal point |
For South Florida owners and managers, this is one of the strongest arguments for hiring experienced crews. It's not only about getting insulation out of the attic. It's about making sure the job finishes cleanly, legally, and without creating a second problem offsite.
Prepping Your Attic For High-Performance Spray Foam
Once the old insulation is out, the attic finally becomes workable. You can see the structure, evaluate the roof deck, and deal with the gaps and moisture pathways that loose-fill insulation often hides.
That's the moment when a replacement strategy starts to matter. In South Florida, this isn't just about adding R-value. It's about controlling humid air movement, reducing the chance of future moisture problems, and making the attic perform as a system instead of as a pile of material spread across the floor.
A clean attic exposes the real work
Old loose-fill insulation can conceal a lot. After removal, crews can inspect the attic floor and roofline for the issues that drive discomfort and moisture migration.
The important prep items usually include:
- Air leakage at penetrations around wiring, plumbing, and framing transitions
- Signs of roof-related moisture on decking or around problem areas
- Open joints and gaps that let hot, humid attic air communicate with the house
- Residual debris that would interfere with proper adhesion or inspection
This is why a clean slate matters. Spray foam performs best when the substrate is dry, visible, and properly prepared. If debris, dust, or unresolved moisture remain, the replacement phase starts with avoidable problems.
South Florida attics need moisture discipline
In this region, moisture isn't a side issue. It's part of the daily load on the house.
That changes the standard for prep work. You can't treat a humid coastal attic like a dry-climate attic and expect the same result. Crews need to verify that any source of water intrusion has been corrected, that the roof deck condition is acceptable, and that the surfaces receiving foam are ready.
Spray foam isn't a bandage for an active leak. It works best after the attic has been cleaned, dried, inspected, and detailed correctly.
This is also the point where strategy becomes more important than simple replacement. If the old insulation failed because humid air kept finding its way through the ceiling plane, installing new material without addressing those leakage paths only repeats the cycle in a different form.
Why removal and replacement need to be connected
Homeowners sometimes think of removal as demolition and foam installation as a separate upgrade. In practice, the quality of the first step directly affects the second.
A properly cleared attic gives installers access to the details that matter most:
- Transitions and penetrations can be identified clearly
- Moisture concerns can be addressed before new material goes in
- The substrate can be prepared for reliable adhesion
- The finished system can be designed around the attic's actual condition
That's why attic upgrades work best when the removal phase isn't rushed. Every hidden issue left behind limits what the new insulation system can do.
If you're weighing your next step after removal, it helps to look at how a professional attic insulation installation approach handles the space as a full envelope problem rather than just a material swap. In South Florida, that systems approach is what separates a short-term cleanup from a lasting upgrade.
Transform Your Home with a Clean Slate
In South Florida, a failing attic usually shows up before anyone opens the hatch. The upstairs stays humid. A musty smell hangs around. Rooms get uneven, and pest activity starts showing up in places that should stay clean and dry. In that situation, blown in insulation removal is not a cosmetic project. It is the first step in getting contaminated, moisture-loaded material out of the house so the attic can be corrected properly.
Some attics do not need removal. Old insulation that is still dry, stable, and clean can sometimes stay in place. But once that material has taken on moisture, picked up rodent droppings, or started holding odor, keeping it there usually means keeping the source of the problem there too. In our climate, humid air does not give those conditions much of a break.
A proper removal changes what you can do next. It exposes the attic floor, reveals staining and entry points, and gives the crew a clean surface to inspect before any new insulation goes in. That matters in South Florida, where the goal is not just to refill the attic. The goal is to dry it out, seal the leakage paths that feed humidity, and prep the space for spray foam that can control the environment instead of absorbing its problems.
Homeowners tackling a broader cleanup at the same time may also find Endless Storage's guide to decluttering useful for sorting what should be removed from the home, what should be stored, and what is only adding to the mess.
A clean attic gives you a fresh starting point. More important, it gives the replacement system a fair chance to perform. When old blown insulation is removed the right way and replaced with a solution that fits South Florida heat, humidity, and pest pressure, the attic stops working against the house.