Blog
Your Guide to Insulation Removal Services
When it comes to home maintenance, most people think about painting, landscaping, or maybe a new roof. But what about the stuff hidden in your attic and walls? Insulation removal services are about much more than just a cleanup—they’re a critical step in protecting your home’s health and efficiency from the inside out.
Why Bother Removing Old Insulation?
Think of your home's insulation as its winter coat or its sun shield. Over the years, that shield gets worn down. It can get soaked by leaks, invaded by pests, or simply lose its fluff. When that happens, it’s not just underperforming—it's actively causing problems.
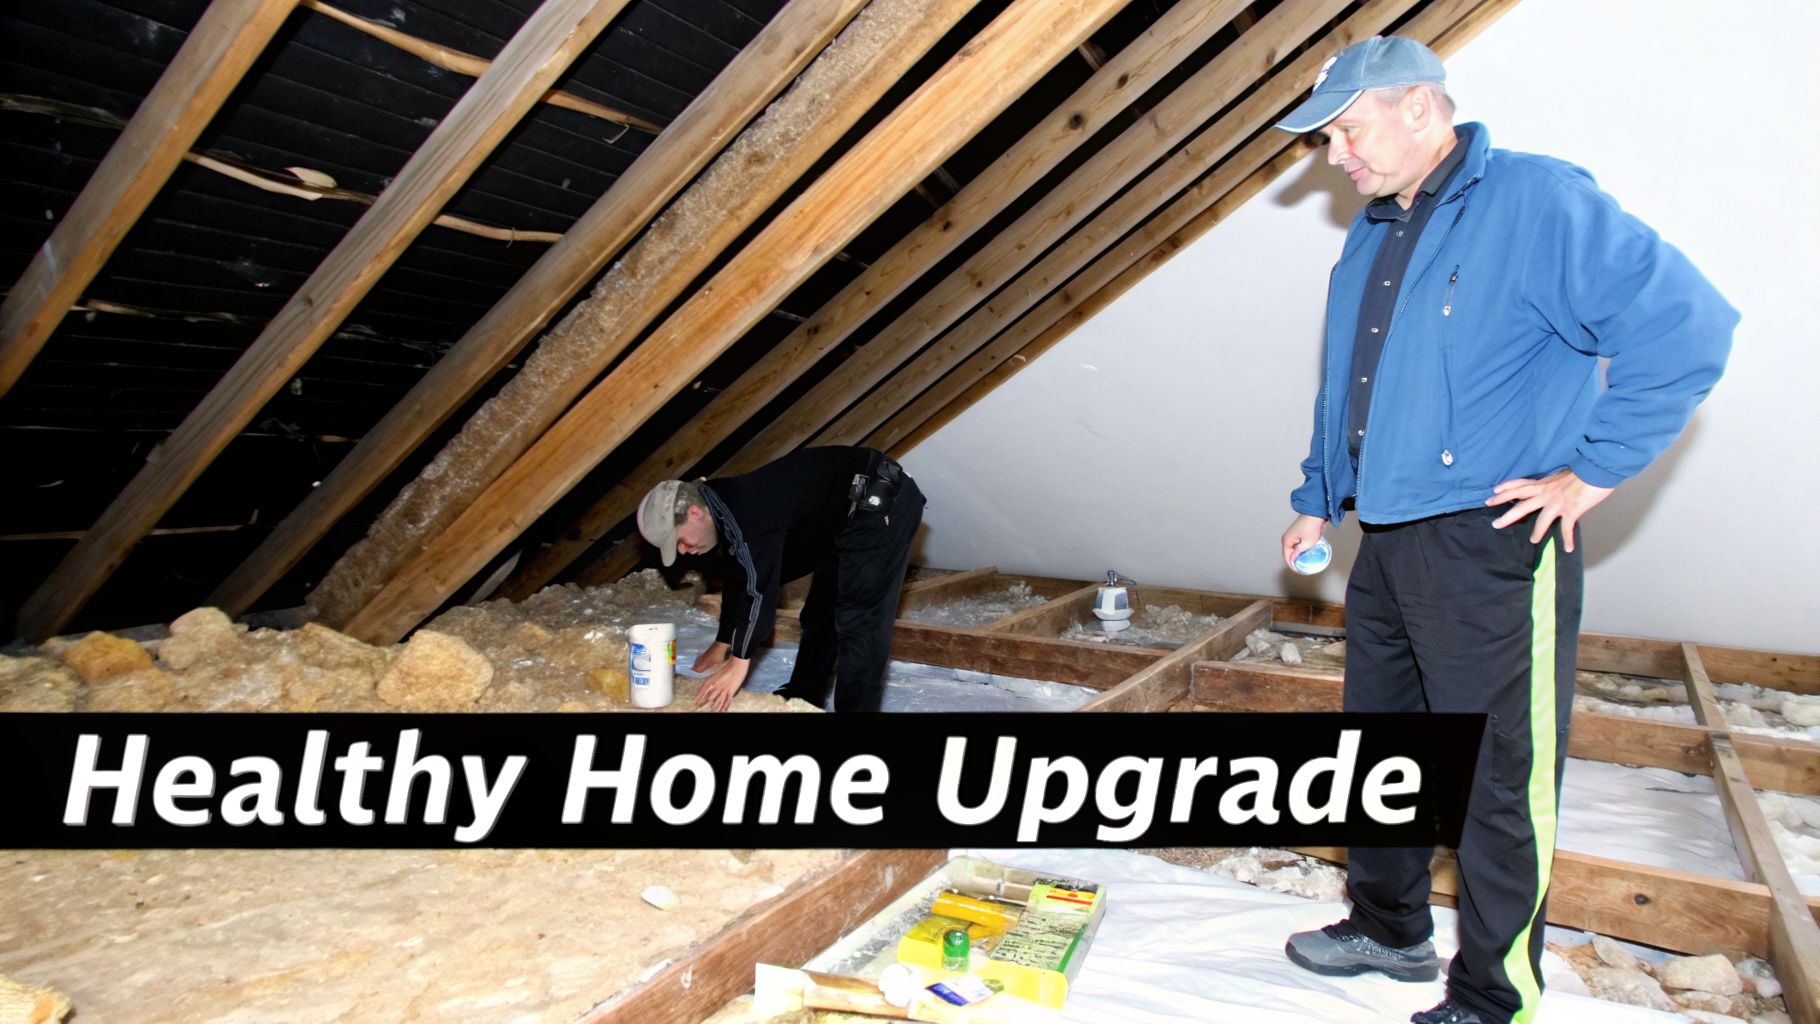
This isn’t a simple DIY weekend project. Hauling out old insulation is a messy, specialized job that tackles serious issues lurking in your attic, walls, or crawlspace. When insulation fails, your home is left wide open to the elements and other hazards.
A Clean Slate for a High-Performance Home
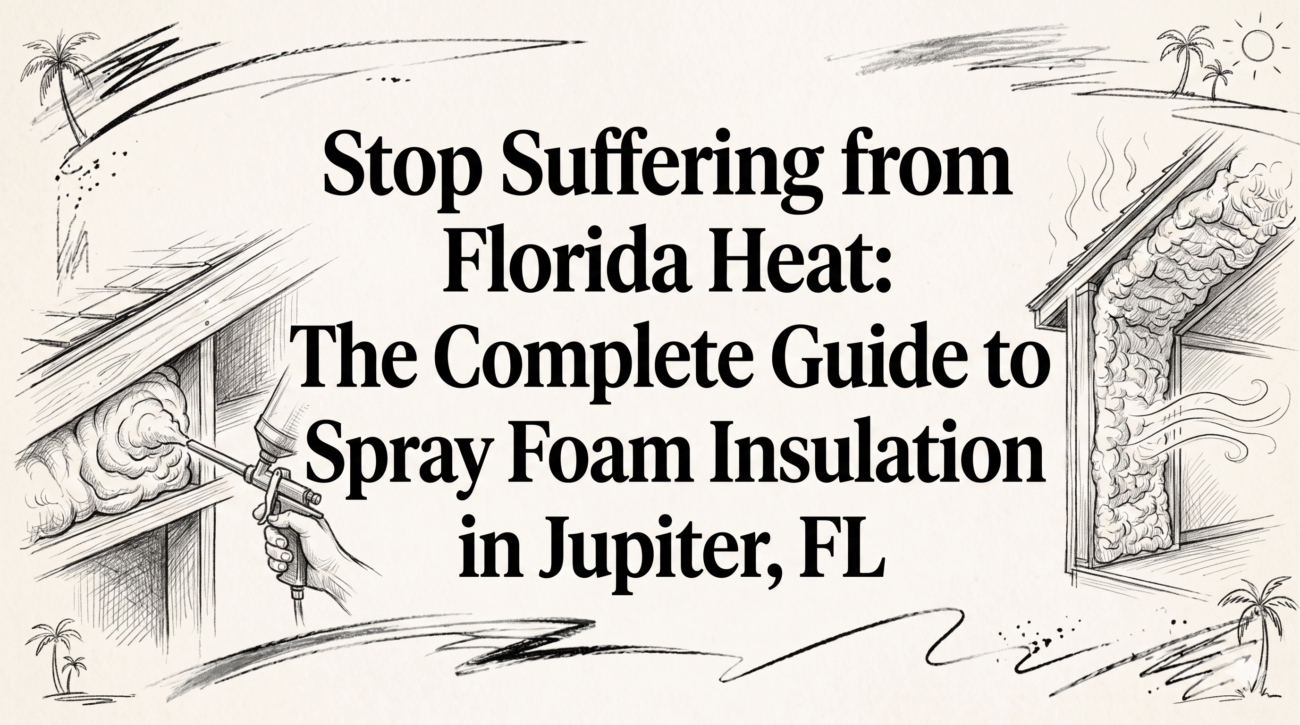
You wouldn't build a new house on a crumbling foundation. The same logic applies here. Removing old, compromised insulation gives you a "clean slate" to build a modern, high-performance thermal barrier. This is especially vital here in South Florida, where humidity is a relentless enemy.
Professional removal is designed to solve problems like these at the source:
- Water Damage and Mold: Once insulation gets wet from a roof leak or constant humidity, it’s like a giant, saturated sponge. Its thermal resistance (R-value) plummets, and it becomes a perfect breeding ground for mold. Understanding the hidden dangers of mould makes it clear why this isn't something to ignore.
- Pest Infestations: Your attic’s old, soft insulation looks like a luxury condo to rodents, birds, and insects. They leave behind a nasty mix of droppings, urine, and nesting materials that contaminate your air and pose real health risks.
- Age and Degradation: Old-school insulation, especially blown-in fiberglass and cellulose, doesn’t last forever. It settles, compresses, and loses its effectiveness. The R-30 insulation you had 20 years ago might only be giving you R-15 performance today, forcing your AC to work double-time.
Not sure if your home is showing the signs? This quick checklist can help you spot the tell-tale clues that it’s time to call in the professionals.
Quick Checklist: When to Call for Insulation Removal
| Problem Sign | What to Look For or Smell | Why It Demands Action |
|---|---|---|
| Visible Mold or Mildew | Black, green, or white stains on insulation; a persistent musty, earthy smell in the attic or home. | Mold spores circulate through your home's air, causing allergies, respiratory issues, and other health problems. |
| Pest Activity | Droppings, tunnels in the insulation, shredded materials, or foul odors from animal waste. | Pests carry diseases and their waste creates a toxic environment that degrades your indoor air quality. |
| Noticeable Water Damage | Damp, clumpy, or compressed insulation; water stains on the ceiling below the attic. | Wet insulation has zero R-value and will quickly lead to wood rot, mold, and structural damage. |
| High Energy Bills | Your heating and cooling costs are climbing for no obvious reason. | Old, settled insulation has lost its ability to resist heat transfer, making your HVAC system work much harder. |
| Poor Temperature Control | Some rooms are always too hot or too cold; your home feels drafty or uncomfortable. | Inconsistent insulation coverage creates hot and cold spots, indicating a failing thermal barrier. |
If you checked off any of these boxes, it’s a strong signal that your insulation isn’t just old—it's become a liability.
By getting to the root of these problems, professional insulation removal does more than just tidy up. It’s the essential first step toward creating a home that is genuinely healthy, quiet, and energy-efficient. You’re clearing the way for a proper air seal and new, high-performance insulation that can do its job correctly.
Ultimately, this process turns a reactive fix into a proactive investment. By getting rid of allergens, moisture, and energy drains at their source, you’re setting the stage for a more comfortable, valuable, and healthier home for your family.
Red Flags That Your Insulation Must Be Replaced
Most homeowners don't think about their attic insulation until there’s a problem. Out of sight, out of mind, right? But over time, what was once a protective barrier can turn into a serious liability. Knowing the warning signs is the first step to figuring out if you need professional insulation removal services.
These red flags aren't just about age; they point to active issues that can compromise your family's health, drive up your energy bills, and even damage your home's structure.
The Unmistakable Odor of Mold and Moisture
One of the first things people notice is a smell—that persistent, musty odor that hangs in the air, especially in certain rooms or near the attic. If you’ve got a damp, earthy scent that just won't go away, you’re almost certainly smelling active mold growth hiding in your insulation.
This isn’t just an unpleasant smell; it's a blaring alarm for your home's health. Mold releases microscopic spores into your air, which can trigger or worsen all sorts of issues:
- Chronic allergies and sinus problems
- Asthma attacks and respiratory distress
- Unexplained headaches and fatigue
Ignoring that smell is like disabling a smoke detector. It's your home telling you the air you're breathing is contaminated. If you want to understand the science behind it, our guide explains exactly how and can mold grow on insulation. When you can smell it, it’s a clear sign you need a complete replacement.
Signs of Unwanted Guests
To a pest, your attic is a five-star hotel. It’s warm, sheltered, and filled with fluffy insulation that makes for perfect nesting material. Rodents, squirrels, raccoons, and insects will happily move in, turning your home's thermal shield into a contaminated biohazard.
Finding evidence of an infestation is an immediate, non-negotiable red flag. Look for droppings, tunnels burrowed through the insulation, and sections that have been torn up or matted down. The waste these critters leave behind is loaded with bacteria and viruses that can easily find their way into your home's air supply.
Once pests have turned your insulation into their home and toilet, it's no longer safe or effective. The only real solution is to have it professionally removed and the entire area sanitized to eliminate the health risks.
The Danger Lurking in Older Homes
If your home was built before the 1990s, you could be dealing with a far more sinister problem: asbestos. For many years, a loose-fill attic insulation called vermiculite was common. Unfortunately, a huge portion of the vermiculite sold in North America came from a mine contaminated with asbestos.
This type of insulation often looks like small, lightweight pebbles, either grayish-brown or with silvery-gold flecks. It is incredibly dangerous if disturbed. When its fibers become airborne and are inhaled, they can cause devastating lung diseases like mesothelioma and asbestosis, often decades after exposure.
It's critical to know what asbestos insulation looks like, especially in an older home. Never, ever try to handle or remove this material yourself. If you even suspect you have asbestos, call a certified professional immediately. Your safety is not something to gamble on.
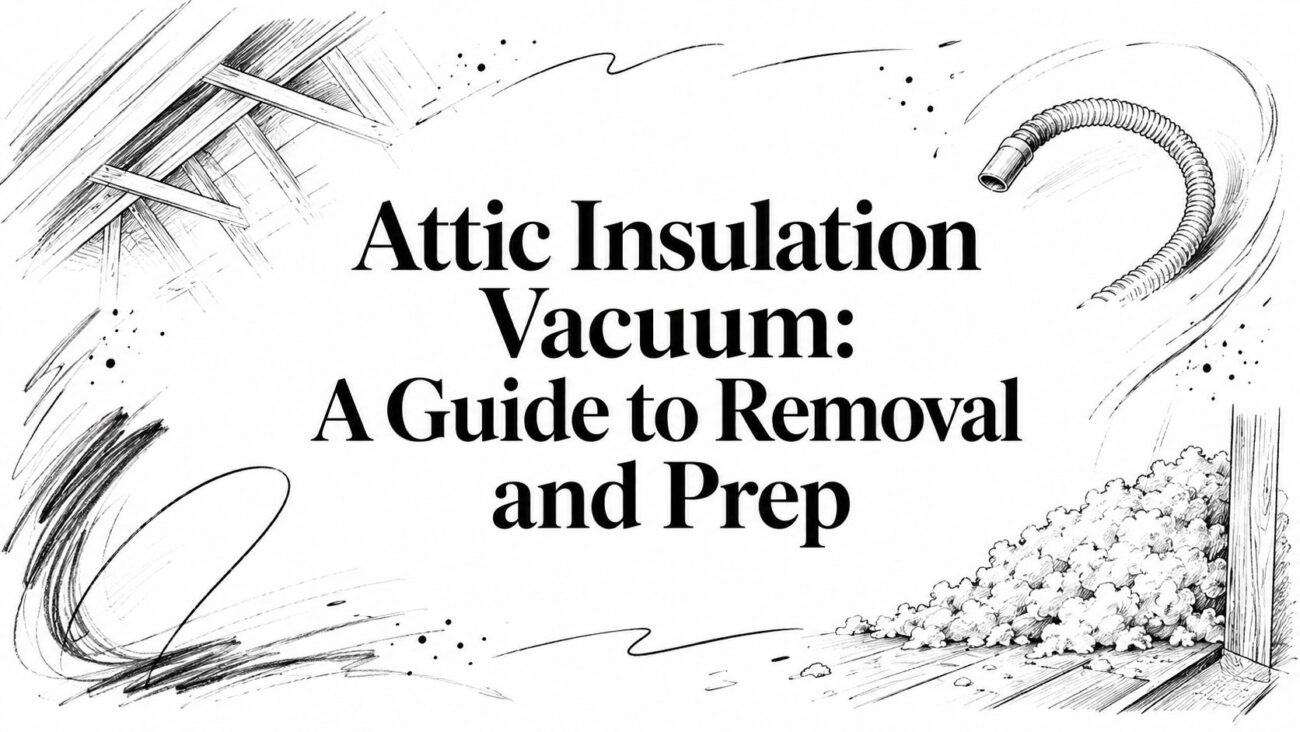
What Really Happens During a Professional Insulation Removal? A Step-by-Step Look
When you hear “insulation removal,” what comes to mind? If you’re picturing a couple of guys with rakes and garbage bags, stirring up a massive cloud of dust in your attic, it’s time for an update. The way we handle insulation removal today is a completely different ballgame. It’s a clean, contained, and highly efficient operation that’s more like a surgical procedure for your home than a messy demolition.
The key to this modern approach is a powerful, truck-mounted vacuum system. This isn't your garage shop-vac. It’s an industrial-strength machine connected to a wide-diameter hose that runs directly from your attic to a containment unit outside. This setup ensures all the old, nasty insulation—along with the dust, pest droppings, and allergens mixed in—is pulled completely out of your home without ever contaminating your living space.
Let’s walk through what you can expect when a professional crew shows up at your door.
Step 1: Prepping the Site and Sealing It Off
Before a single piece of insulation is touched, the first job is to protect your home. A good crew will carefully lay down protective floor coverings and plastic sheeting on walls along the entire path they’ll walk, from the front door right up to the attic access.
They’ll then create an airtight seal around the attic hatch or scuttle hole using more plastic and tape. This is a non-negotiable step. It isolates the work area completely, preventing any of those airborne particles and contaminants from drifting down into your home. Think of it as creating a "clean room" environment to keep the mess contained right where it starts.
Step 2: The Vacuum Extraction
With the area prepped and sealed, the real work begins. The team runs the large, flexible hose from the vacuum unit on their truck up into the attic. From there, they move methodically across the attic floor, using the powerful suction to pull up every bit of the old loose-fill material, whether it’s fiberglass, cellulose, or rock wool.
Everything travels through the sealed hose and goes directly into a high-filtration bag or containment bin on the truck. The old days of dragging dusty bags through a house are long gone.
The technology behind this has improved dramatically. In fact, the market for these specialized insulation removal vacuums was valued at $0.5 billion in 2026 and is expected to more than double by 2034. These modern rigs can cut the removal time for a typical attic by up to 70%, which means less disruption for you and your family. You can see just how much this equipment has changed the game by reading about modern insulation removal methods.
If you have batt insulation, the process is just as meticulous. The crew will carefully roll up the sections, place them in heavy-duty disposal bags while still in the attic, and then carry the sealed bags out of the home.
The infographic below shows exactly why this professional, contained approach is so critical.
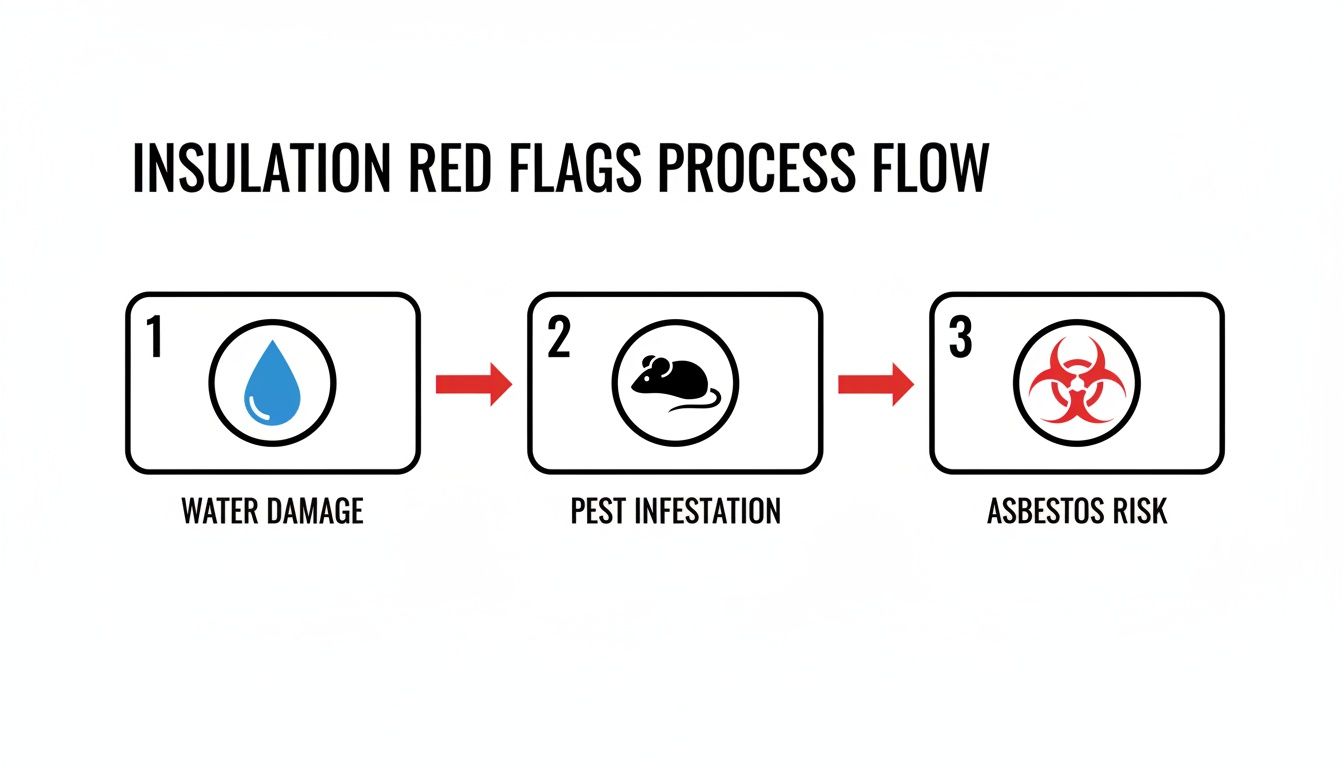
When you're dealing with hazards like water damage, pests, or potential asbestos, you can't afford to take chances. It’s not just about getting the old stuff out; it’s about doing it safely.
Step 3: The Deep Clean and Sanitization
Just getting the bulk material out isn't the end of the job. Any contractor worth their salt knows the goal is to leave the attic completely spotless, creating a perfectly clean slate for the new insulation.
After the main extraction is done, the crew goes back over every square inch of the attic deck with smaller hoses attached to commercial-grade HEPA-filter vacuums. This is how they capture all the fine dust, microscopic mold spores, and lingering debris the big hose might have missed.
This isn't just a quick sweep-up. A HEPA-vacuumed attic is the foundation for a healthy and effective new insulation system. It guarantees you aren't just trapping old contaminants under a fresh layer.
If we found evidence of pests or mold, this is when we apply an EPA-approved biocide. It's a disinfecting, sanitizing, and deodorizing fog that neutralizes any remaining bacteria, viruses, and spores, making the space truly clean and safe.
Finally, the crew packs up, removes all the protective coverings, and does a final cleanup of the work area. The goal is to leave your home looking like we were never even there—except for a perfectly clean, empty attic ready for its upgrade.
Breaking Down Insulation Removal Costs
The first question I always get from homeowners is, "So, what's this going to set me back?" And it's a fair question. The honest answer is, there's no flat rate. Every home, every attic, and every situation is unique.
But I can walk you through how a professional quote is built. Think of it less like buying a product off the shelf and more like hiring a specialized crew for a custom job. The final price comes down to the time, the tools, and the safety protocols needed to do the job right.
What Shapes the Price of Your Project
The biggest variable, of course, is the square footage of the space. More area means more material to handle and more time on the clock. But the type of insulation we're dealing with is just as important.
- Blown-In Insulation (Fiberglass/Cellulose): This is the loose stuff you see in most attics, and frankly, it's the messiest to remove. It requires massive, truck-mounted vacuums with long hoses to suck it all out without sending a cloud of dust and debris through your entire house.
- Batt Insulation (Rolls/Batts): These are the big blankets of insulation. If they're in decent shape, removal is pretty straightforward—we roll them up, bag them, and carry them out. This usually means less labor time, which can lower the cost.
Then there's the attic itself. A big, open attic with high ceilings and easy ladder access is a best-case scenario. A cramped crawlspace or a tight attic full of cross-beams and a tiny access hatch? That's going to slow the crew down, which adds labor hours and drives up the cost.
Contamination and Hazardous Material Premiums
Now we get to the wild cards. If your insulation is just old and ineffective, removal is simple. But when it's been compromised, the job gets a lot more complicated and the price will reflect that.
- Heavy Pest Infestation: When rodents have made a home in your insulation, it's no longer just insulation—it's a biohazard. The crew needs extra personal protective equipment (PPE), and the area must be thoroughly sanitized after removal. This isn't just a cleanup; it's a decontamination.
- Widespread Mold Growth: Just like with pests, moldy insulation requires a specific protocol. We have to contain the area carefully to prevent spores from spreading through your home's air. This involves specialized handling and biocides, which adds a necessary layer of cost.
- Asbestos Contamination: This is the big one. If you have old vermiculite insulation, it could contain asbestos. This is a completely different ballgame, requiring a state-certified asbestos abatement team with rigorous containment and disposal procedures. It's by far the most expensive and critical removal scenario.
Think of it this way: removing clean laundry from a basket is easy. Removing that same laundry after it's been soaked in mud and left to sit requires a whole different level of effort. The principle is the same for your insulation.
Understanding the Numbers in Your Quote
Looking at national averages can give you a ballpark idea. Data from sources like HomeAdvisor shows that typical attic insulation removal costs range from $1,500 to $3,000. This usually breaks down to $1.50 to $3.00 per square foot. A big chunk of that is labor, which can run anywhere from $40 to $100 per hour per crew member.
For a closer look at what goes into these figures, check out our detailed guide on the cost of insulation removal.
When you receive a quote from a true professional, it won't just be a single number. It will reflect the unique factors of your home—the square footage, the type and condition of the insulation, the accessibility of the space, and the specific disposal requirements. It's a plan to protect your home and your family's health, not just a price tag.
DIY Removal vs Hiring a Professional Contractor
It’s a question I hear all the time: "Can't I just pull out the old insulation myself and save some money?" I get it. On the surface, it looks like a straightforward, if messy, weekend project. But after 25 years in this business, I can tell you that a proper insulation removal service is a lot more involved—and hazardous—than it seems.
Think of it like this: you wouldn't try to solve a major plumbing leak with just a wrench and a YouTube video. You could end up causing a lot more damage than you started with. DIY insulation removal has similar, often hidden, risks that can affect your home's air quality and your family's health.
The Realities of a DIY Project
Going the DIY route isn't just about bagging up some fluff. To do this job safely and correctly, you need specialized equipment that goes way beyond a simple dust mask and gloves from the hardware store.
You'd have to get your hands on:
- A full-face respirator with P100 cartridges. This is non-negotiable for protecting your lungs from microscopic fiberglass, mold spores, and dried pest droppings.
- A disposable, full-body hazmat suit. This keeps contaminated dust and fibers off your skin and from being tracked back into your home.
- An industrial-grade, HEPA-filter vacuum. A standard shop vac will just clog or, worse, shoot the most dangerous particles right back into the air you’re breathing.
Once you’re geared up, you’re crawling around in a cramped, dark, and often brutally hot attic. Then comes the biggest headache: getting rid of the stuff. You can't just toss bags of old insulation, especially if it's contaminated, into your weekly trash. Most local waste services have strict rules for disposal, often requiring special permits, fees, and a trip to a designated facility.
The Professional Advantage
Hiring a professional for insulation removal services is an investment in safety, certainty, and your own peace of mind. An experienced crew doesn't just show up with the right commercial-grade gear; they bring years of training and know-how to handle the job efficiently and, most importantly, safely.
Here’s what a professional brings to the table that a DIY job just can't replicate:
- Hazard Identification: A trained eye can spot dangers most homeowners would never see. We know the signs of asbestos-laced vermiculite, can find black mold hiding under old insulation, and can identify wood rot from moisture problems that have gone undetected for years.
- Containment and Air Quality: Professionals know how to completely seal off the work area. This is a critical step that prevents toxic dust, mold, and bacteria from getting into your HVAC system and circulating throughout the rest of your house.
- Efficiency and Thoroughness: A skilled team with a powerful truck-mounted vacuum can clear out an entire attic in a few hours, not a whole weekend. Afterward, they perform a detailed HEPA vacuuming of the entire deck, leaving the space truly clean and ready for new insulation.
- Liability and Insurance: Reputable contractors carry full liability insurance and workers' compensation. If there's an accident on your property, you're completely protected.
Ultimately, hiring a professional turns a risky, exhausting, and messy project into a streamlined service. We handle everything from the initial assessment and safe removal to the final sanitization and legal disposal, ensuring the job is done right from start to finish.
Your Next Step After a Clean Slate
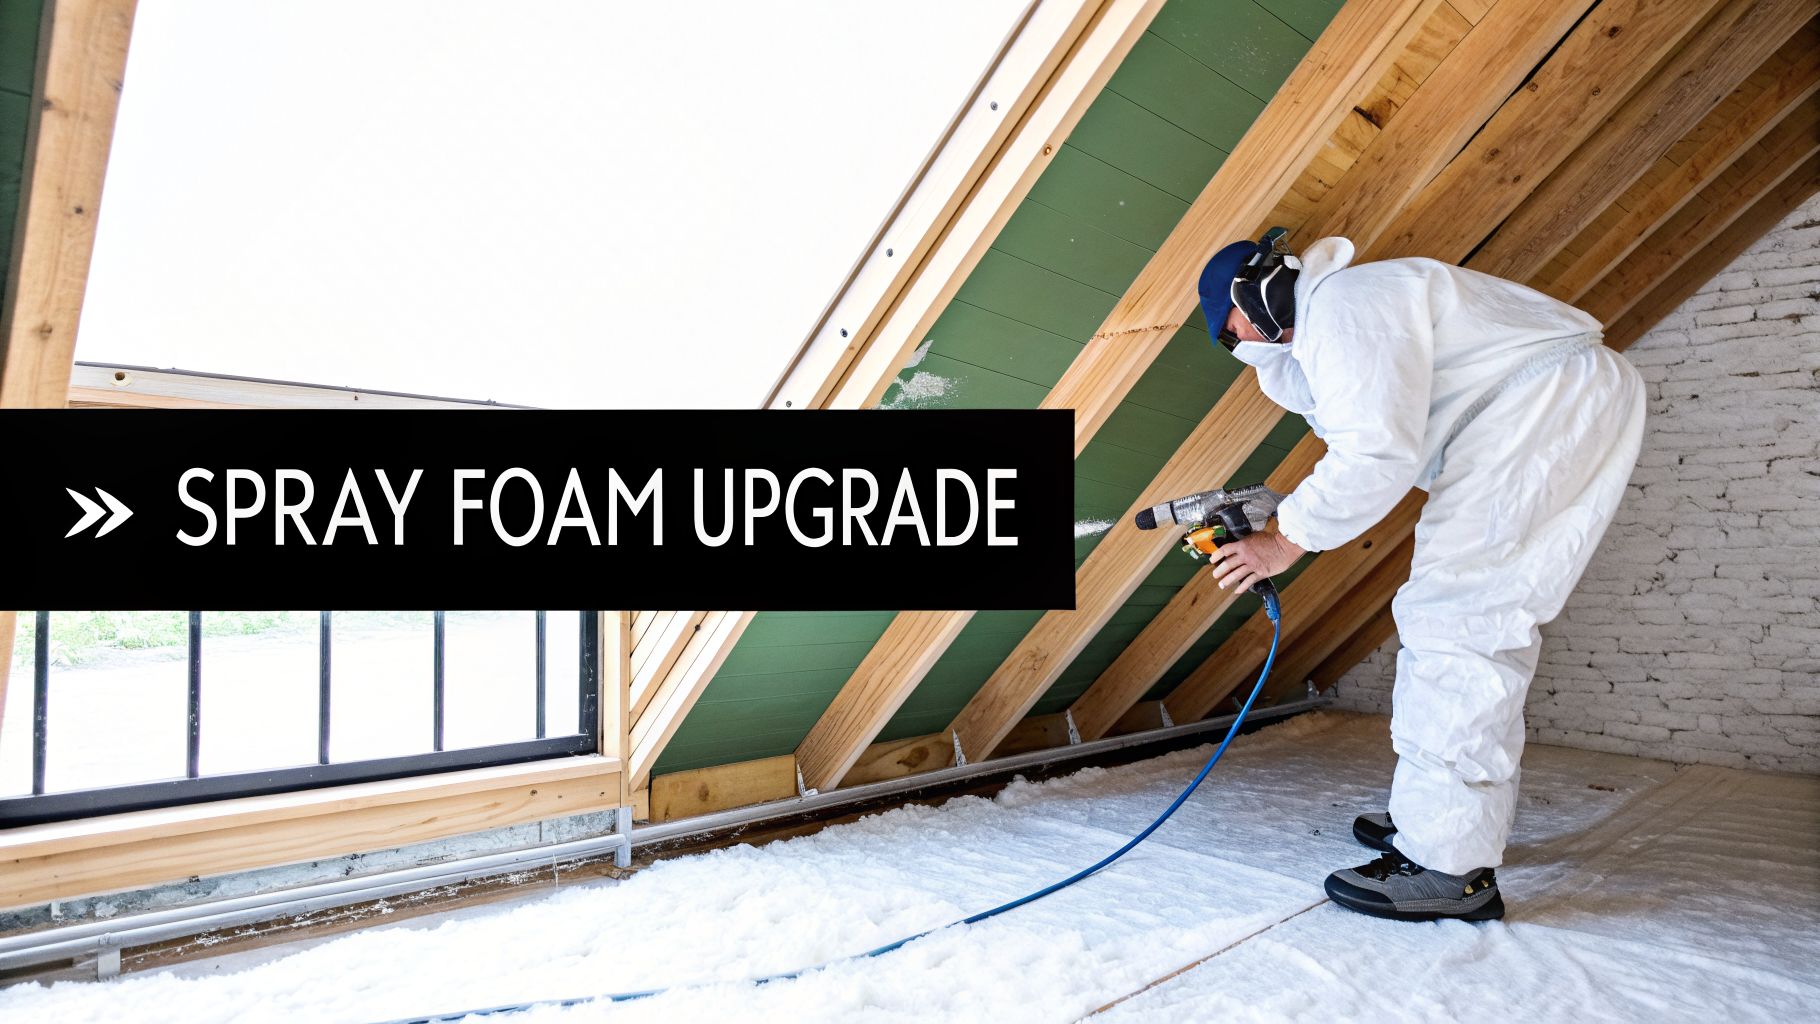
Once all that old, nasty insulation is finally gone, your attic is a clean slate. We see this all the time—it’s not just an empty space, it's a golden opportunity to completely rethink your home’s performance, starting from the very top. Instead of just putting the same old stuff back in, you can now install a modern system that turns your attic into a true high-performance shield.
This is the moment to stop patching symptoms and finally fix the root of the problem. With a clear view of the entire attic deck, you can finally see and address the dozens of small gaps, cracks, and holes that the old insulation was just hiding.
The Power of an All-in-One Solution
Here in South Florida, just adding more traditional insulation is a losing battle. The real enemy isn't just heat; it's the humid, moisture-heavy air that seeps into your attic and home. This is where modern spray foam insulation completely changes the game. Unlike fiberglass or cellulose that just slows down heat transfer, spray foam does a whole lot more.
When applied, it expands to create one solid, seamless, and permanent barrier. It does three critical jobs at once:
- It Insulates: Its high R-value provides a powerful thermal barrier to keep the scorching heat out.
- It Air Seals: It expands into every nook and cranny, stopping drafts and air leaks in their tracks.
- It Blocks Moisture: It forms a non-permeable vapor barrier, preventing humidity from getting in and feeding mold.
This all-in-one approach is what transforms your attic from your home's weakest link into one of its strongest assets. For a closer look at this crucial step, our article on how to seal attic air leaks breaks down the entire process.
Turning Removal into a Lasting Investment
Choosing spray foam after a professional insulation removal service isn't just about replacement. It’s a serious upgrade that delivers tangible, long-term benefits. You’re not just putting in new fluff; you're investing in a complete system that makes your whole house better.
By creating a complete air and moisture barrier, spray foam directly solves the very issues that probably led to the removal in the first place—moisture, mold risk, and terrible energy bills. It's a proactive solution, not just another reactive fix.
The results are immediate. Homeowners see a real drop in their monthly energy bills because the air conditioner isn’t constantly fighting air leaks anymore. The house gets noticeably quieter, too, since the dense foam dampens noise from outside. And here in a storm-prone area like South Florida, the way closed-cell spray foam glues itself to the roof deck can even add structural strength.
Best of all, your indoor air quality gets a massive boost. By sealing off the attic, you stop pollen, dust, and other junk from being sucked into your home’s air. This is how you take an insulation removal service and turn it into something that creates a quieter, stronger, more efficient, and healthier home for years to come.
Your Top Questions About Insulation Removal, Answered
Homeowners always have great questions when they call us about insulation removal. It's a big job, and you want to know what you’re getting into. From my years in the field, here are the straightforward answers to the questions I hear most often.
How Long Does Insulation Removal Actually Take?
One of the first things homeowners want to know is how long this process will disrupt their home. The good news is, it’s faster than you probably think.
For a typical attic, say around 1,000 to 1,500 square feet, a professional crew can have the old insulation completely removed in just one day. We're usually talking about 4 to 8 hours from start to finish. This is possible because we use powerful, truck-mounted vacuums that make quick work of old, loose material. Of course, if we run into tricky access points or have to carefully remove old, hardened materials, it might take a bit longer, but we'll give you a precise timeline after we see the space.
Do I Really Have to Remove the Old Insulation First?
Yes, and I can't stress this enough. Simply blowing new insulation over the old stuff is a huge mistake I see people make. It’s like trying to paint over rust—you're just trapping the problem underneath a new surface.
Old insulation often holds onto years of dust, allergens, hidden moisture, and even pest droppings. Covering it up just seals in those contaminants. This not only sabotages the performance of your new insulation but can also create a serious air quality issue inside your home. To get the full benefit of your investment and ensure a healthy house, you have to start with a clean slate.
Key Takeaway: For new insulation to do its job right, the attic or crawlspace needs to be completely empty and clean. Starting fresh is the only way to guarantee you aren't sealing in old problems and wasting your money.
What Happens to All That Old Insulation?
You don’t have to worry about a thing—a professional team handles 100% of the disposal. We follow all local and state regulations to the letter. The old material is sucked directly into specialized, heavy-duty disposal bags inside our truck, which keeps any dust or contaminants from getting into your home or yard.
From there, our team hauls the sealed bags to an approved disposal facility. This is especially important when we're dealing with material contaminated by mold or pests. We make sure it's handled responsibly from the moment it leaves your attic until it's properly disposed of.
Can We Stay Home While You Work?
Absolutely. We know life doesn’t stop for a home project, so our entire process is built to keep disruption to a minimum. We use strict containment protocols to isolate the work area from the rest of your home.
The first thing we do is seal off the attic access. Then, we run our powerful vacuum hoses straight from the attic to our truck parked outside. This is a critical step—it ensures all the dust, debris, and nasty contaminants are pulled completely out of the house, never circulating through your living space. Our goal is to leave your home even cleaner than we found it.
Ready to get a clean slate for your attic? The team at Airtight Spray Foam Insulation has the expertise and equipment to handle your insulation removal safely and efficiently, setting the stage for a healthier, more energy-efficient home. Request your free, no-obligation quote today!