Blog
Rim Joist Air Sealing: A South Florida How-To Guide

If you're in South Florida and your house always feels a little sticky inside, the AC never seems to catch up, or there's a musty smell near the crawl space, garage edge, or floor system, the problem isn't always the attic. A lot of the time, the leak is lower, right at the rim joist.
That narrow band around the perimeter of the floor framing gets ignored all the time. I see homeowners focus on windows, doors, and attic insulation first, while the rim joist keeps pulling humid outside air into the structure. In a dry climate, that still matters. In South Florida, it can turn into a comfort problem and a moisture problem at the same time.
Why Sealing Your Rim Joist Is Non-Negotiable
The rim joist is the section of framing that closes off the ends of your floor joists at the outer edge of the house. It's where wood framing, subfloor, sill plate, and foundation all come together. That also makes it one of the easiest places for air to slip through if the details weren't sealed well during construction.
In South Florida, that leak path matters more than most homeowners realize. Hot, damp outdoor air doesn't need a big opening. It only needs a crack at the sill plate, a rough cut around a pipe, or a gap where the rim joist meets the sheathing. Once that air gets in, your AC has to deal with both heat and moisture.
What homeowners usually notice first
This isn't typically identified as a rim joist problem. It's known by its symptom.
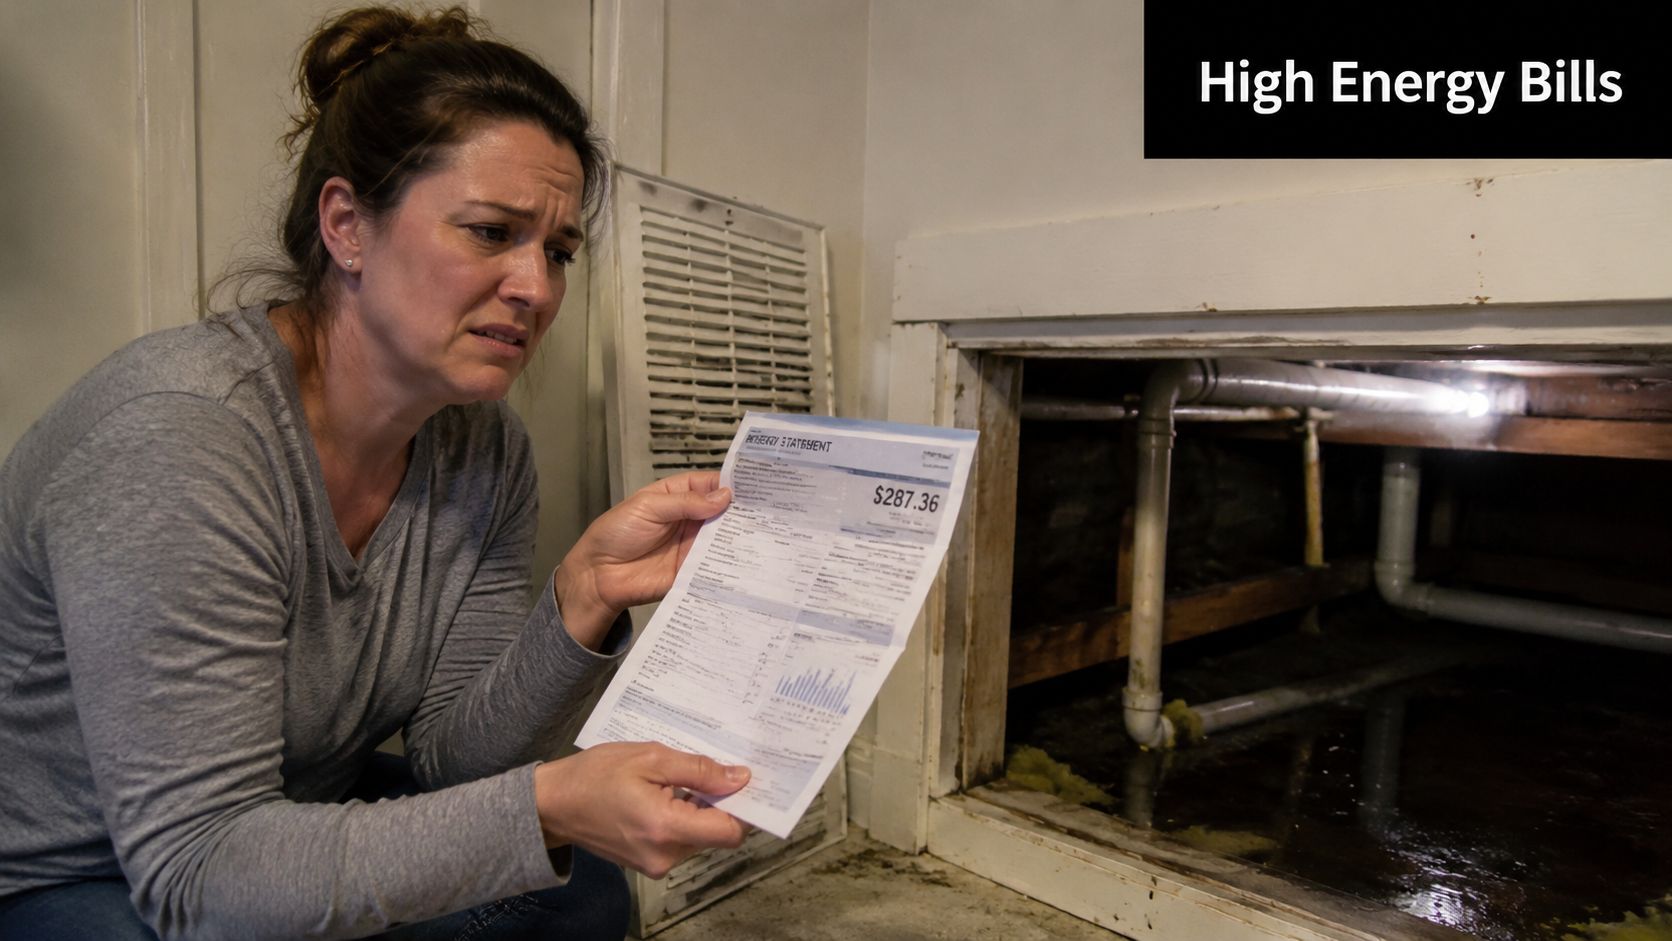
- High cooling bills: The house runs longer because outside air keeps leaking into the conditioned space.
- Uneven comfort: Floors above the perimeter can feel warmer, and rooms near the edges of the house often feel harder to cool.
- Musty odor: Humid air moving through hidden framing cavities can leave that stale smell people notice but can't track down.
- Dirty insulation or dark streaks: Air leaks often leave visible marks where dust gets caught around gaps.
The building science side of this isn't minor. The International Residential Code allows exposed spray foam at rim joists without a thermal barrier when the foam is less than 3.25 inches thick in IRC Section R314.5.11, and Building Science Corporation describes the spray foam connection between the foundation wall, rim joist, and floor sheathing as a critical seal that has shown “outstanding building airtightness” while controlling condensation at the same time in its rim joist critical seal guidance.
In a humid climate, the wrong rim joist detail doesn't just waste energy. It gives moisture a place to hang around.
Why humidity changes the stakes
South Florida houses fight outdoor moisture almost year-round. If humid air reaches cooler interior surfaces, condensation risk goes up. That's why rim joist air sealing isn't just about adding insulation. It's about creating a continuous air barrier where several materials meet.
This is also one of those details that can affect more than comfort. If you're tightening up the house and reviewing broader property risks, it also makes sense to discover Florida insurance tips so you're looking at the home as a whole system instead of treating each issue separately.
What doesn't work is stuffing fiberglass into the cavity and calling it done. Fiberglass slows heat flow, but it doesn't stop air movement. If humid air can move around it, you've insulated the space without sealing it.
Choosing Your Air Sealing Materials
Material choice at the rim joist isn't about brand loyalty. It's about gap size, moisture exposure, access, and how long you want the fix to last. In South Florida, I lean toward materials that don't just block airflow, but also hold up when the surrounding air is consistently humid.
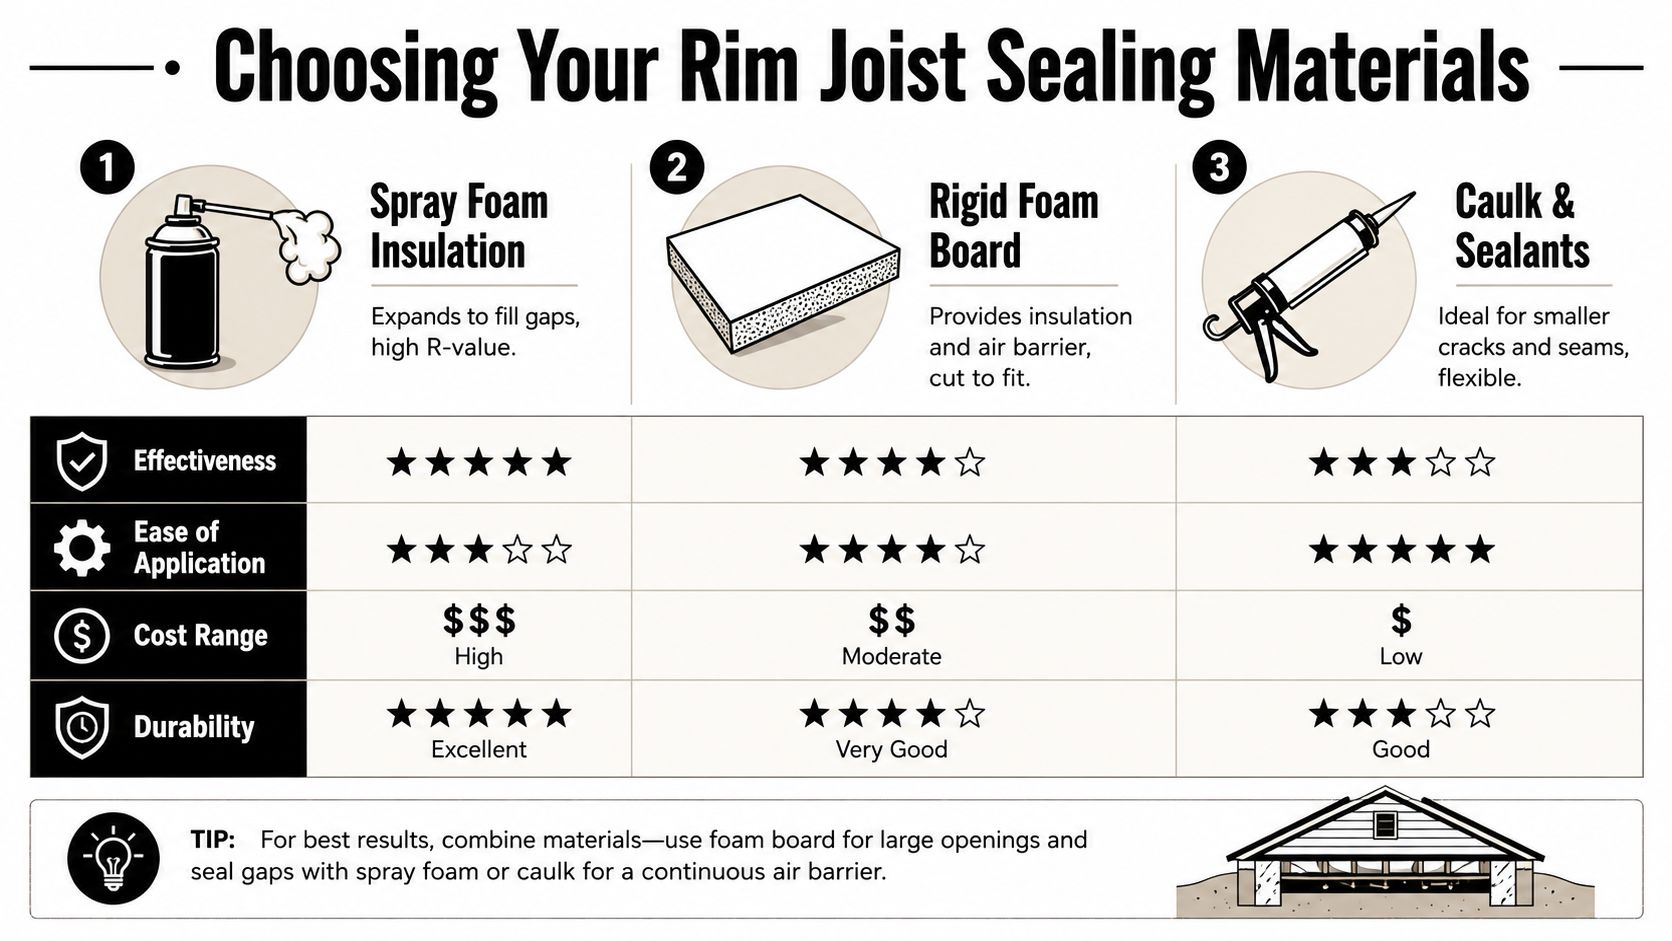
Match the material to the gap
Authoritative guidance for rim joists is straightforward. Use caulk for gaps up to about 1/4 inch, and use spray foam for gaps from about 1/4 inch to 3 inches, as outlined in this rim joist sealing reference. That same guidance notes that open-cell foam is about 0.5 lb/ft³ and closed-cell foam is about 2 lb/ft³, which is part of why they behave differently around moisture.
That gap-based approach matters because homeowners often use one product for everything. That's where bad results start. Caulk isn't for wide irregular cavities. Canned foam isn't the best answer for every seam. Fiberglass isn't an air seal at all.
What each option does well
Caulk and sealants work best on small cracks and linear joints. Around the sill plate seam, small wood-to-wood joints, and tight penetrations, a quality sealant gives you control and clean placement. It's affordable and realistic for DIY work, but only if the gap is small enough.
Canned one-part foam is useful for patching medium gaps and sealing around pipes, wires, and foam board edges. It's a good support product. I don't treat it as the top-tier answer for a whole perimeter unless the area is small and very accessible.
Rigid foam board, often installed with the cut-and-cobble method, can work well when each bay is measured carefully. You cut each piece tight, place it against the rim area, then seal the perimeter. Done well, it performs respectably. Done carelessly, it leaves hidden channels around the edges.
Two-part spray foam, especially closed-cell, is the premium solution when the goal is full contact and long-term moisture resistance. It adheres to wood, masonry, and irregular surfaces in a way board products can't match. If you want a practical overview of professional approaches, this guide on how contractors insulate rim joists is a useful reference.
Practical rule: In South Florida, materials that leave tiny unsealed edges tend to disappoint later.
Closed-cell versus open-cell in humid conditions
Open-cell foam can air seal well. In the right assembly, it has a place. But when I'm looking at rim joists in a humid region, closed-cell foam usually makes more sense because it gives a stronger air and moisture barrier in the same application.
That doesn't mean every job needs a truck and a two-part rig. It means you should be honest about the location. If the cavity is shallow, irregular, or has a history of dampness, moisture tolerance becomes more important than saving a few steps.
Rim Joist Sealing Material Comparison
| Material | Best For | Moisture Resistance | DIY Friendliness |
|---|---|---|---|
| Caulk | Small cracks and seams | Good for minor joints | High |
| Canned spray foam | Medium gaps, penetrations, foam board edges | Moderate | Medium |
| Rigid foam board | Flat bays where careful fitting is possible | Good when perimeter is fully sealed | Medium |
| Closed-cell spray foam | Irregular cavities, humid environments, long-term air seal | Strong | Low |
| Open-cell spray foam | Air sealing where a lighter foam is appropriate | Moderate | Low |
Inspection and Preparation Work
Bad prep ruins good materials. A lot of failed rim joist air sealing jobs don't fail because the product was wrong. They fail because the cavity was dusty, damp, blocked by old insulation, or never inspected for actual damage before the sealant went in.
What to inspect before you seal anything
Start by pulling back any existing insulation so you can see the full cavity. In older homes, you'll often find fiberglass stuffed into the bay with air moving freely around it. In newer homes, you may find partial foam, loose sealant, or unsealed penetrations around wiring and plumbing.
Look for these problems before you move forward:
- Water staining: Brown marks, discoloration, or repeated dampness suggest a moisture issue that needs attention first.
- Rot or soft wood: If the rim or sill is deteriorating, sealing over it is the wrong move.
- Pest entry points: Ants, roaches, rodents, and lizards don't need much space.
- Failed insulation: Sagging batts, gaps, and loose pieces usually mean air has been bypassing the assembly for a long time.
- Penetrations: Pipes, cable lines, low-voltage wiring, and electrical runs often leave rough openings.
If the area smells musty before you begin, stop and find out why. Air sealing helps control humid air movement. It doesn't fix bulk water entry.
Prep steps that actually matter
The cavity needs to be clean and dry before you install any sealing material. Dust, cobwebs, and loose debris reduce adhesion. In South Florida, I also pay attention to surface moisture. If the wood feels damp or the masonry is sweating, you're not ready yet.
A good prep sequence looks like this:
- Remove old insulation so the framing and joints are visible.
- Vacuum the cavity and brush off loose dirt or flaky material.
- Let surfaces dry if there's any sign of condensation or dampness.
- Check every bay individually because the dimensions and gap patterns often change from one joist space to the next.
- Stage your materials nearby so you're not climbing in and out of a tight crawl space with open foam cans or sealant tubes.
Wear gloves, eye protection, and a respirator when you're working overhead or disturbing old materials. Rim joist bays collect dust, debris, and things you don't want in your lungs.
Prep mistakes that lead to callbacks
The biggest one is sealing over a moisture source. The second is leaving old fiberglass in place and trying to foam around it. The third is rushing measurements on a cut-and-cobble job. Rim joists aren't clean cabinet openings. They're rough framing. Every bay is its own little puzzle.
The Complete Rim Joist Sealing Process
A high-performance job follows a sequence. You don't insulate first and hope you've sealed enough. The U.S. Department of Energy says the cavity should be cleaned and dried, penetrations sealed, and a continuous air barrier created by sealing the rim joist to the sill plate and subfloor before insulation goes in. If batts are used, they need to be tightly fitted and all edges sealed so air can't bypass them, as shown in the Department of Energy's rim joist insulation workflow.
Step one starts with penetrations
Go after the obvious leak paths first. Pipes, wire bundles, and odd framing transitions should be sealed before you deal with the larger field of the cavity.
For small openings, run a controlled bead of sealant where the penetration meets the surrounding material. For larger irregular openings, install backing or pest-resistant filler first so the foam or sealant has something to bridge against. The goal is a complete perimeter seal, not a blob in the middle.
The cut-and-cobble method
This method can work well when you're patient. Measure each bay separately, cut rigid foam board for a snug fit, and leave just enough room around the perimeter to seal the edges cleanly. Then use canned foam around all four sides so the board becomes part of the air barrier, not just insulation shoved into the opening.
What goes wrong here is predictable:
- Cuts are too loose: That leaves oversized edge gaps that are hard to seal cleanly.
- The board isn't tight to the cavity: Air can still circulate behind it.
- Only the visible edges get foamed: Hidden corners stay open.
- The installer compresses batt insulation on top of a poor air seal: The cavity looks finished but still leaks.
If you use batts after air sealing, fit them tight without gaps, voids, compression, or slumping. Batts don't fix a sloppy perimeter.
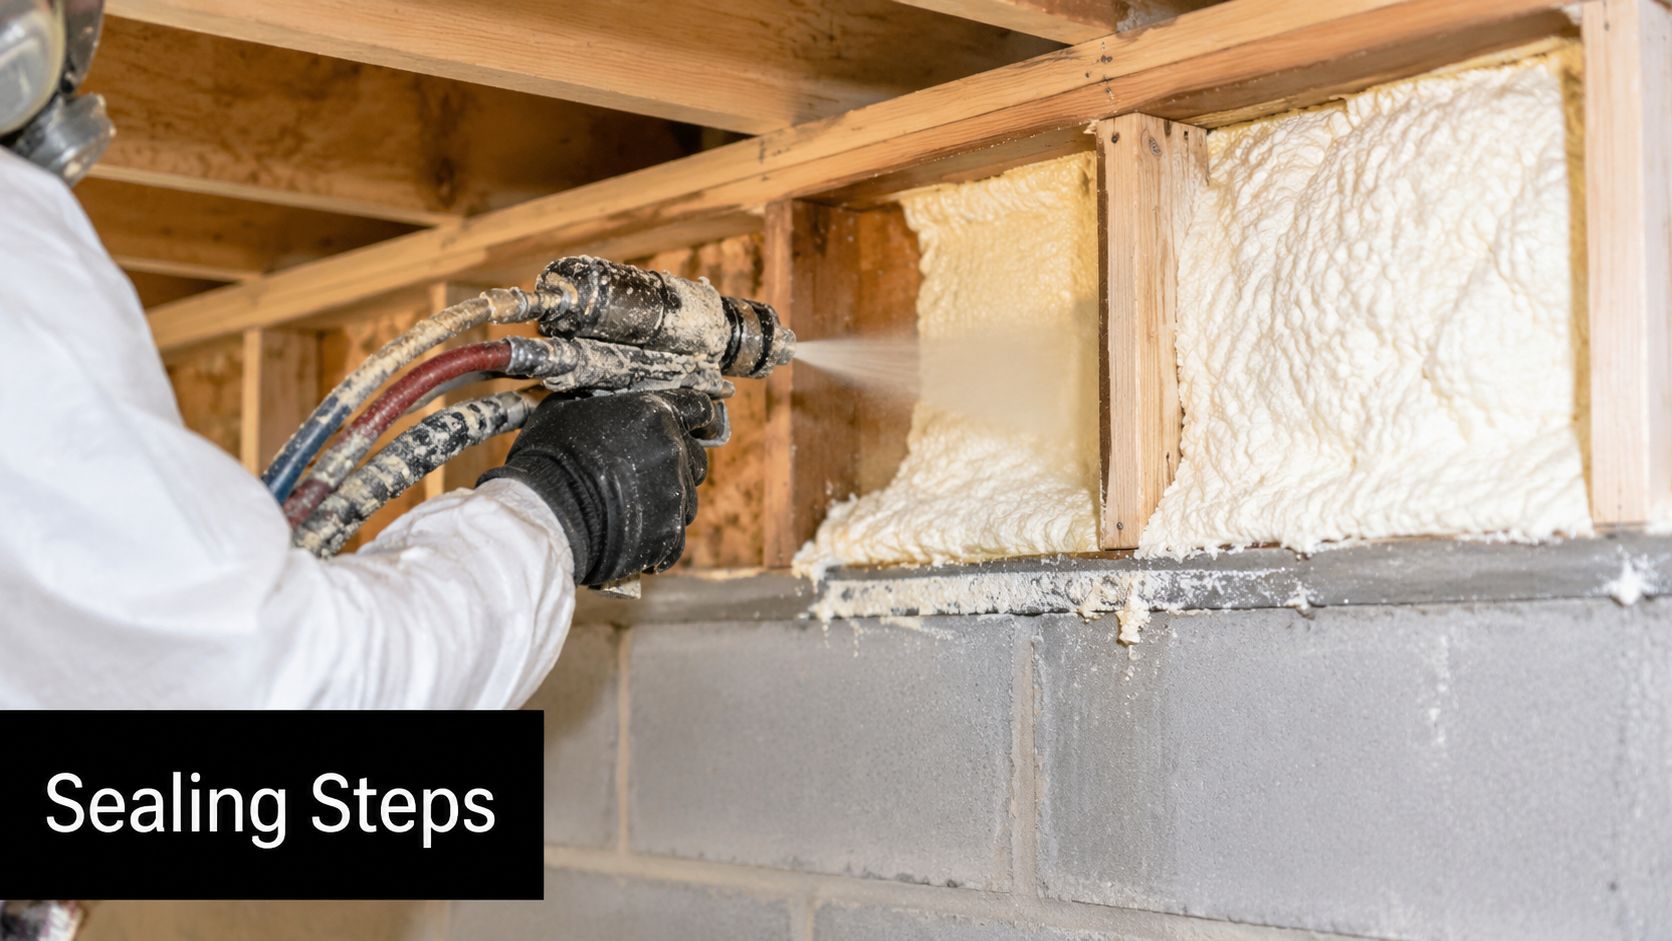
Professional spray foam application
Two-part foam separates itself from pieced-together DIY methods. A proper spray application bonds directly to the wood rim, sill plate, and adjacent surfaces, creating one continuous layer across the messy transitions that usually leak.
That matters at rim joists because this area rarely has one flat plane. You've got framing joints, concrete variation, rough sheathing edges, fasteners, and penetrations in a short span. Spray foam handles those changes better than rigid inserts do.
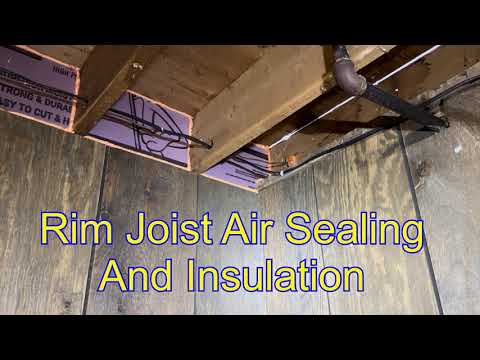
A quick visual helps if you want to see the detail in action.
What a finished job should look like
The final result should be boring. That's a compliment. No visible voids. No loose insulation hanging in front of an open crack. No random globs where someone hoped expansion would save the day.
A good rim joist job looks continuous from bay to bay. If your eye keeps stopping at little gaps, air will too.
In South Florida, the best jobs also respect drying time, substrate condition, and temperature during application. Foam applied to dirty or damp surfaces can lose the bond that makes the whole assembly work.
DIY Sealing vs Hiring a Professional
Some rim joist jobs are realistic for a careful homeowner. Some are not. The trick is knowing which one you're looking at before you buy materials and spend a Saturday in a cramped crawl space.
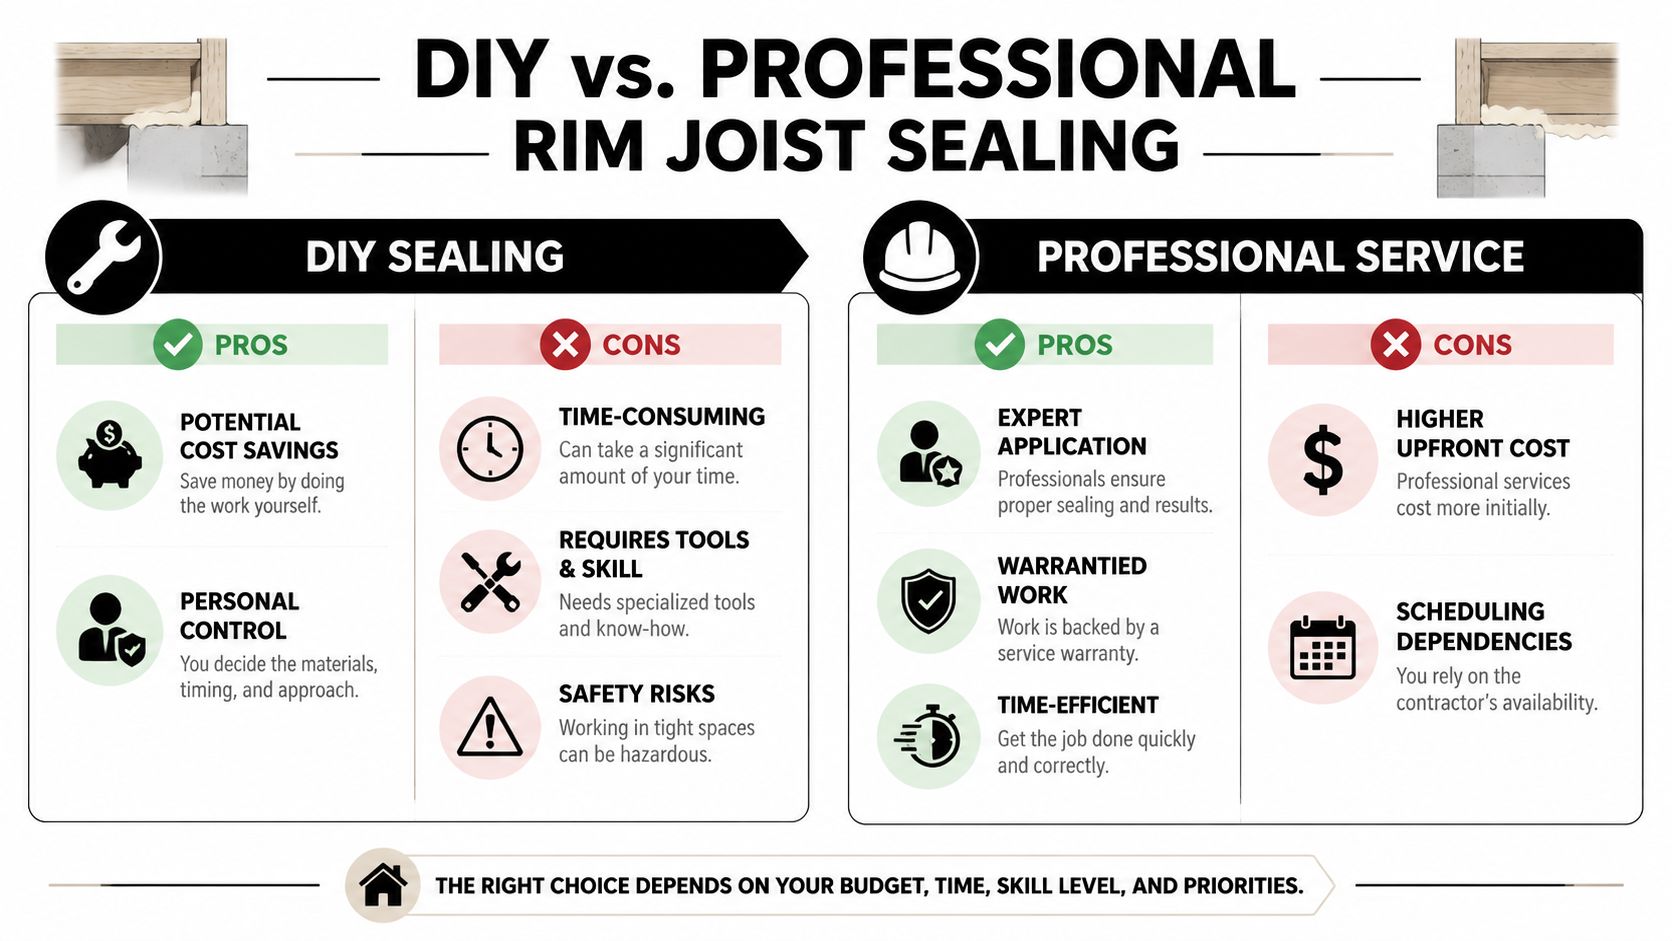
When DIY makes sense
DIY is reasonable if the area is easy to access, the leaks are limited, and you're working mostly with small seams, a few penetrations, or a straightforward rigid-foam install. If you're disciplined with prep and patient with fitting, you can improve a lot.
DIY also gives you direct control. You can inspect every bay, choose your materials, and work in stages. For many homeowners, that's enough.
Where DIY starts to fall short
The trouble starts when the job moves from “seal a few cracks” to “build a durable air and moisture barrier.” South Florida humidity doesn't forgive half-finished details. Miss one backside gap at the sill or leave small channels around a board edge and humid air will keep moving.
Professional work becomes the better choice when:
- Access is bad: Low crawl spaces, tight corners, and mechanical obstructions make clean application difficult.
- Moisture signs are present: Staining, musty odor, or damp surfaces need experienced judgment.
- You want one continuous application: Two-part spray foam does a better job across rough transitions.
- You don't want trial and error: Buying multiple cans and reworking missed spots adds up in time and frustration.
If you're comparing patch-style products with denser options, this page on closed-cell canned spray foam applications gives a practical look at where smaller foam products fit and where they don't.
DIY can seal a leak. Professional installation is better at sealing the whole assembly.
The trade-off homeowners should be honest about
The trade-off isn't just cost. It's tolerance for imperfection. A DIY job can absolutely help. But if your house has persistent humidity issues, tricky rim bays, or previous insulation that never performed well, the premium for professional application often buys better diagnosis and a more complete result.
For contractors reading this, the business side matters too. Homeowners usually call when comfort complaints keep coming back, and companies that explain building-envelope work clearly tend to earn more trust. That's one reason many trade businesses study effective lead strategies for contractors that focus on education instead of hard selling.
Post-Sealing Checks and Long-Term Maintenance
Once the rim joist air sealing is done, don't just look at it and move on. Check whether it changed the space.
What to verify right away
Walk the perimeter and inspect each bay visually. You're looking for continuity. Sealed edges should be complete, not spot-treated. Insulation should sit tight in place without sagging or leaving side gaps.
Then pay attention to the room above and the nearby area over the next few days.
- Feel for air movement: On a windy or stormy day, the perimeter should feel calmer.
- Notice indoor humidity: The space should feel less damp and less musty.
- Watch for condensation signs: If you still see sweating or damp surfaces, another moisture source may be involved.
- Listen to the AC cycle: You're not looking for a dramatic overnight miracle. You're looking for a house that feels steadier.
Maintenance should be minimal
A well-executed rim joist job doesn't need constant upkeep. Closed-cell spray foam, in particular, is usually a do-it-once detail if the original moisture issues were addressed and the application bonded properly.
That said, don't ignore the rest of the house. Air sealing is one part of moisture control. If you have a crawl space, garage perimeter, or other enclosed area that still runs damp, keep an eye on overall humidity conditions. This guide on spray foam insulation and mold is helpful if you're trying to separate real mold concerns from general moisture-management issues.
Frequently Asked Questions About Rim Joist Sealing
Is fiberglass batt insulation enough by itself
No. Fiberglass can insulate, but it doesn't stop air movement. If you stuff a batt into the cavity without air sealing the edges and penetrations, humid air can still move around it. That's why batt-only rim joist jobs often underperform in South Florida.
Should I seal around pipes and wires first or foam the whole cavity first
Seal penetrations first. Small openings around services are some of the biggest leak paths in the whole assembly. If you skip them and jump straight to insulation, you've left the easiest air routes open.
Is closed-cell foam worth it in a humid climate
Usually, yes. At the rim joist, South Florida homes benefit from materials that handle both air leakage and moisture resistance well. Closed-cell foam is often the stronger long-term choice when the cavity is irregular, the area is humid, or the homeowner wants the most complete seal possible.
Can I do one section now and the rest later
You can, if you're organized. Just finish each section completely. Don't leave bays half-sealed with exposed gaps and loose insulation. Partial work is better than no work only when each completed area is airtight.
If your home in Jupiter, Palm Beach Gardens, West Palm Beach, Wellington, or Stuart has drafty floors, musty perimeter spaces, or stubborn humidity, Airtight Spray Foam Insulation can help you fix the problem at the source with professional spray foam installation designed for South Florida conditions.