You're usually not thinking about your attic until something forces the issue. A musty smell shows up after rain. You hear scratching over the bedroom ceiling at night. Your AC runs hard, but the house still feels sticky. Then you pop the hatch and find dirty insulation, pest debris, dark staining on wood, and air that feels hotter and wetter than it should.
In South Florida, attic cleaning and sanitizing isn't just a housekeeping job. It's part of moisture control. If that attic stays contaminated, damp, and leaky, any insulation you install afterward is starting from a bad foundation. That matters even more with spray foam, because foam performs best when the space is dry, properly prepared, and sealed for the right reasons, not used to cover up an unresolved attic problem.
A good cleanup fixes the space in the right order. Inspect first. Remove contaminated material safely. Sanitize what stays. Seal the leaks and repair what caused the problem. That's how you protect indoor air, stop recurring odor issues, and set the attic up for insulation that lasts.
The inspection determines everything that follows. If you skip it, you can miss the underlying problem and waste time cleaning a symptom instead of fixing the cause.
Most attics in South Florida don't fail for one reason. They fail because moisture, pests, and air leakage work together. A roof leak wets the insulation. Humid air moves up from the house. Rodents disturb the insulation and contaminate it. By the time a homeowner notices an odor or hot rooms, the attic often has several issues layered together.
Before touching insulation or debris, gear up and light the space properly. Wear a respirator, not just a dust mask, along with gloves and eye protection. Rodent waste, mold, and old dusty insulation don't belong in your lungs or eyes.
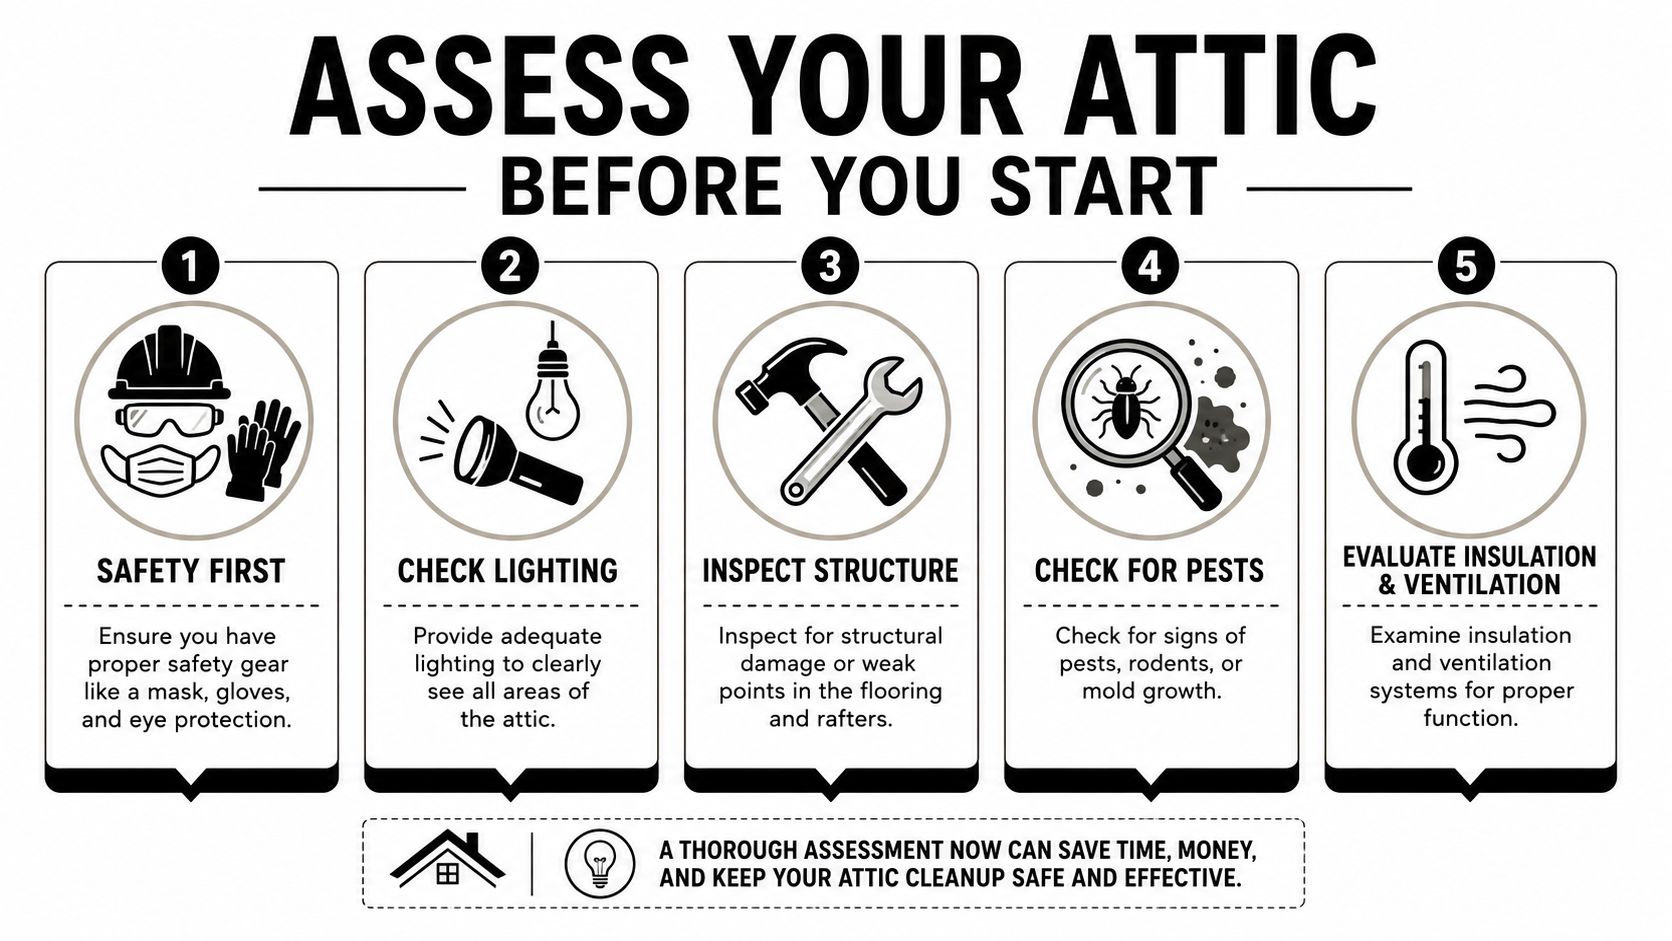
Bring a strong flashlight or work light. Attics hide trouble in corners, along eaves, around can lights, and near duct runs. If you can't see the framing, insulation condition, and roof deck clearly, you can't judge what should be removed and what can stay.
A quick pre-check should include:
Practical rule: If the attic has active leaks, visible heavy contamination, or unsafe footing, stop the DIY plan and bring in the right trade before cleanup starts.
A lot of homeowners look for “dirt” and miss the more important question. Is the material merely dusty, or is it contaminated?
Check insulation closely. A common failure point is skipping this step. According to 1800 Pack Rat's attic cleaning guidance, neglecting to inspect insulation for mold, mildew, or pest damage during the initial sort can lead to a 30-40% recurrence rate of air quality issues if contaminated insulation isn't removed and replaced. That same source recommends a top-down methodology, starting with rafters before vacuuming floors to avoid re-contamination.
Look for:
If there's pest activity, don't treat it like a cleaning-only job. It's also an exclusion job. Consequently, attic rodent control measures are vital, because sanitizing an attic without closing the access points only sets you up for another contaminated cycle.
Cleaning doesn't solve moisture intrusion. It exposes it.
Use the inspection to trace why the attic got dirty or contaminated in the first place. Check around roof penetrations, bathroom exhaust terminations, plumbing stacks, soffits, and top plates. If moisture is entering from above or humid indoor air is leaking upward, the attic will keep failing no matter how thoroughly you clean it.
A sound inspection gives you a map. It tells you what must come out, what can be treated, what has to be repaired, and whether the attic is even a safe DIY project.
Debris removal is where a lot of attic jobs go wrong. People start fast, stir up contamination, drag loose material through the house, and make the attic air worse than it was before. The right method is controlled, slow, and built around containment.
The basic rule is simple. Remove bulk debris first, then fine contamination, and don't turn contaminated dust into airborne dust.
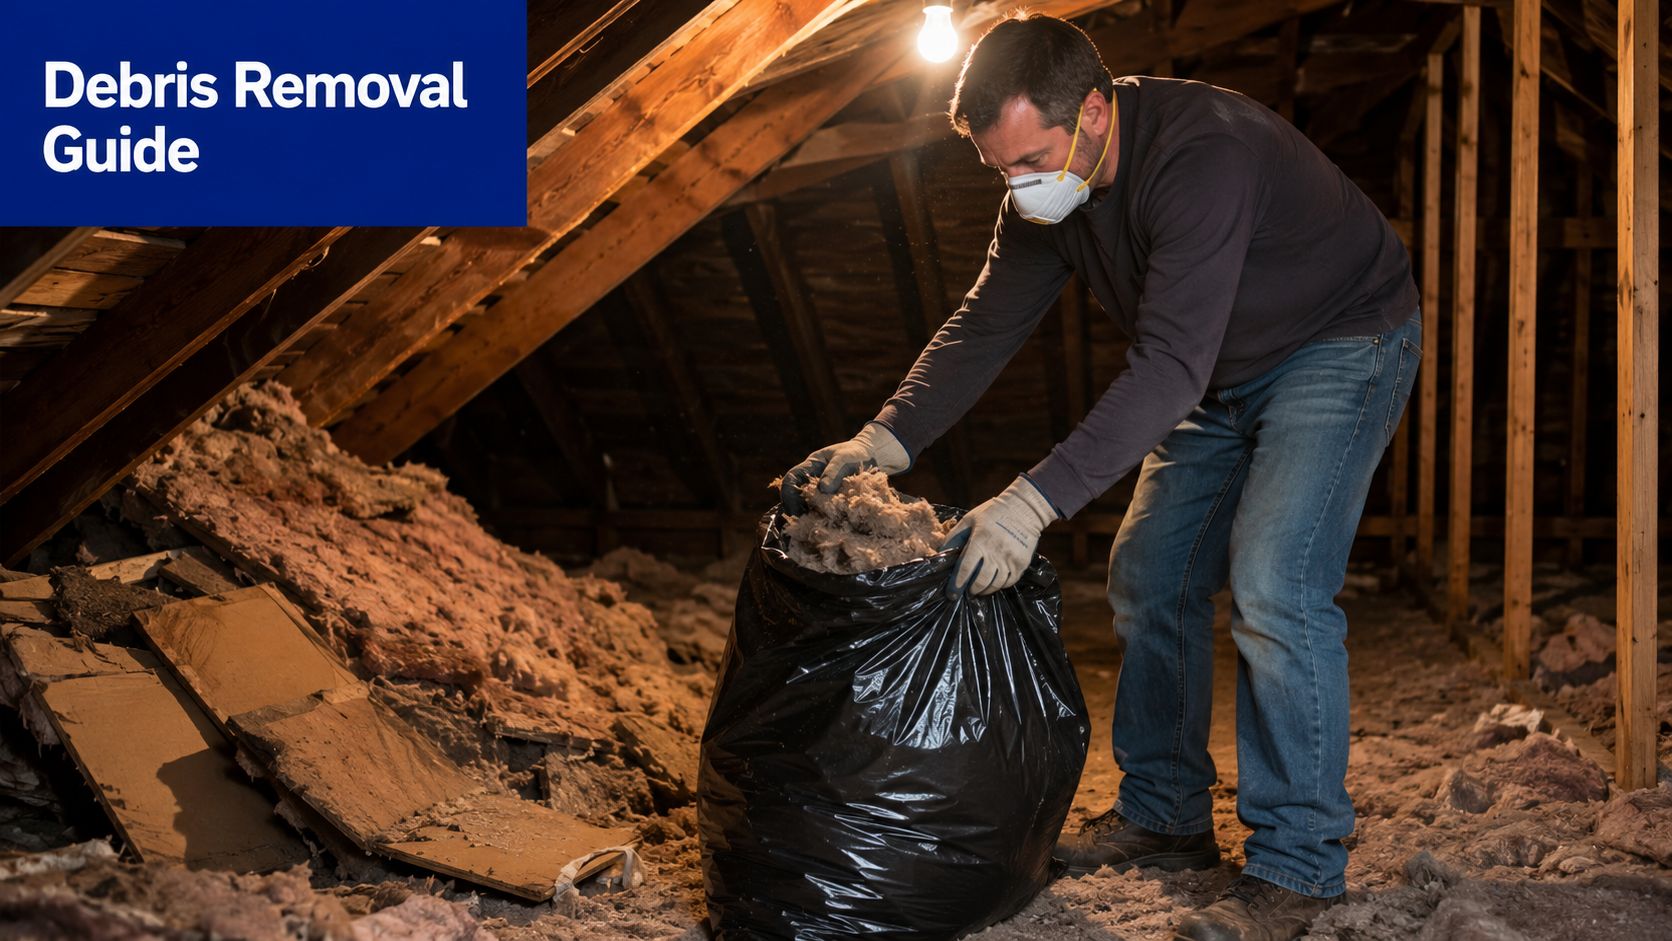
Start overhead, not on the attic floor. Dust rafters, truss members, and wall faces first so loosened debris falls into areas you haven't cleaned yet. That top-down sequence prevents you from dirtying a surface twice.
Remove large debris by hand as you go. Old boxes, construction scraps, loose nesting material, and damaged storage items should be bagged immediately. Don't create piles all over the attic. Every extra movement through the space increases the chance of tracking contaminants.
A practical workflow looks like this:
If you want a broader non-attic reference for handling cleanup mess without scattering it through the property, this homeowner's guide to managing debris is useful for planning containment and disposal logistics.
Sweeping rodent droppings or dry pest debris can aerosolize bacteria and pathogens. For safety, the method to use is a HEPA-filter vacuum and then disinfect with an enzyme-type cleaner that breaks down biological contamination instead of just covering odor. That cleanup approach is outlined in this attic cleaning methods guide.
Standard shop vacs are the wrong tool for this kind of work unless they're equipped and rated for this use. A machine that blows fine particles back into the attic defeats the whole job. For insulation removal in particular, this is why contractors use equipment built for extraction, like the systems discussed in this page about an attic insulation vacuum.
If the attic contains rodent waste, think “capture,” not “disturb.”
The same source also notes that removed insulation should be carefully bagged to avoid cross-contamination, and the attic must be allowed to dry completely before reinstalling insulation. That drying step matters in South Florida, where residual moisture can keep feeding mold and can compromise how later air-sealing or foam work performs.
Not every attic needs full insulation removal, but contaminated sections can't be ignored. If insulation is holding odor, pest waste, or moisture, leaving it in place usually means leaving the problem in place.
This video gives a useful look at the physical side of cleanup and removal work:
When bagging old insulation, avoid overfilling bags. Heavy bags tear. Torn bags leak debris into hallways, garage floors, and trucks. Seal each bag before moving the next one. Small discipline beats speed on this kind of job.
Debris removal often reveals the actual attic conditions. Once insulation is out of the way, you may find roof staining, fungal growth on sheathing, disconnected bath fans, or open penetrations around wiring and plumbing. That's good news, because hidden problems can finally be corrected. But it also means the cleaning phase isn't the end of the project.
A properly cleaned attic should look stripped back enough that you can inspect framing, penetrations, and the underside of the roof clearly. If you can't see the attic structure after “cleanup,” the job usually isn't finished.
A South Florida attic can look clean and still be a bad candidate for new insulation. Rodent urine in the decking, mildew on framing, and odor soaked into dusty wood keep working after the debris is gone. If spray foam is part of the plan, that leftover contamination matters even more because foam needs clean, dry substrate to bond and perform the way it should.
Cleaning removes what can be picked up and bagged. Sanitizing deals with what stays behind on wood, sheathing, and other hard surfaces. Deodorizing has a separate job. It addresses odor after the source has been removed and treated, not before.
The treatment has to match the problem.
Pest contamination calls for products that break down organic residue. Damp or mold-affected wood usually needs an antimicrobial treatment meant for porous framing members. A generic spray-everything approach wastes time and often leaves the underlying problem in place.
If you want a general primer on surface disinfection principles before choosing a treatment plan, this guidance on pathogen prevention helps explain why contact time, coverage, and proper drying matter.
A solid attic sanitizing sequence usually includes:
Hand wiping only gets you so far. Attics have tight corners at eaves, rooflines, and framing intersections that trap residue and odor. In those cases, thermal fogging can help distribute deodorizing or antimicrobial product into areas a cloth or pump sprayer will not reach, but it should support physical cleaning, not replace it.
Rainbow Restoration notes in its overview of attic cleaning and sanitizing services that projects often involve HEPA vacuuming, disinfecting contaminated surfaces, deodorizing, and, where needed, insulation removal and replacement. That lines up with field reality. A proper decontamination job usually takes more than one pass because porous wood, layered dust, and odor pockets do not all respond at the same speed.
A sanitized attic should smell neutral. Heavy fragrance usually means odor was covered instead of removed.
If mold has been part of the attic history, review whether mold can grow on insulation materials before deciding what stays and what gets replaced. That decision affects indoor air quality, odor control, and how well new insulation holds up in a humid climate.
Drying is where many attic cleanups go wrong. In South Florida, treated framing can stay damp longer than homeowners expect, especially during wet season humidity. Putting insulation back too soon traps moisture against wood and creates conditions for odor return, microbial growth, and reduced spray foam adhesion.
For foam work, dry and sanitized surfaces are the standard. If the roof deck or framing still carries moisture or biological residue, the attic is not ready yet.
A lot of attic cleaning jobs fail because the cleanup crew leaves behind the actual engine of the problem. They remove debris, spray disinfectant, and call it done. Then the attic gets humid again, mold risk returns, odor creeps back, and the new insulation starts life in a compromised space.
The missing step is air sealing and repair. In South Florida, that isn't optional.
Building science points to the main reason many attics relapse. The so-called sanitization-only approach ignores the source of moisture. According to this discussion of attic sanitizing and air leakage, 90% of attic moisture and mold growth is driven by unsealed air leaks from the living space, and in climates where humidity exceeds 70%, air sealing the ceiling plane is the primary defense against recurring mold.
That's the connection many generic attic cleaning articles miss. If humid indoor air keeps leaking into the attic around recessed lights, bath fan housings, plumbing penetrations, top plates, and chase openings, sanitizers only buy time. They don't change the moisture load.
For spray foam performance, this point is even more important. Foam is not a magic eraser for a wet, dirty attic. It performs best when the substrate is dry, contamination has been removed, and the assembly has been repaired correctly. If you install foam over unresolved moisture pathways, you haven't built a durable system. You've hidden a bad one.
Once the attic is clean enough to inspect, focus on the leakage and damage points that keep feeding contamination.
| Area | What to look for | Why it matters |
|---|---|---|
| Ceiling penetrations | Gaps around wiring, plumbing, and fixtures | Humid indoor air escapes upward |
| Vent terminations | Disconnected or poorly routed exhausts | Moisture gets dumped into the attic |
| Roof-related damage | Staining, softened wood, leak paths | Water intrusion undermines cleanup |
| Pest access points | Openings at eaves, vents, and roofline transitions | Re-infestation starts the cycle over |
| Ventilation pathways | Blocked soffits or airflow restrictions | Moisture lingers instead of clearing |
Repairs may include replacing water-damaged wood, clearing blocked ventilation paths, securing vent terminations, and sealing entry points with durable materials that pests can't chew through. The exact material depends on the opening. Caulk, foam, metal flashing, and hardware cloth all have their place. What matters is using the right product for the gap, not one product for everything.
If inspection points to roof leakage as part of the contamination history, even a simple visual reference can help homeowners understand where the failure may be starting. This example of Paletz Roofing's Miramar leak expertise is a reminder that attic cleanup and roof diagnostics often belong in the same conversation.
Clean attics stay clean when you stop the moisture and the animals, not when you spray stronger chemicals.
A repaired and air-sealed attic gives new insulation a fair chance to work. That applies to blown-in material, batts, and especially spray foam.
When the attic is dry, sealed at the right leakage points, and free of contaminated debris, spray foam can do what it's supposed to do. It can control air movement, help stabilize indoor conditions, and reduce the moisture swings that punish South Florida homes. Without that prep, you're asking insulation to compensate for unresolved building defects. No insulation product should be expected to do that.
A homeowner clears out old boxes, stirs up insulation, and finds rodent droppings packed along the soffit line. Two weeks later, the attic still smells, the wood still feels damp, and they are scheduling spray foam. That is the point where a cleanup job stops being basic housekeeping and becomes a building-performance problem.
Some attics can be cleaned by a careful homeowner. An attic with pest waste, wet insulation, visible microbial growth, damaged framing, or poor access should be handled by a trained crew. In South Florida, high humidity raises the stakes because contamination that is left behind does not stay dormant for long.
Professional help makes sense when the work involves conditions such as:
The cost gap between DIY and professional work is real, but the trade-off is simple. Supplies are cheaper than labor. They do not give a homeowner containment equipment, trained removal methods, moisture diagnosis, or a clean substrate that is ready for insulation.
Pricing changes with contamination level, attic size, access, and whether the job stops at cleaning or includes sanitizing, rodent-proofing, and restoration.
According to HomeGuide's attic cleaning cost data, the national average for professional attic cleaning is $438, with most homeowners paying $258 to $713. Basic debris removal averages $100 to $500, while extensive sanitization for mold, asbestos, or rodent infestation ranges from $700 to $11,000. The same source notes that severe mold or rodent contamination can reach $2,000 to $6,000+, and a 1,000-square-foot attic often averages around $1,500 for thorough cleaning and decontamination.
A few common line items explain why totals move quickly:
That range reflects the nature of the work. A proper attic cleanup often includes several separate tasks, each with different labor, equipment, and disposal requirements.
South Florida attics hold moisture longer. That changes how cleanup should be judged.
A dry-climate attic with minor contamination may tolerate a basic cleanup. A South Florida attic with the same contamination can keep odor in the wood, leave humidity trapped in old insulation, and create conditions that undermine the next insulation system. Spray foam is where I see this missed most often. If the attic is sanitized poorly, left damp, or still carrying organic residue, foam does not fix that. It seals over a bad starting point.
That matters because spray foam performs best on clean, dry, stable surfaces. If the attic still has hidden moisture, lingering contamination, or unresolved pest intrusion, the homeowner can end up paying premium insulation prices on top of a substrate that was never ready for encapsulation.
Professional help is often less about cleaning faster and more about cleaning in the right order. Remove contaminated material safely. Sanitize what remains. Verify dryness. Correct the source of the moisture or pest entry. Then install insulation into an attic that is ready to stay clean.
A clean attic isn't the finish line. It's the reset point.
When attic cleaning and sanitizing is done properly, the benefits stack together. You remove contaminated debris. You treat the surfaces that remain. You stop moisture and pest pathways. Then you install insulation into an attic that's finally ready for it. That order protects indoor air quality and gives the home a better chance at consistent comfort.
The attic projects that hold up over time usually share the same traits:
That last point is where long-term performance is won or lost in South Florida. If the attic still allows humid indoor air to leak upward, you're asking any insulation system to fight a battle it didn't create. Once the attic is clean, dry, repaired, and sealed, insulation can perform the way it was intended to perform.
Spray foam is at its best when it's installed in a controlled, prepared environment. Clean substrates matter. Dry framing matters. So does solving the reason the attic got contaminated in the first place.
That's why attic cleanup shouldn't be treated as a side chore before insulation. It's part of the insulation project. When the attic is properly reset first, foam can help stabilize temperatures, reduce unwanted air movement, and support a healthier, more durable home environment.
If your attic smells off, looks dirty, shows signs of pests, or has insulation that's been through moisture or contamination, don't rush to cover it. Clean it correctly. Sanitize it correctly. Repair it correctly. Then insulate it on purpose.
If you want expert help turning a dirty, humid attic into a clean, sealed, insulation-ready space, Airtight Spray Foam Insulation serves homeowners and builders across South Florida with attic-focused spray foam solutions built for this climate. Request a free quote to get a professional assessment and a clear plan for creating a healthier, more energy-efficient home.