Blog
A Homeowner’s Guide to Insulation Removal and Replacement
When we talk about insulation removal and replacement, we’re not just talking about routine maintenance. We’re talking about a fundamental upgrade to your home’s health, comfort, and performance. For homeowners here in South Florida, it's one of the single most effective investments you can make to combat our unique climate challenges.
Think of it as swapping out an old, worn-out part of your home's core system for something that actually works.
Why Modern Insulation Is a Smart Home Upgrade
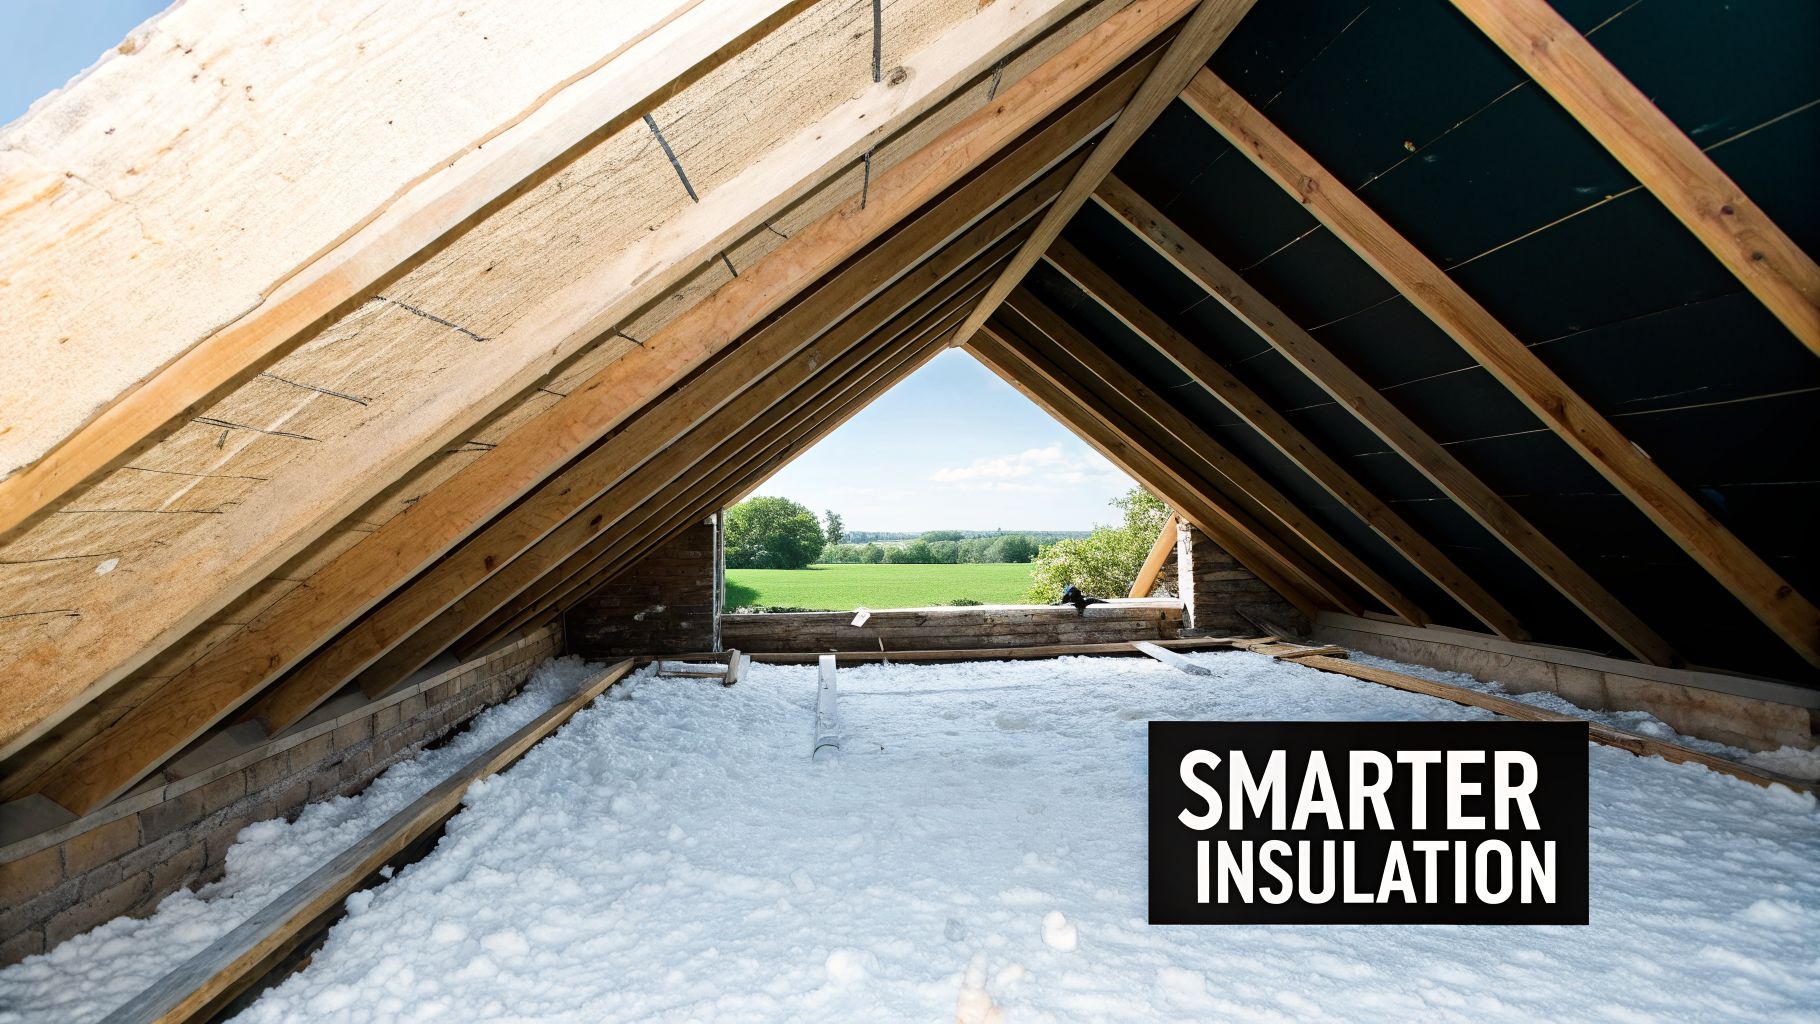
Right now, your home's old attic insulation is probably like a cheap, cracked cooler you’d take to the beach. No matter how much ice you pack in, it just can’t keep things cold against that relentless Florida sun. Your AC is working overtime, but it’s fighting a losing battle against the heat constantly seeping in.
This is exactly where a professional insulation removal and replacement project changes everything. It's more than a simple fix; it's a complete performance overhaul for your house.
By getting rid of that old, ineffective material and putting in a modern system like spray foam, you’re creating a seamless, airtight barrier. This isn’t just insulation—it’s a solution engineered from the ground up to handle the two things we have in abundance: extreme heat and suffocating humidity.
The Immediate Benefits of Upgrading
When you decide to upgrade your insulation, you're making an investment that starts paying you back right away. You’re essentially creating a protective thermal shell around your home, stopping your expensive cool air from leaking out and preventing hot, sticky air from getting in. The results are real, and you'll feel them almost immediately.
Here are the core benefits you can expect:
- Dramatically Lower Energy Bills: A properly sealed attic can slash your heating and cooling costs by up to 50%. Your air conditioner finally gets a break, running less often and more efficiently.
- Consistent Indoor Comfort: You can finally say goodbye to those frustrating hot spots and rooms that never seem to get cool. Modern insulation helps stabilize the temperature throughout your entire home.
- Enhanced Property Value: An energy-efficient home is a huge selling point. Buyers are looking for homes that are cheaper to run, and upgraded insulation is a concrete feature that boosts your home’s value.
Think of it this way: You wouldn't drive your car with a leaky gas tank, right? Leaving old, failing insulation in your attic is the exact same concept—it’s just constantly draining your energy budget and making your home less comfortable.
A Foundation for a Healthier Home
Beyond the savings and comfort, new insulation is a major step toward a healthier home. Over the years, old fiberglass or cellulose insulation gets compressed, dirty, and—if it's been exposed to even a small roof leak or our high humidity—can become a breeding ground for mold, mildew, and dust mites.
Removing that contaminated material gets rid of a major source of potential allergens. You’re not just putting in new insulation; you're creating a clean slate for better indoor air quality.
This process establishes the "why" before we get into the nuts and bolts of your insulation project. For a broader look at the strategies involved, this guide on how to improve home insulation is a great resource. It's a smart place to start as you plan to transform your home.
Signs Your Attic Insulation Is Failing
Your attic insulation is the first line of defense against South Florida’s relentless heat and humidity. It’s constantly working. But over time, that defense weakens. When insulation starts to fail, it can't do its job, and your home—and your wallet—will feel the effects.
Knowing what to look for is the key. You have to be able to spot the tell-tale signs that your insulation has given up the ghost and it's time for an insulation removal and replacement project.
The Obvious Visual Red Flags
Sometimes, the best way to know if you have a problem is to just take a look. If you can safely get into your attic, a quick inspection with a good flashlight will tell you a lot. Old, failing insulation doesn’t hide very well.
- Compacted or Flattened Insulation: Healthy insulation, whether it's blown-in or batts, should look fluffy. That fluffiness is what creates the air pockets that stop heat transfer. When you see insulation that’s matted down, compressed, and dense, it has lost its thermal resistance (its R-value) and is no longer effective.
- Visible Water Stains or Wetness: Moisture is insulation’s worst enemy. If you see any water stains on the material, or if it feels damp to the touch, you’ve got a serious issue. Insulation acts like a sponge, and once it's wet, it's not only useless for insulating but becomes a perfect breeding ground for mold.
- Discoloration and Grime: Is the insulation dark, dirty, or covered in black streaks? That’s a dead giveaway for air leaks. Your attic is pulling in dust and pollutants from outside, and the insulation is acting like a filter. This means your home’s thermal envelope is breached.
If your Jupiter home feels muggy and sticky no matter how low you set the AC, failing insulation is almost always part of the problem. What you see in the attic is just physical proof that your home has lost its protection.
We see it all the time in older homes around West Palm Beach and Stuart. The original blown-in insulation from the 80s or 90s has often settled and compressed by 20-30%. That’s a massive drop in performance, leaving the home vulnerable to heat gain and creating the exact humid conditions mold loves. This trend is a major reason so many homeowners are finally upgrading their insulation to save on energy costs, a key driver in the residential insulation market. You can discover more insights about this growing market trend on futuremarketinsights.com.
Is Your Insulation Failing? A Quick Diagnostic Checklist
Not sure if what you're seeing is a real problem? This checklist breaks down the common symptoms we find in South Florida homes and what they mean for you.
| Symptom | What It Looks Like | What It Means for Your Home |
|---|---|---|
| High Energy Bills | Your FPL bill keeps climbing without explanation. | Your AC is running constantly to fight the heat pouring in through your poorly insulated attic. |
| Hot & Cold Spots | One bedroom is an oven while the living room is fine. | Insulation coverage is uneven, missing, or has settled, creating weak spots in your thermal barrier. |
| Visible Attic Damage | Insulation looks flat, wet, or has dark, dirty streaks. | The material has degraded, suffered water damage, or is filtering dirty air—it's no longer working. |
| Pest Activity | You hear scratching or find droppings in the attic. | Rodents and other pests have torn up your insulation to nest, destroying its effectiveness and creating a health hazard. |
| Musty Odors | A persistent damp, musty smell comes from vents. | This is a strong indicator of mold or mildew growing in damp, degraded insulation. |
If you checked off even one or two of these, your insulation is likely underperforming and costing you money.
Clues You Can Feel and Hear
You don't even have to climb into the attic to know something's wrong. Your home itself will give you plenty of clues.
The most obvious one? An air conditioner that never seems to stop running. It's fighting a losing battle, trying to cool down living spaces while hot air from the attic radiates through the ceiling. This directly translates to those stubbornly high energy bills that just don’t make sense.
Inconsistent temperatures are another classic sign. Is there one room that’s always hotter than everywhere else? That's a hot spot, and it's almost certainly caused by thin, settled, or missing insulation directly above it.
Finally, just listen. Scratching or scurrying sounds are a sure sign that pests have moved in. Rodents love to tunnel through old fiberglass, shredding it for nests and leaving behind droppings and urine that contaminate your attic. A faint musty smell coming from your air vents is another serious warning, pointing directly to mold and mildew that require immediate and professional insulation removal and replacement.
Choosing Your Insulation: Open-Cell vs. Closed-Cell Foam
Once you’ve made the call to replace your old, failing insulation, you’re faced with the most important decision of the project: what to put back in. For South Florida homes, spray foam is the gold standard, but it’s critical to understand that not all foam is the same. The choice between open-cell and closed-cell foam is a big one, and they do very different jobs.
Think of it this way: you have to choose the right tool for the job. You wouldn't use a delicate paintbrush to paint the entire exterior of a house. The same principle applies here. Picking the right foam for the right application is the key to a successful project and a comfortable, efficient home.
Open-Cell Foam: The Sound-Absorbing Sponge
Open-cell foam is the lighter, softer, and more flexible of the two. Its structure is made of tiny cells that aren't completely sealed, which is what gives it a pliable, almost spongy texture.
This unique structure makes it a phenomenal sound absorber. If you're looking to create a quiet home office, a peaceful nursery, or a movie-quality home theater, installing open-cell foam in your interior walls will make a world of difference. It literally deadens sound waves as they try to pass through.
However, that open structure also means it can absorb water like a sponge if it gets wet. In our humid climate, and especially in areas prone to leaks like attics and crawl spaces, this can be a major problem. For this reason, we almost never recommend it for attics in South Florida.
- Best Use: Interior walls, between floors, and in media rooms where sound control is the top priority.
- Key Feature: Excellent sound dampening and flexibility.
- Limitation: It is not a moisture barrier and will hold water if it comes into contact with a leak.
Closed-Cell Foam: The Rigid, Waterproof Shield
Now, let's talk about closed-cell foam. This is a completely different animal. It’s dense, rigid, and incredibly strong. The cells are completely sealed and packed tightly together, making it an absolute barrier to both air and water.
This is the material we trust for attics and roofs in South Florida, hands down. It acts like a rigid, waterproof shield for your home. When applied directly to the underside of your roof deck, it not only provides an exceptional thermal barrier but also adds significant structural reinforcement—a massive benefit during a hurricane. Its R-value (insulating power) is also nearly double that of open-cell foam per inch.
For a South Florida home, using closed-cell foam in the attic is like adding a layer of armor. It provides an impermeable barrier against our two biggest enemies: water intrusion from storms and heat gain from the sun.
Making the Right Choice for Your Home
So, how do you know it's time to even start thinking about this? Many homeowners come to us with the same problems—high energy bills, strange smells, or signs of pests. This flowchart breaks down the typical journey.
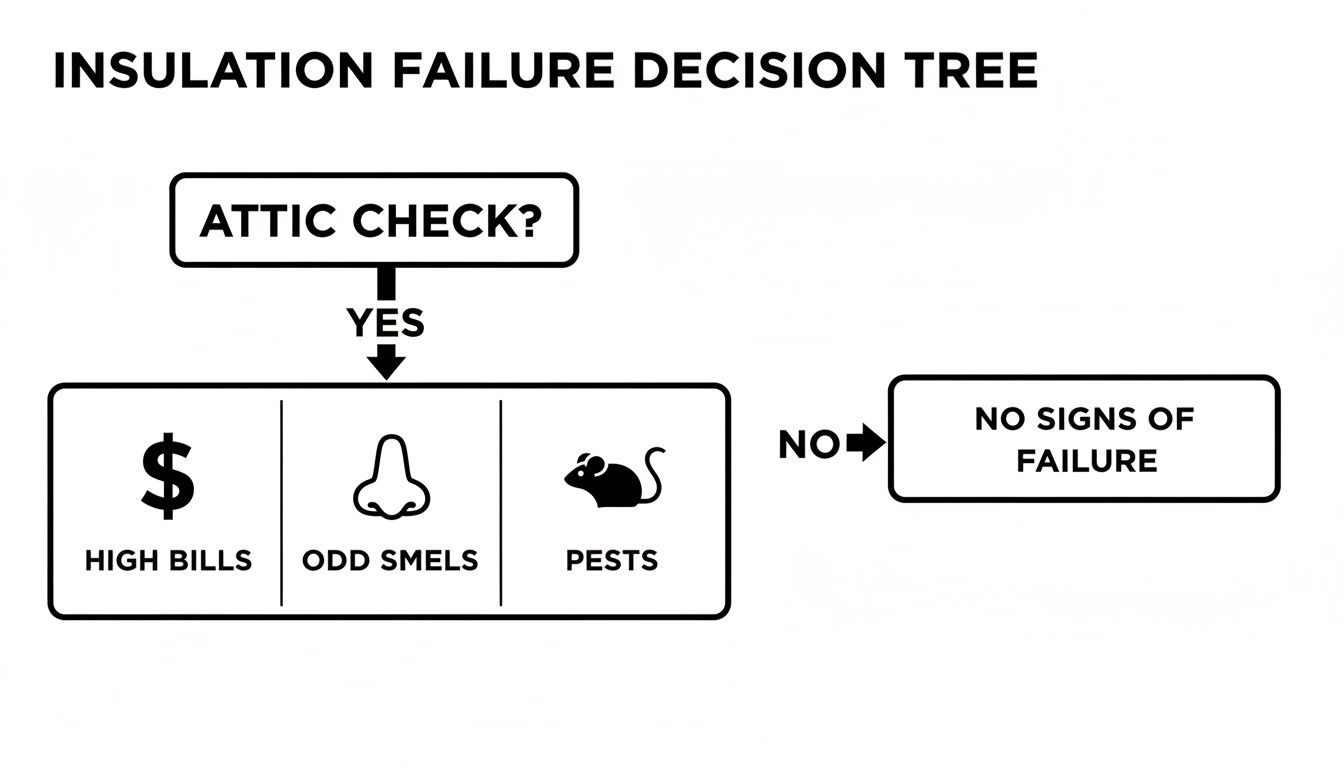
As you can see, those common issues all lead to an attic inspection, which is the first step in any professional insulation removal and replacement project. To get even more granular, you can learn more about the specific differences between open-cell and closed-cell foam in our side-by-side comparison.
Ultimately, the choice comes down to the application. For the vast majority of South Florida homeowners looking to slash energy bills and fortify their homes against moisture, closed-cell foam is the clear winner for attic applications. For soundproofing interior rooms, open-cell is a fantastic and cost-effective solution. Often, the best strategy is a hybrid approach, and a qualified contractor can help you decide where to use each material for the best results.
The Professional Removal and Replacement Process
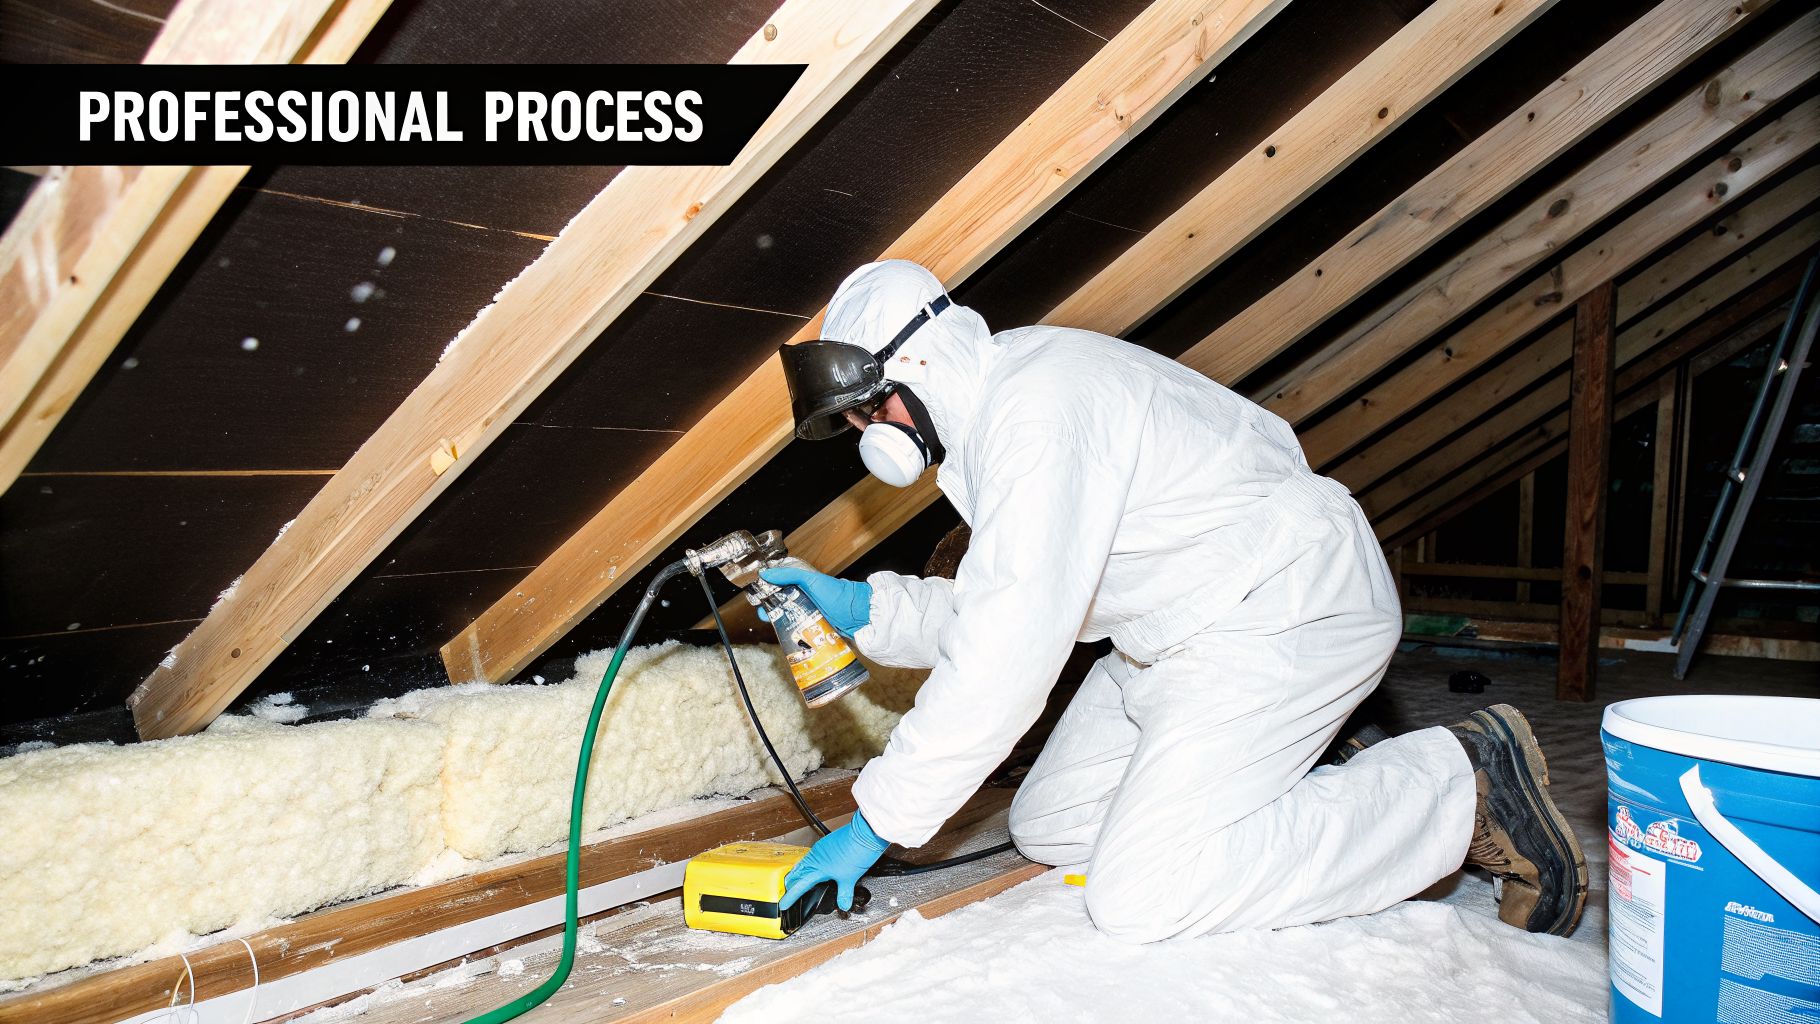
Seeing what goes into a professional insulation removal and replacement job takes the mystery out of it. This isn't just about yanking out old material and spraying in something new. It’s a systematic process we've perfected over the years to protect your home and guarantee the new insulation performs as it should.
A quality contractor follows a precise workflow from start to finish. Think of it less like a demolition and more like a carefully planned operation. Each step sets the stage for the next, transforming your attic from a source of problems into a sealed, high-performance part of your home. Here’s exactly what you can expect when our team is on the job.
Step 1: Setting Up a Clean and Contained Workspace
Our first job is always to protect your home. Before we touch the old insulation, our technicians create a full containment zone. We lay down heavy-duty plastic sheeting on your floors and carefully cover any furniture, walls, or belongings in the work area to shield them from even a speck of dust.
We then map out a secure path from the attic access to the outside of your home. This ensures that every bit of old, contaminated insulation is moved directly out without ever passing through your living spaces. It’s all about keeping your home clean and your family safe.
Step 2: Safe and Contained Insulation Removal
With your home fully protected, we get to work on the removal. Our crew uses high-powered, commercial-grade vacuums with long-reach hoses designed specifically for this task. This system pulls all the old, contaminated insulation directly out of the attic and feeds it into a secure containment bag or a dedicated vehicle parked outside.
This vacuum method is non-negotiable for a few critical reasons:
- It controls the mess. Old insulation is packed with decades of dust, allergens, and often mold spores. Vacuuming prevents that from becoming airborne inside your home.
- It’s thorough. The powerful suction pulls out every last bit of degraded material, even from tight corners and between joists where it's impossible to reach by hand.
- It keeps everyone safe. By containing the material immediately, we minimize exposure for our crew and your family.
If we're dealing with old fiberglass batts, our team rolls them up carefully, bags them, and removes them by hand. This methodical approach is the foundation of a job done right. You can see more details on our approach by reading about our foam insulation removal services.
Step 3: The "Clean Slate" – Attic Cleaning and Air Sealing
Once the old insulation is out, you're left with a clean slate—the bare bones of your attic. This is a crucial step that low-bid contractors almost always skip. We meticulously sweep and vacuum the entire attic floor, removing any leftover debris to get the surface perfectly clean for the next phase.
With the attic exposed, our technicians hunt down and seal every single air leak. This means sealing gaps around light fixtures, plumbing stacks, electrical wires, and where interior walls meet the attic floor. This air sealing is what truly creates an airtight barrier, stopping your expensive conditioned air from leaking out.
When we're working on a renovation, we often find old, settled cellulose or crumbling foam. After we clear it all out, we apply new spray foam that can deliver an R-6 per inch for closed-cell—a massive jump from the old R-3.3 you'd get with fiberglass. For anyone managing a property or owning a metal building, that means stable temperatures, quieter rooms, and lower energy bills. The investment often pays for itself in just 3-5 years.
Step 4: Applying New, High-Performance Insulation
With a clean, sealed attic ready to go, it's time for the main event. Our certified installers apply the new spray foam insulation to the precise depth needed to hit your target R-value. They work methodically to ensure complete, even coverage across the entire attic deck, creating a single, solid, gap-free thermal barrier.
This is where expertise really matters. The goal is a monolithic seal that delivers the maximum possible energy efficiency and moisture control for your home.
Step 5: Final Cleanup and a Walkthrough You Can Trust
We finish every project with a thorough, top-to-bottom cleanup. Our team removes all the protective coverings, vacuums any remaining dust, and leaves your home exactly as we found it—just a whole lot more comfortable and efficient.
A final walkthrough and quality check ensures the installation meets our demanding standards and that you are completely satisfied with the results.
Alright, let's get down to the numbers. When you're looking at a major home project like insulation removal and replacement, two questions always pop up first: "How much is this going to set me back?" and "Is it actually worth it?"
It's natural to focus on the initial price, but if that's all you look at, you’re missing the bigger picture. This isn't just an expense; it's an investment in your home that pays you back, month after month. Before we dive into the financials, it's helpful to get a handle on your current energy use by understanding why your electric bill might be so high. That context really highlights just how much of a difference a proper insulation upgrade makes.
What Factors Influence the Final Price?
There’s no one-size-fits-all price tag for an insulation job. The final cost comes down to a few key variables that are specific to your home.
Here are the main things that drive the cost:
- Square Footage: The size of your attic is the biggest factor. A larger space simply requires more material and more time to insulate correctly.
- Type of Foam: As we've covered, closed-cell foam costs more per board foot than open-cell. That's because it's denser, has a higher R-value, and gives you that critical moisture barrier we need here in South Florida.
- Accessibility and Complexity: If your attic has a wild layout, low-hanging ceilings, or is just a pain to get into, it's going to require more labor to prep and insulate properly.
- Extent of Removal: The condition of your old insulation matters, too. If we’re dealing with contaminated or heavily packed-down material, it takes more work to get it all out safely and cleanly.
For a more in-depth look at the numbers, you can check out our guide on the cost of insulation removal.
From Expense to Investment: The Power of ROI
Now, let's talk about what really counts: your return on investment (ROI). The moment we finish installing new spray foam, it starts paying for itself. By creating an airtight seal, we dramatically lighten the load on your AC system.
Did you know that tearing out old, useless insulation and upgrading to spray foam can cut your energy bills by up to 50%? Think about Florida's brutal, sticky humidity. Old fiberglass acts like a sponge, getting soggy, losing its R-value, and letting that oppressive hot air seep right into your attic. Your AC never gets a break.
The payback period for a professional insulation removal and replacement job is usually just 3-5 years. Once you hit that mark, the energy savings turn into pure profit, putting money back in your wallet every single month for as long as you own the home.
To see how this plays out over time, let's look at a typical five-year scenario.
Spray Foam ROI Breakdown: A 5-Year Outlook
This table shows how your initial investment starts paying you back through energy savings.
| Year | Estimated Annual Energy Savings | Cumulative Savings |
|---|---|---|
| 1 | $1,200 | $1,200 |
| 2 | $1,200 | $2,400 |
| 3 | $1,200 | $3,600 |
| 4 | $1,200 | $4,800 |
| 5 | $1,200 | $6,000 |
As you can see, the savings add up quickly, often covering the entire project cost within just a few years.
And the benefits don't stop with your monthly bills. A properly insulated home is a huge plus on the real estate market. In competitive areas like Jupiter and Palm Beach, energy efficiency is a major selling point that helps your home stand out, attract smart buyers, and sell faster for a better price. It's an upgrade that makes your home more comfortable now and more valuable later.
How to Hire the Right Insulation Contractor
You can pick the best insulation money can buy, but if it’s installed by the wrong crew, you’re just throwing that money away. A top-notch installation from a true professional is the difference between decades of comfort and energy savings, and a nightmare of air leaks, moisture problems, and wasted cash.
Frankly, a bad insulation job often costs more in the long run because you'll end up paying someone else to fix the mistakes. This isn’t a project where you can afford to cut corners by just picking the cheapest quote. We’re talking about your home's performance and your family's health, so finding a trustworthy partner who gets the unique demands of South Florida is the final, most crucial step.
Your Contractor Vetting Checklist
When you start talking to contractors, you need to look past the price tag. A real professional will be open and ready to prove their qualifications. Use this checklist to tell the experts from the amateurs.
- Proper Licensing and Insurance: This is the absolute bare minimum. Make sure they hold a valid Florida license and carry both general liability and workers' compensation insurance. It’s not just a piece of paper—it’s what protects you from liability if an accident happens on your property.
- Deep Local Experience: South Florida isn't like the rest of the country. Your contractor needs years of hands-on experience in our hot, humid, hurricane-prone climate. They should know our specific building codes inside and out and have a proven track record of fighting moisture intrusion.
- A History of Happy Customers: Check out their reputation on sites like Google. You’re looking for a long history of positive reviews. Pay close attention to what people say about their professionalism, cleanliness, communication, and whether they actually stood behind their work when it mattered.
- A Serious Commitment to Safety: Ask them to walk you through their safety protocols. Professional crews will always use the right personal protective equipment (PPE), set up containment zones to keep dust and debris out of your living space, and follow strict rules for handling old, potentially hazardous materials.
A contractor’s bid tells a story. An unusually low price is often a red flag that they're cutting corners—maybe on materials, skipping critical prep work like air sealing, or using an untrained, uninsured crew.
Spotting the Red Flags
Knowing what to look for is just as important as knowing what to avoid. Be on high alert if a contractor does any of the following:
- Uses High-Pressure Sales Tactics: A reputable pro will take the time to educate you and give you a detailed estimate without making you feel rushed to sign right then and there.
- Provides Vague or Incomplete Quotes: Your estimate should be crystal clear. It needs to detail the exact scope of work, all the materials they’ll use, the project timeline, and the total cost. No surprises.
- Offers No Written Guarantee: A company that believes in its work will always back it up with a clear, written warranty on both the workmanship and the materials.
Your home is your biggest investment. Take the time to hire a partner who will treat it with the respect it deserves, ensuring your insulation removal and replacement project delivers the comfort, savings, and peace of mind you’re paying for.
At Airtight Spray Foam Insulation, we’ve built our reputation on a transparent process and guaranteed results. Schedule your free, no-obligation estimate today and let us show you what true professionalism looks like.
Frequently Asked Questions About Insulation Projects
It's completely normal to have some questions before diving into a project like insulation removal and replacement. Even with a solid plan, you want to be sure about the details. We get it. These are the top questions we hear from homeowners across South Florida, and getting them answered usually provides that last bit of confidence needed to move forward.
We’ll tackle your concerns head-on, from how long it all takes and what kind of mess to expect, to the safety of the materials we're putting in your attic. Our goal is to clear up any lingering doubts and show you how straightforward the process can be with the right team.
How Long Does an Insulation Project Take?
This is the first thing most people ask, and they're usually surprised by the answer. For a typical single-family home in a place like Jupiter or Wellington, the whole job—start to finish—is usually wrapped up in just one to three days.
Day one is almost always for prep and the full removal of all that old, contaminated insulation. On day two, we're focused on cleaning and sanitizing the attic, air sealing all the gaps, and applying the new spray foam. A much larger home or a particularly complex attic might push us into a third day, but it’s a quick-moving process designed to get your life back to normal fast.
Is the Spray Foam Installation Messy?
If it’s done by an amateur, it can be a disaster. But when you hire a professional crew that knows what they're doing, the answer is a firm no. The difference-maker is painstaking site preparation.
Before we even think about touching the old insulation, our team takes serious steps to protect your home:
- We lay down durable plastic sheeting, covering all your floors and any furniture in the work area.
- We create a fully contained pathway from your attic access straight to the outdoors.
- Our high-powered, specialized vacuums pull the old insulation directly into a containment truck, so none of that dust and debris ever enters your living space.
Once the new foam is in and we’re done, we do a full cleanup. We pull up all the protective coverings and leave your home just as clean as we found it.
One of the biggest concerns homeowners have is about the safety of spray foam itself. It's a valid question—what exactly are we spraying in your attic? The answer is simple: once cured, modern spray foam is a completely stable, inert material that is perfectly safe for your home and family.
Are the Chemicals in Spray Foam Safe?
Absolutely. When installed correctly by professionals, modern spray foam is one of the safest insulation materials on the market. During the application, our technicians mix two liquid components that have a chemical reaction to create the foam. That's why they wear full personal protective equipment (PPE) during this short phase.
But as soon as the foam cures—which happens very quickly—it transforms into a solid, inert plastic. It’s completely stable. It doesn't off-gas or release any volatile organic compounds (VOCs), meaning it has zero negative effect on your indoor air quality. In fact, it dramatically improves it by air-sealing your attic and blocking outside dust, pollen, and other pollutants from getting in.
At Airtight Spray Foam Insulation, we’re committed to a process that’s safe, clean, and incredibly effective. If you have any other questions or you're ready to see how we can transform your home's comfort and energy bills, schedule your free, no-obligation estimate today.