Blog
Insulation for Wall Outlets: Seal Drafts & Save Money
If you've ever felt a stubborn draft you just can't seem to place, the culprit might be hiding in plain sight. We spend a lot of time sealing windows and doors, but often overlook the insulation for wall outlets. These small gaps seem minor, but they add up, creating major air leaks that hurt your home's comfort and your wallet.
The Hidden Costs of Drafty Wall Outlets

It’s easy to ignore your home’s electrical outlets and light switches. But think about what's behind each of those faceplates: a hole cut directly into your drywall. This creates a clear path for air to travel between your living space and the unconditioned void inside your walls.
When you multiply that by every single outlet and switch in your house, the combined effect can be like leaving a window cracked open 24/7. In our experience, these little gaps account for a shocking amount of a home's total air leakage, forcing your HVAC system to work much harder than it should.
Wasted Energy and Higher Bills
Every time your air conditioner fires up to fight the South Florida heat, you're paying to treat the air inside your home. Unsealed outlets let that precious cool air bleed out into the wall cavities while inviting hot, humid outdoor air to sneak in.
This constant, invisible air exchange means your AC runs longer and harder just to keep up. That wasted effort shows up directly on your monthly FPL bill. Sealing these leaks is one of the fastest and most cost-effective ways to boost your home's efficiency. And when combined with other smart Energy Efficiency Tips, the savings really start to add up.
In poorly sealed homes, we've seen penetrations like outlets contribute to as much as 15-20% of total air infiltration. Just fixing these can cut your annual cooling costs by 5-10%.
Moisture Intrusion and Air Quality Concerns
Here in Jupiter and West Palm Beach, air leakage isn't just about temperature—it's about humidity. When hot, muggy air finds its way into your walls and meets cooler, air-conditioned surfaces, condensation is inevitable. This creates a perfect storm for problems you can't see.
Here are a few risks we see all the time from unsealed outlets:
- Mold and Mildew: Trapped moisture inside your walls is a breeding ground for mold, which can damage your home's structure and tank your indoor air quality.
- Shorter HVAC Lifespan: An overworked air conditioner doesn't just cost more to run; the constant cycling causes extra wear and tear, leading to premature failure.
- Musty Odors: That damp, musty smell you can't get rid of? It's often the result of moisture festering inside the walls.
Blocking these air-and-moisture entry points is a critical step in controlling indoor humidity and protecting your family's health.
If you're serious about finding every source of energy loss, a professional assessment is the way to go. We break down the entire process in our guide that explains what an energy audit is and how it uncovers hidden weak spots like drafty outlets. For now, let's walk through the simple steps to seal these costly leaks yourself.
Finding and Prepping Leaky Outlets for Sealing
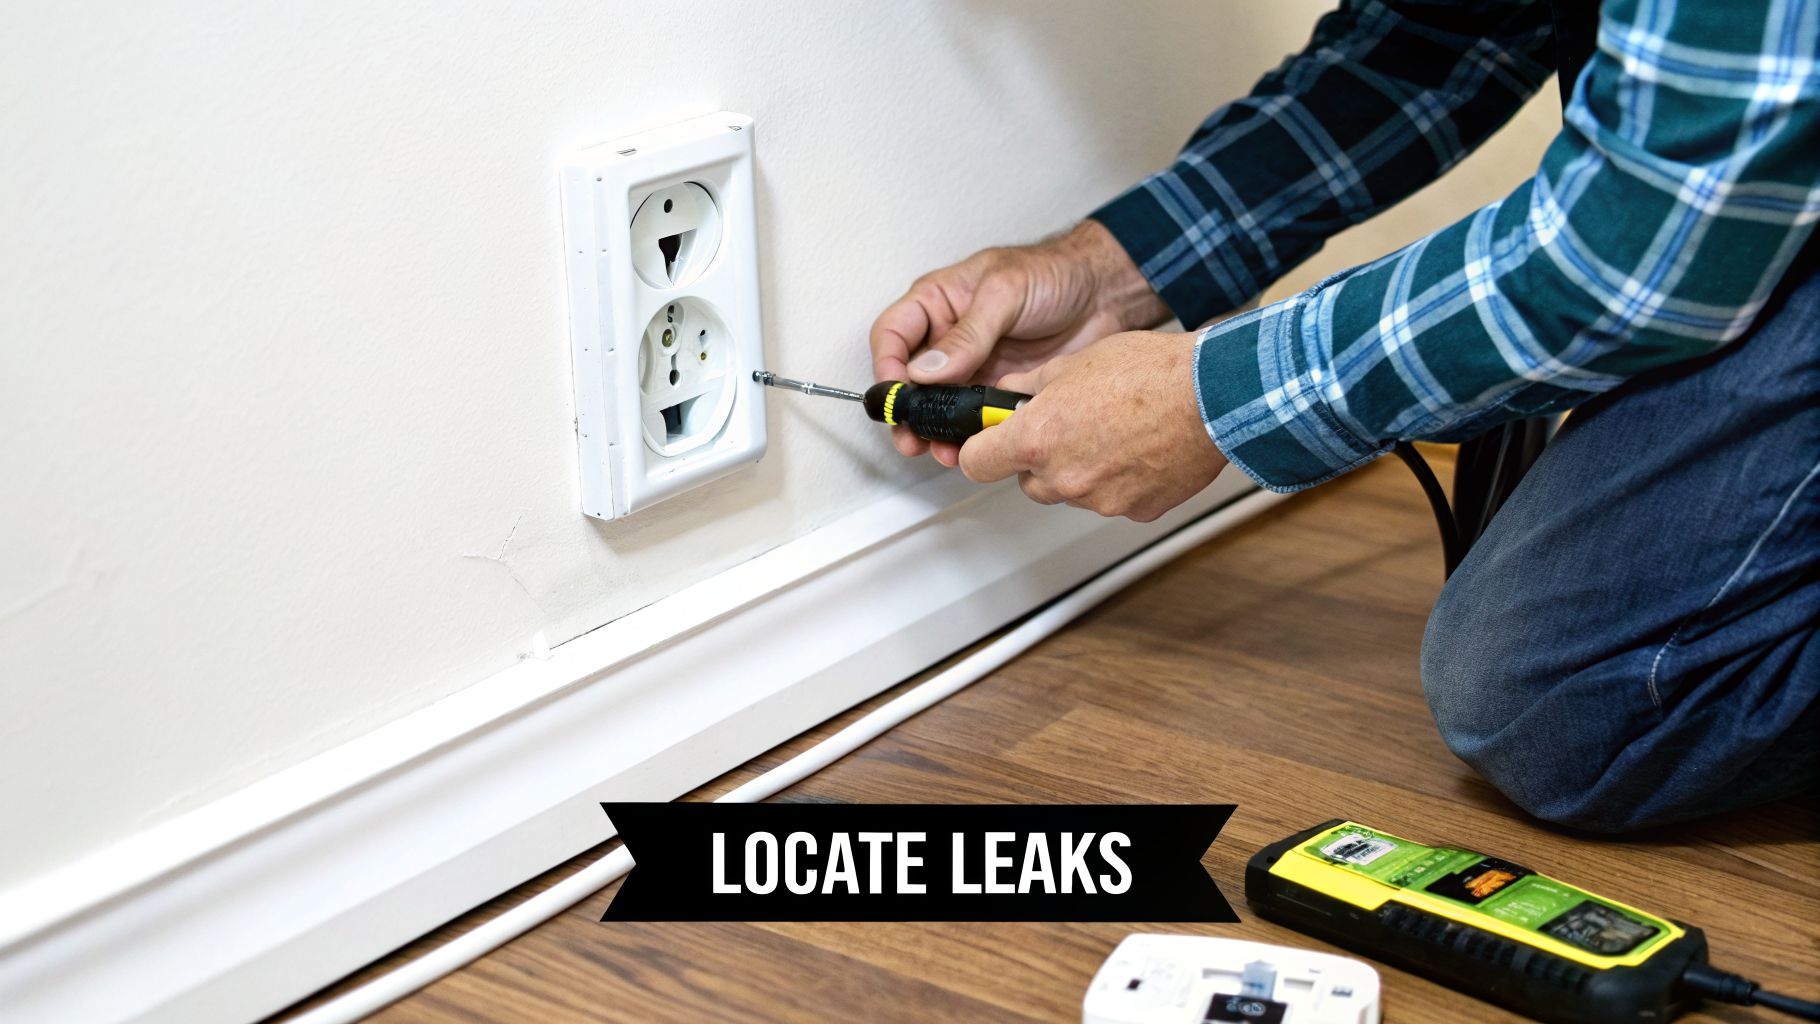
Before you seal a single outlet, you've got to play detective. Not every outlet is bleeding your expensive, conditioned air into the walls, but the ones that are can be serious energy vampires. Thankfully, a few simple checks are all it takes to find the culprits.
The best time to hunt for drafts is on a windy day. The pressure difference between inside and outside your home makes even small leaks obvious. Pay special attention to outlets on your exterior walls—in my experience, these are almost always the biggest offenders.
Simple Ways to Detect Outlet Drafts
You don't need a lot of fancy gear for this part. The easiest check is the hand test. Dampen your hand slightly and hold it close to the edges of an outlet cover. If you feel a distinct stream of cool (or in our South Florida summers, hot) air, you've found a leak.
For a visual confirmation, light a stick of incense and hold it near the outlet plate. Watch the smoke. If it gets sucked toward the wall or blown away from it, that's a surefire sign of air movement that needs to be stopped.
Pro Tip: Don't just check the exterior walls. Test outlets on any wall that borders an unconditioned space, like your garage or attic. Sealing these priority areas will give you the most bang for your buck on your energy bills.
For a truly comprehensive assessment of your home's air leakage, professionals use a blower door test to pinpoint every draft and measure the home's overall airtightness.
Safety First: Shutting Off the Power
Let's be crystal clear: when you're working with electricity, there are no shortcuts. Safety is the only priority. Before you even think about touching a screwdriver, you absolutely must kill the power to the circuit you're working on.
Here’s the process. No skipping steps.
- Find Your Breaker Box: It’s usually tucked away in the garage, a utility closet, or the basement. Look for the panel directory inside the door, which should map the breakers to specific rooms.
- Identify the Right Breaker: Find the one labeled for the room or area where you'll be working.
- Switch it to "OFF": Flip the breaker firmly to the off position. I always recommend putting a piece of tape over the switch as a warning so no one accidentally flips it back on.
Once you've flipped the breaker, you have one more critical step. You have to be positive the power is off.
Verifying the Outlet Is Dead
The only way to be 100% certain an outlet has no power is with a voltage tester. It’s a cheap, essential tool you can get at any hardware store, and you should never work without one.
Push the prongs of the tester into the outlet's slots. If it lights up or beeps, the circuit is still hot. Go back to the breaker box and try again. Do not move forward until that tester shows zero power.
After you’ve confirmed the outlet is dead, you can safely unscrew and remove the faceplate. This will expose the electrical box and the gap between it and the drywall—that's our target. Give the area a quick wipe with a cloth or brush to clear out any dust and cobwebs. A clean surface is non-negotiable for getting a strong, airtight seal, whether you're using gaskets, caulk, or foam.
Your Wall Outlet Insulation Options Compared
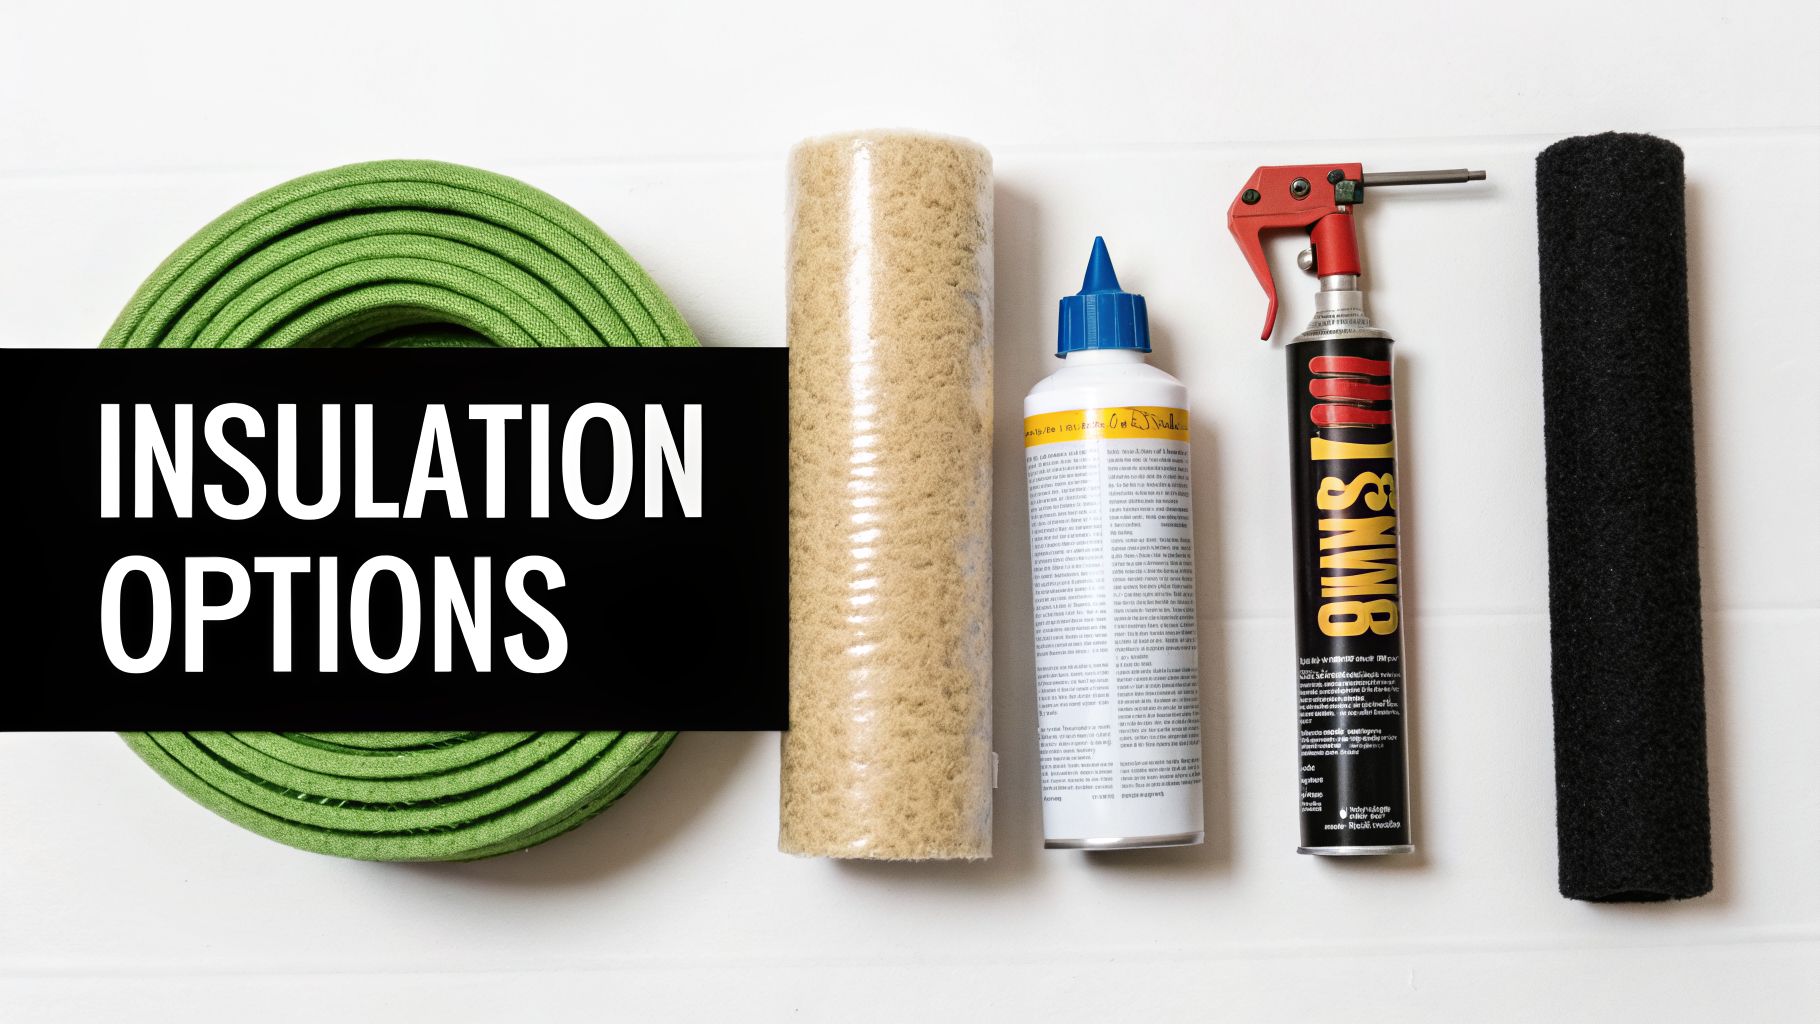
Once you've found your drafty outlets and prepped the area, you have a few choices for sealing them up. There isn’t one "best" way to handle insulation for wall outlets; the right method really depends on your house, your budget, and how comfortable you are with the work.
Here in South Florida, we’re not just fighting drafts—we’re fighting humidity. Choosing the right material is crucial for a seal that lasts and keeps that moist air out. Let's walk through the most common materials I see people use: foam gaskets, caulk, backer rod, and spray foam. Each has its place.
The Quick Fix: Pre-Cut Foam Gaskets
Foam outlet gaskets are what most people grab first at the hardware store. They're cheap, simple, and you can’t really mess up the installation. You just pop off the cover plate, slip the foam gasket over the outlet, and screw the plate back on. It takes two minutes.
For a newer home with very minor drafts, you might feel a small difference. It’s a start.
The problem is, these gaskets don't stop the leak at its source—the gap between the drywall and the electrical box itself. Here in Jupiter, when the wind picks up, air will push right past that flimsy foam. They're more of a band-aid than a permanent fix.
A More Permanent Seal: Fire-Rated Caulk
If you want to do the job right, I always recommend a good fire-rated acoustical sealant. This isn't your standard painter's caulk. It's designed to stop air, stay flexible over time, and stick to both the plastic box and the drywall. Most importantly, it’s fire-rated, which is a must for working around electrical components.
Applying caulk takes more patience than using a gasket, but the results are night and day. You're creating a solid, airtight barrier right where the air is getting in.
Key Takeaway: Your goal is to run a continuous bead of caulk on the outside of the electrical box, sealing it to the drywall. Never, ever put caulk or any other sealant inside the electrical box with the wires.
This is the method that truly stops air infiltration at the source. Because the sealant stays flexible, it moves with your house, so the seal won't crack and fail a year later. It’s a little more effort, but it’s a real solution.
Filling Larger Gaps With Backer Rod
Sometimes, especially in older homes, the hole cut in the drywall for the outlet box is just sloppy and way too big. Trying to fill a quarter-inch gap with caulk is just going to make a huge mess and waste material.
This is the perfect job for a backer rod. It’s basically a flexible foam rope that you stuff into the gap before you caulk. It does two things:
- It fills most of the space, so you use far less caulk.
- It gives the caulk a surface to bond to, creating a much stronger and more durable seal.
Just press the foam rod into the gap with a putty knife until it's slightly recessed, then apply your fire-rated caulk over it. This combination gives you a professional-grade seal that can handle even the biggest, most irregular gaps around your outlets.
The Ultimate Seal: Minimal Expanding Spray Foam
For the absolute tightest seal possible, nothing beats spray foam. But let me be very clear: using a can of "Great Stuff" around outlets is an advanced technique that requires a careful hand. This is not a beginner’s job.
When applied correctly—using a minimal-expanding formula around the outside of the box—spray foam creates a perfect seal that fills every single tiny crack.
The danger is that all spray foam expands. If you use too much, it can ooze into the electrical box, which is a major fire hazard. It can also expand with enough force to warp the box or bow the drywall. For these reasons, I generally tell homeowners to leave this method to pros or very experienced DIYers.
It's also worth noting that not all foam is the same. The science behind open-cell vs closed-cell insulation is why we, as professionals, select specific foams to create a complete air and vapor barrier for an entire home.
To help you decide, here’s a quick comparison of the methods we've covered.
Outlet Insulation Methods At a Glance
This table breaks down the common options for sealing your outlets, giving you a quick look at how they stack up in terms of performance, cost, and difficulty.
| Method | Effectiveness | Avg. Cost Per Outlet | DIY Skill Level | Best For |
|---|---|---|---|---|
| Foam Gaskets | Low-Moderate | $0.25 – $0.50 | Beginner | Quick fixes for minor drafts on interior walls. |
| Fire-Rated Caulk | High | $0.50 – $1.00 | Intermediate | Creating a permanent, airtight seal on exterior walls. |
| Backer Rod + Caulk | Very High | $0.75 – $1.50 | Intermediate | Sealing large, inconsistent gaps common in older homes. |
| Minimal Spray Foam | Highest | $1.00 – $2.00 | Advanced / Pro | Maximum airtightness for experienced users. |
For a simple weekend project, gaskets are tempting. But for a lasting solution that genuinely improves your home's comfort and efficiency, taking the time to seal properly with caulk is always the better investment.
Alright, let's get those outlets sealed up. Now that you know what materials to look for, it’s time to get your hands dirty. This is absolutely a project you can handle yourself, and when you do it right, you’ll create a tough barrier against the drafts and humidity we know all too well here in South Florida.
We’ll go through the proper techniques, from the quick-and-easy foam gaskets to the more permanent, professional-grade seal you get with caulk and backer rod.
First things first: safety. Before you even think about touching a screwdriver, head to your breaker box and shut off the power to the outlets you're working on. Triple-check that it’s off with a voltage tester. No excuses.
The Quick Fix: Installing Foam Gaskets
Foam gaskets are your entry-level option. Think of them as a band-aid for minor drafts or a temporary stop-gap while you plan a more thorough job. They’re simple to install and all you really need is a screwdriver.
Here’s the right way to do it:
- First, take off the faceplate by removing the screw (or screws) and set it aside.
- The gaskets come pre-cut for different outlet styles. Just pop out the perforated pieces to match the outlet you’re working on.
- Fit the foam gasket right over the outlet, making sure it sits flush around the receptacles.
- Finally, put the cover plate back on and screw it back in. Go easy on it—overtightening can crush the foam or crack the plastic plate.
While this is a start, it only seals the gap between the faceplate and the drywall. It does nothing to stop air from sneaking through the much bigger gap between the electrical box and the drywall itself.
A Pro's Perspective: If you want to give this method a little more oomph, you can add some removable weatherstripping putty around the edge of the electrical box before you put the gasket on. It's still not a true air seal, but it's an improvement.
The Real Deal: Applying Caulk for a Permanent Air Seal
For a seal that actually lasts and performs, fire-rated acoustical sealant is what the pros use. It creates a flexible, airtight bond right where the leak starts: the gap between the electrical box and the drywall. This is the method we recommend for every single outlet on your home’s exterior walls.
A clean job is a good job. You’ll want a caulk gun, a roll of paper towels, and a little bit of water for smoothing the bead.
Sealing Standard Gaps With Caulk
If the gap around the box is less than a quarter-inch, you can seal it with just a bead of caulk. The key is to lay down one continuous, unbroken line all the way around the box.
- Start by cutting the tip of your caulk tube at a 45-degree angle. Keep the opening small; you can always make it bigger.
- Tuck the tip of the tube right into that gap between the box and the drywall. Squeeze the trigger with steady pressure and move smoothly around the entire box.
- Once the bead is down, dip your finger in some water and run it gently along the caulk line. This is called "tooling," and it forces the sealant deep into the gap while giving you a clean, professional finish.
- Wipe up any mess right away with a damp paper towel before it has a chance to start drying.
Let the caulk cure for a few hours (check the manufacturer's instructions) before you put the faceplate back on.
Tackling Large Gaps with Backer Rod and Caulk
In some houses, especially older ones, the hole cut for the outlet box can be… generous. Trying to fill a wide, sloppy gap with caulk alone is a recipe for a messy, wasteful disaster that will probably sag and crack over time.
This is exactly what backer rod was made for. It’s a flexible foam rope you stuff into the gap first, giving the caulk a solid surface to stick to.
- Get the Right Size: Pick a backer rod that’s slightly thicker than the gap. You want it to fit snugly once you press it in.
- Press It in Place: Use a putty knife or just your fingers to push the backer rod into the space around the electrical box. Set it just deep enough that it’s a little below the surface of the drywall.
- Caulk Over the Rod: With the backer rod in place, you can now apply your fire-rated caulk right over it, using the same technique as before. The rod does the heavy lifting, and the caulk creates the perfect, durable air seal on top.
This two-step approach is, without a doubt, the best way to handle big, ugly gaps and get a result you can be proud of.
A Word of Caution on Canned Spray Foam
Look, we’re a spray foam company, but we have to be honest: canned spray foam around outlets is a risky move for a DIYer. Standard expanding foams can exert incredible pressure—enough to warp the electrical box, push out your drywall, or worse, ooze inside the box and contact the wiring. That’s a serious fire hazard.
For this reason, we strongly advise homeowners to stick with caulk and backer rod. If you feel spray foam is the only answer, only use a "low-pressure" or "window and door" formula and apply it with extreme caution around the outside of the box only.
Frankly, this is one of those jobs best left to a professional insulation contractor. We have the right low-pressure equipment and the experience to apply it safely without putting your home at risk.
When to Call a Pro for Outlet Insulation
I get it. Sealing up drafty outlets with a foam gasket or a tube of caulk seems like an easy weekend win, and sometimes, it is. But after more than two decades in this business, I’ve seen enough South Florida homes to know when that simple fix is just a band-aid on a much bigger problem.
Knowing the difference between a quick DIY job and a situation that needs a professional eye is crucial. The last thing you want to do is disturb something that could create a safety hazard or cover up a serious moisture issue.
Signs You Need Professional Help
If you live in an older home, especially one built before the 1970s, you need to be cautious. We often run into old, brittle wiring or even outdated knob-and-tube systems. Messing with that stuff without knowing exactly what you’re doing is a fire risk, plain and simple. That's an immediate "stop and call a pro" situation.
Beyond the wiring, there are other tell-tale signs that a can of caulk won't be enough:
- Serious Drafts: If you feel a legitimate breeze coming from multiple outlets, you're not dealing with a small gap. That usually points to major voids or completely missing insulation in the wall cavity.
- Moisture or Mold: See any water stains, mildew, or feel dampness around an outlet? That's a huge red flag for a condensation problem. Sealing the outlet will only trap that moisture and make the mold worse.
- New Construction or a Gut Reno: This is the golden opportunity. Before the drywall goes up, a professional can properly air-seal around every single electrical box. This creates a perfect, continuous barrier that's impossible to replicate later on.
This diagram shows how different sealing methods stack up. It’s a good visual for understanding what you get from each approach.
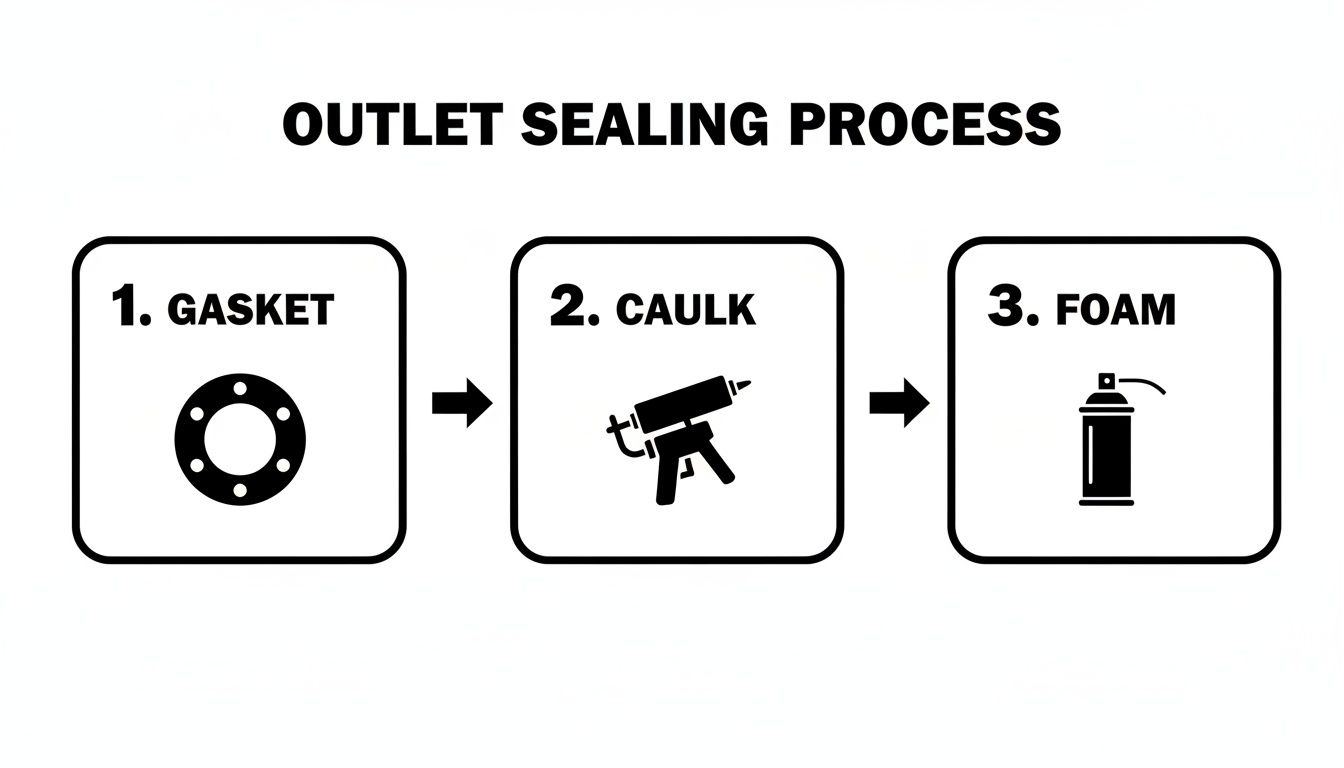
As you can see, gaskets and caulk help, but professional spray foam is what truly creates an airtight seal by expanding to fill every crack and crevice.
The Airtight Advantage of Professional Spray Foam
For homeowners here in Wellington and Stuart, bringing in a team like Airtight Spray Foam Insulation gives you access to a completely different level of materials and expertise. We don't just shove foam in the wall. We use specialized, low-pressure closed-cell spray foam, applied with precision equipment to seal the exterior of the electrical box. This creates a solid, monolithic barrier against both air and vapor.
In a typical U.S. home, air leaks from outlets and other wall penetrations can contribute 20-30% of total air infiltration. Here in South Florida, where that infiltration can slash your home’s efficiency by 40%, a professional seal is non-negotiable. It doesn’t just save hundreds a year on cooling—it’s one of your best defenses against mold. You can read more on the data at the Insulation Institute's website.
When we come to a job, we’re not just looking at one drafty outlet. We're assessing how your entire home breathes. A professional job guarantees a solution that stops drafts, manages our oppressive humidity, improves your indoor air quality, and can even extend the life of your HVAC system by an estimated 25%.
If you want a permanent solution with guaranteed results, calling a pro is the smartest investment you can make.
Your Top Questions About Sealing Outlets
Even when you have a plan, it's smart to have questions—especially when you’re working around your home’s electrical system. We get a lot of the same great questions from homeowners, so let's get you some clear, straightforward answers.
The biggest one, and for good reason, is always about safety.
Is It Safe to Put Insulation Around Electrical Outlets?
Yes, it's perfectly safe to insulate around the outside of your wall outlets, as long as you use the right materials and the right approach. The whole idea is to seal the gap between the drywall and the electrical box itself.
What you should never do is put any material inside the electrical box where the wiring is.
Products made for this job, like UL-listed foam gaskets and fire-rated caulk, are designed to be safe for this specific use. If spray foam is part of the plan, a professional should be the one to apply a low-pressure formula carefully around the box, making sure no foam comes into contact with the wiring and everything stays up to code.
And, of course, the absolute first step is always turning off the power at the circuit breaker. No exceptions.
How Much Money Can I Really Save by Insulating My Outlets?
It might feel like a small fix, but the savings add up fast, particularly here in South Florida. When you properly seal the air leaks from every outlet and light switch on your exterior walls, you can cut your home’s total air infiltration by up to 15%.
For a typical family in our area, that translates to a 5-10% drop in annual cooling and heating costs. You could be looking at an extra $100 to $300 back in your wallet every year, giving this project a payback period that’s hard to beat.
The hotter it gets outside, the more those unsealed outlets are costing you. Every bit of cool, conditioned air you keep inside is money saved.
Which Outlets Should I Insulate First?
To get the biggest bang for your buck and your time, you need to be strategic. Don't just start sealing outlets at random.
Here’s the order we always recommend for maximum impact:
- Exterior Walls First: Start with every outlet and switch on your home's exterior walls. These are the worst offenders, acting as tiny highways for hot, humid air to get inside.
- Unconditioned Space Borders: Next, tackle any walls that border an unconditioned space. Think of the walls separating your living room from the garage, attic, or a crawl space.
- Interior Walls Last: Sealing outlets on interior walls might help with a little sound dampening, but they aren't a major source of energy loss. Your main focus should always be on your home's thermal boundary.
As you work, you’ll also notice different types of outlets. For instance, knowing the basics of GFCI power outlets, common in kitchens and bathrooms, is helpful since their bulkier size can require a little more care when you're sealing around them.
Ready to stop those drafts for good and start saving money? The team at Airtight Spray Foam Insulation has the professional-grade solutions to create a truly seamless air and moisture barrier in your home. Request your free, no-obligation quote today!