Blog
Spray Foam Crawl Space Encapsulation: FL Home Benefits
If your house smells musty every time the air conditioner kicks on, or the floors feel a little clammy during a South Florida summer, the crawl space is often where the problem starts. I've seen plenty of homes in Jupiter, Palm Beach Gardens, West Palm Beach, Wellington, and Stuart where the rooms above looked fine, but underneath the house there was damp soil, sweating ductwork, and outside air moving through old vents like it belonged there.
In this climate, a vented crawl space usually works against the house. Hot, wet air gets in. Ground moisture rises. Wood stays damp longer than it should. Then that air gets pulled upward into the living space. Spray foam crawl space encapsulation is meant to stop that cycle, but only when it's done as a full moisture-control system and not just a quick foam job.
What Is Spray Foam Crawl Space Encapsulation
Spray foam crawl space encapsulation means turning the crawl space from an outdoor environment into a controlled part of the building envelope. That sounds technical, but the goal is simple. Keep ground moisture out, keep humid outside air out, seal air leaks, and insulate the surfaces that need to stay stable.
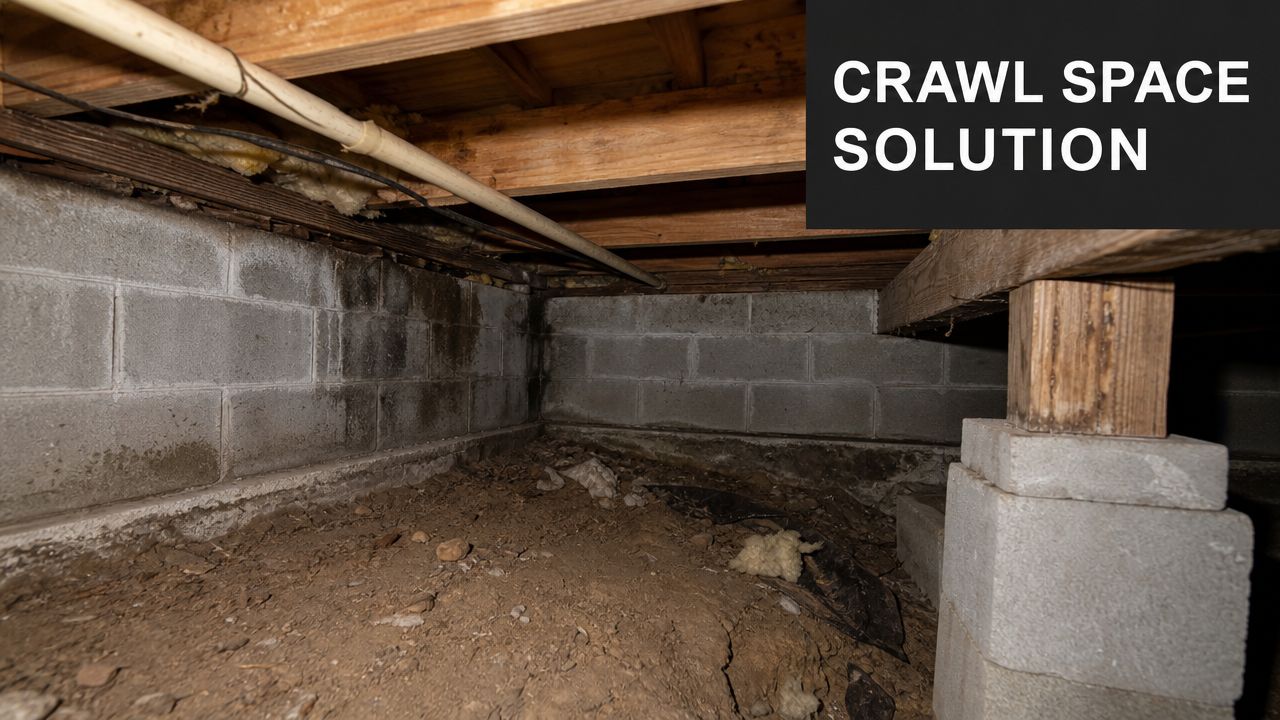
In a South Florida crawl space, the problem usually isn't just one thing. It's a combination of bare earth, vent openings, humid salt-air conditions, warm block walls, cool mechanicals, and a house above that keeps pulling air from below. If you only spray foam one area and ignore the soil, the vents, or the moisture load, you haven't fixed the crawl space. You've just covered part of it.
What the system includes
A proper encapsulation job usually includes:
- Ground vapor control: A reinforced polyethylene liner goes over the soil to block moisture coming up from the ground.
- Air sealing: Vents, utility penetrations, and leakage points get sealed so outside air stops moving through the crawl space.
- Wall and rim joist insulation: Closed-cell spray foam is commonly applied to foundation walls, band joists, rim joists, and hard-to-seal penetrations.
- Humidity management: The space still has to stay dry after installation, which often means conditioned air or a dedicated dehumidifier.
Why spray foam is part of the answer
Closed-cell spray foam earns its place here because it insulates and air-seals at the same time. In below-grade or damp conditions, that matters. It helps control temperature swings on wall surfaces and seals irregular masonry, corners, and framing transitions that sheet goods often miss.
Practical rule: If the crawl space is still acting like the outdoors, it will keep behaving like the outdoors. Encapsulation works when the entire space is treated as part of the house, not the leftover space under it.
For homeowners, the result is usually less musty air, more stable indoor comfort, and a crawl space that doesn't stay damp all season. For builders, it creates a cleaner and more durable assembly, especially on projects near the coast where humidity pressure never really lets up.
Key Benefits of a Sealed and Insulated Crawl Space
You walk into the house in August and the AC is running, but the floors feel clammy and there is a musty smell near the return grille or hallway closet. In South Florida, I see that pattern all the time. The crawl space is holding moisture, and the house above it is living with the consequences.
A sealed and insulated crawl space helps because it changes the conditions under the house, not just the appearance of the space. The payoff is better humidity control, less strain on mechanical systems, cleaner indoor air, and fewer moisture-related repair problems over time. That only happens when the crawl space is ready for encapsulation and the system is set up to stay dry after the foam is installed.
Better moisture control where problems usually start
The biggest benefit is controlling damp air before it gets into framing, insulation, and floor surfaces. Analysts at Advanced Energy's sealed crawl space research found that sealed crawl spaces stayed far drier than vented ones. In our climate, that difference matters because high humidity can sit under a house for months, even without standing water.
That is the part many articles skip. South Florida crawl spaces fail from constant moisture exposure far more often than from one dramatic event.
When humidity stays high under the house, wood can absorb that moisture, metal components can sweat, and surfaces stay in the range where mold growth becomes more likely. If mold is already part of the discussion, AMPM Restoration Services lays out why Florida homes deal with it so often.
Lower HVAC load and steadier indoor comfort
A vented crawl space puts your ductwork and floor system in a harsh environment. Even if the air handler is in good shape, humid air around ducts and plumbing penetrations can push extra moisture into the house and make the AC work harder than it should.
Homeowners usually notice a few practical changes after a proper encapsulation system is in place:
- Floors feel less damp during humid weather
- Rooms stay more even from one side of the house to the other
- Supply ducts and metal components are less likely to sweat
- The AC has an easier job holding temperature and indoor humidity
Foam choice matters here too. The differences between products affect moisture behavior, drying potential, and thermal performance. This closed-cell vs open-cell spray foam comparison gives a good overview of why the right material matters in a crawl space.
Cleaner indoor air above the floor system
Air from a crawl space does not stay neatly below the subfloor. It moves through plumbing cutouts, wiring penetrations, framing joints, and other leakage paths. If the crawl space smells musty, the house often picks up that odor.
I tell homeowners to treat this as an air quality issue as much as an insulation issue. Sealing and insulating the crawl space helps cut off that moisture-laden air before it gets into living areas. That can make the house smell cleaner and feel less sticky, especially in older homes near the coast.
Less inviting conditions for pests and long-term damage
Open, damp crawl spaces are easier for pests to use and harder to inspect. Once the space is sealed, kept dry, and properly maintained, it becomes less attractive to roaches, rodents, and other common crawl space intruders.
There is also a durability benefit. Dry framing, drier ductwork, and better-controlled surfaces usually mean fewer moisture-driven repairs later. That is why I do not look at encapsulation as a foam job alone. In South Florida, the primary benefit comes from treating the crawl space as a managed part of the house, with moisture control, air sealing, insulation, and follow-up humidity control all working together.
Open-Cell vs Closed-Cell Foam for Your Crawl Space
A crawl space in South Florida can stay humid even after a string of sunny days. Salt air, wet soil, wind-driven rain, and long cooling seasons keep pressure on the floor system. That is why foam choice matters. The wrong product can leave you with insulation on the invoice and moisture problems still in place.
The difference that matters in a humid crawl space
Open-cell and closed-cell foam do different jobs.
Open-cell foam is softer and more vapor-permeable. It can work well in the right assembly, especially where drying potential is part of the design. A crawl space is usually not that assembly, especially near the coast where humidity stays high for much of the year.
Closed-cell foam is denser, more rigid, and more resistant to moisture movement. It also gives you more R-value per inch, which helps when access is tight and every inch counts around rim joists, band joists, and irregular foundation areas. In real crawl spaces, that combination usually makes closed-cell the better fit.
A good closed-cell vs. open-cell spray foam comparison shows the basic material differences, but the field decision comes down to exposure. If the crawl space has a history of damp walls, sweating ducts, or seasonal moisture spikes, I want the foam that adds insulation and better moisture resistance at the same time.
Open-Cell vs. Closed-Cell Foam for Crawl Spaces
| Feature | Open-Cell Foam | Closed-Cell Foam |
|---|---|---|
| Moisture behavior | More vapor-permeable | Better vapor resistance |
| R-value per inch | Lower | Higher |
| Crawl space fit | Better reserved for controlled, lower-risk assemblies | Usually the better choice in humid crawl spaces |
| Density | Softer, lighter | Denser, more rigid |
| Added rigidity | Minimal | Can add some stiffness to the surface it bonds to |
What I recommend in South Florida
In this climate, I rarely recommend open-cell foam inside a crawl space enclosure. It can absorb and hold moisture, and that is not a trait I want near cool surfaces, damp masonry, or framing that already sees seasonal humidity stress.
Closed-cell foam is usually the safer call for several reasons:
- It handles humid conditions better.
- It delivers more thermal performance in less thickness.
- It air-seals and insulates at the same time.
- It fits the way South Florida crawl spaces behave, not the way they look on a clean diagram.
That does not mean closed-cell fixes every problem by itself.
If bulk water is getting in, if the ground is uncovered, or if humidity is not being controlled after the space is sealed, foam will not rescue the job. I have seen crawl spaces with decent spray foam and bad results because nobody addressed readiness first. The best installations treat encapsulation as a full system. Foam, liner, air sealing, drainage details, and humidity control all have to support each other.
A simple rule helps here. If a contractor talks about foam brand and thickness before talking about water entry, ground moisture, and drying strategy, the recommendation is incomplete.
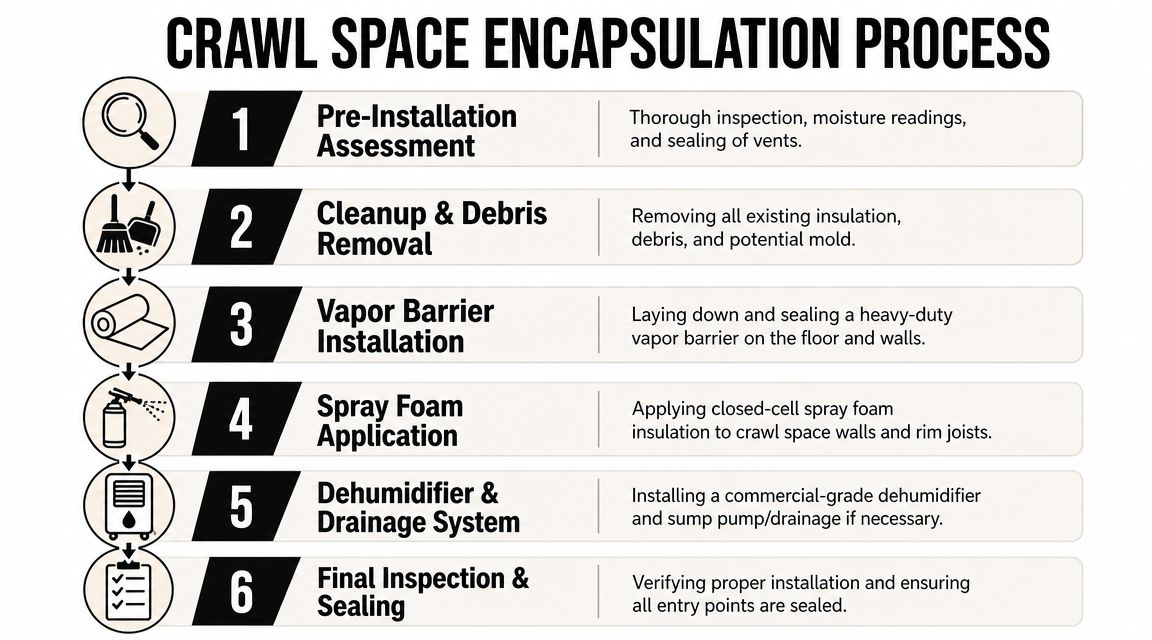
The Crawl Space Encapsulation Process Explained
Good spray foam crawl space encapsulation starts before the first hose is pulled. The crawl space has to be ready for encapsulation. That one point separates durable work from expensive disappointment.
Readiness comes first
Some crawl spaces should not be sealed on day one. If there's standing water, active mold, poor drainage, or a backdrafting combustion appliance, encapsulation can lock in trouble instead of solving it. In flood-prone and high-humidity parts of South Florida, that pre-check isn't optional.
The crawl space needs to be stable enough to become enclosed. That may mean drainage work, sump planning, mold cleanup, repairs to leaks, or corrections around grading and water entry before insulation ever begins.
A clean recommendation sounds like this: fix the water problem, dry the crawl space, then encapsulate.
Prep work that determines the outcome
Once the space is suitable, the first physical work is cleanup. Old insulation hanging under the floor, loose debris, organic material, torn plastic, and junk left by prior trades all have to come out. A dirty crawl space is hard to seal properly, and it's impossible to inspect well.
After cleanup, the area has to be dry enough for materials to perform the way they're supposed to. Tapes don't bond well to wet surfaces. Foam shouldn't be installed over active moisture conditions and expected to make them disappear later.
Installing the ground liner correctly
The ground vapor barrier is the base layer of the system. Guidance on crawl space encapsulation methods calls for a 10–20 mil reinforced polyethylene liner, with seams overlapped about 6–12 inches and taped, before the liner is run up the foundation walls and sealed at transitions in the installation sequence described here.
That overlap and seam tape detail is where a lot of jobs are won or lost. Small gaps don't stay small in a wet crawl space. Moisture vapor finds them. Air finds them too.
For a more detailed look at the assembly itself, this guide on installing insulation in a crawl space gives a useful field perspective.
Sealing vents and penetrations
Before foam goes on the walls, the crawl space has to stop communicating with the exterior through old vent openings, pipe penetrations, cable holes, and framing gaps. That includes sealing around utility entries and the irregular spots where masonry meets wood.
Many encapsulation jobs commonly fail. The same field guidance points to incomplete seam sealing and unsealed penetrations as the most common failure points in the system. That matches what contractors see in real life. A job can look clean from the access opening and still leak badly at ten small misses around the perimeter.
Most crawl spaces don't fail because the concept is wrong. They fail because someone left the weak points open.
Applying the spray foam where it counts
Once the liner is down and the leakage paths are sealed, closed-cell spray foam gets applied to the foundation walls, rim joists, band joists, and selected penetrations to create the continuous air barrier and thermal layer. In rough block crawl spaces, foam does a better job than many rigid products at conforming to irregular surfaces.
The focus should stay on continuity. If the foam stops short at transitions, or if the band joist is missed, the system leaks where pressure differences are strongest. One technical guide notes that spray foam at the band joist is the best way to seal air leaks there, and that's one of the details I'd never skip in a humid coastal house.
Conditioning after encapsulation
Encapsulation doesn't automatically control interior humidity year-round. The sealed space still has to be kept dry after the work is finished. In South Florida, that usually means adding active humidity control or tying the crawl space into the conditioned side of the house in a code-appropriate way.
The practical target is simple. Keep the crawl space dry enough that surfaces don't stay cool and wet, and the air doesn't drift back toward the swampy conditions that caused the trouble in the first place.
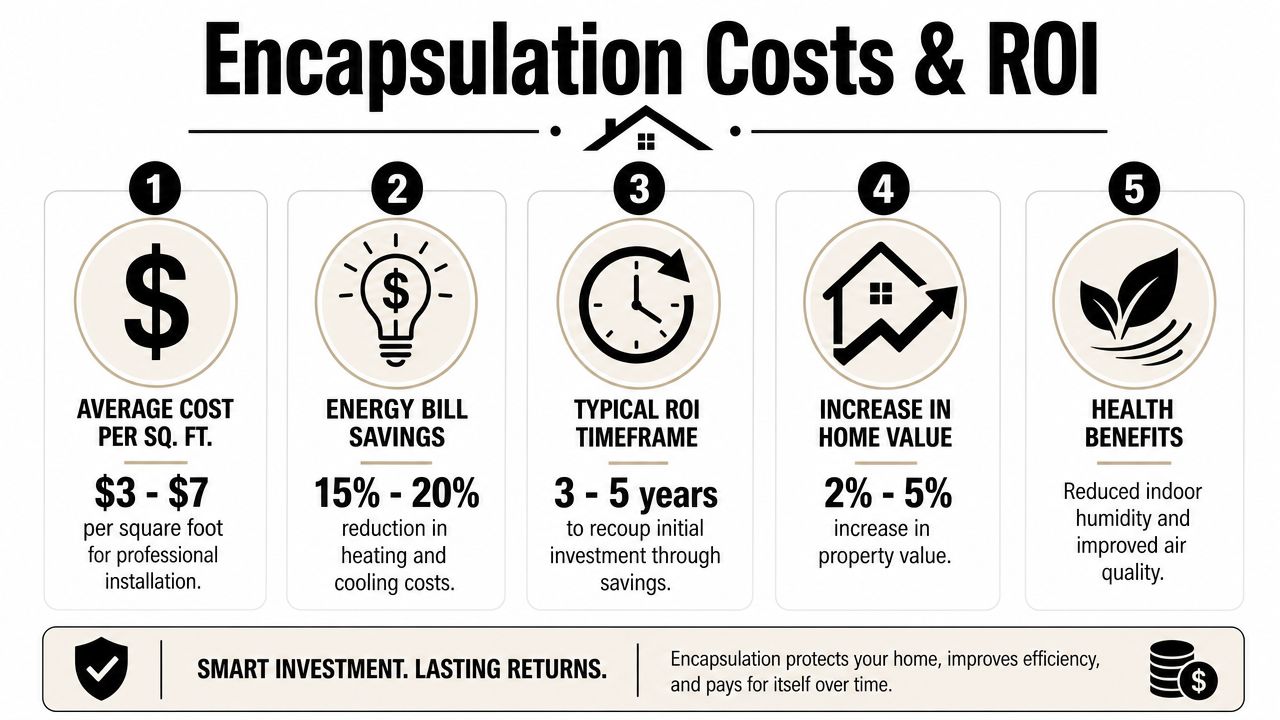
Estimating Costs and Return on Investment
A South Florida crawl space can look like a simple foam job until the estimate starts accounting for what is causing the moisture trouble. One house needs a straightforward seal and insulation package. The next needs drainage correction, liner repairs, old insulation removal, duct sealing, and a dehumidifier to keep the space stable through summer.
What the foam portion typically costs
The foam itself is only one line item. Open-cell usually costs less upfront, while closed-cell costs more but is often the better fit in a damp crawl space because it handles moisture exposure better and adds more rigidity at the wall assembly.
That is why I tell homeowners not to compare bids by foam price alone. A low number can leave out the work that makes encapsulation hold up in South Florida, especially prep, wall sealing, vapor barrier detailing, access door work, and humidity control after installation.
If you want a baseline for how contractors build these numbers, this breakdown of spray foam insulation installation cost is a useful starting point.
What drives the full project cost
Readiness changes the number more than square footage does in a lot of homes. A crawl space with standing water history, mud, torn duct wrap, termite damage, or poor access takes more labor and more correction before foam should ever be sprayed.
The biggest cost drivers usually include:
- Crawl space condition: Wet soil, mold, debris, and damaged materials add cleanup and repair work.
- Foam choice and thickness: Closed-cell generally costs more, but it is often the safer choice for humid coastal conditions.
- Ground liner and air sealing details: The liner, seams, piers, vents, and access door all affect whether the system remains dry.
- Mechanical humidity control: Many South Florida crawl spaces need a dehumidifier or a code-appropriate conditioning strategy.
- Permits and inspections: Local requirements can add time and cost, especially on larger repair scopes.
Builders should budget for the whole system, not just the spray pass.
Where the return actually comes from
The return usually shows up in fewer moisture-related repairs, fewer odor complaints, and better HVAC performance over time. In real houses, that means less wet insulation, less rust on equipment, fewer callbacks for musty air, and less risk of rot at the framing above the crawl space.
Energy savings are part of the picture, especially when ductwork runs through the crawl space. Sealing and insulating that area can reduce losses that force the HVAC system to run longer in hot, humid weather. Properly installed spray foam also has a long service life when it is protected from damage and applied to a crawl space that was dry enough to encapsulate in the first place.
That last point matters. If the space was not ready, the payback gets delayed by repair work that should have been handled before installation.
Budget for durability, not just installation day
The cheapest proposal often becomes the expensive one after one wet season. I have seen plenty of jobs where foam was sprayed into a crawl space that still had water entry or no humidity control plan. The house owner paid once for encapsulation and again to fix the conditions that should have been addressed first.
If you are comparing proposals, ask each contractor what is included before and after the foam goes in. If you need a general checklist for vetting companies while you price the work, this guide on finding professionals for home repairs can help you ask better questions.
A good estimate should explain the moisture problem, the readiness work, the encapsulation scope, and the plan for keeping the space dry afterward. That is where long-term value comes from in South Florida.
Hiring a Contractor and Maintaining Your System
A good encapsulation crew should talk more about moisture, drainage, and sequencing than about foam alone. If the sales pitch starts and ends with “we spray it and you're done,” keep looking. In South Florida, that approach misses the whole reason crawl spaces fail.
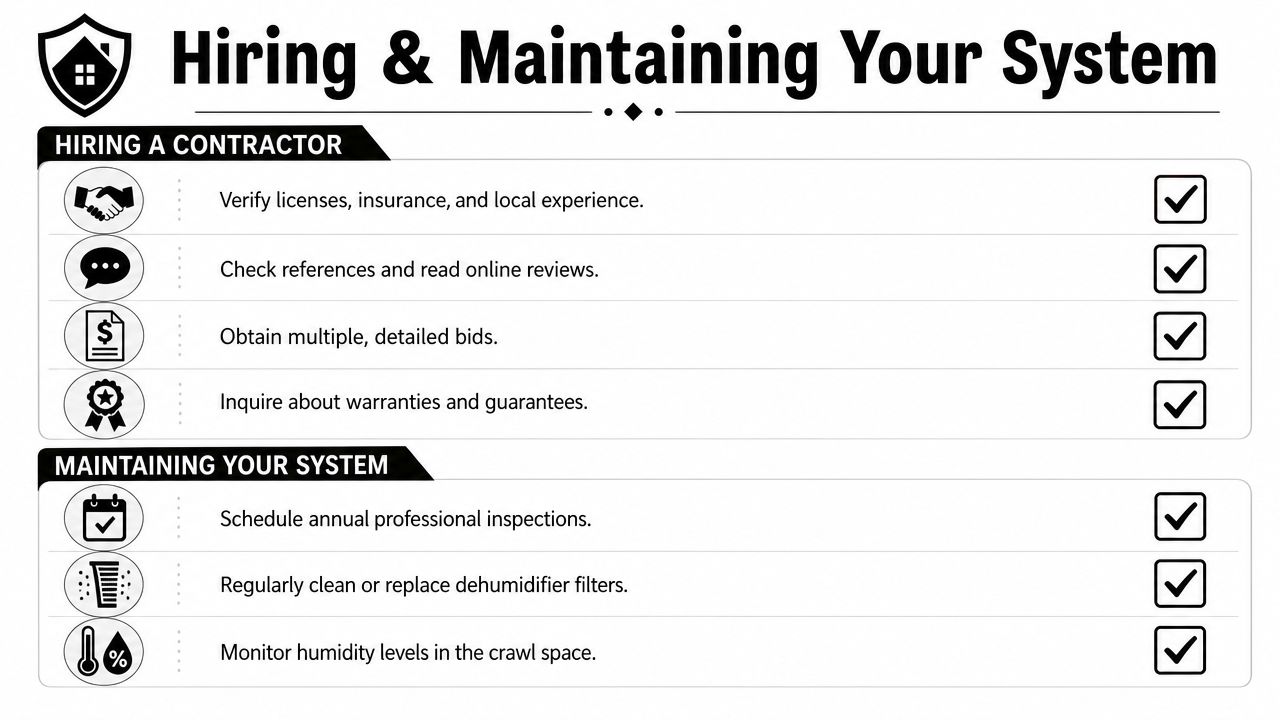
What to look for in a contractor
Start with local experience. Coastal humidity, storm exposure, and year-round vapor load change how crawl spaces behave. A contractor who mainly works in dry climates may understand spray foam, but not South Florida crawl spaces.
Use a hiring checklist that covers basics like licensing, insurance, references, and scope clarity. If you want a general framework before you start calling companies, this guide on finding professionals for home repairs is a useful place to begin.
Ask direct questions such as:
- How do you determine whether the crawl space is ready to encapsulate?
- What do you do if you find standing water, mold, or drainage problems?
- Where exactly will you apply closed-cell foam?
- How will you seal vents, band joists, pipe penetrations, and access points?
- What humidity-control plan do you include after encapsulation?
- Who handles permits or code-related requirements if they apply?
Red flags I'd pay attention to
A few warning signs show up again and again:
- They skip the inspection details: If they don't ask about water entry, they're not diagnosing the underlying problem.
- They recommend open-cell by default: That tells me they may be treating the crawl space like an attic wall.
- They don't mention post-install humidity control: That's a major miss in Florida conditions.
- Their proposal is vague: You want materials, prep scope, sealing points, and exclusions spelled out.
A solid proposal doesn't just say what's being installed. It says what conditions must be corrected before installation begins.
Keeping the system working
Encapsulation is durable, but it isn't a set-it-and-forget-it assembly. Experts emphasize that it's a system, not a single product, and that keeping crawl-space relative humidity below 60% often requires active control such as a dedicated dehumidifier or conditioned air, as explained in this guidance on crawl space humidity control after encapsulation.
Homeowners don't need to overcomplicate maintenance. They just need to stay observant.
- Check the liner: Look for tears, loose seams, or spots where someone working under the house disturbed it.
- Watch the humidity equipment: Clean or replace filters as needed and make sure the unit is operating normally.
- Inspect after heavy rain: A Florida storm can expose drainage problems quickly.
- Pay attention to smell: If musty odor starts to return, investigate early rather than waiting.
The best encapsulated crawl spaces are boring. They stay dry, clean, sealed, and uneventful.
If you're dealing with a damp crawl space, musty indoor air, or insulation problems under a South Florida home, Airtight Spray Foam Insulation can help you evaluate whether the space is ready for encapsulation and what kind of full system will hold up in this climate. Reach out for a quote and get a plan built around moisture control, not guesswork.