Blog
How to Soundproof Interior Walls: A Complete Guide

You hear it at the worst times. A TV bleeding through the guest-room wall during a work call. Plumbing noise next to a nursery. Voices carrying down a hallway in a house that otherwise feels solid. Most interior wall noise problems aren't caused by one big defect. They're caused by a wall assembly that was never built to control sound in the first place.
That matters because a lot of advice on how to soundproof interior walls is incomplete. Homeowners get sold one product, one panel, one foam, one blanket, and then wonder why the wall still leaks noise. In the field, the walls that perform well use a system. Materials matter, but sequence, air sealing, and workmanship matter just as much.
Beyond Quiet The Goal of True Soundproofing
A wall can sound better and still fail the room.
We see that in South Florida homes all the time. A bedroom gets extra insulation, or one side gets another layer of drywall, and the owner expects real privacy. Then the TV still comes through at night, voices still carry during work calls, and the room still feels connected to the one next to it. The problem is usually not effort. The problem is treating sound control as a single-product fix instead of a wall assembly problem.
True soundproofing means the wall works as a system. Mass helps slow sound. Cavity insulation reduces the energy moving inside the stud bay. Separation details limit direct vibration transfer. Air sealing closes the cracks that let sound pass around the rest of the work. Miss one of those pieces and the weak point often sets the result.
Why single-product fixes fall short
Homeowners often ask which one product works best. There usually is no best single answer.
A heavier wall can reduce noise, but rigid framing can still carry vibration. Insulation in the cavity can improve the wall, but gaps at electrical boxes, top plates, baseboards, and pipe penetrations can keep speech surprisingly clear. Acoustic caulk helps, but it does not add mass or isolate framing. We explain that relationship in more detail in this guide to insulation as a sound barrier.
In real projects, the wall only performs as well as its weakest path.
Practical rule: If the assembly still has empty cavities, hard connections, or air leaks, one specialty material rarely changes the room the way people expect.
What good soundproofing actually aims for
For most interior walls, the goal is not studio isolation. The goal is usable separation. A home office should stay workable while the rest of the house is active. A nursery should not pick up every plumbing sound and conversation from the adjacent room. A rental or multigenerational home should feel more private and more solid.
That is why we recommend judging the whole assembly, not the label on one product. In South Florida, that also means choosing materials and installation methods that hold up in humid conditions, because a wall that manages sound well but handles moisture poorly can create a different problem later. Contractors in other climates may focus on a different mix of details, much like teams comparing soundproofing solutions for Boise homes against what works near the coast.
The best results come from layers that work together and stay dry, tight, and correctly installed.
First Identify Your Enemy Airborne vs Structure-Borne Noise
Before you buy drywall, batts, caulk, or channel, identify the kind of noise you're fighting. The right fix depends on the path the sound is taking.

Airborne noise
Airborne noise includes voices, music, a television, barking, and most sounds you hear as clear content rather than vibration. It travels through the air, enters the wall cavity, and passes through weak points in the assembly.
If the noise sounds muffled but understandable, and it gets worse around outlets, door casing, or wall intersections, you're usually dealing with airborne transfer. Shared bedroom walls, office walls, and media-room partitions often fall into this category.
Structure-borne noise
Structure-borne noise behaves differently. Think door slams, footfall vibration, mechanical hum, or the low thump that seems to travel through framing instead of through the room air. You may notice it in the wall, floor, or ceiling at the same time.
Many DIY jobs often miss the mark. People add cavity insulation for a vibration problem and get only modest improvement because the framing is still carrying energy directly through the assembly.
Listen for clarity versus impact. If you can make out words, that points toward airborne sound. If you mostly feel or hear thuds, buzz, or rumble, framing and connections are part of the problem.
A quick field diagnosis
Walk the wall and test it in a few spots while the noise is active.
- Check outlets and switches: If the sound gets sharper near electrical boxes, air leakage is likely part of the issue.
- Press on the wall surface: If the wall feels light and hollow, lack of mass is probably contributing.
- Notice when the sound occurs: Talking and TV suggest airborne transfer. Repeated impact or machine vibration points toward structural transmission.
- Look beyond the wall: Noise may be flanking through floors, ceilings, duct runs, or adjacent partitions.
Regional construction also affects what you're hearing. In places with different window assemblies, homeowners sometimes start by reviewing broader soundproofing solutions for Boise homes because openings and adjacent assemblies can change how noise enters a room. The principle applies anywhere: diagnose the whole path, not just the surface in front of you.
Set a realistic goal before you open the wall
Most homeowners don't need silence. They need reduction. That's a major difference.
If your goal is to make a bedroom calmer, a wall upgrade may do the job. If your goal is to eliminate low-frequency bass, impact vibration, and speech transfer at the same time, the project usually expands beyond one wall surface. Doors, ceilings, floor paths, and penetrations start to matter more.
That doesn't mean the project isn't worth doing. It means the right question isn't "What product soundproofs a wall?" It's "Which sound paths can I realistically control in this assembly?"
Your Soundproofing Toolkit Materials and Methods That Work
Good wall soundproofing comes from combining four functions in one assembly: mass, absorption, decoupling, and sealing. Miss one, and the wall usually underperforms. We see that often in South Florida remodels where someone adds insulation but leaves a leaky outlet box, or hangs extra drywall tight to the studs and expects a major improvement. The result is usually modest because sound still has a clean path through the assembly.
Each tool does a different job.
Mass slows transmission
Heavier wall surfaces resist airborne sound better than light finishes. In practical terms, that usually means 5/8-inch drywall, often in two layers, with damping compound between layers when the budget allows.
For interior partitions, mass upgrades usually look like this:
- One layer of 5/8-inch drywall when space or budget is limited
- Two layers of 5/8-inch drywall where speech privacy matters more
- Damping compound between drywall layers to reduce resonance
- Consistent fastening and full panel contact so the wall acts like one continuous surface
A second drywall layer usually does more to reduce room-to-room sound transfer than decorative acoustic panels. Panels help with echo inside the room. They do not add much isolation through the wall.
Absorption reduces echo inside the wall cavity
An empty stud bay lets sound bounce inside the cavity. Filling that space cuts down that internal reverberation and helps the rest of the wall assembly work better.
For open walls, mineral wool is a strong choice because it fits the cavity well, handles jobsite abuse better than many light batts, and offers good sound absorption. Fiberglass batts can still work if they are installed carefully and fully fill the bay without compression or gaps. For closed walls, retrofit options such as dense-fill products may make sense. We explain one retrofit approach in this guide to blown-in insulation for soundproofing.
Here is how the common options compare in the field:
| Material | Primary Benefit | Moisture Resistance | Best Use Case |
|---|---|---|---|
| Mineral wool | Dense batt that absorbs sound well in wall cavities | Good moisture tolerance | Open walls where acoustic control is a priority |
| Fiberglass batts | Lower-cost cavity fill for airborne sound reduction | Moderate, depends on fit and surrounding conditions | Budget-conscious upgrades in conditioned interiors |
| Open-cell spray foam | Air sealing plus sound dampening | Moderate, needs climate-aware detailing | Interior partitions where leakage is a known problem |
| Closed-cell spray foam | Air sealing, added rigidity, stronger moisture control | High | South Florida assemblies where humidity control is part of the design |
| Blown-in fiberglass or cellulose retrofit | Adds cavity fill with less demolition | Varies by material and wall condition | Finished walls where access is limited |
Spray foam deserves a realistic explanation here. We use it where air leakage is part of the sound problem and where moisture control matters, but it is not a substitute for mass or decoupling. In a high-performance wall, it works as one part of the system.
Decoupling breaks the mechanical connection
If drywall is fastened directly to studs, vibration moves through that hard connection easily. Decoupling interrupts that path.
Common decoupling methods include:
- Resilient channel
- Isolation clips with hat channel
- Separate stud walls in major remodels or new construction
Isolation clips and hat channel usually give more predictable results than basic resilient channel because they are harder to flatten or short-circuit during installation. The trade-off is cost and wall thickness. Decoupling also demands discipline. A misplaced fastener into a stud can reduce the benefit of the whole assembly.
Wall upgrades also have limits. If impact noise is traveling through the floor system, the wall may only solve part of the problem. In those cases, it helps to find soundproofing underlayment at Flacks Flooring and address the floor assembly as part of the noise path.
Sealing decides whether the assembly performs as designed
Small gaps cause big losses. Sound rides air movement, so an otherwise solid wall can fail at the perimeter, at a pipe opening, or around an electrical box.
Focus on these areas:
- Perimeter joints at the floor, ceiling, and intersecting walls
- Electrical boxes that need acoustic sealant or putty protection
- Pipe and wire penetrations before drywall is finished
- Drywall seams and cut edges that need continuity
We treat sealing as finish work with performance consequences. A well-built wall with weak sealing often sounds disappointing. A carefully sealed wall gives the mass, insulation, and decoupling a chance to do their jobs.
Putting It All Together A Wall Soundproofing Project Guide
A bedroom backs up to a bathroom wall, or a home office shares framing with a TV room. The complaint usually sounds simple. Voices carry, doors close hard, plumbing noise shows up at night. The fix is rarely one product. Good results come from building the wall in the right order and choosing an assembly that fits the level of disruption the project can tolerate.

A high-performing wall assembly usually starts with cavity treatment, then adds separation between the framing and drywall, then adds face-layer mass, then finishes with careful detailing. Skip the sequence and the wall often costs more to correct later. Follow the sequence and each layer supports the next one, which is how sound control improves in the field.
New construction or open-wall remodel
Open framing gives the best chance to build the wall correctly from the start. It also lets you deal with problems that have nothing to do with acoustics but still affect the outcome, such as wiring runs, plumbing contact, air leaks into adjacent cavities, or framing that will make drywall sit unevenly.
A practical open-wall sequence looks like this:
Start with the framing and rough-ins
Check for bowed studs, loose pipes, back-to-back electrical boxes, and openings into soffits or adjacent chases. Correcting those issues now is cheaper than trying to work around them after insulation and drywall go in.Treat the cavity
Install the insulation specified for the assembly and fit it tightly without compression or voids. In some retrofit-friendly situations, insulating existing walls with spray foam can help fill irregular spaces and reduce air movement at the same time, which matters in a climate like South Florida where air leakage carries both noise and moisture.Install the separation layer
Add the selected clip-and-channel or channel system exactly to spec. Spacing, orientation, and screw length matter. One wrong fastener into framing can create a hard connection where you were trying to isolate the wall surface.Build the face of the wall
Hang the drywall layers called for in the design. If the assembly uses damping compound between layers, apply it consistently and keep the field installation clean so the second layer seats properly.Finish the details before trim and paint
Seal the perimeter, penetrations, and electrical box areas so the wall performs like the drawing says it should.
Homeowners looking up how to soundproof interior walls are often deciding whether opening the wall is worth it. If the room is already under renovation, exposed studs usually give the most predictable result because you can control the full assembly instead of treating only the surface.
A quick visual helps clarify the order of operations:
Finished wall retrofit
Retrofit work is about compromise. The wall is staying in place, the homeowner wants less mess, and access is limited. That changes the strategy.
For a closed wall, start by asking what level of improvement is realistic without demolition. If the goal is to reduce normal speech and TV bleed, a cavity-fill approach plus added drywall mass can make sense. If the complaint is low-frequency bass, repeated door slams, or plumbing noise tied into framing, expectations need to be set early because a surface-only upgrade may leave part of the problem in place.
A typical retrofit path looks like this:
- Map the cavity before cutting or drilling
Find studs, wiring, plumbing, fire blocking, and any irregular framing. - Fill the cavity with a method suited to finished walls
Coverage matters more than speed. Voids and missed bays leave obvious weak areas. - Repair and flatten the wall surface
The finish layer only performs well if it sits tight and even. - Add another drywall layer if the design calls for more mass
That step often gives better value than jumping straight to invasive framing changes. - Seal the edges and penetrations after the new layer is installed
Floor lines, ceiling lines, window casing returns, and device openings all need attention.
We see many retrofit jobs stall because the owner spends on premium materials but leaves the existing weak points untouched. A shared outlet box, an unsealed pipe cutout, or a chase open into the attic can keep the wall from sounding much better even after the visible work is done.
The details that separate a decent result from a disappointing one
Soundproofing failures are usually assembly failures. The material list may be fine. The installation often is not.
A wall performs best when each part supports the others. Cavity insulation helps control resonance. Decoupling reduces direct vibration transfer. Added drywall raises mass. Sealant closes the air paths that let sound slip through the edges. We approach these as one system because that is how the wall behaves after the job is finished.
That systems approach matters even more in South Florida, where the wall also has to manage humid air, service penetrations, and real-life remodeling constraints.
Soundproofing in South Florida Why Humidity Matters
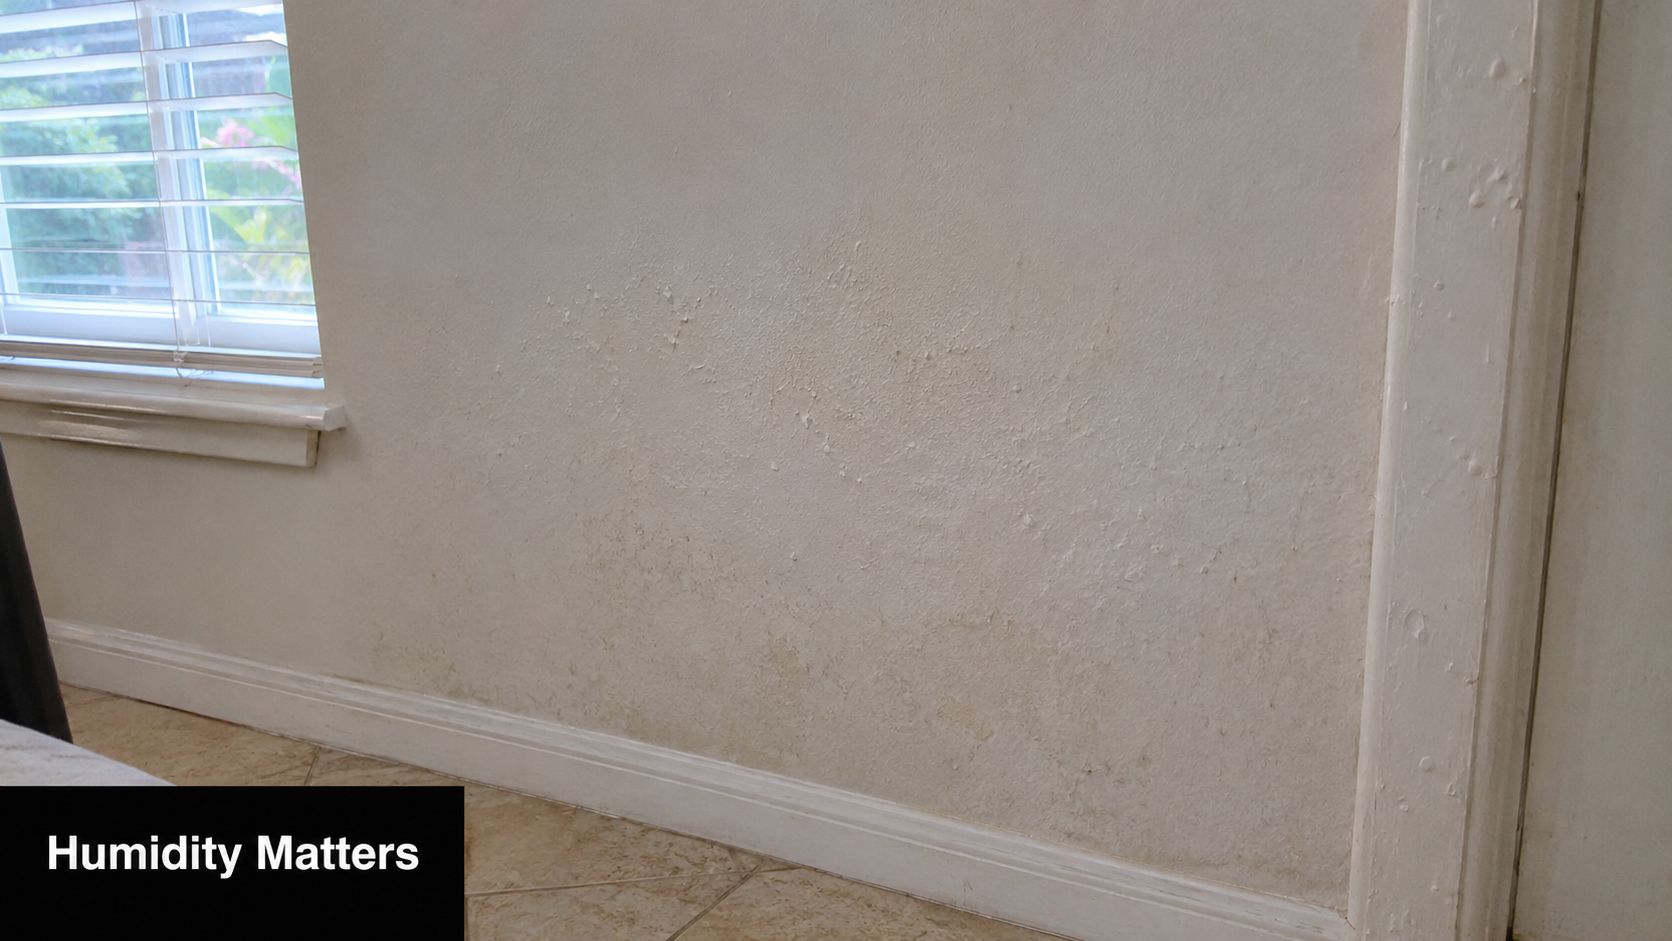
South Florida changes the conversation. A wall assembly here doesn't just have to reduce sound. It also has to survive humidity, temperature swings, and the moisture load that builds up inside homes for much of the year.
Moisture changes how materials perform
A generic soundproofing guide may tell you to stuff any soft material into a wall and call it done. In South Florida, that's risky advice. If a wall takes on moisture, materials that hold water or allow humid air to move freely through gaps can turn a noise project into an indoor air quality problem.
That doesn't mean fiberglass or mineral wool never belong in a wall here. It means the whole assembly has to be considered. Where is the humid air coming from? Is the wall connected to a garage, laundry area, or humid mechanical space? Are there leaks around penetrations, top plates, or baseboards? A sound wall that ignores air movement can underperform acoustically and create durability issues at the same time.
Air sealing matters as much as sound absorption
Building science and sound control often overlap. Air carries sound, but in South Florida it also carries moisture. When we inspect noisy interior partitions, we often find the same weak points causing both problems: outlet penetrations, unsealed framing joints, utility runs, and sloppy perimeter transitions.
Closed-cell spray foam can make sense in climate-sensitive assemblies because it helps with air sealing while also supporting sound dampening as part of a larger wall system. Open-cell foam can also be useful in interior partitions where the priority is reducing air movement and softening sound transfer. The product choice should follow the wall's moisture exposure, not just the acoustic goal.
The regional trade-off homeowners should understand
Some soundproofing upgrades look fine on paper but don't fit a humid climate well if they trap moisture in the wrong place or leave the cavity vulnerable to condensation and air leakage.
Use this checklist when planning interior wall soundproofing in South Florida:
- Choose materials for the wall's environment: A quiet wall that stays damp isn't a successful wall.
- Prioritize airtight detailing: Gaps move both sound and humidity.
- Think beyond the partition: Adjacent attics, garages, and mechanical zones often affect interior walls.
- Match the insulation to the assembly: Acoustic benefit is only part of the decision.
The wall has to be quiet, durable, and dry. In this climate, those three goals belong together.
DIY vs Professional Soundproofing The Airtight Advantage
A homeowner usually calls us after the first round of fixes fails. They added foam gaskets, swapped in insulation, maybe hung another layer of drywall, and the voices from the next room still come through at night. That result is common because soundproofing is a system, and weak execution at one point can waste money spent everywhere else.
A small, low-risk project can still be a good DIY job. Sealing trim gaps, treating a shared wall during a planned remodel, or adding a second drywall layer in a simple room is realistic for a careful homeowner with time and patience. The work gets harder once the wall includes wiring obstacles, steel framing, uneven surfaces, recessed boxes, finish-sensitive areas, or moisture concerns that affect material choice.
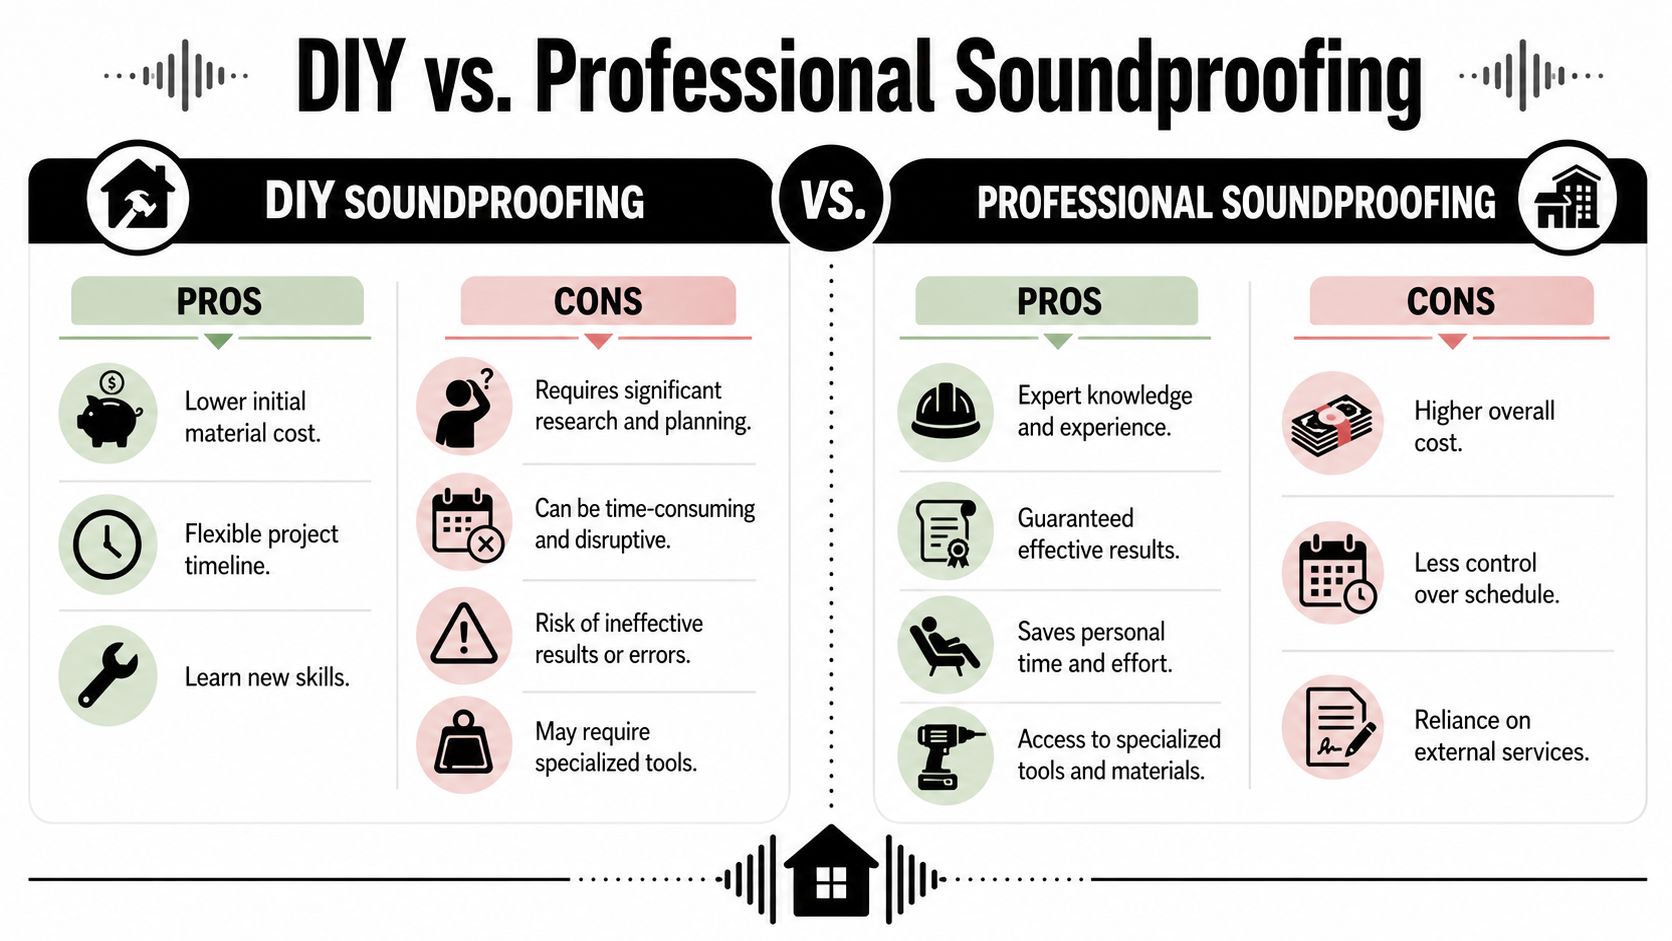
What DIY gets right and where it goes wrong
DIY usually works best when the goal is moderate improvement, not studio-grade isolation. Homeowners can save on labor, spread the work across weekends, and make smart gains if the wall is accessible and the scope stays simple.
Where DIY projects slip is diagnosis and detailing. Existing-wall retrofits often involve some mix of cavity insulation, more mass, damping, and careful sealing. Decoupling can help, but it adds complexity fast and is easy to compromise during installation. We see the same field mistakes over and over:
- Wrong fix for the noise: A wall packed with insulation will not do much for vibration traveling through framing, floors, or ceiling connections.
- Missed air paths: Outlets, switch boxes, baseboard lines, top plates, and drywall edges get left open.
- Fastening errors: One misplaced screw can tie a decoupled layer back to the framing and reduce the benefit.
- Product mismatch: Materials get chosen for price or convenience instead of the wall assembly, room use, and climate conditions.
Small details decide whether a wall feels noticeably quieter or barely different.
Where STC helps and where it doesn't
STC, or Sound Transmission Class, is useful for comparing airborne sound performance between wall assemblies. It helps sort out whether one tested build-up should perform better than another for speech, TV noise, and similar sounds.
It does not predict the whole room.
A wall can post a solid STC rating on paper and still disappoint in a house with flanking paths, a hollow-core door, a duct run, back-to-back electrical boxes, or poor perimeter sealing. STC also does not tell you much about low-frequency vibration or impact-related noise. Homeowners should treat it as one decision tool, not the final answer.
Why homeowners bring in a contractor
Professional soundproofing brings more than labor. It brings assembly planning, sequence control, cleaner retrofits, and fewer expensive do-overs. That matters when the project includes spray-applied insulation, channel systems, selective demolition, drywall finishing, or occupied rooms that need to stay clean and usable.
In South Florida, workmanship has to account for humidity as well as noise. A wall that reduces sound but leaves the assembly vulnerable to air leakage or moisture problems is not a successful upgrade. We approach these projects as building science work first. The insulation, drywall, sealants, framing details, and finish layer all need to work together.
Airtight Spray Foam Insulation serves homeowners, builders, and property managers across Jupiter, Palm Beach Gardens, West Palm Beach, Wellington, and Stuart. Christian Cates brings over 25 years of hands-on experience to projects that need careful installation, air sealing, and moisture-aware insulation strategy.
If you're dealing with room-to-room noise and want a wall assembly that fits South Florida conditions, Airtight Spray Foam Insulation can help. We provide practical recommendations for existing walls, remodels, and new construction, with a focus on air sealing, insulation performance, and durable installation. Request a free, no-obligation estimate to see what makes sense for your home or project.