Blog
A Homeowner’s Guide to Spray Foam Ceiling Insulation
For homeowners in South Florida, a spray foam ceiling isn't just an upgrade; it's your single most powerful defense against our oppressive heat and humidity. Forget old-school insulation. Spray foam creates a seamless, airtight seal directly on the underside of your roof deck.
This one move completely changes the game. It stops heat and moisture dead in their tracks, transforming your attic from a sweltering oven into a much cooler, semi-conditioned space. The direct result? Your home's cooling system gets a massive break, and your energy bills start to drop.
Your Best Defense Against Florida Heat

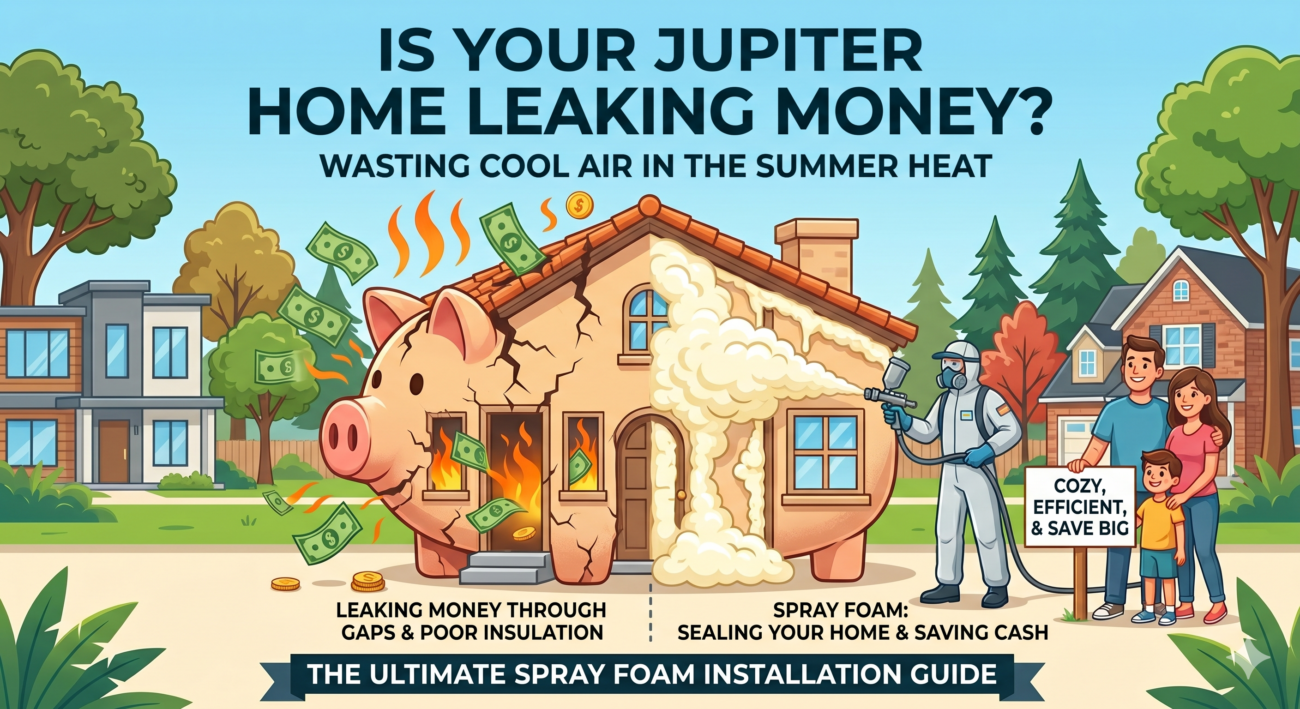
Whether you live in Jupiter, Wellington, or anywhere in between, you're in a constant battle with a climate that pushes your AC to its absolute limit. But the main culprit isn't your walls or windows—it's your roof. On any given sunny afternoon, a traditional vented attic can easily skyrocket to 140°F or even higher. That intense heat radiates straight down through your ceiling, forcing your AC to work overtime just to keep up.
A spray foam ceiling flips the script entirely.
By applying the insulation directly to the roof deck, we essentially create an "unvented" or "conditioned" attic. Think of it like this: we're moving your home's thermal shield from the floor of your attic up to the roofline itself. It's a fundamental shift in building science that offers some huge, immediate wins for homeowners across Palm Beach County and the Treasure Coast.
Immediate Benefits of a Spray Foam Ceiling
Here’s a quick look at the powerful advantages you gain by sealing your attic at the roofline. This isn't a minor improvement; it's a total transformation of your home's performance envelope.
| Benefit | Impact on Your Home |
|---|---|
| Drastic Temperature Drop | Your attic goes from a scorching 140°F+ to within 10-15 degrees of your home's interior. |
| Superior Moisture Control | The foam forms an airtight barrier, blocking humid outside air from causing condensation and mold. |
| Improved HVAC Efficiency | Your AC unit and ductwork (often in the attic) operate in a cooler space, reducing strain and wear. |
| Major Energy Savings | Homeowners typically see their cooling costs drop by 20-40% because the AC isn't fighting a super-heated attic. |
These benefits are tangible and immediate, making a spray foam ceiling one of the smartest investments for long-term comfort and savings in our climate.
The numbers back it up. The global market for spray foam insulation hit USD 2.4 billion in 2023, and the open-cell foam segment—which is what we typically use for ceilings—accounted for USD 1.7 billion of that. This isn't some niche product; it's a proven solution that homeowners are turning to as energy costs continue to climb.
By tackling the root cause of heat gain right at the source, a spray foam ceiling does more than just insulate. It's a complete performance overhaul for your home. To learn more about why this approach is so effective in our area, take a look at our complete guide on attic insulation in Florida.
How a Spray Foam Ceiling Actually Works
Think of a spray foam ceiling as a custom-fitted, high-performance barrier for the very top of your house. It's not like old-school insulation that's just rolled out or blown in; it's literally manufactured on-site, perfectly molded to every nook and cranny of your attic. It's a simple concept with a pretty amazing execution, and the result is an unbeatable shield against the brutal Florida heat.
The magic starts with two separate liquid chemicals, what we in the business call an "A-side" and a "B-side." These liquids are stored in big drums on our truck and pumped through heated hoses all the way up to your attic. They stay completely separate until the very last moment—right at the tip of the technician's spray gun.
The second our technician pulls the trigger, those two liquids mix and hit the underside of your roof deck. That's when the chemical reaction kicks in, and things happen fast.
From Liquid to Solid in Seconds
This reaction causes the liquid to expand at a wild rate—often up to 100 times its original volume. This incredible expansion is the secret sauce behind a spray foam ceiling. The foam aggressively expands into every single gap, crack, and seam, no matter how tiny. It perfectly seals around trusses, plumbing vents, and electrical wiring, creating one solid, continuous, airtight layer of insulation.
Key Takeaway: Fiberglass batts have seams. Blown-in insulation can settle and leave gaps. Spray foam creates a truly seamless, monolithic barrier. This airtight seal is its superpower, completely shutting down the flow of hot, humid air into your attic.
Within minutes, the foam cures and hardens, bonding permanently to the wood sheathing of your roof deck. What you're left with is a rigid, durable layer of insulation that actually adds a bit of structural integrity to your roof assembly.
Transforming the Attic Environment
The biggest change here is the creation of what we call a "conditioned" or "unvented" attic. By applying the insulation directly to the roof deck instead of the attic floor, we've essentially brought your attic inside your home's conditioned space. This is a game-changer for your home's performance.
- Protects Your HVAC System: If your air handler and ductwork are in the attic, they no longer have to bake in 140°F heat. Instead, they're operating in a space that’s maybe only 10-15 degrees warmer than your living room. This makes a huge difference in efficiency and equipment lifespan.
- Reduces Thermal Bridging: The foam completely covers the wooden rafters, which otherwise act like heat highways, conducting heat straight from your hot roof into the attic.
- Stops Radiant Heat Transfer: That thick, seamless layer of foam stops the intense heat radiating from your sun-beaten shingles from ever reaching your attic space and eventually your ceilings.
This whole process effectively turns your attic from a giant oven sitting on top of your house into a neutral buffer zone. It's a fascinating mix of chemistry and smart building science that older insulation methods just can't touch. If you want to get into the nitty-gritty, you can explore a more detailed explanation of how spray foam insulation works to really understand the science. This transformation is exactly why so many of our customers see such a dramatic drop in their cooling bills and a massive improvement in comfort.
Choosing Between Open-Cell and Closed-Cell Foam
When it comes to spraying your ceiling, you’ll face a big decision that will directly impact how your home feels and performs. This isn't just about picking insulation; it’s about choosing the right material for the job, especially here in South Florida. The two main players are open-cell foam and closed-cell foam, and they have very different personalities.
Let’s break them down.
Open-Cell Foam: The Airtight Sponge
Think of open-cell foam as a dense, flexible sponge. It’s light, soft to the touch, and expands like crazy when we spray it. That massive expansion is its superpower—it lets the foam work its way into every tiny crack and crevice, creating an almost perfect air seal. Stopping air leakage is priority number one.
This sponge-like structure also makes it incredible for dampening sound. If you’re tired of hearing every raindrop or gust of wind, open-cell foam will quiet things down considerably.
For most residential attics in our humid climate, open-cell is the go-to choice. Here’s why it works so well:
- Creates a Superior Air Seal: Its ability to expand and fill every gap is exactly what you want when creating a sealed, conditioned attic.
- Excellent Sound Barrier: The soft cell structure absorbs sound waves, making your home a quieter, more peaceful place to be.
- More Budget-Friendly: Open-cell foam generally costs less than closed-cell, giving you top-tier performance without the premium price tag.
- Helps Spot Roof Leaks: Because it's vapor-permeable (like a sponge), it won't trap water from a roof leak. This is a good thing! It allows water to show itself, so you can find and fix the leak source before it causes major hidden damage.
This chart quickly shows why sealing the attic with spray foam (creating an "unvented attic") is the modern, superior way to cool your home compared to old-school vented methods.

As you can see, for an unvented attic, spray foam is the clear winner for keeping things cool and dry.
Closed-Cell Foam: The Rigid Shell
Now, let’s talk about closed-cell foam. If open-cell is a sponge, closed-cell is a hard, rigid shell. The cells are packed tightly together and filled with a gas that gives it a higher insulation value (R-value) per inch. This density makes it incredibly strong and almost totally waterproof.
Closed-cell foam is a beast. It doesn't just insulate; it adds structural integrity and acts as a complete vapor barrier, blocking moisture from passing through.
Because it's so tough and impermeable, we typically use closed-cell foam in specific situations—think commercial buildings, metal sheds, or crawl spaces where you need a bulletproof moisture barrier. Its high R-value is also handy in tight spots where you can't spray as thick. But all that strength and performance comes with a higher price tag.
To get a simple, side-by-side view, this table lays out the key differences. It’ll help you see which foam is the right fit for your ceiling project.
| Feature | Open-Cell Foam (The 'Sponge') | Closed-Cell Foam (The 'Shell') |
|---|---|---|
| Structure | Soft, flexible, and spongy texture. | Rigid, dense, and hard to the touch. |
| Air Sealing | Excellent. Expands significantly to fill all gaps. | Excellent. Creates a complete, airtight seal. |
| Moisture Handling | Vapor-permeable. Allows moisture to pass through, helping detect leaks. | Acts as a vapor barrier, completely blocking water and moisture. |
| Sound Dampening | Superior. The soft structure is great at absorbing sound. | Good, but less effective than open-cell due to its rigidity. |
| R-Value per Inch | Around R-3.5 to R-4.5. | Higher, around R-6 to R-7. |
| Structural Strength | Adds no structural strength. | Adds significant racking strength to the structure. |
| Cost | More affordable. | More expensive due to higher material density. |
| Common Use | Attics, rooflines, and soundproofing interior walls in South Florida homes. | Commercial buildings, metal structures, crawl spaces, and areas needing a vapor barrier. |
Ultimately, deciding between the two really comes down to what your home needs. For almost every South Florida homeowner looking to create a comfortable, energy-efficient conditioned attic, open-cell foam is the hands-down winner. It delivers the perfect mix of air-sealing, sound dampening, and value. But for those unique jobs that demand a hardcore moisture barrier or extra structural muscle, closed-cell is ready to step in.
If you want to get into the nitty-gritty, we have a complete guide that explores the differences between closed-cell vs. open-cell spray foam in more detail.
How We Install Your Spray Foam Ceiling

A professional spray foam job isn't just about spraying goo on your ceiling—it's a carefully orchestrated process that blends deep technical knowledge with meticulous, hands-on work. When you see how a real pro team operates, you realize it’s all about protecting your home, ensuring safety, and delivering a perfect result with as little fuss as possible.
It really starts well before our rig ever pulls up to your curb. We first come out for a detailed consultation, where we get into the specifics of your attic—its size, how it’s built, and what kind of insulation is already up there. This isn't a sales pitch; it's the critical first step to crafting a plan that's right for your house.
Step 1: All About the Prep Work
You can’t just rush into spraying. In fact, the prep work is arguably the most important part of the entire job. It’s what separates a professional, clean installation from a sloppy mess, and we don't cut corners here.
If your attic has old fiberglass batts or blown-in cellulose that's seen better days, it has to go. We'll handle the complete removal and proper disposal, giving us a clean, bare surface on the underside of your roof deck. This is essential for the spray foam to grab on tight and form that perfect, seamless seal.
Next, we go into protection mode.
- Masking and Covering: Think of it like a painter prepping a room. We use heavy-duty plastic sheeting to cover everything that can't be moved out of the attic. We also tape off and protect sensitive spots like your HVAC unit, recessed lights, and electrical boxes.
- Setting Up Ventilation: Safety is everything. We set up powerful fans and ventilation systems to pull any fumes and airborne particles directly outside while we work.
Getting this foundation right makes all the difference. It ensures a clean job site and prevents any overspray from getting where it shouldn't.
Step 2: Applying the Foam
Once everything is prepped and secure, our certified technicians get into their full Personal Protective Equipment (PPE)—we're talking full-body suits and respirators. You can't be too careful. They then start the application, methodically spraying the two-part liquid foam directly onto the underside of your roof deck, filling the spaces between the rafters.
As it hits the surface, the foam expands in seconds, sealing every single crack, gap, and tiny hole to create one solid, unbroken air barrier. There's a real art to this. Our installers have to apply the foam in smooth, even layers (we call them "lifts") to get the right thickness without overdoing it. That's where experience truly counts.
It's no surprise this technology is catching on everywhere. The U.S. spray foam market was valued at USD 750.02 million in 2024 and is booming for one simple reason: its air-sealing power is a game-changer for HVAC performance and meeting modern energy codes. You can learn more about spray foam's growth on gminsights.com.
Step 3: Curing and The Final Cleanup
After the last pass of the spray gun, the foam needs to cure. This is where the chemical reaction finishes, and the foam hardens into a solid, inert plastic. For most foams we use in homes, this process takes about 24 hours. During this time, we'll ask that you stay out of the house to let it fully ventilate and off-gas.
Once the foam has cured, our crew comes back to finish the job. We pull down all the plastic masking, remove our ventilation equipment, and do a complete cleanup of the work area, leaving it just as we found it. The last thing we do is walk through the finished attic with you, show you the work, and answer any final questions. We're not done until you're 100% satisfied.
Understanding Costs and Maximizing Your Return on Investment
Let's talk money. When it comes to a spray foam ceiling, the first thing most people want to know is, "What's it going to cost me?" Yes, the upfront investment is higher than tossing in some traditional fiberglass batts. But thinking of it as just an expense is the wrong way to look at it.
This is a long-term upgrade to your home's entire performance envelope. You're not just buying insulation; you're buying dramatically lower energy bills, a huge boost in comfort, and a protective shield for your expensive HVAC system. In the brutal South Florida heat, that investment starts paying dividends from day one.
Breaking Down the Costs
So, what goes into the final price tag? A few key things. The size and complexity of your attic are the biggest factors, of course. We also consider the type of foam (for attics, we're almost always using open-cell) and the thickness required to meet local building codes.
On average, homeowners here in Palm Beach County can expect the cost to land somewhere between $3.00 and $6.00 per square foot of the roof deck area we're spraying. That number typically wraps up everything—removing the old, nasty insulation, prepping the whole site, and the professional installation itself.
For a typical 1,500-square-foot attic, you're likely looking at an investment in the ballpark of $4,500 to $9,000. I know that's not pocket change, but let's look at what you're actually getting for that money.
The Real ROI: Your Energy Savings
This is where spray foam truly leaves old-school insulation in the dust. By creating a flawless air seal and moving your home's thermal boundary right up to the roofline, you fundamentally change how your AC operates. That attic that used to feel like an oven, easily hitting 140°F, now stays within 10-15 degrees of your living space.
This isn't just a small tweak in efficiency; it's a game-changer. Most of our clients report slashing their monthly cooling costs by 20% to 40%. In a place where the AC runs almost nonstop, those savings stack up fast, often letting the entire system pay for itself in just a handful of years.
But the return on your investment goes way beyond the monthly power bill:
- Longer HVAC Lifespan: Your air handler and ductwork are no longer fighting for their lives in extreme heat. Less strain means a longer, healthier life for your equipment.
- Improved Home Value: A modern, energy-efficient home with a sealed attic is a huge plus for potential buyers who know what to look for.
- Healthier Air: Sealing the attic doesn't just block hot air. It blocks the pollen, dust, and pollutants that came with it, leading to cleaner air inside your home.
Meeting Florida Building Codes
It's really important to know that sealing your attic with spray foam creates what the Florida Building Code calls an "unvented attic." This is the gold standard for our humid climate, but it absolutely must be done by the book. The code has specific requirements for ventilation and combustion safety to make sure your home is both high-performing and safe.
This is why working with a qualified, licensed, and insured installer is completely non-negotiable. We ensure every project we touch in Jupiter, Wellington, or Palm Beach Gardens meets or exceeds all local codes. Your investment isn't just effective—it's compliant and built to last.
How to Find a Qualified Spray Foam Installer

Let’s be direct: all the amazing benefits of a spray foam ceiling hinge on one thing—a flawless installation. The foam itself is an incredible product, but it’s only as good as the person behind the spray gun. This makes picking the right installer the single most important decision you'll make.
Finding a real pro in the busy South Florida market is about more than a quick Google search. You need a game plan to tell the seasoned experts from the weekend warriors. A top-notch company will be completely transparent, deeply knowledgeable, and eager to show you their credentials.
When you're searching, you'll probably notice that the most reputable local guys invest in things like local SEO for contractors to make sure homeowners can find them. A solid online presence is often a good sign that a company cares about its reputation and is serious about connecting with clients.
Vetting Your Installer The Right Way
Before you even get a quote, it's time for a little homework. Getting the credentials right isn't just a formality; it protects you from shoddy work and potential liability down the road.
Here’s your non-negotiable checklist:
- Proper Licensing and Insurance: Make sure they hold a current license to work in Palm Beach or Martin County. Crucially, they must have both general liability and workers' compensation insurance. This protects you, your home, and their crew.
- Technician Certifications: Ask if their technicians are certified. A certification from an organization like the Spray Polyurethane Foam Alliance (SPFA) means they’ve been professionally trained on proper application and, just as importantly, safety protocols.
- Real Local Experience: South Florida is a different beast. Our heat and humidity demand a specific approach. You need a team that has spent years installing spray foam ceilings right here, not someone who just blew into town.
A contractor's willingness to hand over these documents without you even asking is a huge green light. If they get defensive or make excuses? That's a massive red flag. Your home is too big of an investment to gamble with anyone but a fully credentialed professional.
Key Questions to Ask Every Potential Installer
Once you’ve narrowed down your list to a few companies, it’s interview time. A confident, experienced installer will welcome your questions and give you clear answers. This is where you separate the talkers from the doers.
Arm yourself with these questions for your consultation calls:
- What brand and type of foam do you use? A pro will know the manufacturer off the top of their head and can explain exactly why they recommend a specific open-cell product for your attic's needs.
- Can you walk me through your safety protocols? They should immediately talk about their team's PPE (personal protective equipment), how they ventilate the home during and after the job, and the mandatory 24-hour curing period before your family can safely re-enter.
- How do you prep the attic before you start spraying? Listen for details. They should mention removing old insulation and meticulously masking off sensitive equipment like your AC air handler.
- Do you offer a warranty on both materials and labor? A solid warranty shows they stand behind their work.
- Can you provide a few local references? There is no better peace of mind than talking to a past customer in Jupiter, Wellington, or Palm Beach Gardens who can vouch for their work and professionalism.
Taking the time to do this level of vetting ensures you’re not just hiring a crew; you’re partnering with an expert who will get the job done right. This isn’t just some local trend; it’s a trusted global solution, with the market projected to hit USD 4.80 billion by 2032. A quality installation is what turns that potential into real, tangible results for your home.
Common Questions About Spray Foam Ceilings
Making a big improvement to your home always comes with questions, and that’s a good thing. We get it. You want to be sure you're making the right call. Here are some of the most common questions we hear from homeowners in Jupiter, Wellington, and right across South Florida, with straight-up answers from our team.
Will My House Smell After a Spray Foam Installation?
This is probably the #1 question we get, and it’s a fair one. Yes, there's a distinct smell during the application process. That’s the chemical reaction happening, and it's precisely why we require the home to be empty and use powerful ventilation fans to clear the air.
That smell fades as the foam cures. Once it’s fully set—usually within 24 hours—the foam becomes a solid, inert plastic. It’s completely odorless and doesn't release any gasses. Following your installer's timeline for coming back home is the key to ensuring you walk back into a fresh, comfortable space.
Can Spray Foam Be Installed in an Existing Home?
Absolutely. In fact, most of the spray foam ceiling projects we do are retrofits in existing homes just like yours. The process is more straightforward than you might think.
First, we prep the attic. For almost every job, this means getting rid of all the old, tired insulation, whether it's dusty fiberglass batts or compacted cellulose. Our crew handles the complete removal and disposal, giving us a clean slate on the underside of your roof deck. This step is non-negotiable for getting a perfect bond and creating that powerful, seamless air seal.
Expert Insight: Tearing out the old stuff isn't just about making room. We're removing years of trapped dust, allergens, and who-knows-what-else. It’s like hitting a reset button for your attic, creating a much healthier environment from the get-go.
How Does Spray Foam Affect Future Roof Repairs?
This is a smart question. Homeowners worry that a solid layer of foam will hide leaks, but it actually works the other way around. It often minimizes the damage. Because closed-cell foam is rigid and bonded directly to the wood, it can actually contain a small leak right at the entry point.
This stops water from running down rafters and spreading across your ceiling drywall—a common problem with old insulation that leads to massive, costly damage before you even notice a drip. While the foam's adhesion means a roofer needs to be a bit more methodical to find the exterior entry point, it drastically cuts down on the interior mess. Think of it as a built-in secondary water barrier.
Is Spray Foam Insulation a Safe and Healthy Choice?
When it's installed by a certified professional and given the proper time to cure, modern spray foam is as safe as the other plastic materials in your home. It’s an inert solid. More than just being safe, it actually makes your home a healthier place to live.
The airtight seal created by a spray foam ceiling is a game-changer for indoor air quality. It drastically reduces the amount of pollen, dust, and other pollutants that get sucked into your home through the attic. For anyone in your family with allergies or asthma, this can make a world of difference.
Today's best foams are also made with an eye toward the environment. Many formulas use renewable resources like soy and eco-friendly blowing agents with low Global Warming Potential (GWP). It's a choice you can feel good about for your family and for the planet.
Ready to transform your home with the ultimate defense against South Florida's heat and humidity? The team at Airtight Spray Foam Insulation has the experience and expertise to deliver a flawless installation tailored to your home in Jupiter, Palm Beach Gardens, or Wellington. Contact us today for a free, no-obligation quote and discover the Airtight Comfort System. Learn more and get started at https://airtightsprayfoaminsulation.com.