You walk outside after a repaint, a neighbor's project, or a windy contractor day, and something looks off. The truck has a rough feel across the hood. The hurricane shutters have tiny paint dots. The pool enclosure glass catches the sun and suddenly you see a fine mist baked across it. In South Florida, that kind of overspray doesn't sit gently for long. Heat, salt air, humidity, and direct sun can lock contamination onto a surface fast.
Overspray removal is the process of lifting unwanted paint, coating, or foam residue from a surface without damaging what's underneath. Sometimes that means a light dusting of latex on glass. Sometimes it's hardened automotive overspray on clearcoat. Sometimes it's spray foam where it absolutely doesn't belong. The right fix depends on the surface first, not the contaminant first. That's where a lot of DIY jobs go sideways.
Overspray is often noticed by touch before it is seen. A smooth car roof suddenly feels gritty. A sliding glass door has speckles that won't wipe off. A boat's gelcoat looks dull in one direction when the sun hits it. That's overspray. It's airborne material that drifted beyond the target and bonded to something else.
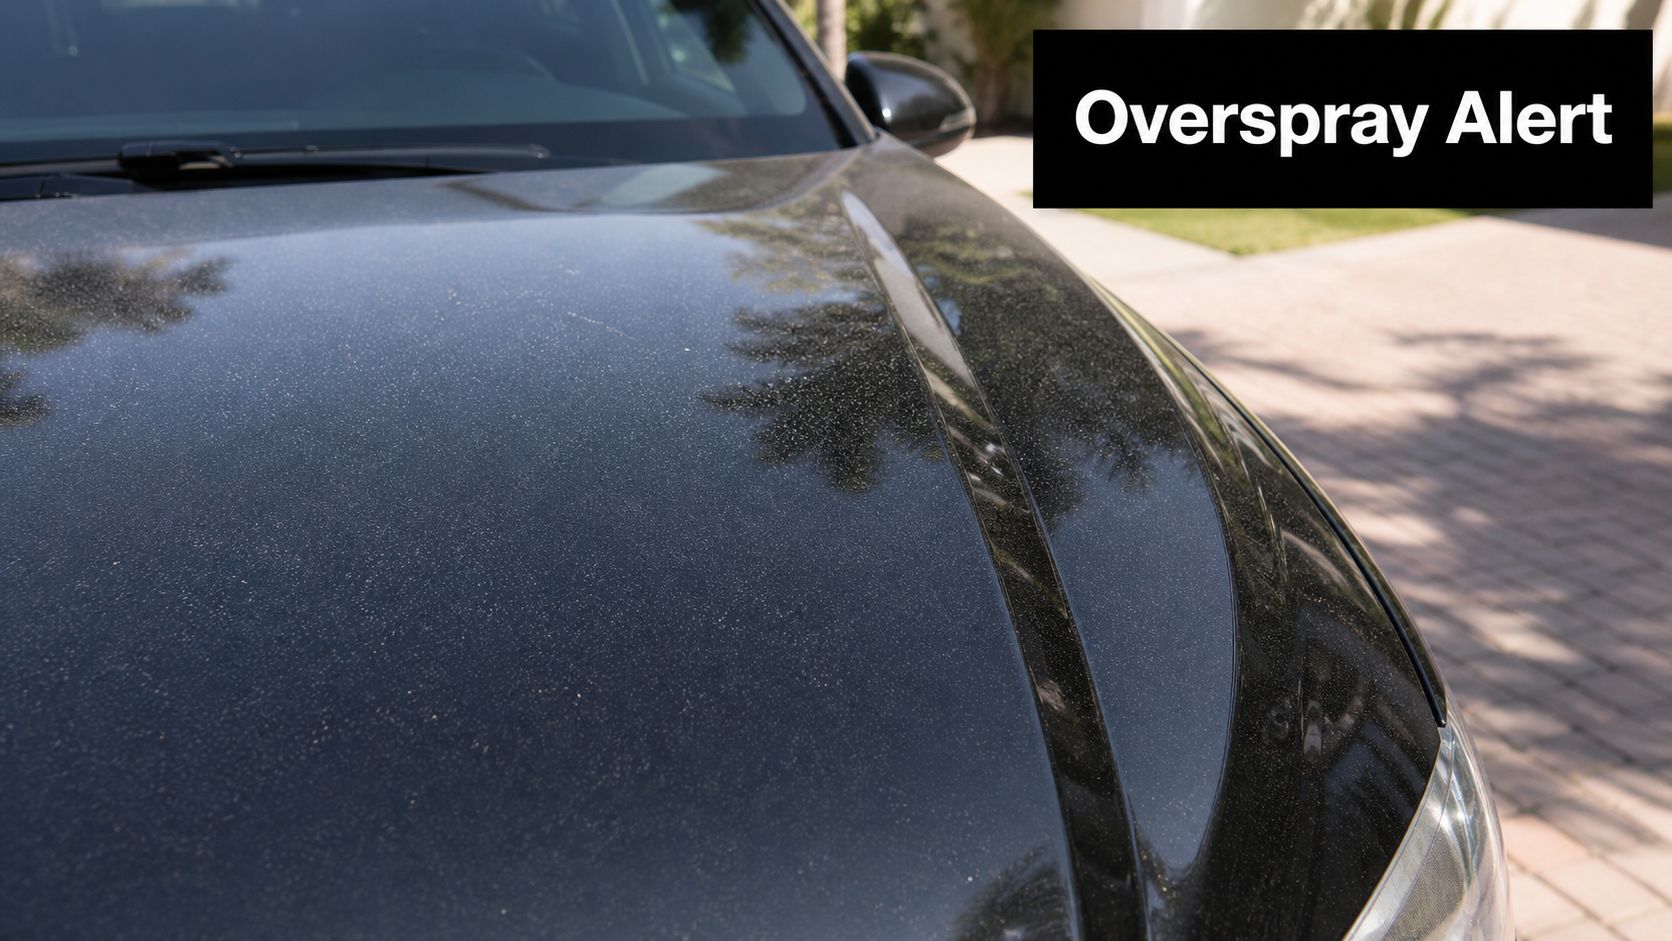
In South Florida, I'd treat it like a same-day problem whenever possible. A light mist on a car in Palm Beach Gardens or Wellington can sit in full sun, then harden enough that a simple wash won't touch it. On powder-coated shutters, pool cage framing, and marine surfaces, the longer it sits, the more likely someone reaches for the wrong chemical and creates a second problem.
Overspray isn't only house paint. It can include:
The primary issue is adhesion. Once the particles land and cure, removal becomes less about cleaning and more about controlled decontamination.
Act before the surface gets hot again. Early overspray removal is usually safer than late overspray removal.
One reason experienced painters obsess over containment is that prevention is cheaper than cleanup. A practical example outside Florida is our Auckland spray painting methods, which show how disciplined masking, setup, and spray control reduce drift before cleanup becomes necessary.
South Florida conditions punish delay. Sun exposure can bake residue onto dark paint, glass, and aluminum. Humidity doesn't make removal easier. It often leaves grime and airborne residue on the same surface, which increases the chance of scratching if you scrub too soon or too dry.
Spray foam overspray deserves extra caution because the cleanup risk changes depending on whether it's uncured or cured. If the material involved is insulation and you're worried about what was applied, it helps to understand spray foam insulation off-gassing before touching it with random solvents or blades.
Good overspray removal starts before you touch the surface. The wrong towel, the wrong solvent, or the wrong level of pressure can turn a removable defect into a scratched panel, hazed window, or stained trim piece. Build the kit around the surface you're trying to save.
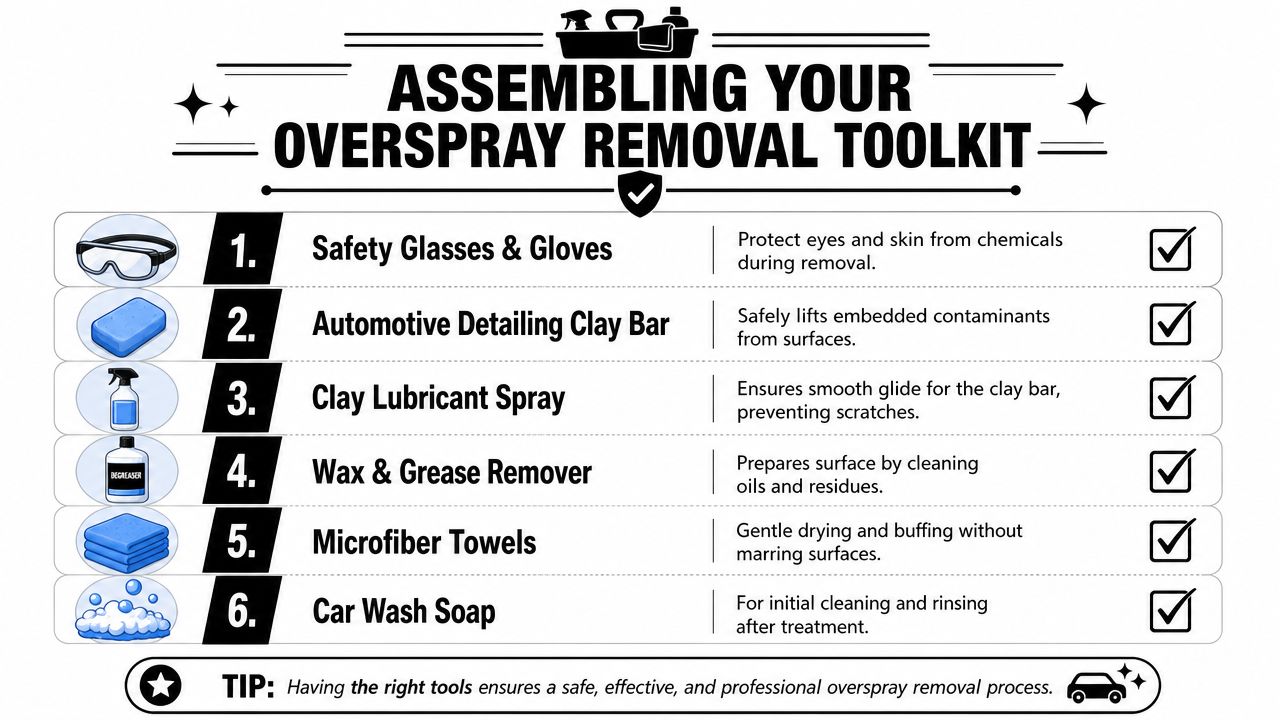
For automotive paint, delicate finishes, and many smooth hard surfaces, the foundation is simple:
If you're dealing with clear-coated vehicles, smooth shutters, or glossy metal, this basic setup handles a lot of common residential overspray.
Golden rule: Always test your chosen method on a small, hidden area first.
The biggest mistake is assuming one method works everywhere. That's especially risky on non-painted surfaces. Existing content often centers on automotive clearcoat, but there's a gap when people try to remove overspray from glass, vinyl wraps, matte finishes, and other sensitive materials. Some common solvents can chemically degrade vinyl wraps or strip matte finishes, and many guides don't specify safe dwell times or neutralization steps, as discussed in this overview of overspray concerns on non-painted surfaces.
That matters in South Florida because homeowners regularly deal with wrapped business vehicles, decorative films, pool-area glazing, and specialty finishes that don't forgive experimentation.
A more complete kit may include:
Household shortcuts usually aren't worth it. Kitchen scrub pads, steel wool on the wrong material, generic adhesive removers, and hot water can all make cleanup harder.
If the contamination involves insulation overspray, don't treat it like ordinary paint. There are health and material-handling reasons to slow down, especially if you're not sure what was sprayed. This background on whether insulation is dangerous is useful before you start cutting, scraping, or dissolving anything.
You see it all the time in South Florida. A car parked near a repaint, a boat sitting beside yard work, or hurricane shutters stacked near a spray job. By the time the specks show up in direct sun, the instinct is to scrub fast. That usually creates the second problem.
Different surfaces need different methods. Factory paint, marine gelcoat, side glass, chrome, rubber seals, and textured trim do not forgive the same mistakes. Start with the least aggressive method that can remove the contamination, then work up only if the surface allows it.
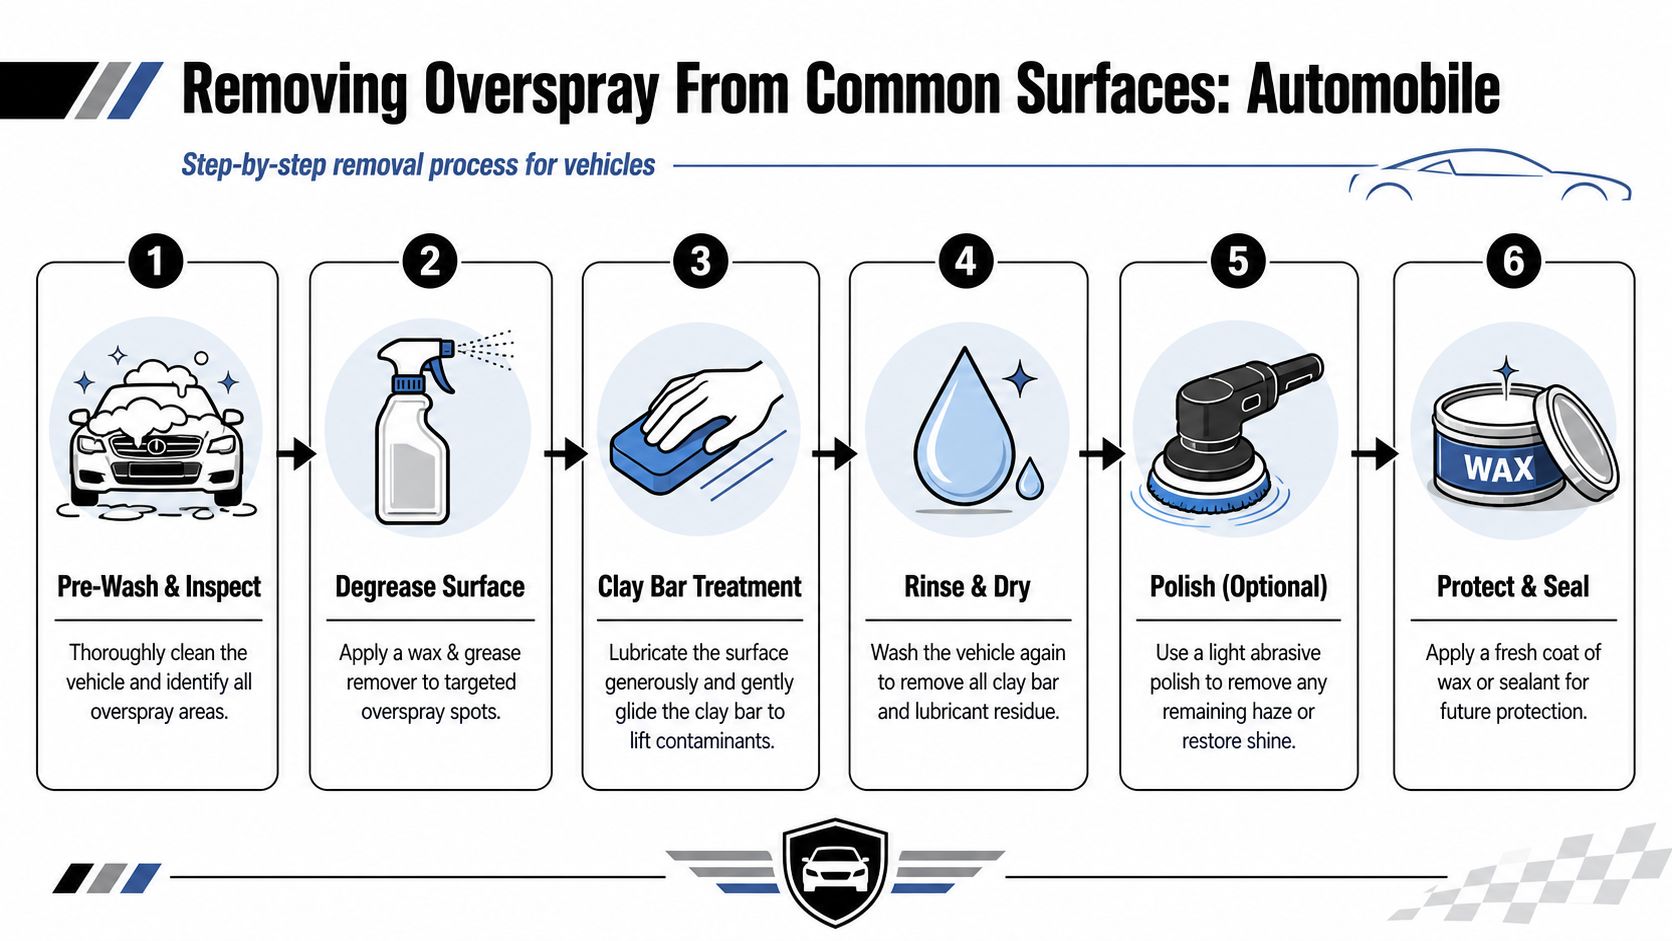
Clay is still the safest first method on many painted vehicles. That applies to cars, trucks, trailers, and a lot of painted metal parts, especially when the overspray sits on top of the finish instead of biting into it. I-CAR identifies clay removal as a standard correction method for refinished vehicles and warns against steel wool because it can scratch and leave metal residue behind, as outlined by I-CAR's overspray removal guidance.
Use a controlled process:
Here's a visual walkthrough if you want to see how a typical removal process is handled in practice.
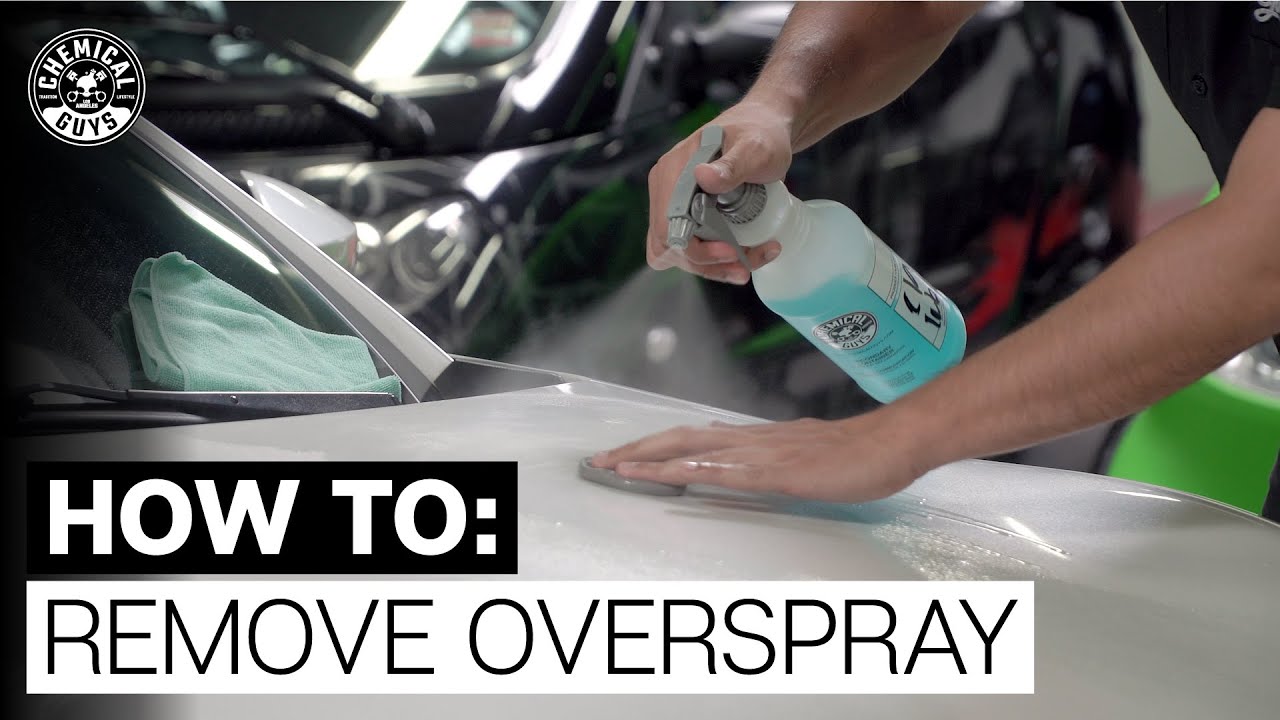
On boats and personal watercraft, use the same caution but respect the substrate. Some marine finishes respond well to clay. Oxidized gelcoat and older repaints may not. If the surface is already chalky or thin, correction can turn into refinishing in a hurry.
Glass gives you more margin than paint, but blade work still demands discipline. Scrape dry, hold the blade too steep, or catch debris under the edge, and you can score the surface. The National Glass Association notes that glass cleaning and scraping should be done with proper lubrication and controlled blade contact to reduce scratching risk, which lines up with what experienced techs already know in the field. Their guidance on safe scraper use is outlined in the NGA Glass Technical Paper on jobsite glass protection and cleaning.
Use this checklist on side glass, windshields, and some chrome surfaces:
For post-job cleanup around windows, tracks, and surrounding construction residue, these post-construction window cleaning best practices are worth reviewing because overspray often shows up with dust, adhesive residue, and other debris at the same time.
Chrome and polished trim need the same restraint. Start with wash media, clay if appropriate, and soft towels. Reach for metal polish only after the contamination is gone and only if the finish needs correction.
Rushed DIY work shows up for months. Textured trim can turn shiny in one spot and chalky in another. Rubber weatherstripping can swell, smear, or hold solvent odor long after the paint flecks are gone.
Start mild. Wash the area, use a microfiber towel, then work seams with a soft detailing brush. If residue remains, test a plastic-safe product in a hidden area before treating the visible face. On work trucks, pool enclosure doors, and shutter hardware, mixed materials sit side by side, so a cleaner that helps one part can stain the next one.
South Florida adds a few common problem areas. Overspray on hurricane shutters often lands across painted slats, plastic end caps, and rubber bumpers in the same assembly. Pool enclosures can have coated aluminum frames next to screening and plastic latch parts. Boats on trailers pick up contamination on gelcoat, anodized parts, vinyl, and rubber all at once. Slow work prevents a small cleanup from becoming a replacement job.
If the residue is foam insulation and not paint, stop and identify it before cutting or dissolving anything. Standard paint removal methods are not the right answer for cured foam on many surfaces. In those cases, a specialist service for spray foam insulation removal is often the safer move.
| Surface | Safer first step | Avoid |
|---|---|---|
| Automotive paint | Wash, lubricate, clay bar | Steel wool, dry rubbing |
| Glass | Lubricated scraping with a low blade angle | Dry blade use, random solvent mixing |
| Chrome | Gentle decontamination, soft towels | Aggressive pads |
| Plastic trim | Plastic-safe cleaner, soft brush | Harsh solvent guessing |
| Rubber seals | Mild cleaning, light agitation | Strong chemicals and abrasion |
House-related overspray removal is less forgiving than vehicle work because building materials vary so much. A stucco wall, aluminum shutter, vinyl fence panel, pool cage frame, and concrete driveway might all sit within a few feet of each other, but they don't respond the same way to pressure, solvent, or abrasion.
Latex and oil-based overspray on porous building materials tends to sink in. On brick, concrete, and stucco, removal success drops when the paint penetrates the surface. The recommended approach is an initial pressure wash to remove loose material, followed by abrasive pad scrubbing or fine steel wool agitation after applying a dwell-time-rated masonry paint remover, as described in this guide to managing overspray on commercial building substrates.
That general approach works on many Florida exteriors, but execution matters:
On decorative block walls and older stucco, expect uneven results. Some overspray sits on top. Some gets deep into pores and leaves faint ghosting even after careful removal.
Pool enclosures, powder-coated hurricane shutters, vinyl fencing, soffits, aluminum rails, and marine hardware need a lighter hand. Too much pressure can strip finish. The wrong solvent can stain the coating or dull the sheen. On powder-coated shutters, for example, it's usually smarter to begin with washing, soft microfiber work, and controlled spot testing rather than jumping straight to abrasive methods.
The surface value should dictate your aggression level. Expensive finish, gentle first move.
Boats deserve the same caution. Gelcoat can look tough, but bad chemistry and hard scrubbing can leave you with oxidation, haze, or a patchy gloss difference. If overspray landed on a hull, tower, or polished hardware, test in a hidden spot and avoid improvising with harsh reducers.
Spray foam overspray is its own category. If it's uncured, smearing it can spread the mess. If it's cured, aggressive scraping can gouge painted doors, windows, metal panels, and finished trim. On homes and commercial properties, that often turns a cleanup issue into a repair issue.
For that reason, foam contamination on finished surfaces usually calls for caution first and removal second. If the affected area is broad, visible, or attached to delicate finishes, it's smart to review foam insulation removal considerations before attempting any DIY cleanup.
The cheapest overspray removal job is the one that never happens. Most overspray problems come from rushed masking, poor wind judgment, weak containment, or spraying too close to vehicles and finished surfaces. In South Florida, afternoon gusts, tight lot lines, and open waterfront exposure make those mistakes show up fast.
Homeowners can reduce risk with a few simple moves:
Contractors and crews should be even more disciplined. Training matters because overspray isn't just cosmetic. An Oregon State analysis found that training programs to reduce paint overspray can save 179 gallons per facility annually, reduce cost by $7,430 per year after a $1,495 implementation cost, and produce a 0.2-year simple payback, according to Oregon State University's paint spray efficiency guidance.
That's a business lesson, but it applies on residential jobs too. Better setup prevents waste, rework, and claims.
DIY overspray removal makes sense when the contamination is light, the surface is forgiving, and you know exactly what landed there. It stops making sense when any of these are true:
If you're guessing between two chemicals, stop. The safer answer is usually not another chemical. It's a better process.
Professionals bring something DIY often can't. Surface identification, controlled methods, and the judgment to know when not to push a fix further.
You finish a wash, run your hand across the surface, and the grit is still there. On a South Florida vehicle, boat, shutter, or pool enclosure, that usually means the overspray has bonded hard from heat, sun, and time. At that point, the job is no longer simple cleanup. It is controlled correction.
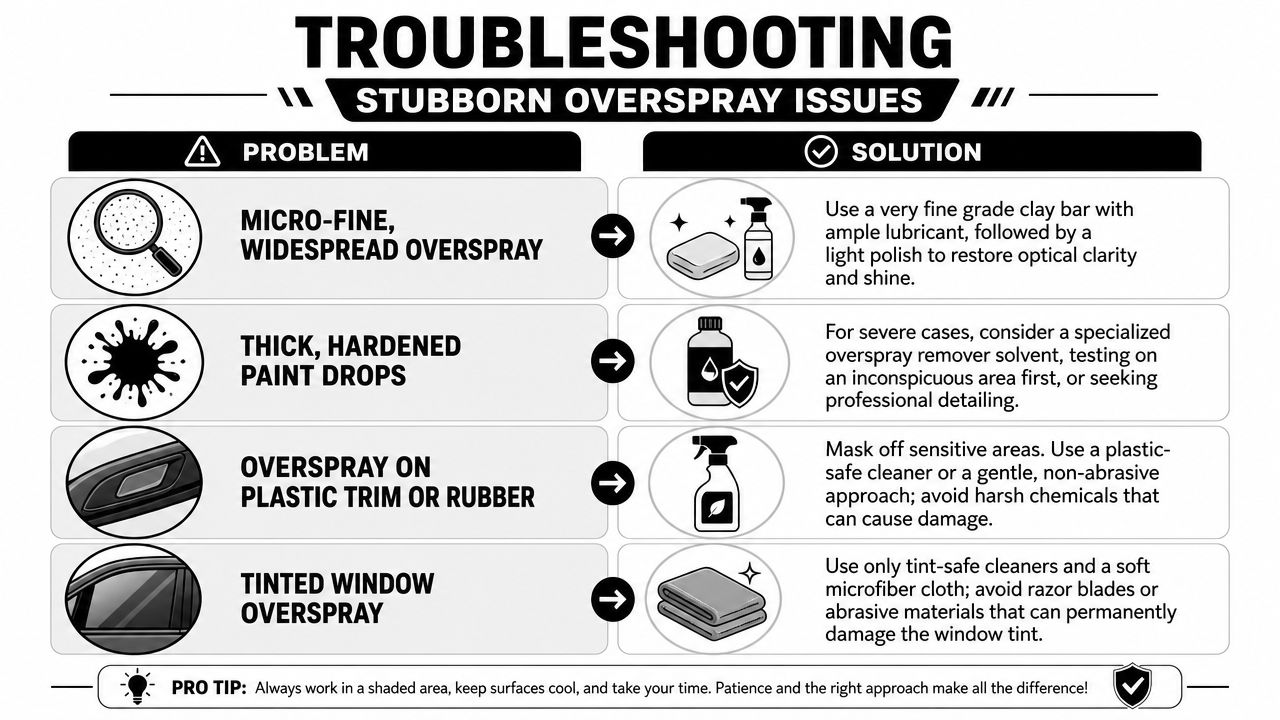
Cured overspray on automotive clearcoat can reach the point where washing, clay, and light polishing stop helping. The next step is often paint correction, and in severe cases that can include very fine wet-sanding followed by machine polishing. Manufacturers and refinish suppliers treat that as a thickness-sensitive repair. Once clearcoat is cut too far, the fix turns into repainting.
That is skilled work, not trial-and-error driveway work.
Use a simple decision line:
On dark vehicles, black shutters, and glossy marine finishes, aggressive sanding mistakes show fast in the South Florida sun.
Matte paint, vinyl wraps, gelcoat, tinted glass, anodized aluminum, and paint protection film all react differently. A method that works on a white work van can ruin a wrapped tailgate, haze a boat panel, or lift film near an edge.
I see this around hurricane shutters and pool enclosures too. Homeowners start with a scraper or hot solvent because the overspray looks thin. Then the finish turns dull, streaked, or permanently scratched. Boats are even less forgiving because gelcoat correction can get expensive fast.
If overspray sits near film edges or trim transitions, controlled removal matters more than speed. The same caution used in professional PPF removal in North Atlanta applies here. Reduce stress on the material, test first, and avoid forcing anything to release.
Spray foam overspray causes some of the worst cleanup damage I see. Once it cures, random solvent advice from forums and video comments can turn a small mess into a costly surface repair. Paint softens. Plastic clouds up. Powder-coated frames get scarred. On boats, the wrong cleaner can stain or dull the finish.
Keep these rules in place:
That matters on South Florida properties where overspray often lands on accordion shutters, impact window frames, screened pool cages, dock hardware, trailers, and consoles. One bad choice can spread the repair across several materials.
If the overspray is old, widespread, or stuck to a specialty surface, stop after washing and inspecting. That pause saves finishes. It also gives a local pro room to remove the contamination without correcting DIY damage first.
If you're dealing with spray foam overspray, insulation contamination, or a cleanup issue that could damage finished surfaces, Airtight Spray Foam Insulation is the local South Florida team to contact. They serve homeowners, builders, and property managers across Jupiter, Palm Beach Gardens, West Palm Beach, Wellington, and Stuart, and they understand how to handle foam-related problems with the care those surfaces require.