Blog
Quiet Your Space: How to Reduce Noise Between Rooms

If you're trying to work in one room while a TV bleeds through the wall, or you're lying in bed listening to footsteps, cabinet doors, or half-heard conversations from the next space, the problem usually isn't mysterious. It's building science. Sound is getting through a path that hasn't been blocked, sealed, or separated well enough.
In South Florida, that problem gets more complicated. We deal with humid air, block construction, metal buildings, garage conversions, and a lot of assemblies that look solid but still leak noise through joints, ducts, door undercuts, and framing connections. The fix isn't always expensive, but it does have to match the kind of noise you're hearing.
Some solutions are quick and worth doing this weekend. Others require opening walls and treating the assembly correctly. If you want to know how to reduce noise between rooms without wasting money on cosmetic fixes, start with diagnosis, then move from sealing to mass to decoupling and insulation.
Pinpointing Your Noise Problem Before You Spend a Dime
Many approaches to noise reduction begin incorrectly. People buy acoustic panels, hang curtains, or add something soft to the room, then wonder why they can still hear speech through the wall. That's because there are different kinds of noise, and they don't respond to the same fix.

Airborne noise versus impact noise
Airborne noise travels through the air first. Think voices, music, a television, barking, or a phone call on speaker. If you can make out words, you're usually dealing with airborne sound moving through a wall, ceiling, door, duct, or gap.
Impact noise starts as vibration in the structure. Footsteps overhead, a chair dragging, a slammed door, or something dropped on the floor falls into this category. Once the structure vibrates, that vibration reradiates as sound in the next room.
That distinction matters. A heavier wall helps with airborne sound. A decoupled ceiling or resilient bar system helps far more with structure-borne noise. A gap under the door can make either problem feel worse.
A fast field test you can do today
Walk the room and listen like a contractor, not a homeowner.
- Stand at the door perimeter: If the sound gets much louder near the edges or undercut, the door assembly is a weak point.
- Check outlets and switches on shared walls: These are common leak paths, especially back-to-back electrical boxes.
- Listen at HVAC grilles and returns: Ductwork often carries voices from room to room better than the wall does.
- Tap the wall and floor: If the wall feels light and hollow, it probably needs more mass or better cavity treatment. If the floor or ceiling transfers vibration, decoupling may matter more.
Practical rule: If you hear muffled sound, start with leaks. If you hear clear speech, the assembly itself probably isn't robust enough.
One core target helps frame the whole job. A 10 decibel reduction makes a space sound about 50% quieter to the human ear, according to DDS Acoustical's rules of thumb for noise mitigation. That doesn't mean every project gets there with one product. It means meaningful quiet usually comes from stacking the right methods, not guessing.
Why adding one thing often disappoints
Homeowners often assume "thicker wall equals quiet room." Sometimes. Not always.
If sound is slipping through an unsealed outlet, a duct boot, a door undercut, or a framing connection, adding one more layer to the middle of the wall may leave the weak point untouched. That's why the best soundproofing jobs follow order. First stop the leaks. Then increase resistance. Then break vibration paths if the noise is severe.
A room doesn't have to be rebuilt from scratch to improve. But it does have to be read correctly before money goes into the wrong fix.
The First Line of Defense Sealing Gaps and Leaks
Sound behaves a lot like air. It takes the easiest path available. In real houses, that path is often a tiny opening nobody notices until the room gets quiet and the noise becomes impossible to ignore.

A lot of inter-room noise problems improve once the obvious leaks are sealed. According to Ikoustic's soundproofing guidance, sealing gaps and flanking paths around doors, windows, and ductwork can reduce noise transmission by up to 15 dB, and even 1% unsealed area in a wall can cut soundproofing effectiveness by half.
That's why I usually start here before recommending heavier work.
Start with the door assembly
Interior doors are frequent offenders, especially hollow-core slabs with a big gap underneath.
Use this checklist:
- Door undercut: Install a quality door sweep if the gap at the bottom is obvious.
- Jamb perimeter: Add compressible weatherstripping where the slab meets the stop.
- Hollow-core door: If the room needs privacy, upgrading to a solid-core door is often more effective than decorating the wall beside it.
- Latch alignment: If the door doesn't pull tight to the stop, the weatherstripping won't do much.
A shared wall can be decent, but if the door leaks on all four sides, you'll still hear everything.
Seal the trim lines and penetrations
The next pass is small but important. Run a bead of acoustical caulk at cracks where casing, baseboard, and drywall meet if those joints are open. Standard painter's caulk isn't my first choice where sound control matters. Use a non-hardening acoustical sealant where possible so the joint stays flexible.
Electrical penetrations deserve extra attention.
- Outlet and switch plates: Remove covers and look for open gaps around the box.
- Back-to-back boxes: These are common on shared bedroom or bathroom walls and can leak a surprising amount of sound.
- Foam gaskets: Install outlet gaskets behind cover plates for an easy improvement.
- Acoustic putty pads: These are better when the wall is open or when the box is clearly part of the problem.
Soundproofing fails at the perimeter first. The field of the wall usually gets blamed, but the edges are where many rooms lose.
Don't ignore ducts and returns
If two rooms share duct runs, transfer grilles, or open return paths, sound can bypass the wall entirely. I've seen people add layers of drywall and still hear conversations because the actual path was the HVAC system.
Look for these conditions:
- Supply and return grilles placed back-to-back
- Open framing around duct boots
- Gaps where metal duct penetrates drywall
- Unsealed register boots in ceilings and walls
Seal the duct boot perimeter with appropriate sealant and make sure the grille opening isn't acting like a speaker between rooms. If the noise clearly follows the air system, that usually needs a more careful HVAC-aware fix.
Windows and room-to-room flanking
Interior room noise isn't always just interior. In South Florida homes, exterior noise can enter one room and be heard through another path entirely. Window frames, slider assemblies, and wall penetrations can all add to the sense that "the whole house is noisy."
This walkthrough gives a useful visual on sealing techniques before you open anything up:
A simple room-by-room sealing list
Before moving to more expensive upgrades, go room by room and check:
- At the door: sweep, weatherstripping, latch pull, slab type
- At outlets: gasket, box gaps, shared-wall placement
- At trim joints: acoustical caulk where visible cracks exist
- At vents and ducts: boot-to-drywall seal, noisy shared runs
- At windows: frame gaps, trim gaps, loose hardware
- At baseboards: open floor line cracks, especially on slab transitions
These fixes won't solve every serious noise complaint. They do something even better at the start. They expose whether the room's problem is mostly leakage, or whether you need to upgrade the wall or ceiling assembly itself.
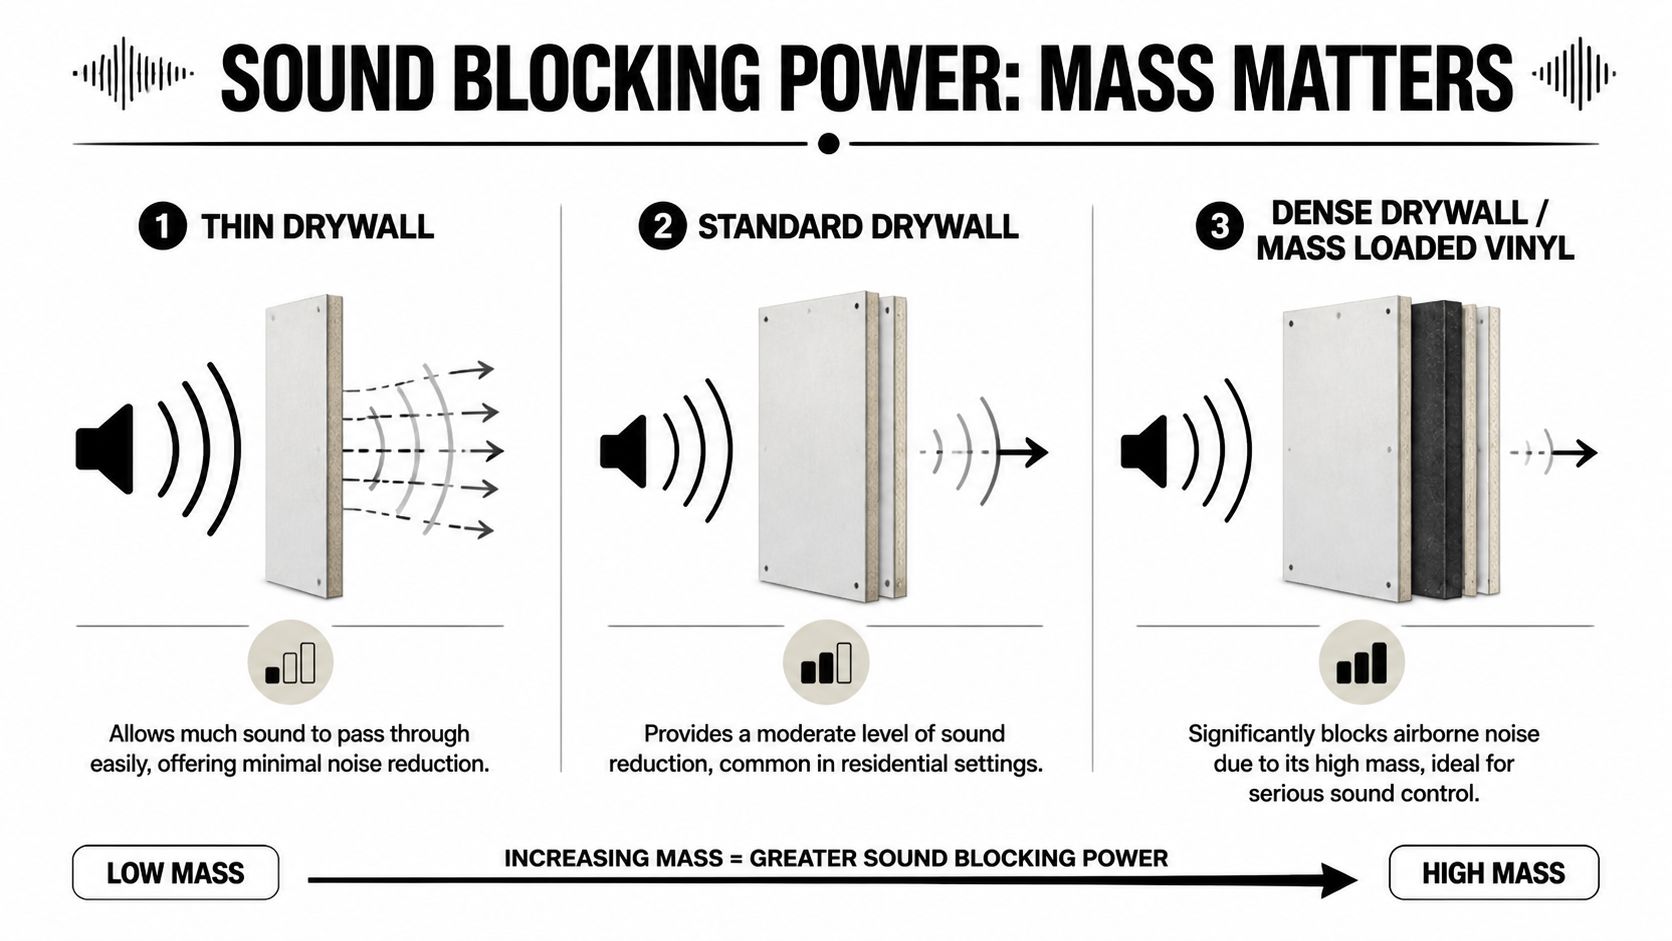
Adding Mass to Stop Airborne Sound
When clear speech comes through a wall, sealing alone usually won't get you where you want to go. At that point, the assembly needs more resistance. The basic idea is simple. Dense materials are harder for sound to move.
Think of airborne sound like someone pushing on a door. A flimsy door moves easily. A heavier one resists that push. Walls behave the same way.
What STC actually tells you
For airborne sound, the key rating is Sound Transmission Class, or STC. It's the common shorthand for how well a wall or ceiling assembly limits sound passing through it.
The most useful way to think about STC is practical, not academic.
- Around STC 35, normal speech is still audible.
- Around STC 50 to 55, privacy gets much better for typical room-to-room noise.
One of the more useful comparison points for wall cavities is that closed-cell spray foam can reach STC 50-55 when a 2×4 wall cavity is filled completely, while fiberglass batts are listed at STC 38-42 in the same comparison from CertainTeed's guide to reducing noise in a room. That same comparison notes up to 20-30% better noise reduction because spray foam seals the tiny gaps that let flanking sound through.
What adding mass looks like in the field
The usual options are a second layer of drywall, a damping compound between drywall layers, or a dense sheet material like mass-loaded vinyl. Each has a place.
Second layer of drywall
This is often the most straightforward upgrade on a shared wall.
Pros:
- familiar to most drywall crews
- adds meaningful density
- finishes cleanly for a residential room
Trade-offs:
- takes up a bit more space
- doesn't fix framing vibration by itself
- won't perform well if the perimeter stays unsealed
A useful rule from building acoustics is that doubling the mass of a partition wall increases STC by about 5 dB, as noted in the earlier acoustics reference. That's a real improvement, but not a miracle by itself.
Damping compound between layers
Products like Green Glue work by reducing vibration between two rigid layers. This is different from stacking more board.
Pros:
- helpful when you want more than just raw mass
- effective in speech-range complaints
- pairs well with a second layer of 5/8-inch drywall
Trade-offs:
- more labor and material coordination
- performance depends on correct application
- still needs sealed edges and good fastening practice
Mass-loaded vinyl
MLV is useful when space is tight or when you need a dense membrane in a layered assembly.
Pros:
- thin for the amount of mass it adds
- useful in selective wall or ceiling retrofits
- can help around problem areas and specialty assemblies
Trade-offs:
- fussy installation
- easy to compromise with poor seams or penetrations
- not my first pick as a standalone answer for a typical interior partition
Side-by-side comparison
| Wall Assembly | Estimated STC Rating | Best For |
|---|---|---|
| Standard interior wall | STC 35 | Basic partitions where privacy isn't a major concern |
| Wall with fiberglass batt insulation | STC 38-42 | Moderate airborne sound control on a budget |
| Wall with fully filled closed-cell spray foam | STC 50-55 | Better speech privacy and gap sealing in demanding rooms |
What works better than people expect
A common mistake is spending on decorative acoustic products when the issue is transmission through the assembly. Panels can reduce echo inside a room. They don't usually stop a neighboring room from hearing you through the wall.
If your noise problem also involves footsteps or noise from above, floor construction matters. A good practical primer on soundproof floors in Cumming, GA is worth reviewing because it explains why floor assemblies need a different approach than shared walls.
For wall-specific sound control, a more complete cavity-based approach matters. This overview of spray foam soundproof insulation is useful if you're comparing cavity fill options and want to see why sealing and density matter together.
A heavier wall helps. A heavier wall with leaks still disappoints.
If you can hear the words clearly, add mass. If you can still feel vibration after that, the next step is to break the connection carrying the vibration in the first place.
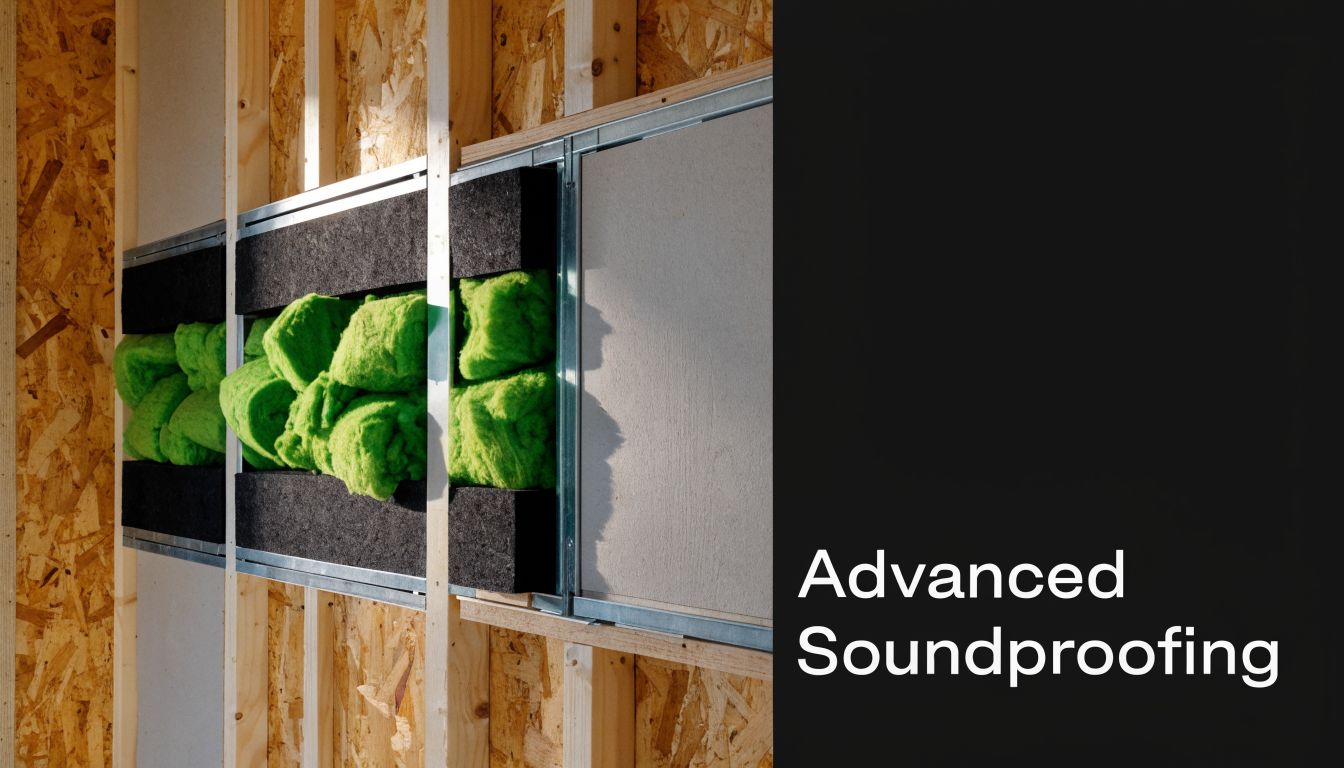
Advanced Soundproofing Decoupling and Insulation
Some noise problems don't respond well to a "just make it thicker" approach. That's especially true with upstairs footsteps, shared framing, metal studs, or rooms where one side of the wall vibrates with the other. In those cases, the job changes from blocking sound to interrupting vibration.
That's where decoupling earns its keep.
What decoupling means in plain English
If drywall is fastened directly to the same framing that receives the vibration, sound energy moves straight through the structure. Decoupling inserts a break in that path.
Common methods include:
- Resilient channels
- Resilient bar systems
- Isolation clips
- Staggered-stud walls
- Double-stud walls
The idea is the same in each case. One side of the assembly is not rigidly tied to the other in the usual way, so less vibration crosses the wall or ceiling.
This matters a lot in multifamily buildings, bonus rooms, garage apartments, and upstairs-downstairs complaints where structure-borne sound is the main issue.
Why resilient systems outperform direct attachment
A properly installed resilient bar assembly can make a dramatic difference. According to Sound Reduction's overview of top noise reduction methods, resilient bar systems can reduce impact noise by 25-35 dB and airborne noise by 15-20 dB. That same source notes that when the assembly is paired with open-cell spray foam in the cavity, with NRC 0.85, the hybrid system can achieve STC over 52.
Those numbers line up with what contractors see in the field when the framing break is respected. The performance comes from the system, not just the product list.
The install details that matter
Decoupling systems fail for boring reasons:
- screws that accidentally bridge into structure
- bars run the wrong direction
- boxes and pipes hard-connected through the isolated layer
- perimeter gaps left untreated
- cavity insulation skipped or installed carelessly
A resilient channel assembly isn't forgiving. If a crew treats it like standard drywall backing, the sound path comes right back.
If structure-borne noise is the complaint, direct-attached drywall usually isn't enough. You need a break in the path.
The insulation piece most people miss
Insulation has two different jobs in a sound wall. It can absorb sound within the cavity, and depending on the material, it can also seal air movement and add density. Those are not the same function.
Open-cell foam and closed-cell foam behave differently.
Open-cell spray foam
Open-cell foam is useful when sound absorption inside the cavity is the priority. It has a softer structure and performs well in the mid and high frequencies that often make speech and everyday living noise irritating. In a decoupled assembly, that absorption inside the cavity helps prevent the wall from acting like a drum.
Closed-cell spray foam
Closed-cell foam is denser and more rigid. It's often a better fit when you need multiple benefits from one material, especially in South Florida where moisture control matters too. It fills irregular cavities, limits air leakage, and contributes to a more solid assembly.
If you're comparing finish-side products to true isolation products, this breakdown of acoustic panel vs soundproof drywall is a useful reference because it shows why room treatment and transmission control aren't interchangeable.
The best assemblies combine methods
The quietest rooms don't rely on one trick. They stack principles.
A strong wall or ceiling assembly usually includes some mix of:
- Airtight edges and penetrations
- Cavity insulation that fills the space
- A decoupled finish layer
- Dense drywall layers
- A damping compound between rigid layers
- Careful detailing at outlets, ducts, and perimeters
That combination is why professionally built media rooms, office partitions, and bedroom walls feel different from standard builder-grade partitions. The work is less about one hero product and more about eliminating weak links.
Where this matters most in South Florida construction
A few local building types show these problems clearly.
Metal stud partitions in commercial spaces
Metal studs transmit vibration differently than many homeowners expect. They can create a light, springy partition that benefits from both cavity treatment and decoupling.
Garage conversions and flex rooms
These rooms often share framing with noisy utility zones, adjacent living spaces, or slab-connected hard surfaces. The result is a room that feels "live" and leaky at the same time.
Bedrooms under active second floors
Direct-attached ceilings often fall short in these scenarios. Footsteps, heel strike, furniture movement, and dropped items all point toward impact control, not just added drywall.
A good primer on insulation as a sound barrier helps connect these assembly choices if you're deciding whether cavity insulation alone is enough, or whether the room needs a fully integrated sound-control build.
What doesn't work nearly as well as people hope
A few things get oversold in noise discussions:
- Acoustic foam tiles on the wall: good for reducing echo inside a room, poor at stopping sound through a partition
- Thick paint or specialty coatings: not a serious fix for clear speech transfer
- One soft layer over a structural problem: rugs and fabrics help room tone, but they don't replace decoupling
- Partial cavity treatment: if the wall has voids, bypasses, or open penetrations, performance falls quickly
Serious soundproofing is assembly work. Once you see it that way, the decisions get easier. You're not shopping for a magic product. You're selecting the right combination of seal, mass, absorption, and separation for the way the building is carrying the noise.
South Florida Soundproofing Humidity and Metal Buildings
General soundproofing advice often ignores climate. In South Florida, that's a mistake.
Humidity changes how materials behave over time. A solution that looks fine on day one can lose ground when insulation sags, air leakage returns, or moisture starts affecting the assembly. That's one reason I don't like generic recommendations copied from dry-climate construction. They don't always hold up well in Jupiter, West Palm Beach, Wellington, or Stuart.
Why humidity changes the choice of material
In our climate, cavity materials need to do more than sit in place and absorb some sound. They also need to tolerate moisture exposure and maintain contact with the assembly. If insulation leaves voids, shrinks away, or loses shape, sound finds those weak points fast.
Closed-cell spray foam has a real advantage here. In humid South Florida conditions, it adds mass at 2.0 lbs/ft³, can achieve STC 50-55, and also works as a vapor barrier, according to Home Depot's soundproofing guide that includes the spray foam wall-assembly data. That same source notes 15-20 dB noise reduction in field tests on local metal buildings, along with 20-30% lower energy costs.
Those benefits matter because in this climate, thermal control, moisture control, and sound control often need to happen together.
Metal buildings are their own category
Metal buildings, workshops, garages, and warehouses are common across South Florida, and they have a very specific acoustic problem. The shell is light, reflective, and prone to vibration. Rain noise, wind, mechanical noise, and interior echo can all stack on top of each other.
A basic soft treatment inside a metal building rarely does enough. The better approach is usually to insulate directly against the metal shell so the assembly is treated at the source. That reduces vibration, limits condensation issues, and improves the way the whole structure sounds.
In metal buildings, the shell itself is often part of the noise problem. If you don't treat the shell, you're usually treating symptoms.
For owners comparing options, this page on insulation for metal buildings is useful because it focuses on the kind of assemblies common in our region.
Where standard advice falls short locally
South Florida also has plenty of CBS construction, mixed-material additions, and garage walls that transition into conditioned living space. On paper those walls can look solid. In reality, noise often gets around them through framed soffits, attic bypasses, duct chases, and shared ceiling cavities.
That means the local version of soundproofing has to account for moisture, air movement, and odd transitions between materials. If you skip that and treat it like a generic interior wall problem, the result is often a nicer-looking room that still isn't quiet enough.
Your Action Plan DIY Fixes vs Hiring a Professional
Not every noise problem needs a crew. Some do.
The right decision comes down to three questions. What kind of noise is it? How much disruption can you tolerate? How quiet do you need the room to become? By answering those questions, the path usually becomes clear.
Start with the least invasive fix that matches the problem
If the issue is light and you mostly hear muffled sound, a DIY pass makes sense first.
Good DIY candidates include:
- Door leakage: install weatherstripping, a sweep, or upgrade the slab if it's hollow-core
- Visible cracks and trim gaps: use acoustical caulk where the perimeter is open
- Outlet and switch leakage: add gaskets and address obvious openings
- Minor room harshness: soft furnishings can help with echo inside the room, even if they don't stop transmission through the wall
These are worth doing because they're inexpensive, practical, and often part of the final solution anyway.
Know when DIY stops being enough
DIY usually falls short when one of these is true:
- you can hear clear conversations
- the noise comes from footsteps or structure vibration
- the room shares ducts, joists, or framing paths
- the wall or ceiling likely needs new layers, decoupling, or cavity insulation
- moisture and building durability matter alongside sound control
Once drywall needs to come off, or once the assembly has to be rebuilt correctly, the quality of installation matters as much as the material choice. That's especially true with resilient channels, damping compounds, or spray foam. Small mistakes can wipe out a lot of the benefit.
A simple decision framework
Use this as a practical guide.
| Noise problem | Likely first move | DIY or pro |
|---|---|---|
| Muffled voices through a door or wall edge | Seal gaps, weatherstrip, caulk penetrations | DIY first |
| Clear speech through a shared wall | Add mass and improve the wall assembly | Often pro |
| Footsteps from above | Decouple ceiling and address impact path | Pro |
| Noise in a garage, workshop, or metal building | Treat shell and cavity, not just surfaces | Pro |
| Mixed comfort problem with noise plus humidity or hot rooms | Choose insulation strategy with air sealing | Pro |
What I tell homeowners and property managers
If your goal is "a little better," weekend fixes can help.
If your goal is privacy, sleep, a quiet office, or fewer tenant complaints, you need to think in assemblies. That means diagnosing the path, choosing the right combination of sealing, mass, and decoupling, and installing it without shortcuts.
Buy the product if you want. Buy the result if the room really matters.
That is the fundamental difference between DIY and professional soundproofing. DIY is product-based. Professional work is path-based. It starts with where the sound is traveling, then treats that route with the right method.
The best investment depends on the room
A nursery, bedroom, home office, therapy room, recording space, garage apartment, and multifamily unit don't all need the same level of treatment. A bedroom may get enough improvement from a solid-core door and better wall sealing. A home office next to a loud family room may need wall upgrades. A bedroom under an active second floor often needs ceiling decoupling, not just more insulation.
In South Florida, you also have to think about longevity. If a sound-control method creates moisture risk or doesn't hold its shape in humid conditions, it can lose performance over time. That's why the best answer isn't always the cheapest one on the shelf.
If you're not sure whether your problem is a simple leak issue or a full assembly issue, get it diagnosed before spending on random materials. That's how you avoid doing the same room twice.
If you're ready to solve room-to-room noise with a method that fits South Florida construction, Airtight Spray Foam Insulation can help you identify the sound path and recommend the right fix for walls, ceilings, garages, metal buildings, and retrofit projects. Their team serves homeowners, builders, and property managers across South Florida with professional spray foam solutions that improve sound control, air sealing, comfort, and moisture resistance. Request a free quote and get a practical plan that works.