Blog
How to Install Radiant Barrier in the Attic: FL Guide
If you're reading this in the middle of another brutal South Florida afternoon, you probably already know the pattern. The AC runs hard, the rooms under the roof never feel quite right, and the attic above your ceiling turns into the hottest part of the house.
That problem isn't just “bad insulation.” In many homes around Jupiter, Palm Beach Gardens, West Palm Beach, Wellington, and Stuart, the roof is loading the attic with radiant heat long before the ceiling drywall and ductwork get a chance to fight back. Learning how to install radiant barrier in the attic can help, but only if you install it for our climate, not for a dry-state attic guide that barely mentions humidity.
Your South Florida Attic a Radiant Heat Oven
A lot of homeowners notice the same clues first. The second floor feels warmer than the first. The hallway near the attic hatch feels muggy. The AC seems to run longest in late afternoon, even after the sun starts dropping.
That’s what a South Florida attic does when the roof keeps absorbing heat all day. The roof deck gets hammered by sun, then radiates that heat downward into the attic space, into the insulation, and into the ductwork.

If you've ever opened the attic hatch and felt a wave of heat hit you in the face, that’s the problem in plain terms. South Florida attics don’t just get hot. They stay hot, and they keep feeding that heat into the house when your cooling system is already working overtime.
What the barrier is actually doing
A radiant barrier isn't there to add bulk insulation value. Its job is different. It reflects radiant heat before that heat gets absorbed deeper into the attic assembly.
In warm, sunny climates like South Florida, properly installed radiant barriers can reduce summer cooling costs by 5% to 10% while reflecting up to 97% of radiant heat, and roofs can reach 160°F in hot conditions, according to this attic radiant barrier installation overview.
That matters most in homes with ductwork in the attic, uneven room temperatures, or older insulation that still has decent depth but keeps getting overwhelmed by roof heat. It also matters in houses where the attic setup makes summer attic temperatures a direct comfort problem, not just an energy-bill problem.
A radiant barrier works best when you treat it like part of a system. Roof heat, attic airflow, insulation depth, duct location, and humidity all interact.
In South Florida, that last part changes everything. A barrier that looks fine on paper can become a moisture problem if the attic can't breathe. That’s why the install method matters as much as the material itself.
Planning and Preparing Your Attic for Installation
By 10 a.m. in South Florida, an attic can already be punishing. Add low clearance, flex ducts, and humid air pushing in through every gap, and a simple foil job turns into a moisture and safety problem fast if the prep is sloppy.

Good results start with an attic inspection, not a material order. In this climate, I care less about how shiny the product looks in the store and more about whether the attic can shed heat and moisture after the barrier goes up.
Start with a real attic inspection
Check these conditions before you buy anything:
- Safe access and working room. If the attic is too tight to move without kneeling over ceiling drywall or tripping over truss webs, the install gets slow and mistake-prone.
- Vent openings and airflow path. Confirm soffit vents are open and the exhaust path is clear. Florida Solar Energy Center guidance on radiant barriers and attic systems lines up with what contractors see in the field. The barrier has to be installed without choking attic ventilation.
- Framing layout. Trusses, rafters, cross-bracing, and low hips all change how cleanly the foil can be stapled.
- Insulation condition. Wet insulation, rodent damage, mold, or badly compressed batts need attention first.
- Obstructions. Air handlers, duct trunks, can lights, bath fan housings, wiring bundles, and plumbing stacks all affect layout.
Humidity is the part homeowners underestimate. A radiant barrier can help with roof-driven heat, but it does not fix attic moisture, duct sweating, or house air leaking upward.
If the attic has obvious bypasses around top plates, bath fans, plumbing penetrations, or chases, address those before the foil goes up. This guide on sealing attic air leaks before insulation work explains why uncontrolled air movement can undercut the whole project.
Choose material for this climate
For South Florida, perforated radiant barrier is usually the safer choice. The perforations reduce the chance of trapping moisture where you do not want it, especially in vented attics that already deal with long cooling seasons and humid outdoor air.
Material selection should be boring and practical. Look for a product rated for attic staple-up use, sized for your framing, and tough enough not to tear every time it touches a truss plate or duct strap. If the foil is flimsy, installation quality drops fast.
Air space matters too. The foil needs adjacent air space to reflect radiant heat effectively. Press it tight against another surface and performance drops.
Measure the roofline, not just the attic floor
Floor area gives you a starting point. It does not tell you how much foil you need to run along the roof framing.
A simple example helps. A 55 x 35 ft attic has 1,925 square feet of floor area. The roof surface area for a staple-up install will be higher than that, sometimes much higher, depending on pitch, overbuilds, drop chords, valleys, and wasted cuts around mechanicals. In a clean, medium-pitch attic, ordering around 2,500 square feet of material is a reasonable planning range. A chopped-up attic can need more.
Measure in sections if the roof shape is irregular. That takes longer, but it beats stopping mid-job because the attic's actual layout did not match the sketch in your head.
Set up the work so you can finish it safely
Attic installs go bad when fatigue shows up before the last third of the job. Heat, dust, and overhead stapling wear people down fast.
Set the space up first:
- Walking surfaces. Use planks or stable boards where needed.
- Light. Add temporary lighting so you can see nails, wiring, and vent paths clearly.
- Protective gear. Gloves, eye protection, long sleeves, knee protection, and a respirator are worth it in a dirty attic.
- Work timing. Start early and stop early. South Florida attics are not forgiving by midday.
- Material staging. Bring in enough rolls, staples, blades, and extension cords before you start. Extra trips through a hot attic cost more energy than people expect.
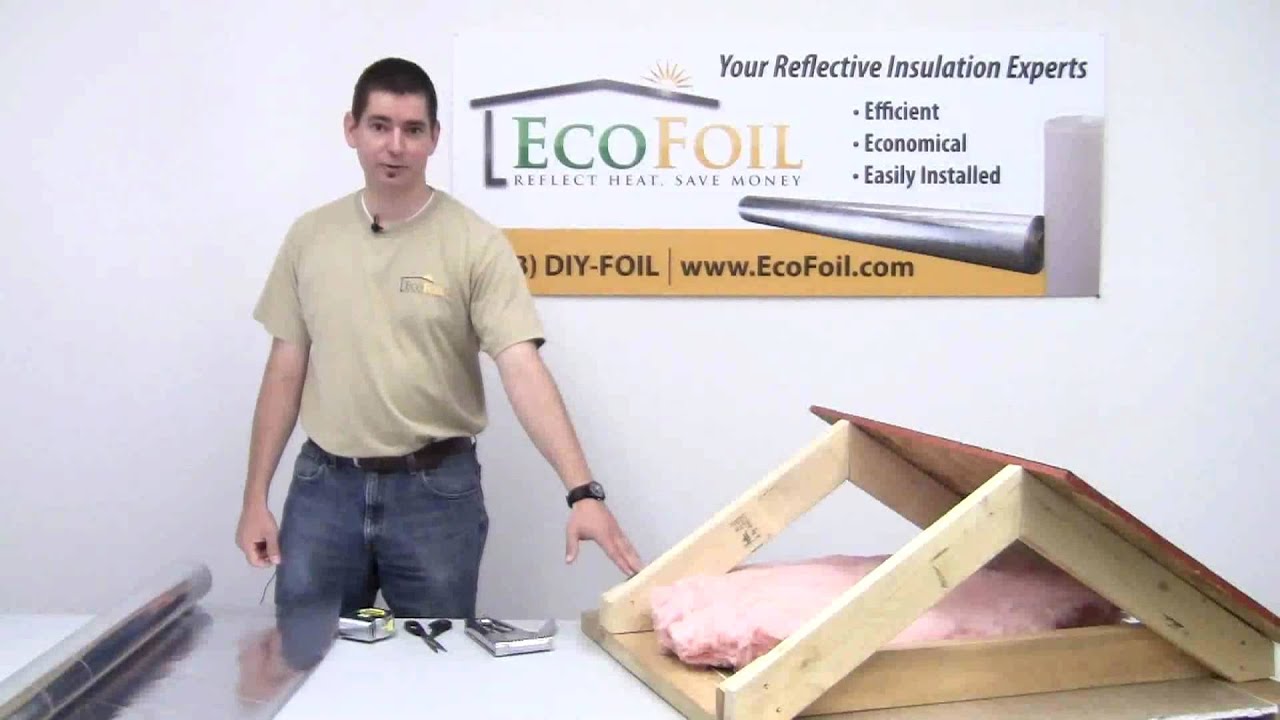
This walkthrough shows the staple-up layout process in a truss-framed attic, including how to route material around framing and keep vent paths open:
Define a good install before you start
A good install leaves the attic able to dry, keeps ventilation paths open, and gives the foil the air space it needs.
That standard matters in South Florida, especially in homes where the attic also has spray foam at the roof deck, partial foam with older insulation left in place, or ducts that already show signs of condensation. In those houses, the question is not just where the foil can go. It is whether foil belongs there at all. If you are unsure about the attic’s ventilation strategy or moisture behavior, get a pro involved before you staple up a single run.
Essential Tools and Materials for the Job
This is the part that separates a workable install from a miserable one. A radiant barrier job is repetitive, overhead, and awkward. Cheap tools slow you down and make bad fastening more likely.
If you’re shopping for this project, buy for control and durability, not just minimum cost. Humid attics expose weak materials fast.
Radiant Barrier Installation Checklist
| Item | Specification/Type | Pro Tip |
|---|---|---|
| Radiant barrier roll | Perforated foil radiant barrier sized for your framing layout | For South Florida attics, perforated material is the safer choice for moisture management. |
| Staple gun | Heavy-duty manual or powered staple gun | A powered stapler reduces fatigue on overhead runs and helps keep spacing consistent. |
| Staples | Staples compatible with your gun and attic framing | Keep extra boxes nearby. Running out in the attic wastes time and momentum. |
| Utility knife | Sharp utility knife with spare blades | Change blades often. Dull blades tear foil instead of cutting it cleanly. |
| Tape measure | Standard locking tape measure | Measure truss or rafter spacing in several spots. Don’t assume framing is perfectly uniform. |
| Straightedge or cutting surface | Scrap plywood or rigid board | Cleaner cuts make fitting around penetrations much easier. |
| Foil tape | Reflective foil tape for selected penetrations or detail areas | Don’t use tape as a default seam treatment in humid attics. Use it only where the detail calls for it. |
| Ladder | Stable attic-access ladder or work ladder | Set it before carrying rolls and tools up. Repositioning later gets old fast. |
| Work lights | Portable LED lighting | Better lighting helps you preserve vent openings and avoid wiring mistakes. |
| PPE | Gloves, eye protection, respirator, long sleeves | The foil edges, dust, and attic debris are rougher than most DIYers expect. |
What matters most in the material itself
The material choice drives the rest of the job. For most retrofit attics here, you want a perforated radiant barrier roll intended for staple-up use.
If you're also trying to understand where reflective foil fits compared with moisture-control layers, this primer on vapour barrier and insulation is worth reading before you buy. A radiant barrier and a vapor-control strategy are not the same thing, and confusing them causes problems.
Tools that make the install cleaner
A few items aren't technically mandatory, but they make a big difference:
- A roll holder or caddy helps keep long runs from twisting while you work overhead.
- Marker or carpenter’s pencil lets you mark cuts around vents, pipes, and truss webs.
- Knee pads are worth it if you’ll be moving across framing for any length of time.
- Small pry tool helps remove and reset a bad section without shredding the foil.
Practical rule: If a tool helps you keep the foil flat where it should be flat, slack where it should sag, and clear where it should vent, it’s worth bringing.
Don’t buy the wrong “upgrade”
Homeowners often assume heavier, non-perforated, or fully sealed products must be better. In a humid attic, that assumption can backfire.
The best shopping decision is usually the one that supports the right installation method. That means staple-up compatible, perforated, easy to cut, and durable enough to stay in place without constant rework.
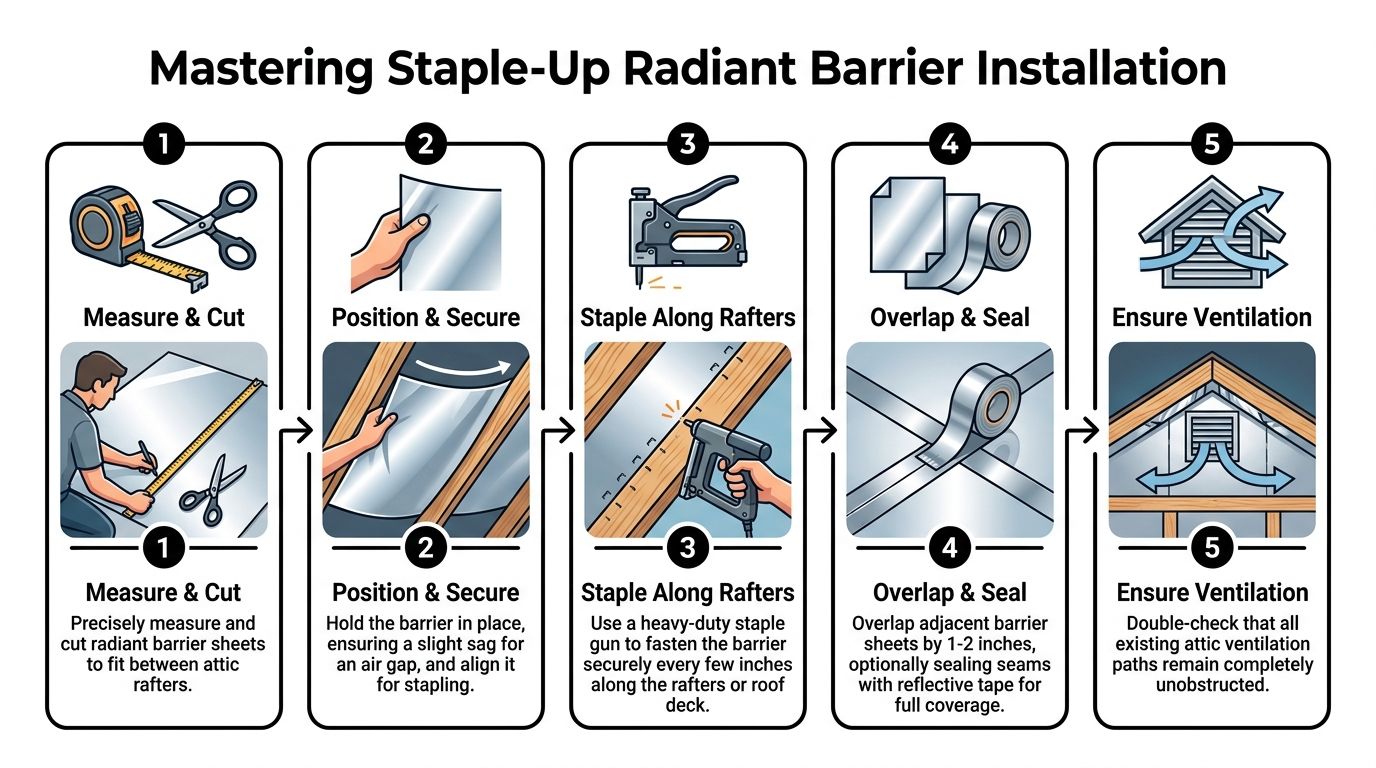
Mastering the Staple-Up Installation Method
For most existing South Florida homes, the staple-up method is the right approach. It puts the radiant barrier where it can intercept heat coming off the roof, while keeping an air space that lets the foil work.
Floor-laid foil has its place in limited situations, but it doesn’t address roof-side radiant load the same way. If the goal is better performance in a retrofit attic, staple-up is usually the move.
Position the first run correctly
Start low near the eaves, but don’t choke off the soffit intake. The barrier needs to stay clear of the vent path.
For truss-framed attics common in South Florida, use perforated radiant barrier, install it with the shiny side down toward the attic floor, create a 2" sag between trusses for airflow, staple to the underside of the bottom truss chords every 14-18", and overlap runs by 2-3" without taping to avoid moisture trapping, as described in this truss-attic installation guide.
That one paragraph contains most of the job’s essential requirements. Orientation matters. Sag matters. Staple spacing matters. Leaving seams untaped matters in a humid attic.
Work upward in clean horizontal runs
Once the first course is in, move upward a run at a time. Keep the material controlled, not stretched drum-tight.
A slight droop is what creates the working air space. If you pull the foil hard and flatten it against framing or sheathing, you’re giving away performance.
On rafters versus trusses
The exact fastening point changes with the framing, but the principle stays the same. You want the foil secured to the underside of the framing members so the reflective face looks down into the attic space.
In conventional rafter attics, that often means running sections horizontally across the underside of rafters. In truss-framed attics, the geometry can force more cuts and more patience around webs and bracing.
Leave the right clearances
Improper clearance often leads to DIY installation errors. The attic still has to breathe when you’re done.
Keep these areas open:
- Soffit vent paths so intake air can still enter
- Upper exhaust paths near the ridge or other designed exhaust locations
- Obstructions and penetrations that need to stay accessible or dry
- Insulation contact points where the foil should not lie directly on top of attic floor insulation
Some guidance for staple-up installs calls for a 1-3 inch air gap from the roof deck, a 3-6 inch gap at the peak, and about 6 inches horizontally between sections in certain layouts, with seams overlapped 1-2 inches and fastened with 3-4 staples per rafter crossing in the staple-up approach noted in the earlier installation reference. The exact geometry depends on your framing, but the principle is simple. Leave air pathways open and don’t let the foil collapse onto other materials.
The neatest-looking install is not always the best install. The best install preserves airflow first.
Cut around penetrations without creating trouble
Pipes, wiring, vents, and framing intersections are where jobs get messy. Don’t rush these cuts.
Use a marker, cut the foil slightly oversized where needed, and fit around the obstruction so the material stays attached and stable. If you have to detail around a vent or penetration, be selective with foil tape. This is a detail tool, not a blanket seam strategy in a humid attic.
A practical sequence that works
- Measure the bay or run before lifting the material overhead.
- Pre-cut on a stable surface rather than freehand in the attic.
- Dry-fit the piece if the section includes obstructions.
- Staple one side lightly first so you can adjust sag.
- Finish fastening once the run is aligned and vent clearances look right.
This sequence cuts down on wasted material and bad rework.
Don’t crowd the peak
A common mistake is trying to make the attic look fully wrapped from eave to ridge. That can interfere with the upper airflow path.
Leave the top area open as the roof design requires. In many attics, that means maintaining a gap near the peak so air can move and moisture doesn’t hang up high in the roof assembly.
Existing homes and steep attics take more judgment
Older retrofits are rarely symmetrical. One side of the attic may have a low work zone while the other side is interrupted by ducts or a platform. Steeper roofs also increase material demand and make overhead handling more awkward.
If the attic is tall enough to require different staple-up patterns, or if the framing changes across the roof, slow down and treat each section as its own install field. Consistency matters more than speed.
Final walk-through before you call it done
Before you leave the attic, inspect your own work like a contractor would.
Look for:
- Blocked soffits
- Foil touching insulation where it shouldn't
- Runs pulled too tight
- Loose edges
- Missed overlaps
- Tape used where open overlap would have been better
- Cuts around penetrations that invite condensation or damage
A good staple-up install should look intentional, but not overworked. The material should stay secure, preserve ventilation, and maintain the air space that gives the foil a reason to be there.
Pairing Radiant Barrier with Spray Foam Insulation
A radiant barrier handles one part of the problem. In South Florida, that’s often not enough by itself.
The attic doesn’t just deal with radiant heat. It also deals with humid air movement, leakage around penetrations, and temperature swings that hit ducts and ceiling assemblies from multiple directions. That’s why the best-performing attic strategies here often combine reflective control with air sealing.
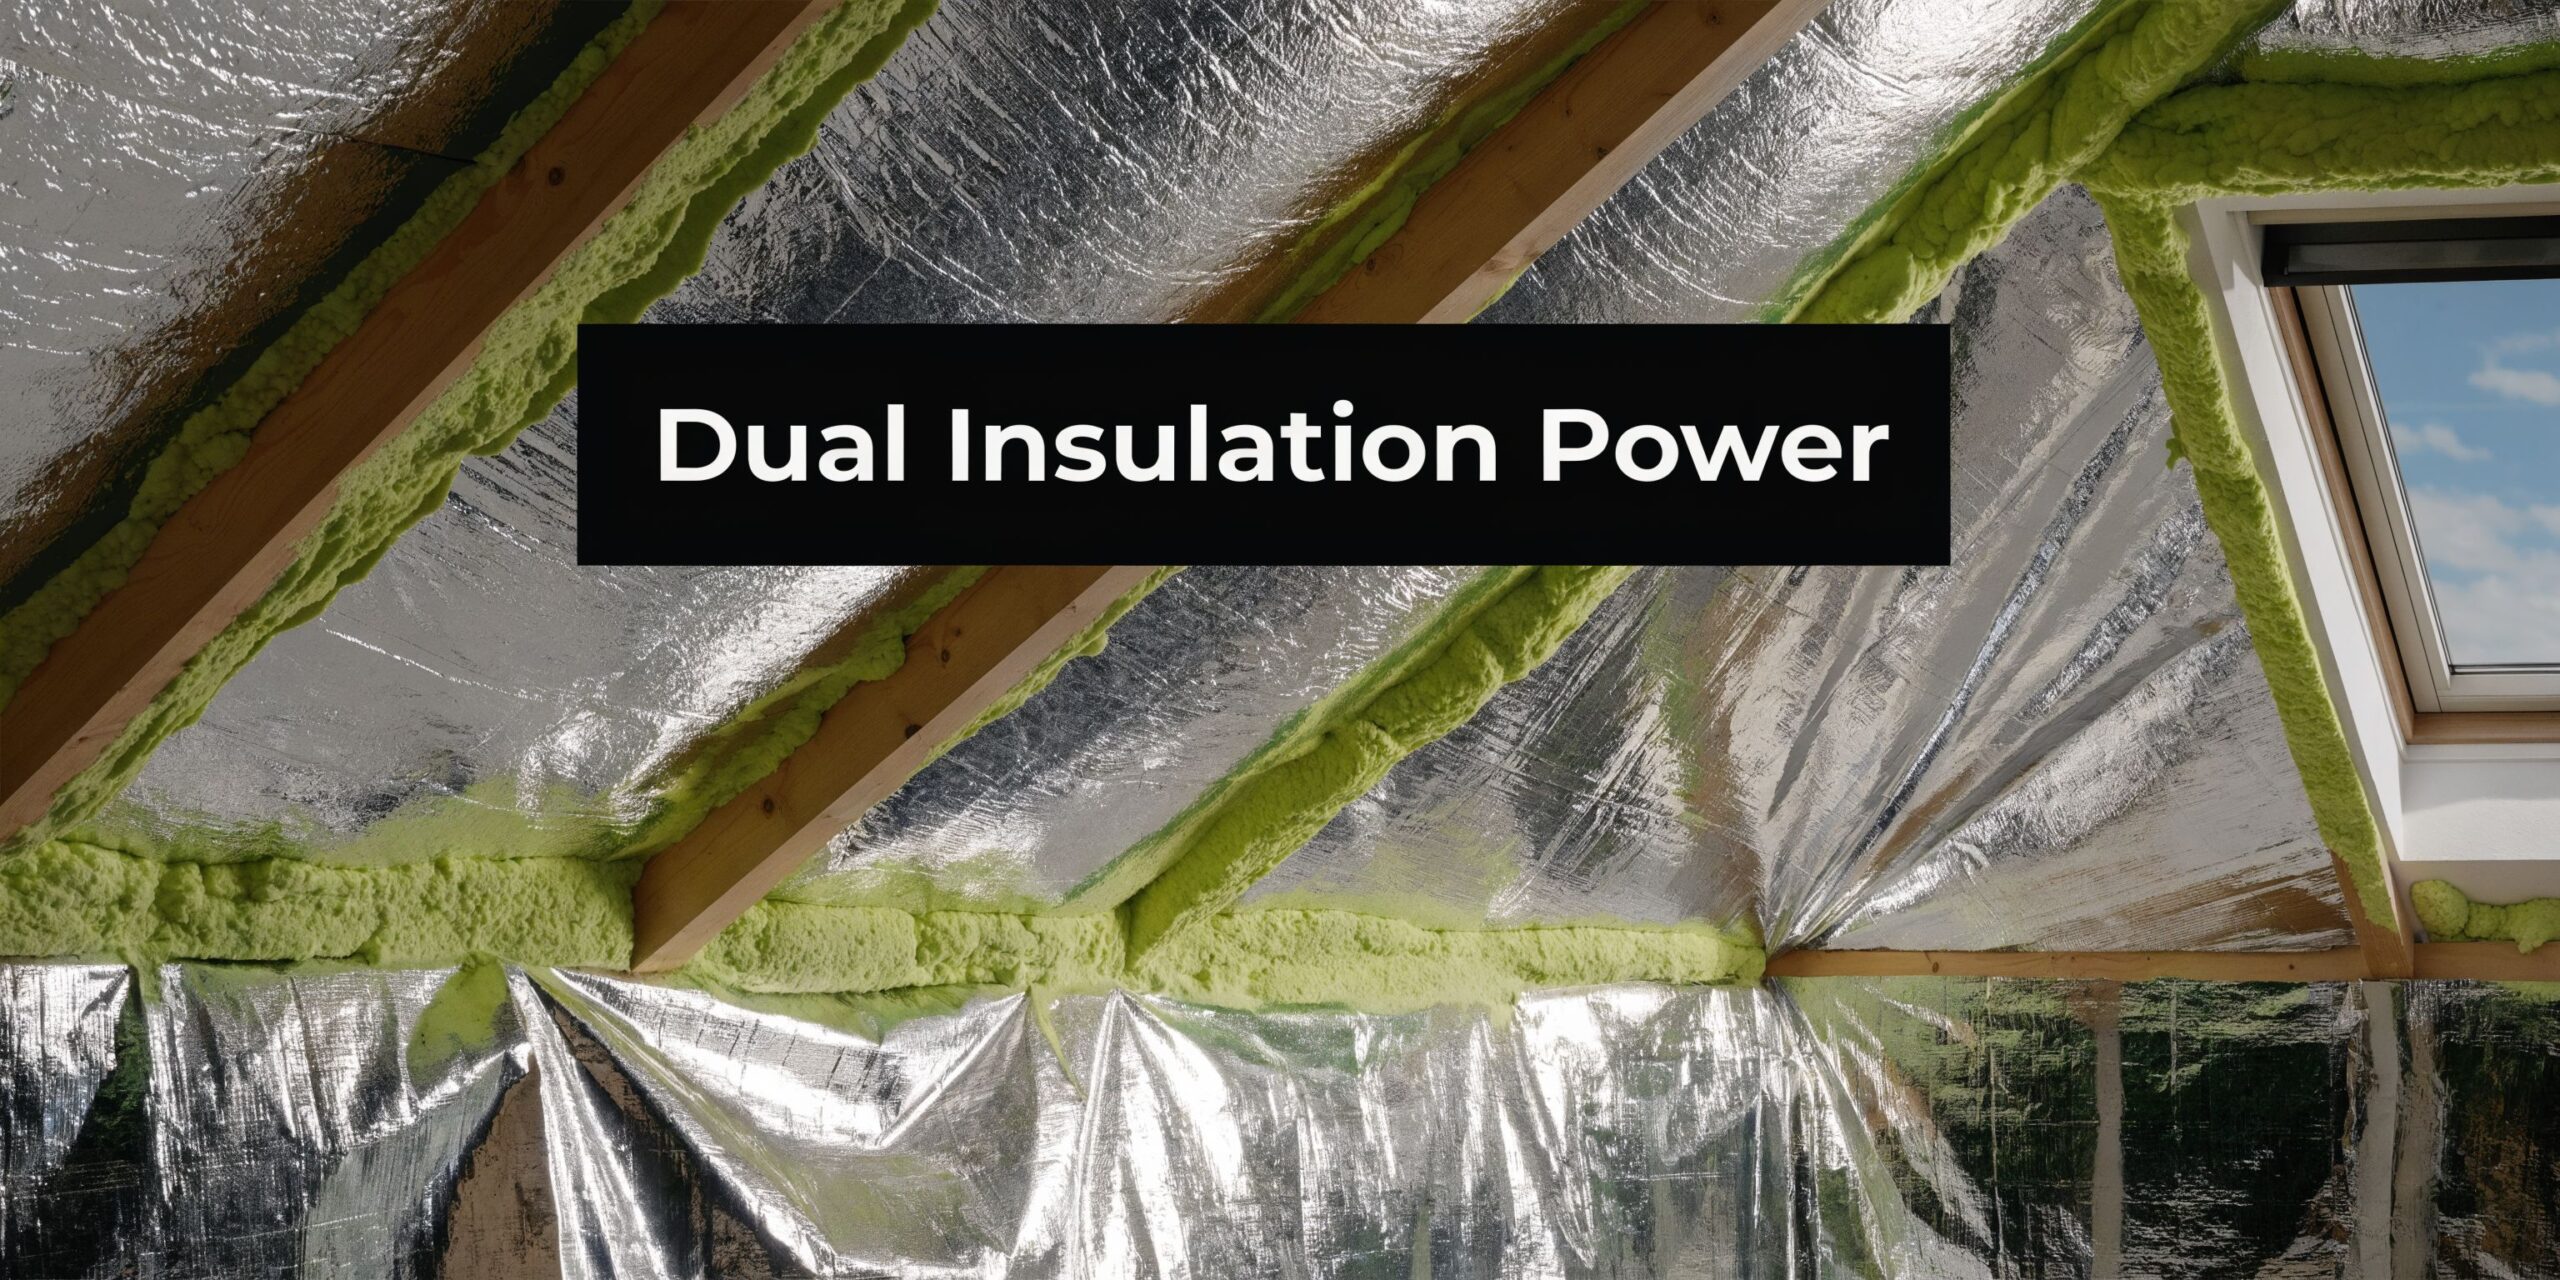
Why the hybrid approach makes sense
Radiant barrier reflects heat. Spray foam seals gaps and reduces air movement through the assembly.
That combination matters in a coastal, humid region because moisture problems rarely arrive through one pathway only. A reflective layer can reduce roof-driven heat gain, but it won’t close the cracks and leakage routes that let hot, damp air move where it shouldn’t.
In high-humidity subtropical climates like South Florida, professional closed-cell spray foam can outperform standalone radiant barriers at air sealing. According to this South Florida attic installation discussion, Florida Solar Energy Center tests show spray foam can reduce AC loads by 25-40%, compared with 10-16% for foil alone.
Where each product helps
A straightforward summary:
| Component | Best role in the attic |
|---|---|
| Radiant barrier | Reflects radiant heat from the roof before it loads the attic further |
| Spray foam | Seals leakage paths and helps control heat and moisture movement through gaps and surfaces |
| Existing bulk insulation | Slows conductive heat flow through the ceiling assembly |
This is why the hybrid setup often feels more complete in real houses. You’re not asking one product to solve every attic problem.
Good fit scenarios for combining them
The hybrid approach is usually worth serious consideration when:
- Ductwork runs through the attic and you want to reduce the heat load around it
- The house feels humid even when it cools
- You have noticeable air leakage around top plates, penetrations, or attic hatches
- The attic has the ventilation to support a proper radiant barrier install
- You’re remodeling or building new, so access is easier and details can be handled cleanly
If HVAC performance is part of the conversation, it also helps to understand how equipment choice and attic conditions interact. This guide on the best HVAC system for Florida is useful because the right equipment still depends on the envelope doing its job.
A stronger HVAC system can't fully compensate for a hot, leaky, humid attic. It just works harder inside the same problem.
When foil alone isn't enough
If the attic has obvious air leakage, moisture staining, or comfort issues tied to infiltration, foil-only thinking usually falls short. The reflective surface may still help, but the house can continue pulling in unwanted heat and humidity through bypasses the foil doesn't address.
That’s where professional judgment matters. The right answer isn’t always “more radiant barrier.” Sometimes it’s “seal the assembly first, then decide what reflective layer belongs in the system.”
Avoiding Common Installation Mistakes
Radiant barrier jobs usually fail at the details. In South Florida, those details matter even more because the attic is dealing with extreme solar load and a lot of moisture at the same time. A foil product that is installed the wrong way can leave you with disappointing heat control, trapped humidity, or both.
I see the same installation errors over and over.
Keep vent paths open
A staple-up job should never choke off soffit intake or interfere with ridge, gable, or other exhaust paths. If air cannot move through the attic as designed, humidity hangs around longer, roof sheathing stays wetter, and the attic gets harder to dry after our long humid days and sudden rain cycles.
Before the first staple goes in, trace the intake and exhaust path. If the route is not obvious, stop and figure that out first. Foil should follow the framing without covering the openings that let the roof system breathe.
What happens when you skip the air gap?
The reflective surface only works when it faces an air space. The U.S. Department of Energy notes that a radiant barrier must face an open air space to reduce radiant heat transfer, which is why staple-up installations are usually more effective than laying foil in contact with other materials in a Florida attic. See the DOE guidance on radiant barriers and reflective insulation.
This is the mistake that catches a lot of DIY installs. Foil pressed flat to the roof deck, or stretched so tightly that it loses separation, gives up much of the benefit you paid for. Leave the space. That gap is doing the work.
Don't treat foil like a moisture membrane
Many homeowners tape every seam because it feels cleaner and more complete. In a humid attic, that instinct can backfire, especially if the product is non-perforated or the attic already has marginal ventilation.
Use a perforated radiant barrier for attic staple-up work in this climate unless the assembly has been designed differently for a specific reason. Overlap runs as the manufacturer calls for, but do not assume every joint needs tape. A radiant barrier is not housewrap, and it is not a vapor barrier. Installing it as if it were one can slow drying and create the kind of hidden moisture problem that shows up months later as staining, musty odor, or mold around framing connections.
Floor installs are often the wrong shortcut
Rolling foil across the attic floor looks easy, and on paper it sounds logical. In practice, it is often the wrong move for South Florida retrofits.
Once the foil is lying directly on insulation, performance drops because the reflective face is no longer positioned where it can do the most good against roof-driven radiant heat. It can also make future attic work more awkward and hide issues underneath. If the goal is to reduce the heat load coming off a superheated roof deck, staple-up is usually the better approach.
Product choice and sequencing matter
A radiant barrier has to match the attic assembly. That is especially true if spray foam is already in the plan, or if part of the roofline has been foamed and part has not. I have seen homeowners buy a foil product first and ask questions later, only to find out the perforation, placement, or fastening method does not fit how the attic dries.
If you are combining trades, make sure each contractor understands how the system is supposed to work. Homeowners should also understand Florida contractor insurance before hiring anyone to work overhead in an attic, especially when insulation, roofing, and HVAC details overlap.
Bad radiant barrier installs are usually not dramatic on day one. They show up as an attic that still runs hot, ductwork that still sweats, or moisture that does not clear the way it should. That is why careful layout matters more than speed.
When to DIY and When to Call a Professional
Some radiant barrier jobs are realistic DIY projects. Some aren't. The hard part is knowing the difference before you’re halfway into the attic with a staple gun and a roll of foil catching on every truss web.
DIY makes sense when
A homeowner with patience can handle this if the attic is straightforward:
- Easy access
- Simple framing
- Clear ventilation paths
- Minimal obstructions
- No existing moisture or mold concerns
- Enough room to move and staple safely
If that’s your attic, and you’re comfortable working overhead in heat, a careful staple-up install is possible.
Call a pro when complexity starts stacking up
You should seriously consider professional help if the attic has:
- Tight or dangerous access
- Complex truss geometry
- Heavy ductwork or air handlers in the way
- Ventilation issues that need correction first
- Evidence of moisture trouble
- A plan to combine radiant barrier with spray foam
That last one matters. Hybrid systems depend on sequence, material compatibility, and building-science judgment. If you want the attic to perform as a full system, not just hold foil, professional installation is usually the smarter path.
Vet the contractor, not just the price
When you hire someone, ask how they handle vent clearances, perforated foil selection, seam treatment, and foil-to-insulation separation. Ask what they do in humid attics specifically.
It also helps to understand Florida contractor insurance before signing anything, especially for attic work that involves ladders, overhead fastening, and insulation upgrades inside an occupied home.
The right installer should be able to explain the why behind each choice, not just promise a cooler attic.
If you want expert help designing the right attic solution for South Florida heat and humidity, Airtight Spray Foam Insulation can help you evaluate whether radiant barrier, spray foam, or a hybrid approach makes the most sense for your home or building. Their team serves Jupiter, Palm Beach Gardens, West Palm Beach, Wellington, Stuart, and surrounding areas with attic-focused recommendations built for real Florida conditions.