Blog
Radiant Barrier Insulation in Attic Energy Savings Guide
Think of radiant barrier insulation as a high-tech sunshade for your home. It’s a super-reflective material, usually a specialized aluminum foil, that stops radiant heat from the sun dead in its tracks. By preventing that heat from ever soaking into your attic, it keeps your living space below much, much cooler. This direct defense against solar heat gain makes it a game-changer for energy savings, especially here in South Florida.
What Is Radiant Barrier Insulation and How Does It Work?
You know that feeling when you get into a car that’s been baking in a Florida parking lot? The air is brutal, but the dashboard is even hotter because it’s been absorbing direct sunlight for hours. Now, what if you had put one of those shiny, reflective sunshades in the windshield? The car is still warm, of course, but the dashboard is dramatically cooler. Why? The sunshade didn’t just slow the heat down—it bounced it right back out.
That’s the perfect way to understand how a radiant barrier works in your attic. It doesn’t try to slow down heat transfer like traditional insulation; it reflects it away entirely.
The Three Ways Heat Moves
To really get why this matters, it helps to remember the three ways heat gets from one place to another:
- Conduction: Heat moving through direct touch. It’s why the handle of a metal spoon gets hot when you leave it in a pot of soup.
- Convection: Heat moving through air or water. This is what causes hot air to rise up to your attic.
- Radiation: Heat traveling through empty space as electromagnetic waves. This is the heat you feel from the sun or a campfire, even from feet away.
Traditional insulation like fiberglass and cellulose is designed to trap air pockets, which slows down conduction and convection. A radiant barrier, on the other hand, is a specialist. Its one and only job is to stop radiant heat.
This illustration shows just how simple and effective the concept is.
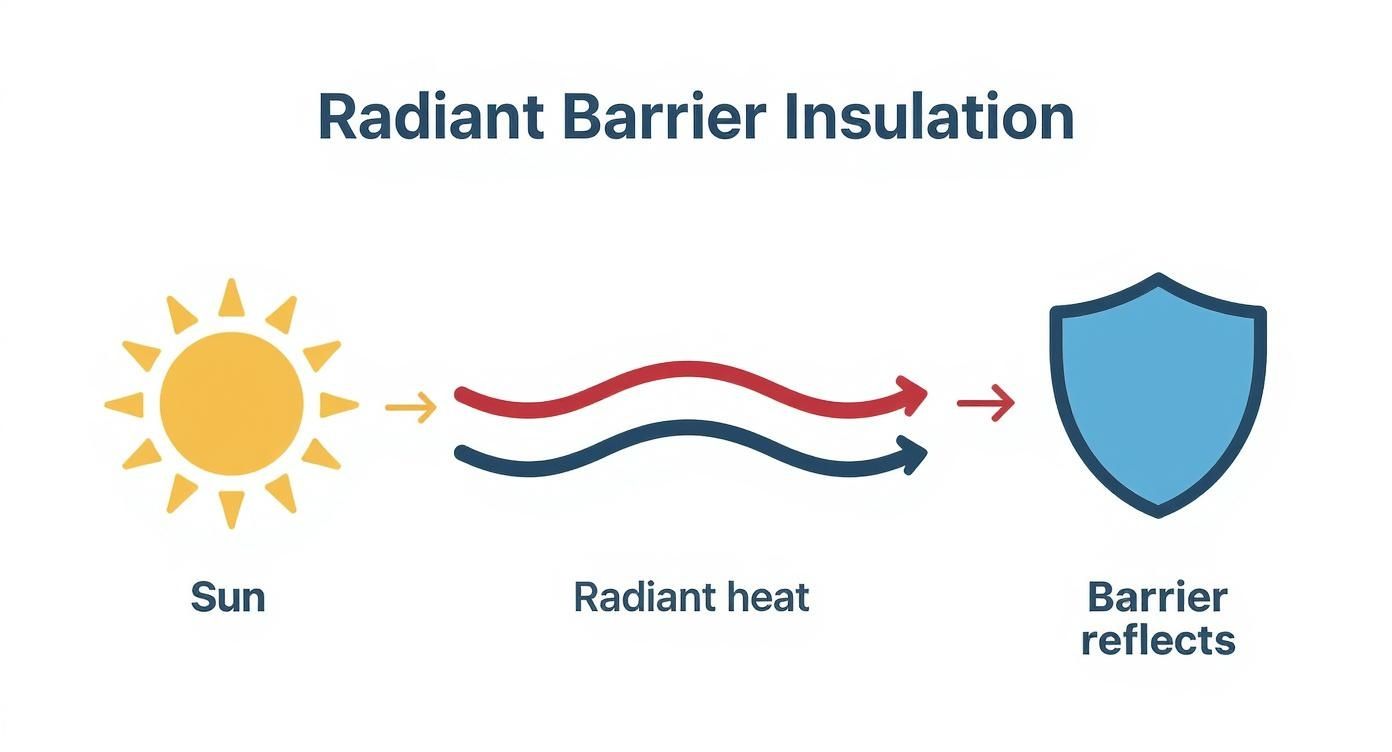
As you can see, the barrier acts like a shield, reflecting the sun’s energy before it has a chance to be absorbed by your roof deck and insulation.
Radiant Barrier vs. Traditional Insulation At a Glance
So, how do these two types of insulation really stack up in a South Florida attic? This table breaks it down.
| Feature | Radiant Barrier Insulation | Traditional Insulation (Fiberglass/Cellulose) |
|---|---|---|
| Primary Function | Reflects radiant heat. | Slows down heat transfer (conduction & convection). |
| How It Works | A low-emissivity surface bounces heat waves away. | Traps air in fibers or particles to resist heat flow. |
| Best Use in South Florida | Stopping intense solar heat from entering the attic from the roof deck. | Preventing heat that’s already in the attic from moving down into your living space. |
| Performance in Extreme Heat | Extremely effective. It directly targets the biggest source of summer heat gain—the sun. | Can become overwhelmed and “heat-soaked,” eventually transferring that heat downward. |
| Moisture Impact | Does not absorb moisture and allows for airflow if installed properly. | Can absorb moisture (especially cellulose), reducing its effectiveness and risking mold. |
In short, they do two different but complementary jobs. A radiant barrier is your first line of defense against the sun, while traditional insulation is the second line of defense for the heat that still gets through.
How a Radiant Barrier Defends Your Attic
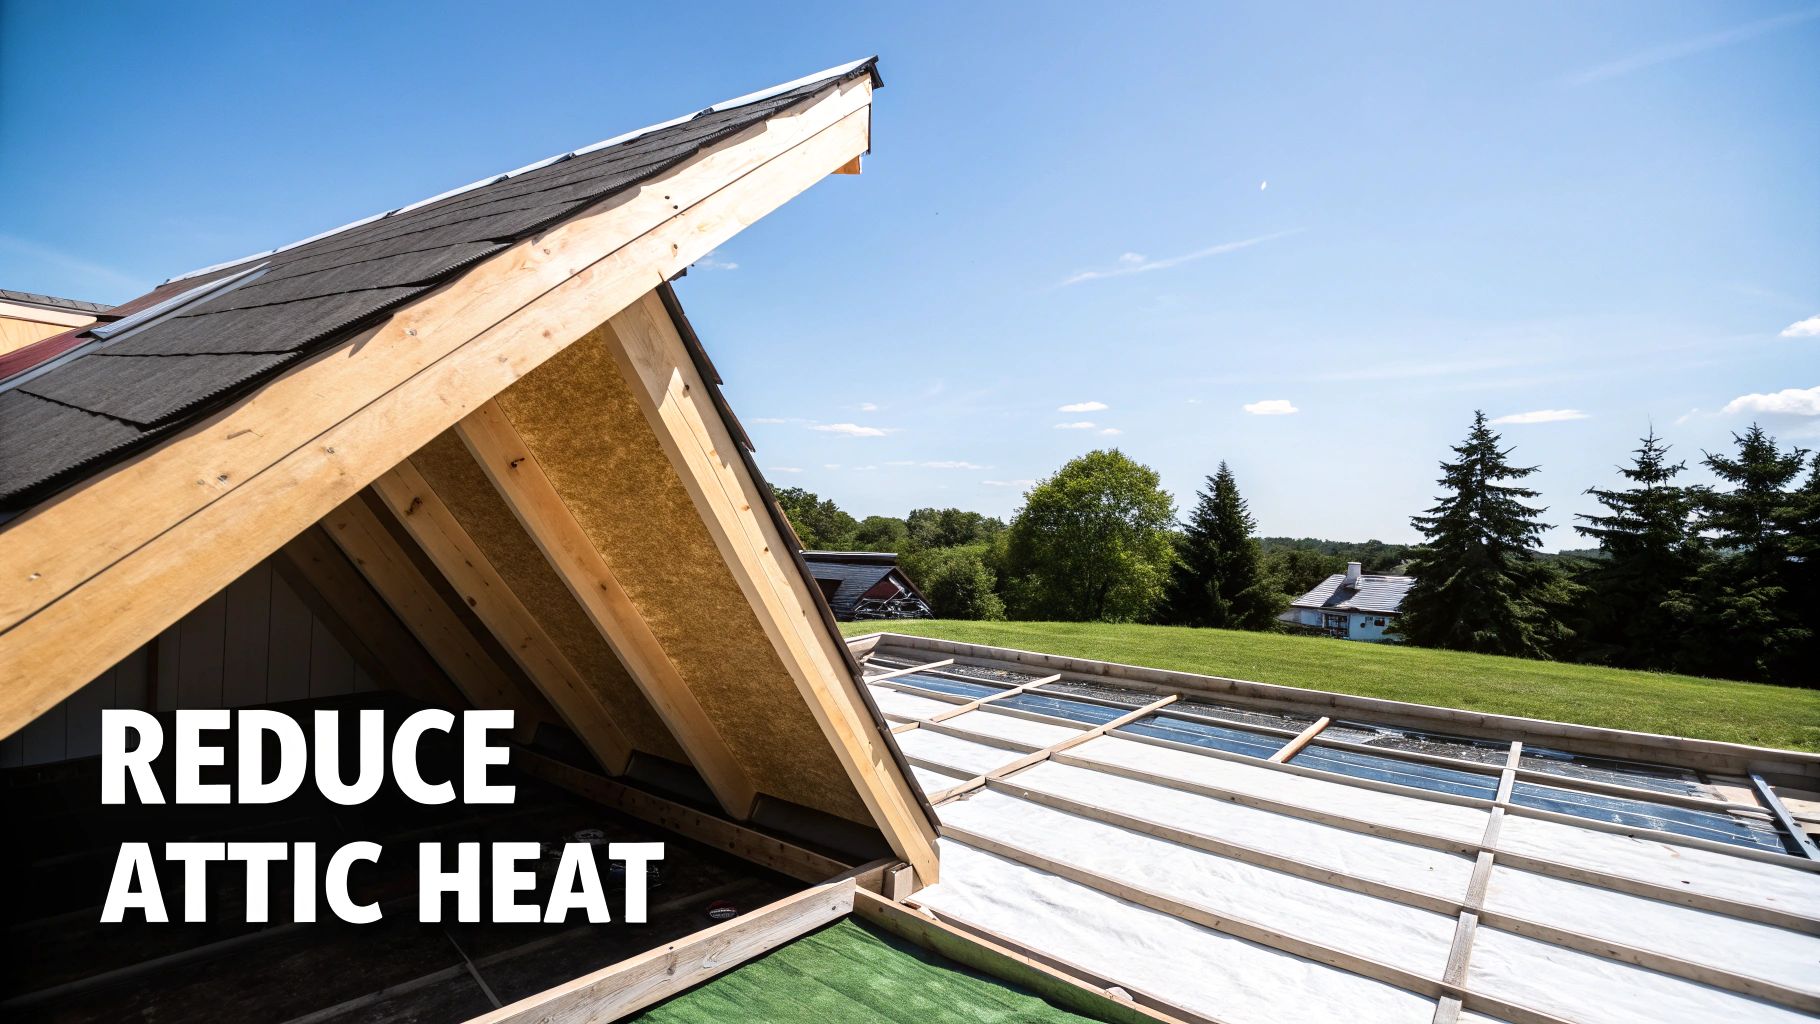
On a typical sunny day in Jupiter or West Palm Beach, your roof shingles can easily bake to over 150°F. That intense heat radiates downward from the underside of your roof deck, turning your attic into an oven.
A radiant barrier, installed against the bottom of the roof rafters, reflects up to 97% of this incoming radiant heat. By blocking the primary source of summer heat gain right at the source, the entire attic space stays dramatically cooler.
This is why the market for this technology is growing so fast. The global demand for radiant barrier and reflective insulation hit USD 4.18 billion in 2024 and is projected to keep climbing. Foil-based products, which offer the highest reflectivity, account for over 53% of that market, proving just how effective they are. If you’re interested, you can find more details on the radiant barrier market’s growth and trends.
Why Radiant Barriers Excel in the Florida Climate
Down here in South Florida, not all insulation is created equal. We’re fighting a different kind of battle—one against the relentless, year-round sun. While traditional insulation works by slowing down heat that’s already found its way into your attic, a radiant barrier takes a much smarter approach.
Think of it like this: traditional insulation is like a thick blanket, slowing the transfer of heat. A radiant barrier is like a mirror, reflecting it away before it even gets in. That’s a huge difference.
This distinction is what makes it a game-changer for homes from Stuart to Wellington. In our climate, the main reason attics get so hot isn’t warm air rising; it’s the raw solar radiation hammering your roof all day long. Radiant barriers were designed to stop exactly that.
Beating the Intense Solar Heat
On a typical summer afternoon in Palm Beach Gardens, the surface of your roof can easily top 150°F. All that heat radiates straight down, turning your attic into a giant oven that sits right above your living space. No wonder your A/C struggles to keep up.
A properly installed radiant barrier reflects up to 97% of that punishing radiant energy right back out through the roof. It’s a simple concept with a powerful effect, preventing the heat from ever soaking into your attic’s insulation and framing.
The result? Attic temperatures can drop by as much as 30°F. This isn’t just a small tweak; it fundamentally changes how your home handles the Florida heat.
The real winner here is your air conditioner. With a cooler attic, there’s far less heat pushing down into your home, which means your HVAC unit doesn’t have to work nearly as hard. It will run less often and for shorter periods, leading to real, immediate savings on your energy bill.
This is why the market for radiant barriers is booming. Valued at roughly USD 282.7 million in 2024, it’s expected to more than double to nearly USD 585.6 million by 2034. Even the U.S. Department of Energy states that radiant barriers can slash cooling costs by 5% to 10% in hot climates like ours. For more on this growing trend, check out the data on factmr.com.
Managing Humidity and Ensuring Performance
A common question we get is about moisture. It’s Florida, after all. Does reflecting heat back toward the roof trap humidity and cause problems?
Not when it’s done right.
A radiant barrier is a non-absorbent material, but the key is professional installation that addresses two critical things:
- Maintaining an Air Gap: For a radiant barrier to work, there has to be an air gap between it and the roof sheathing. Without that space, heat would just conduct right through it, making it useless.
- Preserving Attic Ventilation: A pro installer will never, ever block your soffit, ridge, or gable vents. Proper airflow is non-negotiable in a Florida attic; it’s how you get rid of hot, moist air. A radiant barrier is designed to work with your ventilation system, not fight against it.
By reflecting solar heat while still allowing moisture to escape, a radiant barrier tackles both of our biggest climate challenges head-on. It stops the heat at the source without creating a moisture trap. It’s a completely different approach from other insulation types. If you want to dive deeper into how different materials work, our comparison of spray foam vs. blown-in insulation is a great resource. This balanced approach makes a radiant barrier a smart, targeted upgrade for any South Florida homeowner looking for a cooler, more efficient home.
Pairing Radiant Barriers with Spray Foam Insulation
A lot of homeowners see insulation as an “either/or” decision. But in South Florida, the smartest strategies often involve combining different technologies to get the best of both worlds. That’s definitely the case when pairing a radiant barrier with spray foam insulation.
Instead of competing against each other, these two materials work as a team, creating a powerful, multi-layered defense against our relentless heat.
Think of it as a one-two punch for your attic. The radiant barrier insulation in attic spaces acts as your first line of defense—a shield. Installed on the underside of your roof deck, its job is to reflect the sun’s intense heat right back out before it ever gets a chance to bake your attic. Then, spray foam comes in as the second line of defense—the seal. It stops any leftover heat from moving through conduction and convection while creating a nearly perfect air barrier.
The Ultimate Energy-Saving Duo
This tag-team approach tackles all three ways heat gets into your home. The radiant barrier masters radiant heat, which is responsible for the vast majority of heat gain in a sunny climate like ours. Meanwhile, spray foam is the undisputed champion at stopping conductive and convective heat, forming an airtight thermal boundary.
Together, they create a system that keeps your attic drastically cooler than using either product on its own. The result? Your HVAC system doesn’t have to work nearly as hard, which means real, significant energy savings and a much more comfortable home, even in the middle of a brutal Jupiter summer.
By combining these two insulation superstars, you’re not just insulating; you’re creating a high-performance thermal envelope. The radiant barrier deflects the initial solar assault, and the spray foam contains what’s left, ensuring minimal heat infiltrates your living space.
Two Smart Application Strategies
So, how does this power duo actually get installed in an attic? There are two main strategies, and the right one depends on your goals and whether you have a traditional vented attic or want to create a sealed, unvented space.
Here’s how we typically apply these combinations:
- Strategy 1: The Vented Attic Approach. In a standard vented attic, the radiant barrier is stapled to the bottom of the roof rafters. Then, we apply spray foam insulation to the attic floor, creating a thick, airtight blanket between the attic and your living space below. This keeps the attic itself remarkably cool while stopping any remaining warm air from seeping down into your home.
- Strategy 2: The Unvented (Sealed) Attic Approach. This is the gold standard for homeowners who want to turn their attic into a semi-conditioned space for storage or to house HVAC equipment. For this, both the radiant barrier and the spray foam are applied directly to the underside of the roof deck. The radiant barrier goes on first, followed by a layer of spray foam. This completely seals and insulates the roofline, making the attic a part of your home’s conditioned envelope.
Why This Combination Is Ideal for Florida Homes
Here in South Florida, we’re fighting a battle on two fronts: intense solar heat and oppressive humidity. A radiant barrier directly attacks the heat by reflecting solar radiation. Spray foam tackles both. Its incredible air-sealing properties are second to none when it comes to stopping humid, sticky air from getting into the attic, which is a game-changer for preventing moisture and mold problems.
If you’re interested in this advanced approach, you can learn more about the different types of spray foam insulation and how they perform in our climate.
By choosing to pair a radiant barrier with spray foam, you’re investing in one of the most robust and effective insulation systems available. It’s a solution that delivers exceptional thermal performance, superior moisture control, and big long-term energy savings for homeowners from Palm Beach Gardens to Wellington.
Choosing the Right Installation Method for Your Attic
https://www.youtube.com/embed/6BEPmxeU-Uc
Deciding to install a radiant barrier is a smart move for any South Florida homeowner. But knowing how it gets installed is just as important as knowing what it is. The right installation method makes all the difference in performance, longevity, and how much you’ll actually save on your cooling bills.
There are really two ways a pro will install a radiant barrier, and each one is suited for different situations. Let’s walk through them so you can figure out what’s best for your home, whether you’re in Jupiter, Wellington, or anywhere in between.
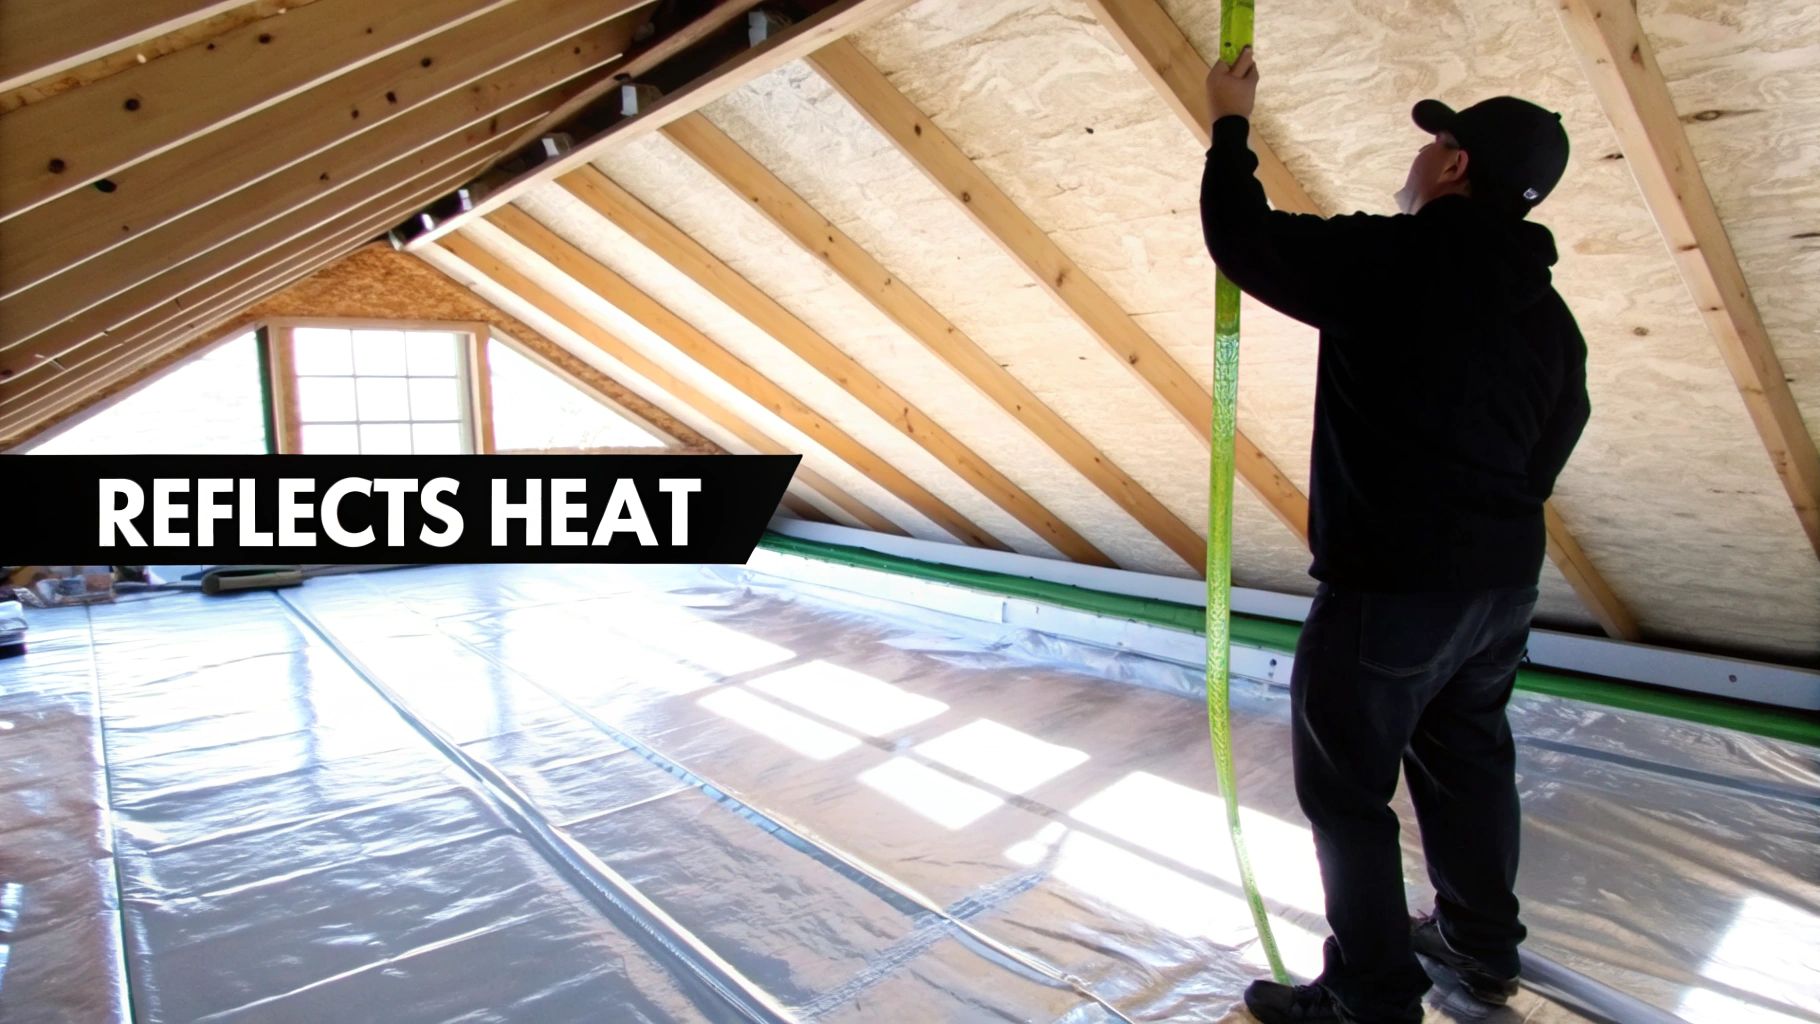
Method 1: Stapling to the Roof Rafters
This is the gold standard for radiant barrier installation, and it’s the method we recommend most often. We attach the reflective foil directly to the underside of your roof rafters, essentially creating a giant reflective shield inside your attic.
Why does this work so well? It stops radiant heat right at the source—before it ever has a chance to bake your attic and everything in it. By blocking the sun’s energy from heating up your attic space and the insulation below, we can drop attic temperatures dramatically. It’s the most effective approach for almost any vented attic.
The secret to making this method work is the air gap. We always leave at least a ¾-inch space between the radiant barrier and the roof deck. Without that gap, the barrier can’t reflect heat. Instead, it would just conduct it, making the whole system useless.
This approach also helps your existing attic floor insulation do its job better. When your fiberglass or cellulose isn’t getting blasted with heat from above all day, it can work far more efficiently to keep your living space comfortable.
Method 2: Laying Over Attic Floor Insulation
The other way to do it is to roll the radiant barrier out directly on top of your existing insulation, like a big reflective blanket on the attic floor. The shiny side faces up toward the roof.
This method can be a bit simpler, especially in attics with tricky layouts or tight spaces. It works by blocking the heat that’s already in the attic from radiating down into your ceilings and living areas.
But—and this is a big one—this method has some serious downsides, especially here in Florida.
- Dust Kills Performance: Over time, dust and grime will settle on the reflective surface. Once it’s covered in a layer of dust, its ability to reflect heat plummets. It basically stops working.
- Moisture Can Get Trapped: In our humid climate, moisture can travel up from your home into the attic. If the radiant barrier isn’t properly perforated, it can trap that moisture right on top of your insulation, which is a recipe for trouble.
Because of these issues, stapling the barrier to the rafters is almost always the better long-term choice for a maintenance-free, high-performance system. Thinking about how heat moves is key. For example, understanding the surprisingly low insulation value of concrete block walls shows just how important it is to address every part of your home’s thermal envelope, especially the roof.
Radiant Barrier Installation Method Comparison
To make it simple, here’s a quick rundown of the two methods and where each one fits best. This should help you see why the rafter-mounted approach is typically the superior choice for lasting results.
| Installation Method | Best For | Key Considerations |
|---|---|---|
| Stapling to Roof Rafters | Most vented attics, long-term performance, and maximum heat reduction. | Requires a ¾-inch air gap for proper function. Blocks heat at the source, protecting the entire attic system. |
| Laying Over Attic Floor | Attics with complex truss systems or limited access where rafter installation is not feasible. | Performance degrades significantly as dust accumulates. Potential to trap moisture if not perforated. |
Ultimately, while laying the barrier on the floor might seem easier, stapling it to the rafters delivers the reliable, long-lasting energy savings South Florida homeowners are looking for.
Why You Should Never DIY This Job
It might look like a simple project, but installing a radiant barrier is definitely a job for a professional. There’s just too much at stake to get it wrong.
A pro brings three critical things to the table:
- Code Compliance: We know the local building codes in Palm Beach Gardens, Stuart, and the surrounding areas. We make sure your installation is done safely and correctly.
- Ventilation is Sacred: A good installer will never, ever block your soffit or ridge vents. Proper attic ventilation is non-negotiable for getting rid of built-up heat and moisture. Blocking it can cause serious damage.
- Safety and Precision: Attics are hot, cramped, and dangerous places to work. We have the right gear and experience to do the job safely while making sure every staple and seam is perfect for maximum effectiveness.
Hiring a professional ensures your investment actually pays off. You get the peace of mind that the job was done right, and you’ll enjoy years of real energy savings and a much more comfortable home.
Calculating Your Costs and Return on Investment

Talking about home upgrades is one thing, but seeing how the numbers really shake out is what matters. Let’s get down to brass tacks and break down the financial side of installing radiant barrier insulation in an attic. We’ll move past the technical stuff and focus on what this investment means for your wallet long-term.
It’s easy to see this as just another expense, but that’s the wrong way to look at it. Think of it as a direct investment in lowering your future FPL bills and boosting your home’s value. The upfront cost is a single step toward years and years of savings.
Understanding the Initial Investment
The total price for a professional radiant barrier installation isn’t one-size-fits-all. A few key things drive the cost, but the biggest factors are the size and complexity of your attic. A bigger, more chopped-up space with lots of angles and obstacles will naturally take more material and time.
Here are the main elements that go into the final price tag:
- Attic Square Footage: This is the starting point. The total area that needs coverage dictates the material cost.
- Labor Costs: Professional installation is non-negotiable if you want the barrier to perform correctly. Rates can change based on how tough the job is.
- Material Quality: Not all shiny foils are created equal. We only use high-quality, durable materials with superior reflectivity to ensure you get lasting results.
- Accessibility: If your attic is a pain to get into or move around in, that can add to the labor time and overall cost.
This isn’t just a local trend; this kind of investment is gaining steam worldwide. The global radiant barrier market was valued at around USD 4.64 billion in 2025 and is expected to hit USD 7.15 billion by 2032. Why? More and more homeowners are realizing how effective it is at stopping heat transfer. You can discover more insights about radiant barrier market growth and see how this trend is playing out.
Calculating Your Return on Investment
Now for the fun part: figuring out when it pays for itself. Every home is different, of course, but a simple example shows just how fast this investment starts putting money back in your pocket.
Let’s say your average summer electricity bill is $300 a month. A properly installed radiant barrier can knock your cooling costs down by 5% to 10%—and honestly, sometimes even more in our brutal Florida climate. We’ll play it safe and use a conservative 8% savings for this example.
Illustrative ROI Calculation:
- Monthly Bill: $300
- Annual Cooling Costs (6 peak months): $1,800
- Annual Savings (at 8%): $144
If your total installation cost was $1,500, you’d make back your entire investment in just over 10 years. But here’s the kicker: this simple math doesn’t account for rising energy costs. Every single time FPL raises its rates, your payback period gets shorter, and your savings become even more valuable.
Factors That Speed Up Your Payback Period
Your ROI isn’t a fixed number. Several things specific to your home can shrink that payback window and get you into pure profit territory much faster.
- High Sun Exposure: If your roof gets baked by the sun all day with little to no shade, especially if it’s a dark color, you’ll see a huge temperature drop and a much faster ROI.
- Older HVAC System: Is your air conditioner already working overtime just to keep up? A radiant barrier gives it a much-needed break, leading to immediate, substantial savings.
- Existing Insulation: A house with weak or insufficient insulation on the attic floor will benefit massively. The radiant barrier becomes a powerful first line of defense against the sun’s heat.
At the end of the day, installing a radiant barrier is a smart financial move that delivers both comfort and real savings. It’s a durable, no-maintenance upgrade that starts paying you back from the very first energy bill.
Got Questions About Radiant Barriers? We Have Answers.
It’s smart to have questions before you invest in a big home improvement, especially for something as important as attic insulation. Homeowners from Jupiter to Palm Beach Gardens want straight answers, not sales pitches. Here, we cut through the confusion and tackle the most common myths and concerns we hear from our customers every day.
We’ll cover everything from whether it will harm your shingles to if you can tackle the job yourself. Our goal is to give you clear, honest information so you can make a decision you feel good about.
Will a Radiant Barrier Cook My Roof Shingles?
This is probably the biggest myth we have to bust, and the answer is a simple, firm no. The worry is that reflecting heat back up at the roof deck will basically fry the shingles from the inside out, causing them to wear down faster.
But the science and real-world data tell a different story. Independent studies have shown that a radiant barrier only bumps up the temperature of your shingles by a tiny 2-5°F. On a blazing hot Florida afternoon, your shingles are already baking at 160°F to 190°F. That small increase is nothing—it’s well within what they’re designed to handle and won’t affect their lifespan or void any warranties.
The key here is proper attic ventilation, which is a must-have for any South Florida home anyway. Good airflow easily whisks that little bit of extra heat away, protecting your roof while the barrier gets back to its real job: keeping your living space cool.
Can’t I Just Install It Myself?
It might look like a straightforward weekend project—grab a staple gun and a roll of foil, right? But we strongly advise against it, and not just because it’s our job. Installing a radiant barrier correctly is a job for a pro for a few critical reasons.
First off, an attic in Wellington or Stuart in the middle of July is a brutal and dangerous place to work. We’re talking extreme heat in very tight, awkward spaces.
Beyond the safety risks, the performance of the entire system depends entirely on getting the installation details perfect.
- The Air Gap is Everything: For a radiant barrier to actually reflect heat, it needs a consistent air gap between it and the roof deck. If it’s laid flat against the wood, it stops working and just conducts heat instead.
- Don’t Block Your Vents: A pro knows exactly how to install the barrier around soffit vents, ridge vents, and gable vents. If you accidentally cover up these pathways for airflow, you’ll trap heat and moisture, creating much bigger problems than you started with.
- Staying Up to Code: A professional installer ensures the job is done right and meets all local building codes, which is crucial for safety, performance, and your home’s value.
Will It Block My Wi-Fi or Cell Signal?
Here’s another common worry you can cross off your list. A radiant barrier installed up in your attic won’t mess with your home’s Wi-Fi, your cell phone reception, or any other electronic signals.
The material is way up in the attic, far from your router, phones, and other devices. Its design and placement don’t create a “Faraday cage” effect that would block signals from getting in or out. Your connectivity will be exactly the same as it was before we showed up.
Ready to see how a professionally installed radiant barrier or spray foam system can transform your home’s comfort and energy bills? The team at Airtight Spray Foam Insulation has the expertise to design the perfect solution for your South Florida property. Request your free, no-obligation quote today!
Radiant barriers are especially effective in Jupiter, FL, where attic temperatures can soar in the Florida sun. Airtight Spray Foam Insulation helps Jupiter homeowners reduce heat gain, improve energy efficiency, and enjoy cooler indoor temperatures year-round.
👉 Learn more about our spray foam services in Jupiter:
https://yourwebsite.com/spray-foam-insulation-jupiter/