You can feel it before you see it. The air inside a South Florida house gets sticky by midafternoon, the upstairs bedroom never quite cools off, and the AC seems to run nonstop while a faint musty smell hangs around the bathroom or the laundry room. A lot of homeowners start with a roll of weatherstripping and a tube of caulk, then wonder why the house still feels humid, the bills still climb, and a patch of ceiling stain keeps coming back.
That happens because weatherproofing homes in this climate is not a generic envelope job. It's a humidity fight, a heat fight, and a water-management job at the same time. When hot, wet outdoor air keeps finding its way into the house, the wrong fix can make the problem louder, not smaller. The right fix starts with the way the building leaks, dries, and handles moisture, not just with what product is on the shelf.
The houses I see in Palm Beach County don't fail in a neat, textbook way. They fight back in layers. A homeowner notices one room that never feels right, then a little mildew on the bathroom ceiling, then condensation around supply registers, then a utility bill that looks worse than last summer's.
South Florida's problem is that the outdoor air is usually hot, humid, and loaded with moisture, while the AC is trying to keep the indoor side cooler and drier. That difference creates constant pressure on the building shell. Air moves through small gaps, then moisture comes with it, and the home ends up managing both heat gain and humidity load at the same time. That's why a quick patch on a visible crack rarely fixes the actual issue.
A lot of weatherproofing content starts with windows and doors. Those matter, but they're rarely the biggest problem in a South Florida house. Losses are often hidden at the attic hatch, the duct boots, the plumbing chases, the garage interface, and the roof-to-wall transitions where hot attic air and moist outdoor air find a path inside.
Practical rule: if a room feels sticky even when the thermostat is set correctly, assume an air-leakage and moisture-path problem before you assume the AC is undersized.
That's why I tell homeowners to think in terms of humidity management first, energy efficiency second. The insulation and air sealing work that helps in Minnesota can backfire here if it traps moisture in the wrong place or blocks drying where the assembly needs it. If you want the physics background on why that happens, the dew-point explanation in this guide is worth a look.
The big takeaway is simple. In South Florida, weatherproofing isn't a cosmetic upgrade. It's part of keeping the house livable, dry, and stable when warm, wet air is constantly pushing in from outside.
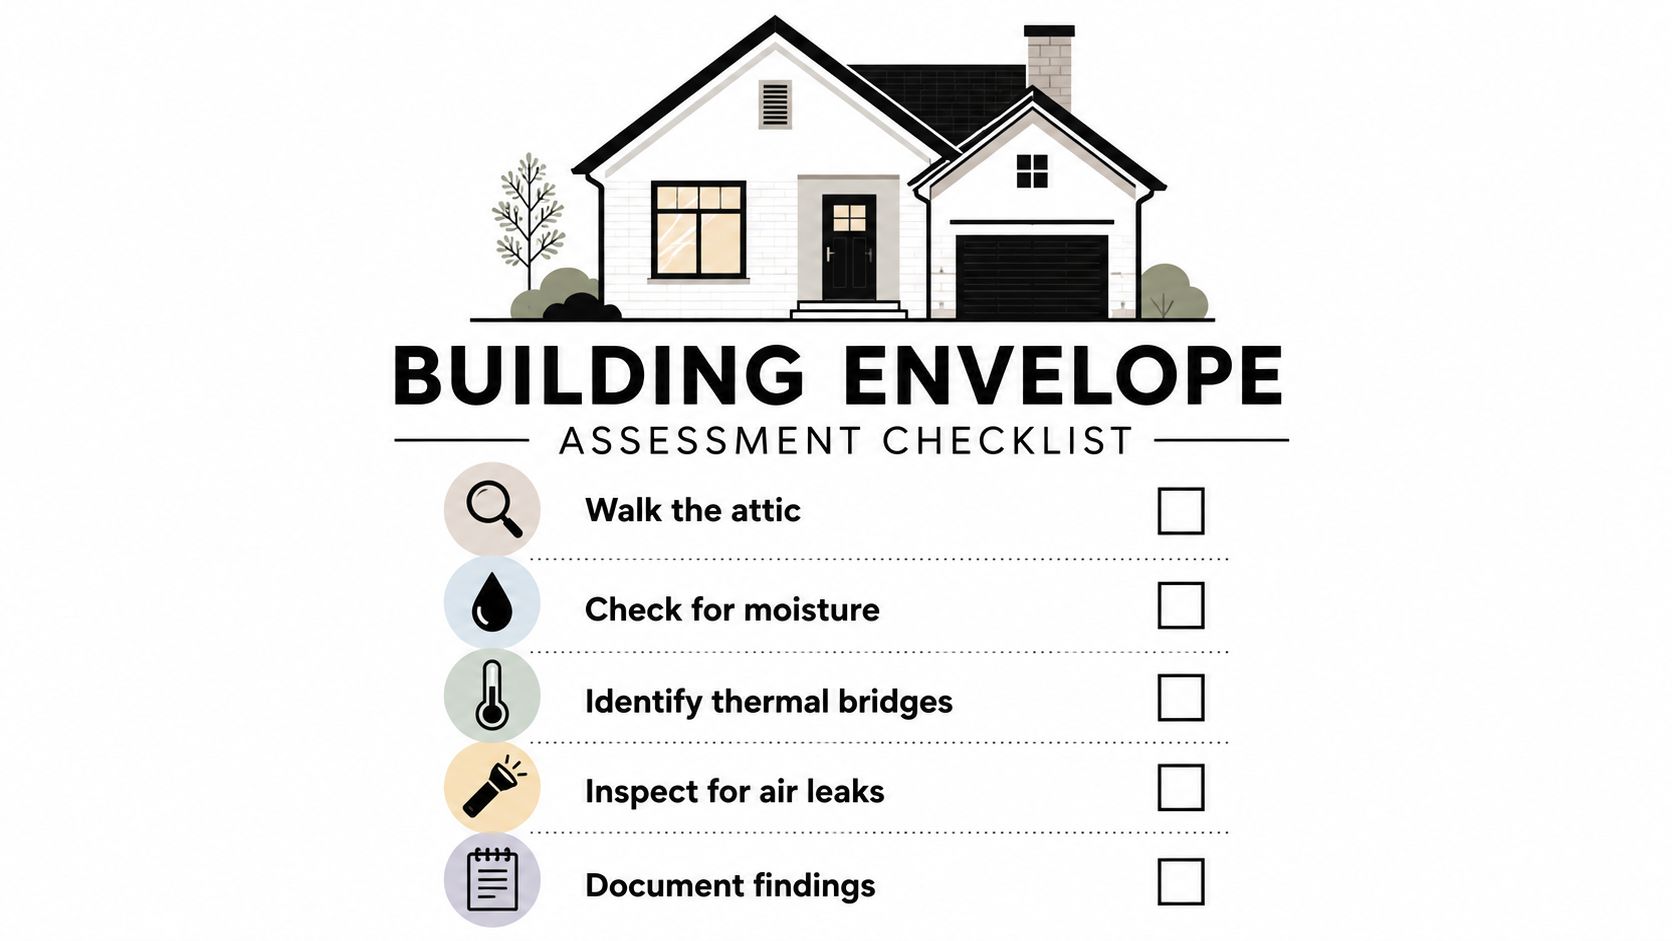
The first mistake I see is people buying insulation before they know where the house is leaking. That is backwards in a South Florida home, because hot, humid air can push through one weak point and spread the problem through the rest of the shell. A proper building-envelope assessment shows where air is moving, where moisture is entering, and what needs repair before anyone seals a cavity or covers it with insulation. The U.S. Department of Energy's whole-house weatherization workflow starts with that diagnostic approach, including blower-door testing, air sealing, insulation upgrades, duct insulation, window and door repairs, and moisture-hazard evaluation. DOE whole-house weatherization
Start in the attic. Look for stained sheathing, exposed penetrations, disconnected ductwork, recessed lights, and gaps around plumbing stacks. Then check wall and ceiling lines that feel unusually warm, damp, or dusty, because those spots often point to the biggest leakage paths.
A blower-door test is the most useful number a homeowner can get before spending money. It quantifies the house's leakage under pressure and shows where the worst bypasses are hiding. Energy Star's savings methodology uses a benchmark of about a 25% reduction in total air infiltration when leaks around attics, foundations, windows, and doors are sealed. Energy Star savings methodology
Here's the sequence I recommend in the field:
That last step matters. DOE requires combustion-appliance safety testing and leak repair before insulation work in relevant areas, because sealing a house without checking backdrafting risk is one of the fastest ways to create a dangerous house. If you are already dealing with cracked stucco, roof leaks, or structural issues, structural damage help from NW Claims can be useful before any weatherproofing begins.
| Metric | Target | Why it matters |
|---|---|---|
| Envelope assessment | Before materials | Finds the leak and moisture paths first |
| Blower-door test | Use on the full house | Shows how leaky the house actually is |
| Major bypasses | Seal before insulation | Prevents trapping hot, moist air |
| Combustion safety | Check before closing assemblies | Reduces backdrafting risk |
| Moisture repairs | Complete first | Keeps water damage from being sealed in |
If you have never looked at the building envelope as a connected system, this definition guide gives a clean way to frame it. A house is not a pile of separate rooms. It is one shell, and in this climate every weak seam can drag humid air into places it does not belong.
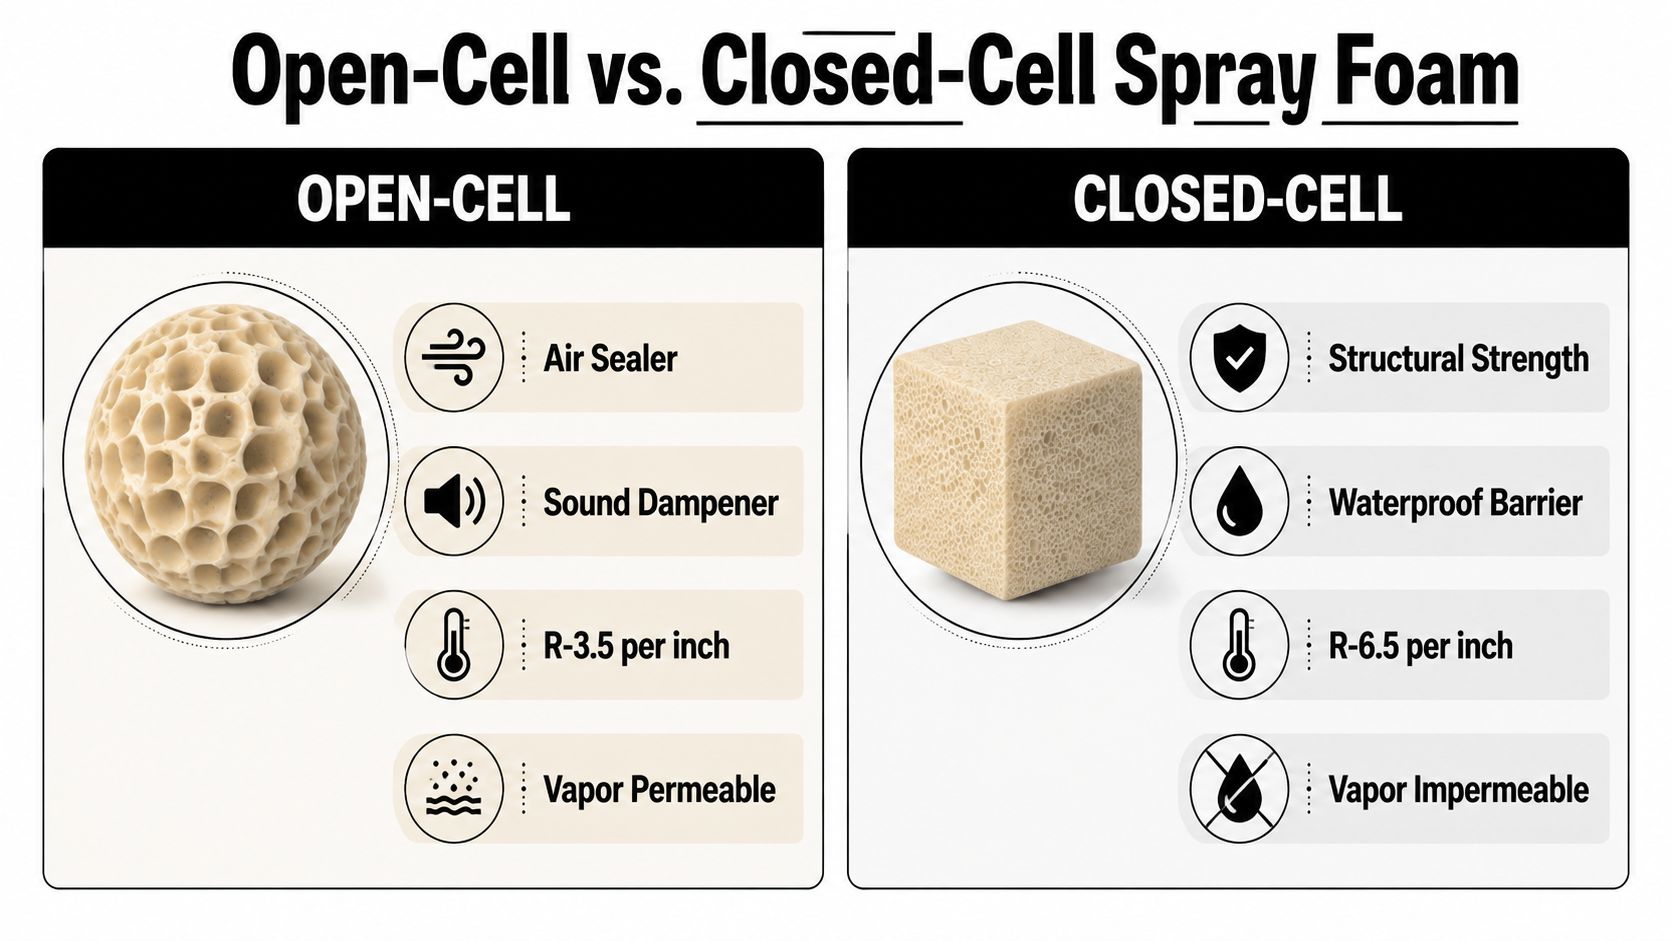
In South Florida, insulation is only one part of the job. A product can have a strong R-value and still underperform if humid air moves through the assembly or if the material blocks drying where the home needs it. That is why spray foam gets so much attention here, because the wrong foam in the wrong place can trap moisture instead of helping control it.
Open-cell spray foam works well where you want air sealing and some drying potential. It is lighter, more permeable, and often a better fit for interior areas that should not be locked down too tightly. Closed-cell spray foam is denser, resists moisture more strongly, and is usually the better fit where you need a tighter vapor control layer, such as roof decks or rim joists. DOE whole-house weatherization
Fiberglass still shows up in a lot of homes, but it is a poor fit for spaces that stay damp and cannot dry well. If humid air reaches fiberglass and that assembly cannot dry, performance drops and odor problems can follow. In homes with attic leakage, the insulation often hides an air problem instead of fixing it.
A hybrid assembly can work well in this climate. Closed-cell foam on the roof deck can help create a tighter, more moisture-resistant envelope, while other parts of the home can use a different approach depending on the cavity and drying needs. That is the kind of job where a contractor should match the product to the assembly, not force one material to do everything.
Field note: if the goal is to stop humid attic air from washing over ducts and ceiling penetrations, the air seal matters as much as the insulation thickness.
The U.S. EPA and Energy Star estimate that homeowners can save an average of 15% on heating and cooling costs and 11% on total energy costs by air sealing homes and adding insulation in key areas such as attics, floors over crawl spaces, and accessible basement rim joists. The same federal weatherization program has served 7.2 million households since 1976, and program materials say the average weatherized household saves about $372 per year in 2022 dollars, with DOE-linked materials estimating typical annual heating-and-cooling savings of about $436.64 for low-income households. WAP fact sheet
That also helps explain why the statement that 89% of U.S. single-family homes are under-insulated matters. It points to how common a weak thermal envelope still is, even before South Florida humidity enters the picture. The same weatherization guidance also notes that a blower-door test can quantify real-world air infiltration and show how leaky the house is.
A contractor can use spray foam, rigid foam, or a mixed approach, but the assembly has to match the moisture load. If you need a plain-language guide to how vapor control fits into that choice, the Atomic Exteriors moisture barrier guide is a useful reference. In practice, that is where a company like Airtight Spray Foam Insulation comes in, because the job is choosing material based on the conditions inside the house, not just filling empty space.
Water control is where generic weatherproofing advice falls apart fast. Caulk gets treated like a cure-all, then the house leaks again the next storm. In South Florida, the problem is hot, humid air pushing into every gap while the AC keeps trying to pull moisture back out. A better approach is the 4D enclosure strategy, deflection, drainage, drying, and durability, which comes straight out of building-science guidance from Canada and New Zealand. Weathertightness remediation guidance
Deflection means shedding water away from the wall before it reaches the assembly. Drainage gives any water that gets in a path back out. Drying lets the assembly release moisture instead of trapping it. Durability means choosing materials that can handle wetting without breaking down early.
A continuous WRB, or weather-resistive barrier, is the part that makes those layers work together. It needs shingle-style laps, flashing tied into the drainage plane, and a path for water to exit. Housewrap should go bottom to top, so the upper courses overlap the lower ones. Corners should be reinforced with an additional spline extending at least 6 inches beyond the corner joint. Weathertightness remediation guidance
Practical rule: caulk is a detail, not the system. If the flashing and laps are wrong, the sealant just delays the leak.
At roof-to-wall intersections, kick-out flashing keeps water from dumping behind the wall finish. At window openings, flashing has to connect to the drainage plane instead of sitting on top of it. That is the detail most DIY jobs miss, because once the trim goes back on, the mistake is hidden.
For a broader discussion of vapor control, the Atomic Exteriors moisture barrier guide is a useful reference point. In Florida, the main caution is simple. A vapor barrier on the wrong side of the wall can slow drying where the wall needs to dry, and that is expensive to fix later.
The failure mode I see most often is not dramatic. It is a small flashing miss, a break in the wrap, or a wet area that stays trapped until the stucco cracks or the drywall stains. In South Florida, that slow failure is the one that hurts homeowners the most.
The roof and attic are where weatherproofing homes in South Florida gets real. That's where heat, moisture, and equipment all meet in one tight space. The order matters. Seal first, insulate second, and only then decide whether the attic should stay vented or become part of a conditioned assembly.
The biggest air leaks are often the ones people walk past every day. Recessed lights, bathroom exhaust fan housings, HVAC boots, and attic access panels can all leak enough humid air to wreck the comfort of a room below. That's why sealing the attic floor is usually the first move before any insulation work goes in.
Radiant barriers get talked about a lot, but they're often oversold. They help reflect radiant heat, but they don't solve air leakage, moisture entry, or bad attic detailing. If humid outdoor air is already entering the attic, the barrier doesn't fix that problem.
For homes with roof-deck foam, an unvented attic can make more sense than a traditional vented attic because it changes the attic from a hot outdoor buffer into a more controlled part of the house. That shift can help reduce the temperature swings that punish ducts and ceiling penetrations. It also means the details have to be right, because the attic is no longer a place to ignore.
The same caution applies to mold history. If you're trying to decide whether the attic has deeper contamination or whether a ceiling leak has already caused hidden damage, a local reference like attic mold pricing for Florida homes can help you understand why inspection comes before patching.
Soffit and ridge ventilation still matter in many assemblies, but they have to be coordinated with the insulation and air-sealing plan. If insulation blocks soffits, or if foam is installed without thinking through the roof system, the attic can lose the airflow path the design depends on. That's one reason roof work should be coordinated with the whole enclosure plan, not handled as a standalone task.
Hurricane season adds another layer. Flashing, edge details, and roof penetrations should be checked before the next storm cycle starts, because once wind-driven rain finds a weak point, the damage is no longer just about energy loss. It becomes a repair bill.
The fastest gains usually come from the places homeowners don't look at first. Windows and doors get all the attention, but the biggest leaks are often at the attic access, the garage interface, the duct boots, and the penetrations that disappear into walls and ceilings. That's where I start on jobs in South Florida.
An attic hatch or pull-down stair assembly often leaks more than a dozen window cracks combined. Weatherstripping and an insulated cover can make a real difference there, as long as the latch still closes evenly. If the hatch is loose or warped, sealant alone won't hold it.
Garage-to-living-space walls deserve more attention than they usually get. I've seen bedrooms over unconditioned garages that stayed uncomfortable until the wall, floor edge, and penetrations were sealed correctly. Baseline comfort often improves when the biggest hidden transfer path is closed, not when another bead of caulk gets added to a window frame.
If a kitchen peninsula, laundry wall, or closet chase feels oddly warm, check for hidden duct runs or service penetrations before you blame the window nearby.
The mistake that wastes the effort is focusing on small visible cracks while leaving larger openings untouched. A tiny bead around a window trim won't matter much if the attic hatch is acting like an open vent. The order of work decides the result.
South Florida homeowners usually ask the same two questions first. What will it cost, and can I do it myself? The honest answer is that air sealing plus attic insulation is usually the smartest first upgrade, while full spray foam work sits in a different category. For a clear pricing framework, this spray foam insulation cost guide helps set expectations before anyone starts comparing bids.
The payoff side is real too. Federal weatherization materials show that weatherized homes save money in a measurable way, and the reported savings for low-income households are enough to justify serious attention to air leakage and insulation. That does not mean every house pays back the same way, but it does show that airtightness and insulation are established upgrades, not decorative add-ons.
DIY makes sense for straightforward work, like weatherstripping a hatch, sealing obvious penetrations, or replacing broken door seals. It stops making sense when the project reaches the roof deck, changes the attic into a new assembly, or calls for large closed-cell spray foam applications. Anything structural, anything with a known moisture history, and anything tied to combustion safety should go to a professional crew.
The bigger trap is insulating before the leak work is done. I've seen homeowners bury a moisture problem under new material, then spend more later tearing it back out when the same issue shows up again. That is how a house ends up with new insulation and the same comfort problem.
A good contractor should explain the enclosure plan, describe the foam type and placement, discuss blower-door verification, and stand behind the installation with clear warranty terms. If they cannot walk you through the order of operations, keep looking.
South Florida homes do best with a simple sequence. Seal the leaks, fix the moisture path, then insulate the assembly that is left. That order is what keeps the house cooler, drier, and easier to live in.
When the scope goes beyond patching obvious gaps, the job usually belongs with a pro who understands how hot, humid air behaves around an air-conditioned house. If you want a fuller sense of what professional spray foam work typically costs and where the money goes, the spray foam installation cost guide is a useful place to start.
If you are dealing with sticky rooms, attic leaks, or moisture problems that keep coming back, Airtight Spray Foam Insulation can evaluate the building envelope, recommend the right air-sealing and foam strategy, and handle the installation with South Florida conditions in mind. Visit Airtight Spray Foam Insulation to request a free estimate and talk through the next step for your home.