Your July electric bill lands in your inbox, and it feels wrong. The house in West Palm Beach never seems to cool evenly, one bedroom is muggy by late afternoon, and the hallway outside the attic hatch feels warmer than the rest of the home. You may suspect bad insulation, leaky ducts, or humid air sneaking in, but you can't see any of it.
That's where a thermal imaging inspection helps. Instead of opening walls or guessing, an inspector uses an infrared camera to read surface temperature patterns. Those patterns can point to hidden air leakage, missing insulation, and moisture that hasn't yet stained drywall or warped trim.
In South Florida, that matters more than many homeowners realize. Moisture and air leakage often show up long before visible damage does, especially around attics, window frames, roof transitions, and wall cavities. If you're still sorting out whether your home has an insulation problem, it helps to first understand what air sealing means in a real house and why small leaks can create comfort and humidity issues that feel much larger than they look.
A thermal camera works a bit like a heat map for your home. It doesn't see through walls like X-ray equipment, and it doesn't magically identify every problem by itself. What it does very well is show where surfaces are warmer or cooler than expected.
That simple idea is powerful. The global thermal imaging market is projected to reach $3.3 billion in 2024, and thermal imaging systems can detect temperature differences as small as 0.02°C, according to thermal imaging market statistics and building inspection data. The same source notes that this can reduce maintenance labor hours by approximately 40% compared with traditional methods when teams use it to find hidden defects earlier.
In a South Florida house, hidden problems rarely announce themselves clearly. You might notice:
A thermal image gives those clues shape. Instead of “this room feels off,” you get a visual pattern that helps narrow down where to inspect further.
Practical rule: A thermal scan is best used to find patterns worth investigating, not to skip diagnosis.
That distinction matters because homeowners often expect one scan to answer everything. It won't. But as a first look, it can save time, reduce guesswork, and help you focus on the parts of the house most likely to waste energy or trap moisture.
An infrared camera is easiest to understand if you think of it as night vision for heat. A normal camera uses visible light. An infrared camera reads heat energy emitted by surfaces and converts those readings into a thermal image.
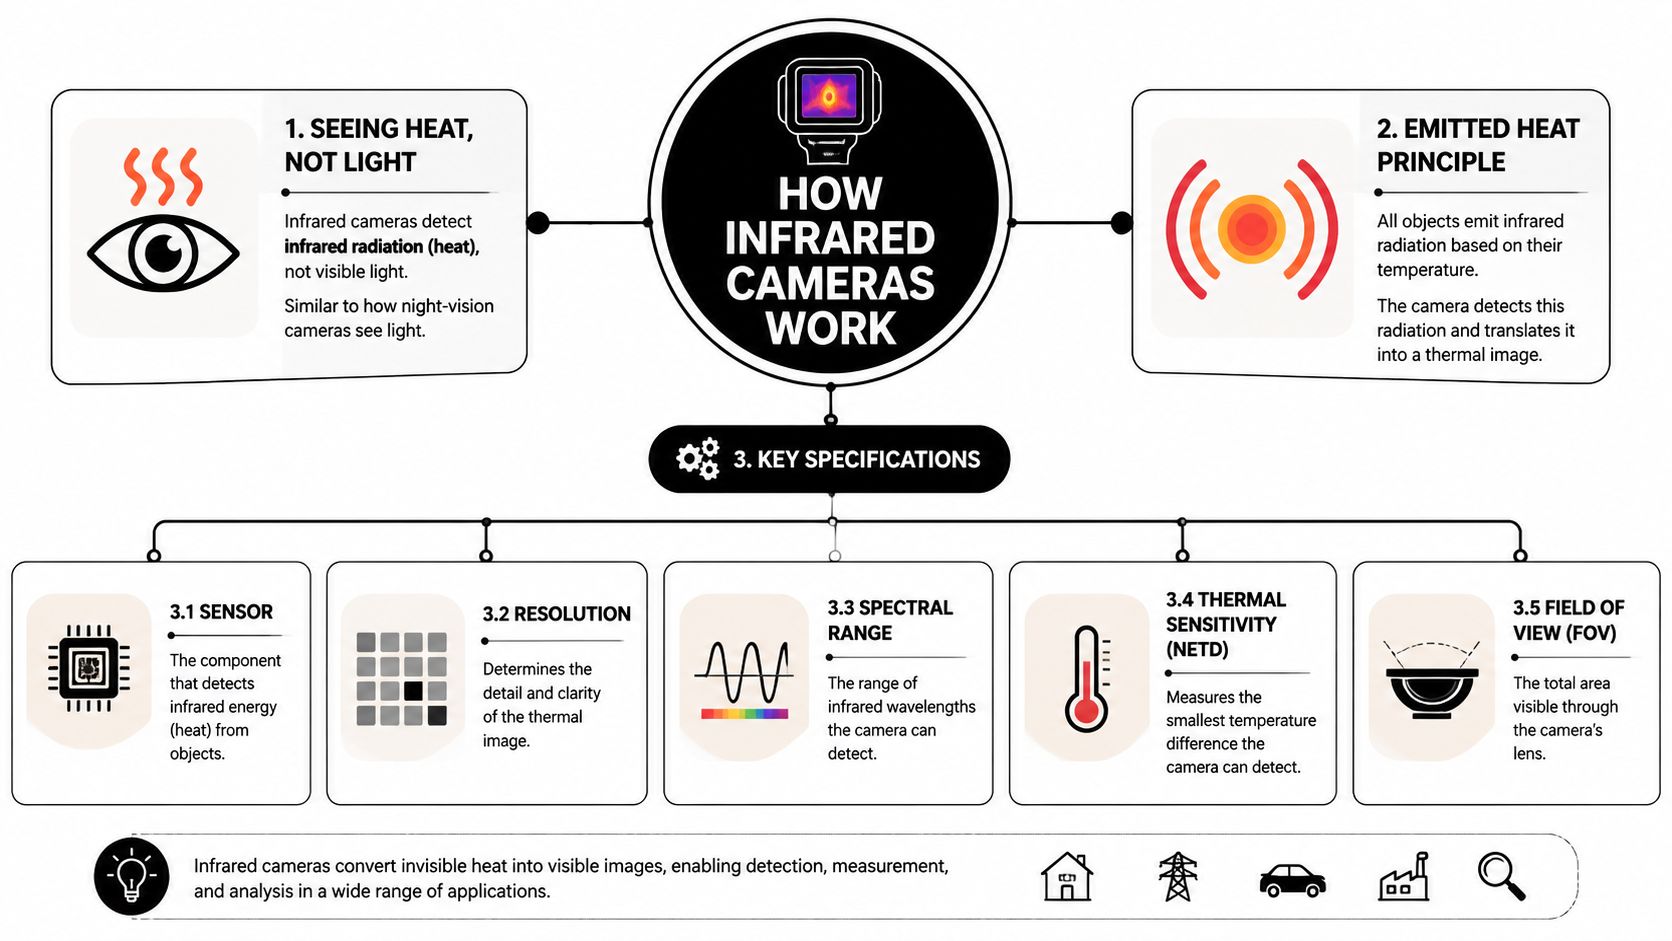
Every surface in your home gives off infrared radiation. The camera detects that radiation and assigns colors or shades to different temperatures. A wall section might appear warmer than the area beside it. A wet ceiling patch may cool differently than dry drywall. An air leak near a recessed light can create a visible streak.
What confuses many people is this: the colors on the screen aren't labels for specific defects. They're just a visual language for temperature differences. The inspector still has to interpret what caused the pattern.
Not every thermal camera is suitable for building envelope work. For serious home inspection, the equipment needs enough detail and sensitivity to pick up small anomalies.
According to this thermal imaging camera specification checklist, expert-level inspection calls for a NETD in the 30–60 mK range for uncooled systems and at least 320×240 resolution to detect small building envelope defects. That same guidance also notes that higher resolution helps when the target is small or the inspector must work from farther away.
Here's a plain-language way to think about those specs:
| Camera term | What it means in plain language | Why it matters in a home |
|---|---|---|
| Resolution | How much detail the image contains | Low resolution can blur a small insulation gap into the surrounding area |
| NETD | How sensitive the camera is to tiny temperature differences | Better sensitivity helps reveal subtle moisture or air leakage patterns |
| Emissivity | A setting that tells the camera how a material emits heat | Wrong settings can distort temperature readings on surfaces |
| Field of view | How much area the camera sees at once | Affects whether the inspector captures enough of the wall or ceiling context |
Even a good camera can mislead if it's used poorly. Inspectors need to match distance, angle, and surface type to the task. The source above notes that emissivity for many non-metallic building materials is typically estimated at 0.9–0.95, and that scan angles that are too steep can compromise resolution and defect size estimation.
A blurry thermal image is like reading a street sign through fog. The sign exists, but you still can't trust the message.
That's why experienced inspectors move deliberately, keep the target large enough in the frame, and avoid treating every bright or dark area as proof of a defect.
South Florida homes tend to show three broad categories of trouble on thermal scans. Each has a different pattern, and each can be harder to spot when humidity and outdoor conditions flatten the temperature difference between inside and outside.
When cooled indoor air escapes, or humid outdoor air enters, the thermal image often shows a streak, outline, or patch that doesn't fit the surrounding surface. Around window frames, door perimeters, attic hatches, and top plates, these anomalies may look like a path rather than a single spot.
Missing or thin insulation usually appears more like an area problem than a line problem. A wall bay with an insulation void can look warmer or cooler than the neighboring bays, depending on conditions. In attics, the pattern may trace framing members, knee walls, or transitions where insulation coverage changed during installation.
Moisture is trickier. Wet materials don't always look dramatic, but they often change temperature differently than dry materials. That can make a roof edge, ceiling corner, or wall baseboard area stand out on a thermal scan.
A thermal image alone still doesn't tell you whether the source is rain intrusion, plumbing, or condensation. It only tells you that the surface is behaving differently.
If you're comparing thermal findings with broader property condition concerns, this guide to Florida home inspection issues gives helpful context on the kinds of defects that often affect insurability and maintenance priorities.
This is the part many consumer guides skip. A weak thermal pattern doesn't always mean the house is fine. Sometimes it means the scan conditions were poor.
Without a minimum 10 °C (18 °F) interior-to-exterior temperature differential, thermal cameras in humid South Florida climates can miss insulation gaps and air leaks, leading to a high false-negative rate unless HVAC conditioning or timing adjustments are used, according to guidance on conducting a successful thermographic survey.
That means a quick summer walk-through in the middle of the day may produce images that look clean while still missing real defects.
Common South Florida examples include:
For homes with suspected spray foam installation defects, that timing issue is especially important. If the scan is poorly timed, you can end up judging the insulation before the conditions allow a fair test.
A valid thermal imaging inspection starts before the camera comes out. The inspector needs the house and weather to cooperate enough to create readable thermal contrast.
Effective building envelope inspection requires maintaining a minimum interior-to-exterior temperature differential of 10 °C (18 °F) for at least four hours before scanning, according to Fluke's thermal imaging guidance for building inspections.
That's the technical way to say your home needs a stable temperature gap long enough for hidden defects to show themselves on the surface.
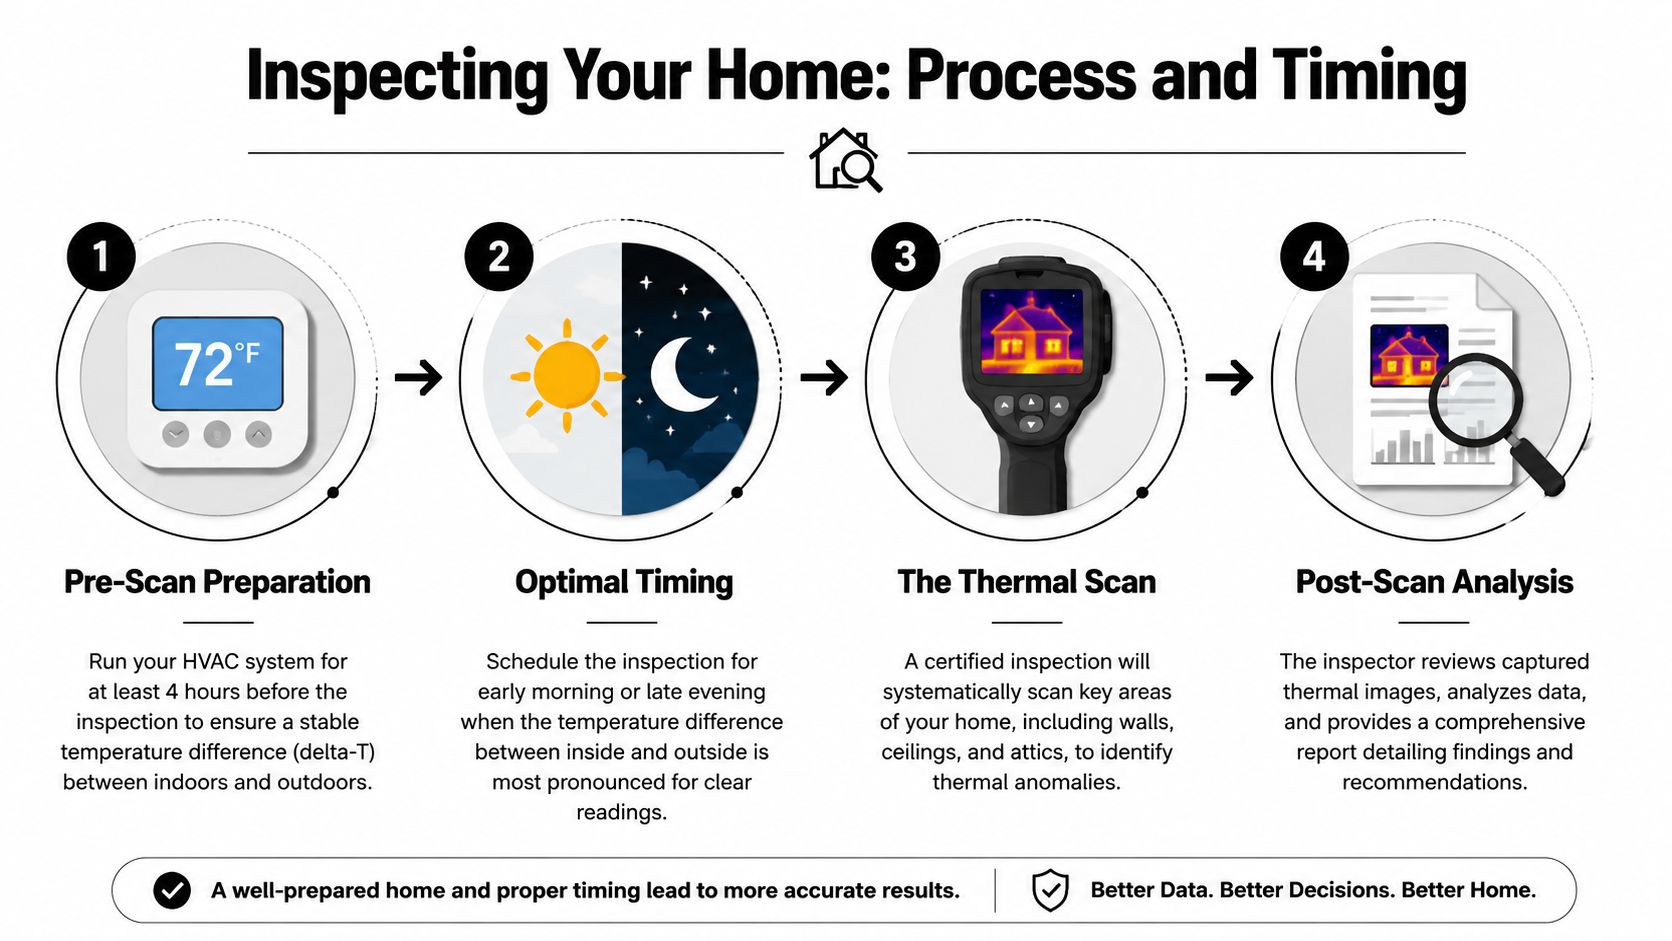
A practical workflow usually looks like this:
For houses that struggle to reach a reliable temperature difference, inspectors may combine infrared imaging with pressure diagnostics. If you're unfamiliar with that process, this overview of what a blower door test is helps explain why forced air movement can reveal leakage paths a camera might otherwise miss.
Distance and viewing angle matter. So does consistency. If the inspector stands too far back in one room and too close in another, it becomes harder to compare findings.
The walkthrough below gives a visual sense of how professionals approach an inspection in real homes.
If the house can't hold a strong temperature difference, the right next step isn't guessing harder. It's improving test conditions.
That's often the difference between a useful scan and a misleading one.
When the report arrives, most homeowners look for one thing: proof. They want the red spot, blue streak, or dark patch to tell them exactly what's wrong and what to fix. Thermal reports don't work that way.
Thermal imaging only detects surface temperature anomalies. Secondary verification such as moisture meters or visual inspection is required to confirm the root cause of a hot or cold spot and avoid misdiagnosis, according to this guide to thermal imaging inspections.
A good report usually includes thermal images, matching visual photos, and notes about the inspection conditions. The most useful parts are often the inspector's interpretation and recommended follow-up, not the color palette itself.
Here's how to think through common findings:
Interpreting thermal findings often trips up homeowners. A cool patch on drywall might be wet insulation, an air leak, a thermal bridge, or a shaded surface that cooled differently than the rest of the wall.
A careful next step usually includes one or more of the following:
| If the report shows | Ask for this follow-up | Why it helps |
|---|---|---|
| Suspected moisture | Moisture meter or visual access | Confirms whether the material is actually damp |
| Suspected air leakage | Pressure testing or smoke tracing | Shows whether air is moving through the assembly |
| Suspected insulation gap | Physical inspection where possible | Confirms whether insulation is missing, thin, or displaced |
| Suspected electrical heat | Licensed electrician evaluation | Rules out safety issues before envelope repairs |
Next step: Treat the thermal image like a map pin, not a final diagnosis.
Once the cause is confirmed, the repair path becomes much clearer. Air leakage near attic penetrations may call for sealing. Voids in wall or roof assemblies may call for insulation correction. If the issue is at the top of the house, this guide on how to seal attic air leaks helps connect the thermal pattern to a practical building-envelope fix.
That's also where spray foam enters the conversation. It isn't a cure-all, and it shouldn't be recommended from a thermal image alone. But when the verification step confirms hidden gaps or leakage paths, spray foam can be an effective way to seal areas that are otherwise difficult to address with batt insulation alone.
The quality of a thermal imaging inspection depends heavily on the person behind the camera. Homeowners often focus on the gadget, but training matters more than the screen color scheme.
You'll often hear about certifications from organizations such as the Infraspection Institute or ASNT. Those credentials generally indicate formal training in thermography principles, camera use, and image interpretation.
For a homeowner, the practical questions are simple:
If you're curious how thermal imaging skills overlap with other inspection environments, even outside housing, programs like Ace Academy's drone training show how imaging technology is increasingly used in roof, exterior, and high-access work where operator training affects image quality and safety.
No verified pricing data was provided here, so it's better to think in terms of scope and conditions rather than fixed numbers. A basic scan of a small home, a full envelope assessment, and an inspection paired with blower door testing are different services. The report detail level also affects cost.
This comparison can help frame your questions:
| Certification | Issuing Body | Typical Cost Range |
|---|---|---|
| Level I Thermography | Infraspection Institute | Varies by provider and inspection scope |
| Level II Thermography | Infraspection Institute | Varies by provider and inspection scope |
| Infrared Thermographer | ASNT | Varies by provider and inspection scope |
Scheduling matters just as much as credentials. In South Florida, ask when the inspector expects the indoor-outdoor difference to be strong enough for the kind of defects you want to investigate. A cheaper appointment at the wrong time can be less useful than a properly timed inspection that answers the essential question.
A homeowner in Jupiter noticed one guest room felt sticky every afternoon, even with the AC running. The thermal scan showed an irregular warm pattern along the upper wall near the attic line. Follow-up inspection found gaps at the top of the wall assembly, and the repair focused on sealing and insulating that transition rather than replacing the HVAC system.
Another homeowner in Palm Beach Gardens called after spotting a faint stain near a ceiling corner after heavy rain. The thermal image revealed a cooler patch extending beyond the visible mark, which prompted moisture verification and targeted repair at the roof transition. After the leak source was fixed, the insulation in the affected area was replaced and sealed so humid air wouldn't keep cycling through the assembly.
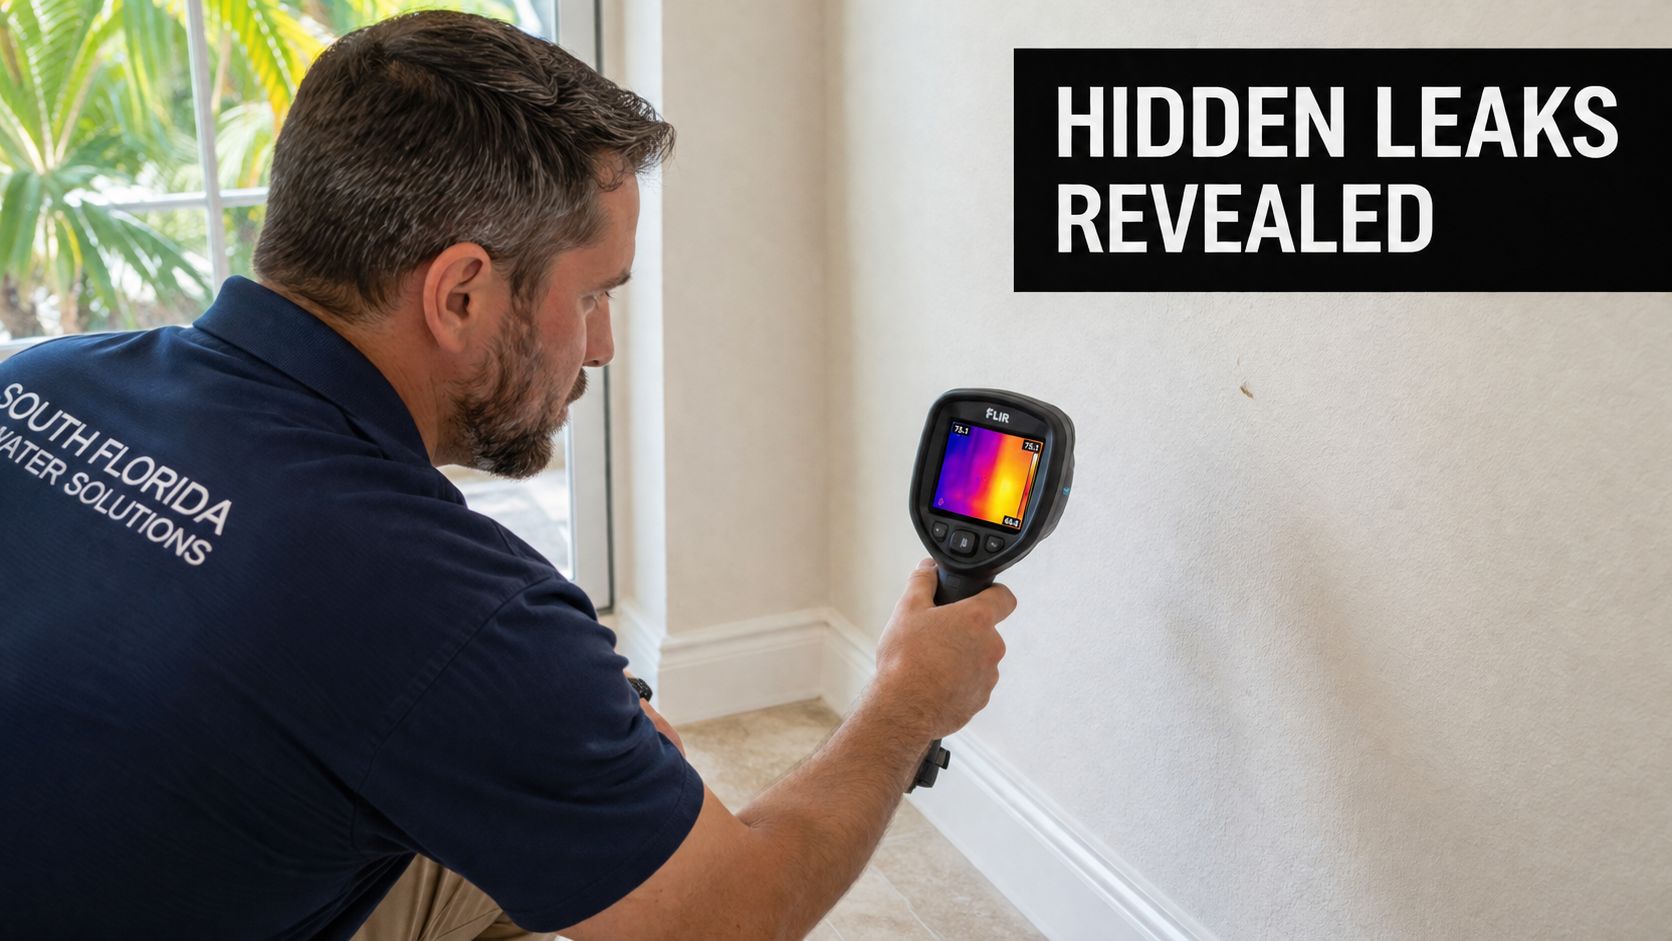
These examples show what thermal imaging does best. It narrows the search area. It helps homeowners avoid random repairs. And when the follow-up confirms leakage or insulation defects, spray foam can become a focused solution rather than a guess.
A good thermal imaging inspection isn't just about owning an infrared camera. It depends on proper equipment, careful timing, and disciplined verification after the scan. In South Florida, the biggest trap is assuming a weak or clean image means there's no problem, when the actual issue may be poor test conditions and a false negative.
Used correctly, thermal imaging helps homeowners see where comfort, energy efficiency, and moisture control start to break down. As camera technology keeps improving, the biggest advantage will still come from skilled interpretation and repairs that match the actual cause.
If your home in Jupiter, Palm Beach Gardens, West Palm Beach, Wellington, Stuart, or nearby areas has uneven temperatures, humidity issues, or suspected attic leakage, Airtight Spray Foam Insulation can help you address the root cause with targeted spray foam solutions. Their team serves South Florida with practical recommendations for sealing gaps, improving insulation performance, and creating a more comfortable home.