Blog
A Homeowner’s Guide to a Vapor Barrier in Ceiling
A properly installed vapor barrier in the ceiling is your first line of defense, stopping moisture dead in its tracks before it can creep into your attic and wreak havoc. It’s a crucial protective layer for managing humidity and preventing mold, wood rot, and sky-high energy bills—especially here in South Florida's relentless climate.
The Invisible Threat Lurking in Your Attic
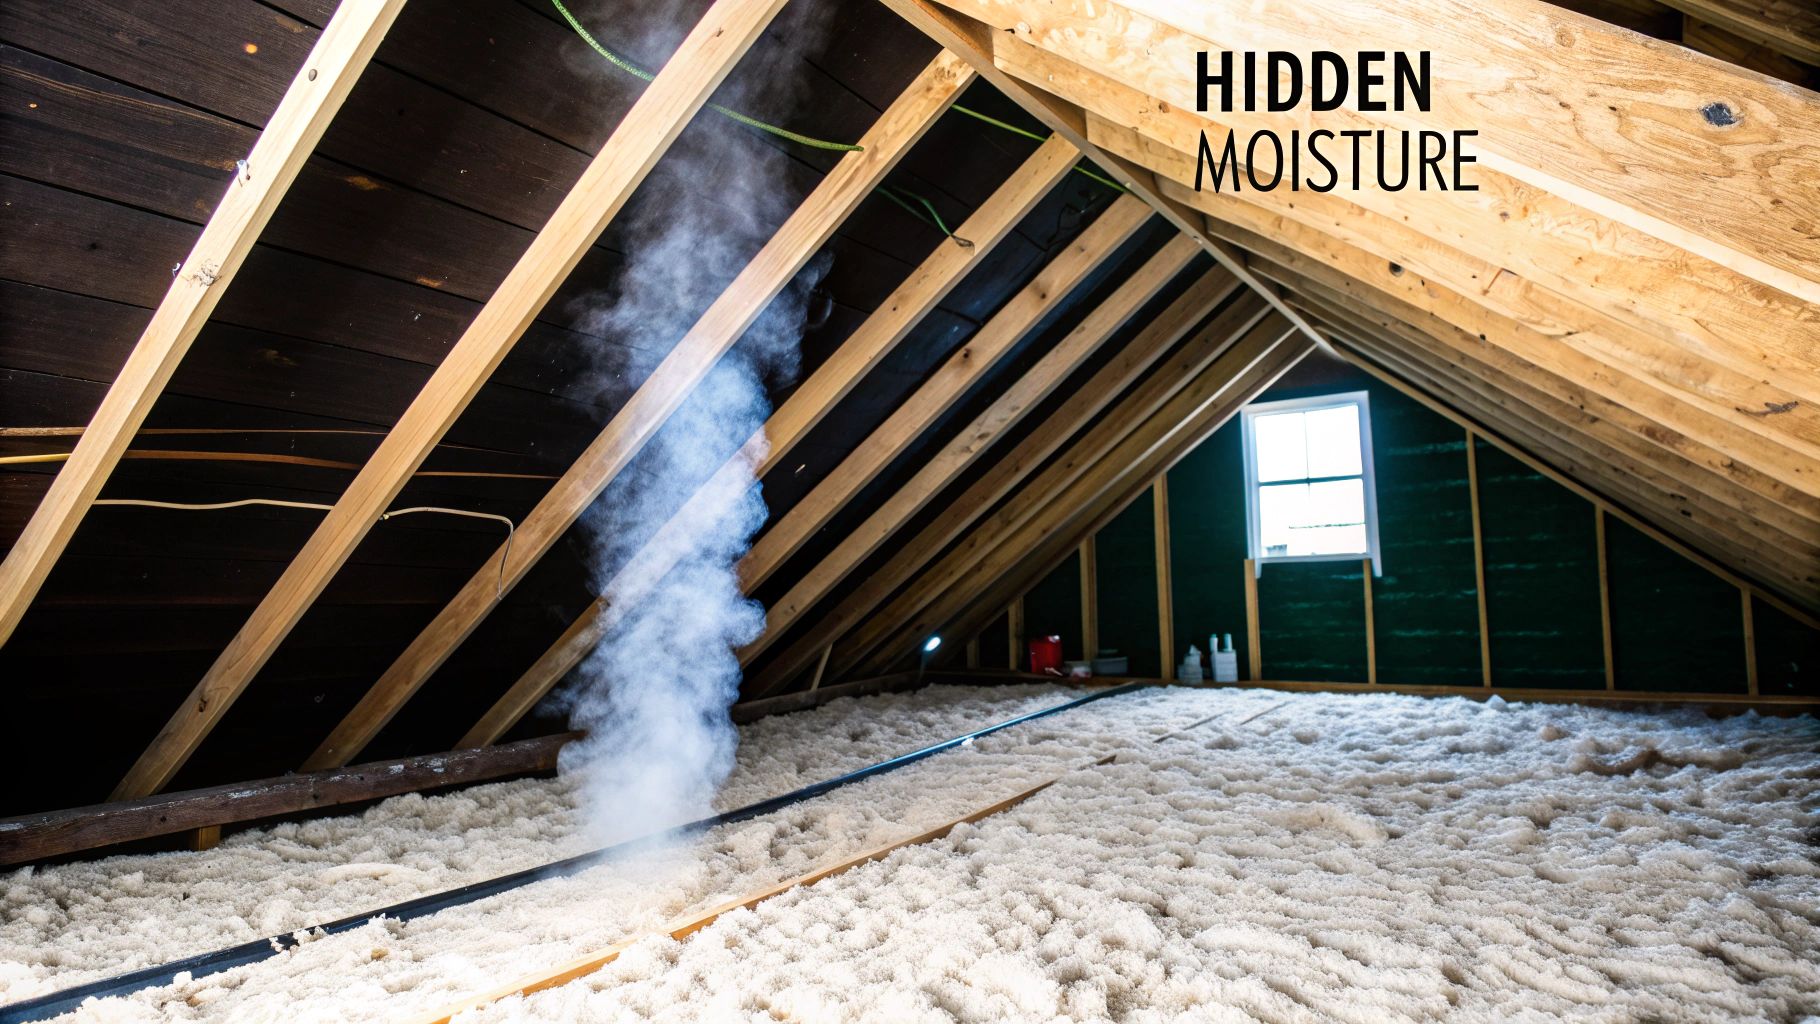
Think of your home like a big tea kettle. Daily life—cooking, showering, even just breathing—pumps moisture into the air. This warm, humid air naturally rises, always pushing its way up toward your ceiling and into the attic.
The real trouble starts when that moisture-heavy air hits a cooler surface, like the underside of your roof sheathing on a cooler night. It condenses, turning from invisible vapor back into liquid water. This is the moment a small problem becomes a massive one, all happening silently above your head.
This hidden condensation is the primary culprit behind structural decay. It creates the perfect breeding ground for mold and rots out the wooden framing of your attic, which can eventually compromise your home's integrity and lead to some seriously expensive repairs.
From Diffusion to Airflow
For a long time, building science was fixated on stopping vapor diffusion—the slow, molecule-by-molecule movement of moisture through solid materials. But then a major shift happened. Research revealed that the vast majority of vapor isn't seeping through drywall; it's hitching a ride on airflow through countless tiny gaps, cracks, and penetrations.
This discovery completely changed how we approach moisture control in ceilings.
Tackling this invisible threat isn't about slapping up a single sheet of plastic. It’s about creating a complete, airtight system that manages both air and vapor. The goal is to keep the humid, conditioned air inside your living space from ever touching the surfaces where it can turn into destructive liquid water.
Why It Matters for Your Home
Getting this right is absolutely critical. Here’s why:
- Protecting Structural Integrity: You're stopping moisture from soaking into your rafters and roof deck, which prevents rot and decay from taking hold.
- Improving Indoor Air Quality: A dry attic means no mold growth. No mold growth means no nasty spores circulating through your home’s HVAC system.
- Boosting Energy Efficiency: Insulation is like a sponge. When it gets wet, it stops working effectively. This forces your air conditioner to run constantly, driving up your utility bills.
Understanding and preventing these issues with professional Condensation Risk Assessments is the first step to protecting your home. A properly designed ceiling assembly with an effective vapor barrier isn't just a building component; it's your home's most important shield against the oppressive humidity we face every day.
How Moisture Actually Moves Through Your Home
To really win the war on moisture, you've got to understand your enemy. Think of your house as a ship floating in the thick, humid air of South Florida. Water can get in two ways: it can slowly seep through the hull, molecule by molecule, or it can gush in through bigger holes.
The slow seep is what we call vapor diffusion. This is when water vapor works its way directly through solid materials like drywall and wood. It’s happening, but it’s a pretty slow-moving threat.
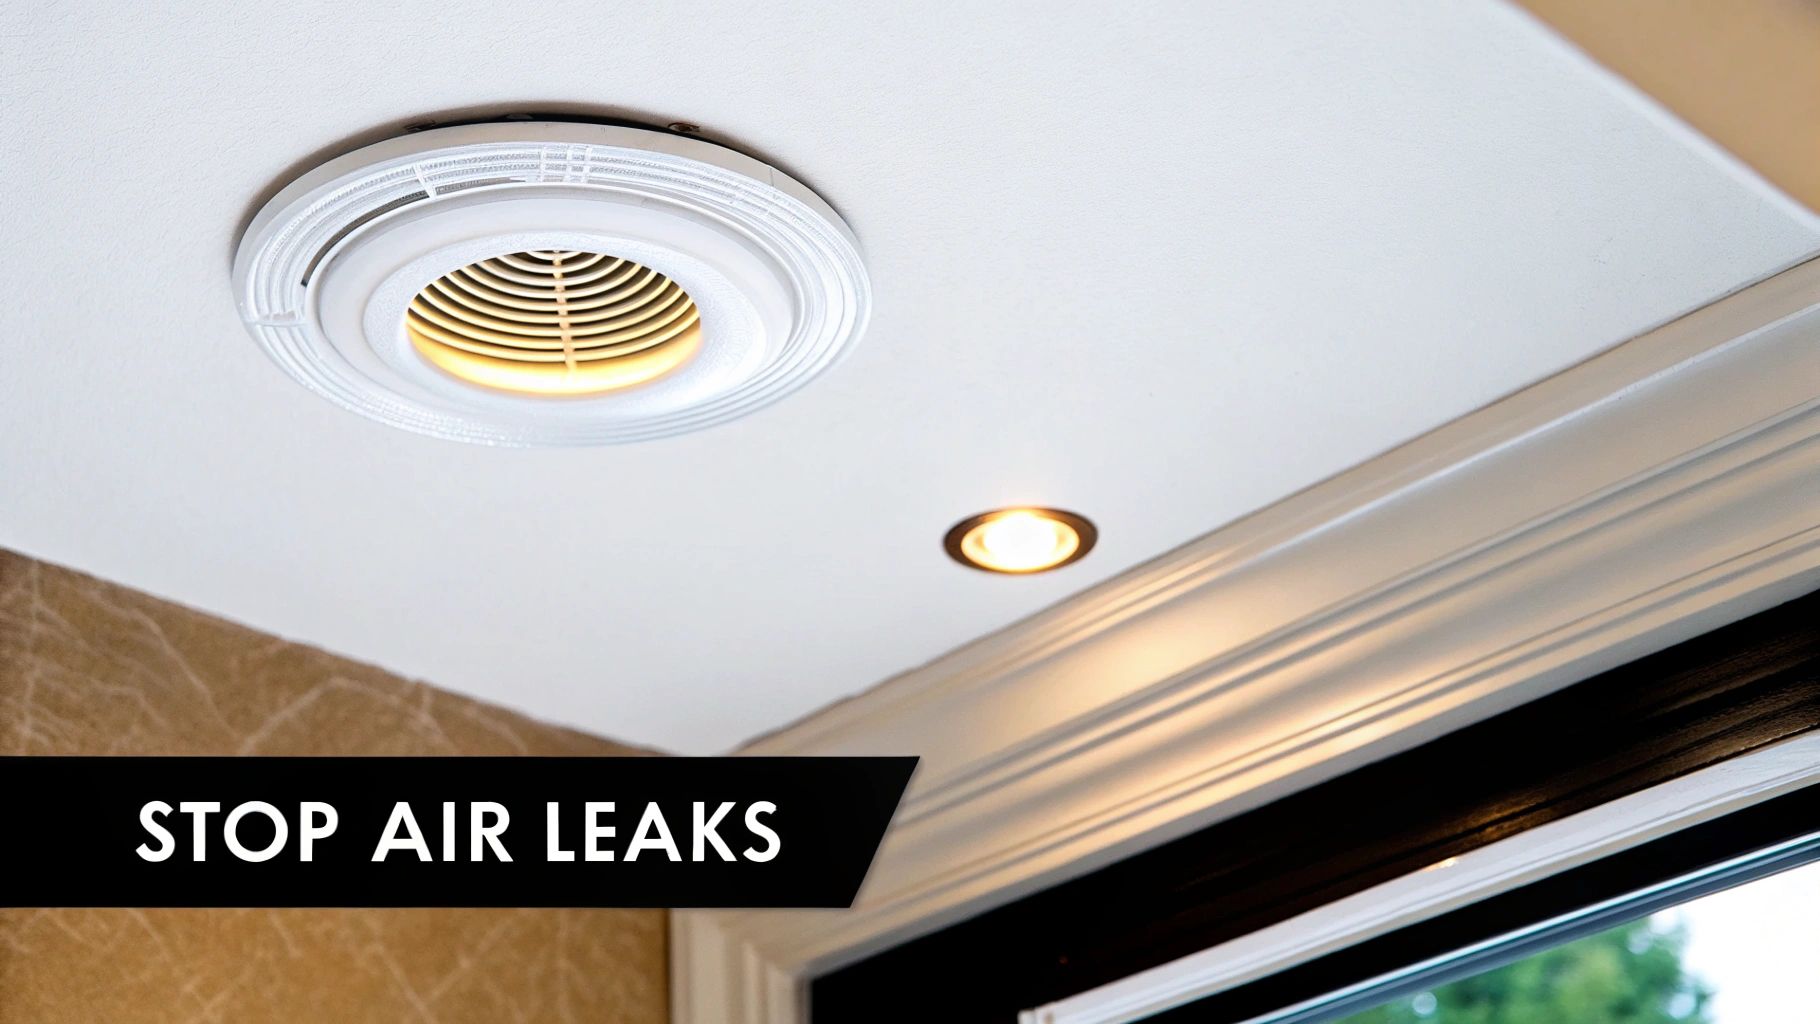
The real monster is air leakage. This is the gaping hole in your ship. Air leakage happens when humid indoor air finds its way into your ceiling and attic through unsealed gaps around light fixtures, the attic hatch, plumbing stacks, and electrical wires. This moving air is a moisture superhighway, capable of dumping up to 100 times more water into your ceiling assembly than diffusion ever could.
Vapor Barriers vs. Vapor Retarders: What’s the Real Story?
For a long time, the go-to term was "vapor barrier." It sounds absolute, like something that stops moisture dead in its tracks. But as building science has gotten smarter, we’ve shifted to a more accurate term: vapor retarder. The difference is small but incredibly important.
A true vapor barrier is basically waterproof, letting almost nothing through. A vapor retarder, on the other hand, just slows moisture down. This matters because completely stopping vapor can accidentally trap it where you don't want it, leading to rot and mold.
Today, building codes and industry pros use the term vapor retarder. The goal isn’t to wrap your home in a plastic bag. It’s to intelligently manage how and where moisture moves through the structure.
Air Control Is Moisture Control
This brings us to the single most important rule for homes in our climate: if you control the air, you control the moisture. Plugging the big holes in the ship is always more effective than trying to make the entire hull waterproof.
When you stop humid, air-conditioned air from leaking into your hot attic, you shut down the main engine of condensation. It's why having a perfect vapor barrier in ceiling assemblies is far less critical than having a perfect air barrier. You can see exactly how this plays out by understanding why your attic is humid and how spray foam fixes it.
Let’s break down the two ways moisture gets in:
- Vapor Diffusion: Think of this as a slow, methodical trickle of moisture molecules passing through solid materials. It’s a minor player in the grand scheme of things.
- Air Leakage: This is the big one. It’s the bulk movement of air—and all the moisture it’s carrying—through every crack and gap. This is what drives condensation and serious moisture problems.
By shifting our focus from diffusion to air sealing, we attack the problem at its source. That’s the key to a drier, healthier, and more durable home here in Florida.
Choosing the Right Vapor Retarder for Your Ceiling
Now that you understand how moisture gets around, picking the right material to manage it is a lot easier. The real goal isn't just to block vapor; it's to install a system that plays nice with your home and can handle the brutal humidity we get in South Florida.
Let’s walk through the common options you'll see for a vapor barrier in ceiling assemblies.
Old-School Materials: The Pros and Cons
For years, a few go-to materials were the standard. They can work, but you need to know their limitations, especially down here.
Polyethylene (Poly) Sheeting: This is what most people picture when they hear "vapor barrier." It's a sheet of plastic that puts a dead stop to vapor. While that sounds good, it's a huge risk in our climate. If any moisture gets trapped behind it—from a small roof leak or condensation—that plastic sheet ensures it can never dry out. You've essentially created a "moisture sandwich" in your ceiling, which is a perfect recipe for rot and mold.
Kraft-Faced Insulation: You've seen this before—the fiberglass batts with paper backing. That asphalt-coated paper is a Class II vapor retarder, which is better. It slows moisture down but isn't a complete roadblock, allowing for some drying potential. The catch? Its performance hinges on a perfect, seamless installation. Every tear, gap, or un-taped seam is a highway for moisture, and getting it perfect is next to impossible in the real world.
Modern Solutions: Smarter and Integrated
Thankfully, building science has given us much better options—materials that are more forgiving, adaptable, and combine several functions into one.
There are even "smart" vapor retarders that can change their permeability. When it's dry, they block moisture. But if humidity builds up in the ceiling assembly, they literally "open up" and let the structure breathe and dry out. This is a game-changer for preventing trapped moisture.
But the biggest leap forward is integrating the vapor control layer directly with the air barrier and insulation. This approach gets rid of the installation errors that plague sheet goods and creates one solid, continuous layer of protection.
This is where spray foam insulation really shines. It doesn't just sit in the joist bay; it expands and bonds to everything, sealing every crack, gap, and penetration. It creates an almost perfect air barrier, stopping that moisture-loaded air from getting in. And as we've covered, stopping airflow is job number one.
Depending on the type, spray foam also pulls double-duty as a top-tier vapor retarder. We break this down in detail in our guide comparing open-cell vs. closed-cell insulation.
Closed-cell spray foam, in particular, is the ultimate all-in-one solution. It's your insulation, your air barrier, and a Class II vapor retarder, all in a single application. When we apply it directly to the underside of the roof deck, it completely eliminates the need for a separate vapor retarder on your ceiling. It’s a simpler, more robust system that delivers far better performance against moisture for the long haul.
Comparing Common Vapor Retarder Materials
To make it even clearer, let's compare the materials side-by-side. You'll quickly see why the right choice is so critical for a humid climate.
| Material Type | Permeability Class | Pros | Cons for South Florida Climate |
|---|---|---|---|
| Polyethylene Sheeting | Class I (Vapor Barrier) | Inexpensive; effective vapor blocker. | High Risk. Traps moisture, prevents drying, and can lead to mold and rot. Generally a bad idea here. |
| Kraft-Faced Batts | Class II (Vapor Retarder) | Affordable; offers some vapor control. | Prone to installation errors (gaps, tears). Provides poor air sealing, allowing moisture intrusion. |
| "Smart" Vapor Retarders | Variable Permeability | Adapts to humidity levels; allows drying. | Higher material cost; still requires careful, expert installation to be effective as an air barrier. |
| Closed-Cell Spray Foam | Class II (Vapor Retarder) | All-in-one air barrier, insulation, and vapor retarder. Monolithic and seamless. | Higher upfront investment; requires professional installation. |
As you can see, while traditional materials might seem cheaper, their risks in a place like South Florida often outweigh the savings. An integrated system like closed-cell spray foam offers the most reliable, long-term protection by addressing air, thermal, and vapor control in one shot.
Does Spray Foam Insulation Need a Vapor Barrier?
This is one of the most common questions we get, and it gets right to the core of what makes modern building science so effective. Spray foam isn't just a swap-out for old-school insulation; it's a completely different way of thinking about how your ceiling assembly works.
Instead of layering different products for insulation, air sealing, and moisture management, a good spray foam system can do it all in one shot. The key is knowing which type of foam to use, because not all spray foam is the same. Whether you need an extra vapor retarder comes down to one thing: open-cell or closed-cell.
Open-Cell Spray Foam: The Air Barrier Specialist
Imagine open-cell spray foam as a dense, firm sponge. Its main superpower is stopping air movement. When we spray it, it expands aggressively into every nook and cranny, creating a monolithic air barrier that is incredibly effective. Since most moisture travels on air currents, stopping the air is a massive win.
But, like a sponge, its structure is vapor permeable. This means water vapor can still slowly diffuse through it over time. While it shuts down the moisture superhighway (air leakage), it doesn't completely block the tiny side streets (vapor diffusion). In some climates, this might mean a separate vapor retarding paint or membrane is needed, but here in South Florida, its air-sealing muscle is usually more than enough.
Closed-Cell Spray Foam: The All-in-One Powerhouse
Now, closed-cell spray foam is a different animal entirely. It cures into a rigid, dense plastic with bubbles that are completely sealed off from one another. This gives it the unique ability to wear three hats at once:
- High-R-Value Insulator: It packs an incredible thermal punch for its thickness.
- Superior Air Barrier: Just like open-cell, it locks down air leaks completely.
- Built-In Vapor Retarder: It’s a Class II vapor retarder, meaning it has a very low perm rating and actively resists moisture vapor from passing through.
When you install closed-cell spray foam, you’re getting your insulation, air barrier, and vapor control in a single, seamless application.
Slapping another vapor barrier in ceiling assemblies with closed-cell foam, like a sheet of poly, is not just pointless—it's downright dangerous. You risk creating a "double vapor barrier," which can trap moisture between two non-drying surfaces. That’s a recipe for disaster.
A professional closed-cell spray foam installation doesn't need a separate vapor barrier; it is the vapor barrier. It's a fully integrated system that provides top-tier insulation and air sealing while expertly managing moisture risk.
This decision tree helps simplify when and where different approaches make the most sense for your ceiling.
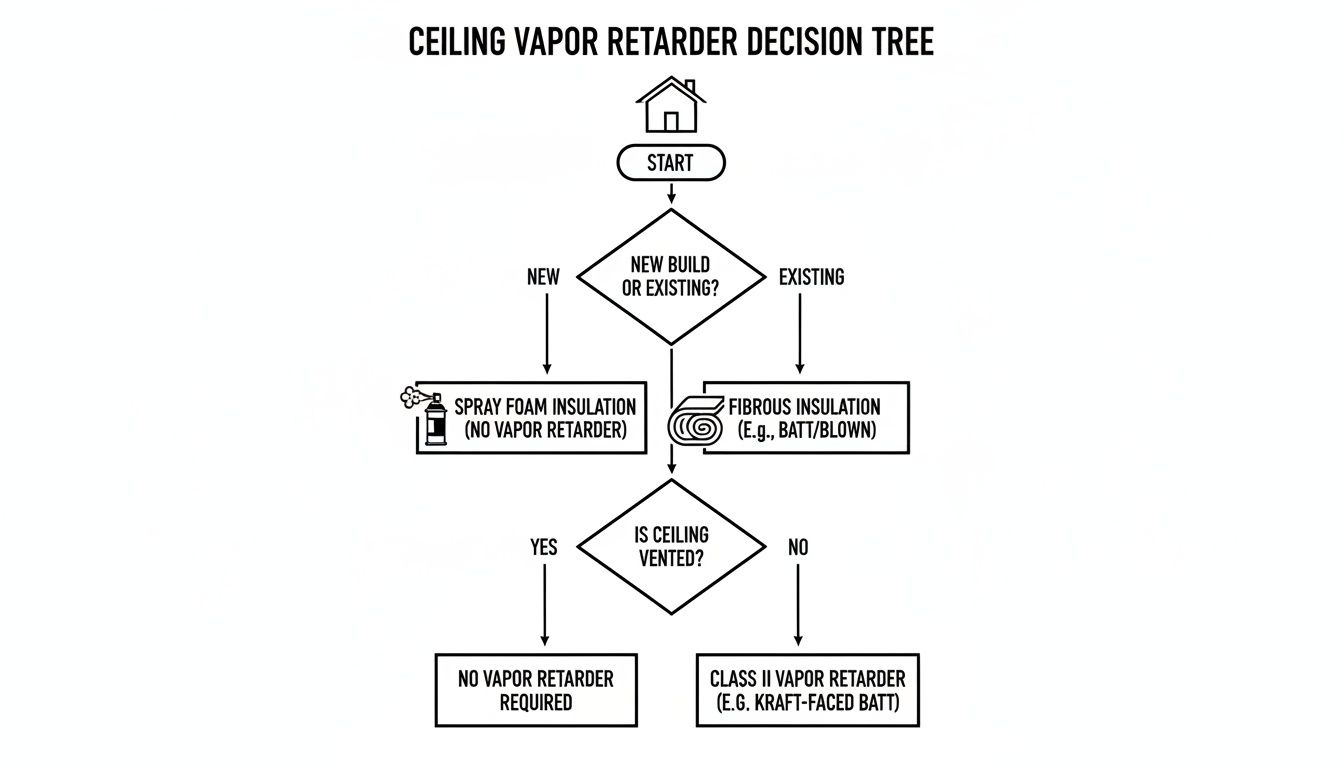
As you can see, modern building science is leaning hard into integrated systems like spray foam, especially for new builds. For years, the industry relied on plastic sheets, but we learned those were only as good as their installation—and they were almost never perfect. Flaws and gaps made them unreliable. This pushed the industry toward better methods, like the airtight drywall approach, where the drywall itself becomes the main air barrier. To get a better sense of this evolution, you can learn how integrated systems became the gold standard and why they perform so much better in the real world.
Real-World Guidance for South Florida Homeowners
Knowing the building science is great, but applying it to your home in Jupiter, West Palm Beach, or Stuart is what really counts. Whether you're a homeowner trying to solve a problem, a builder on a new project, or a property manager protecting an investment, this is where the rubber meets the road.
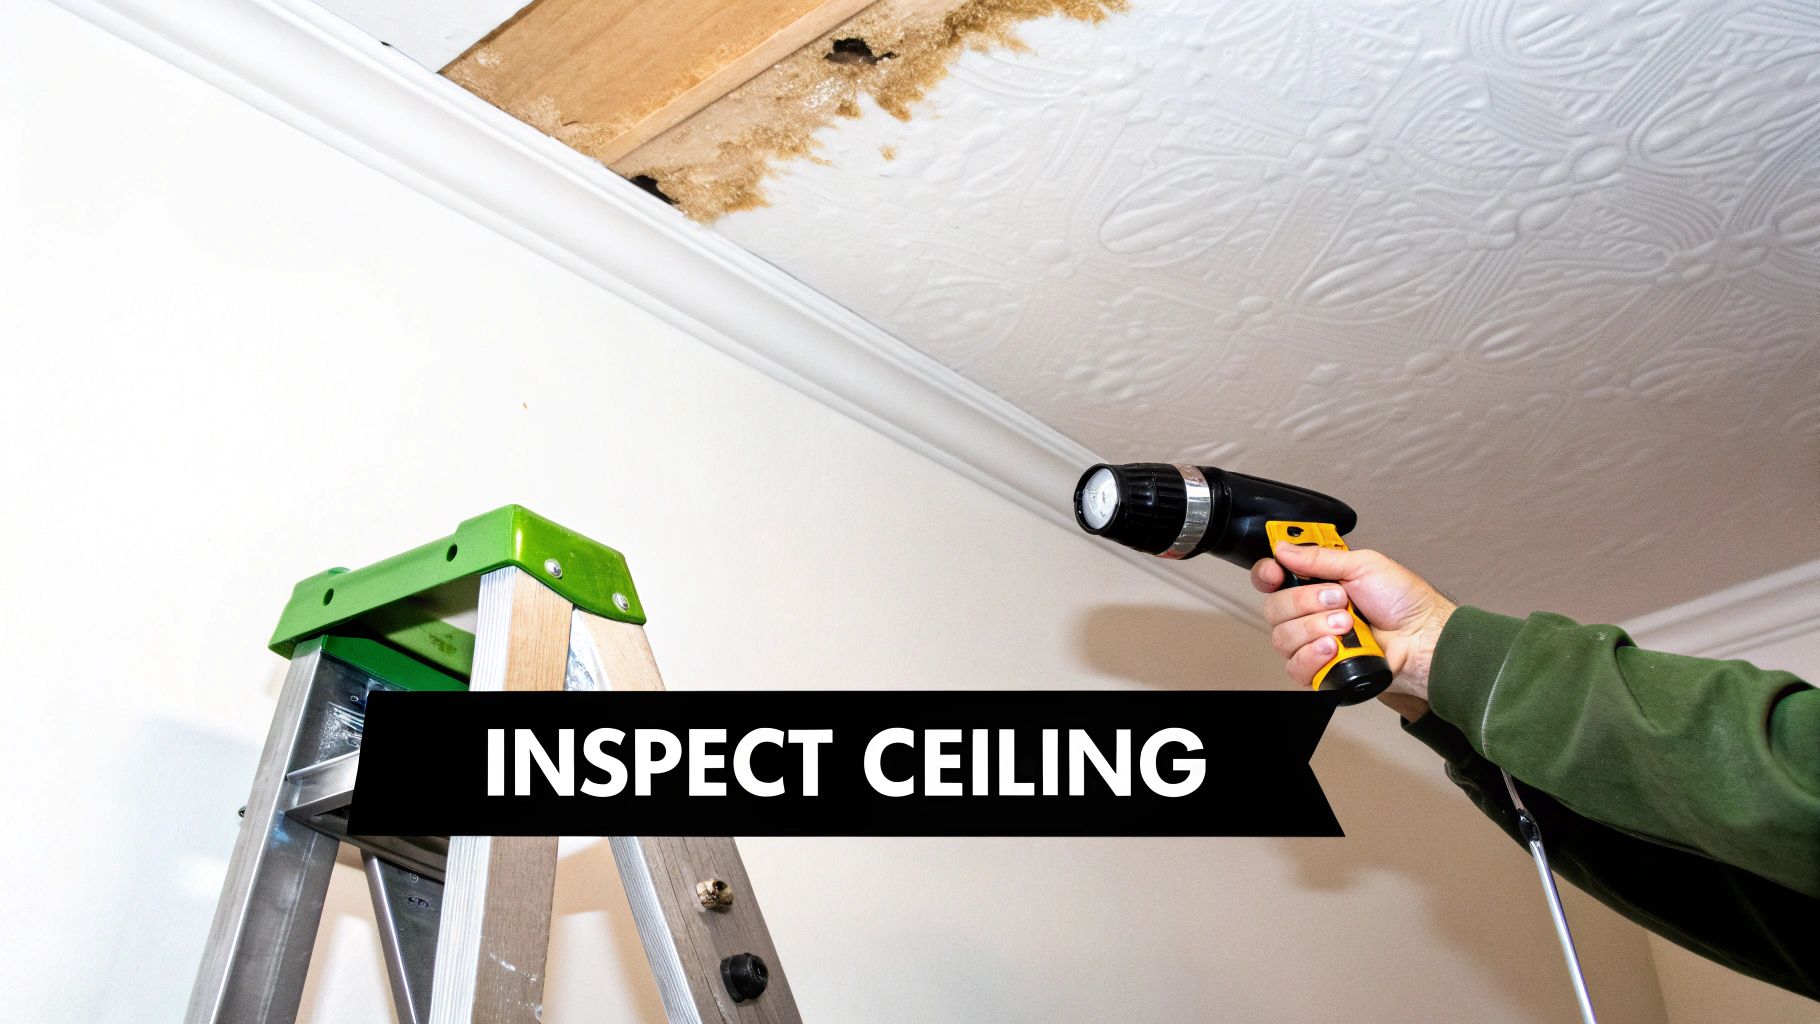
Spotting a failing ceiling system early can save you a world of hurt. Moisture problems rarely stay hidden for long—you just need to know the signs.
Keep an eye out for these red flags:
- Ceiling Stains: Those ugly yellow or brown spots are the calling card of condensation. It means water is forming above your ceiling and soaking into the drywall.
- Peeling or Bubbling Paint: When moisture gets trapped, it literally pushes the paint off the surface. If you see bubbling or cracking, it’s a bad sign.
- Musty Odors: That persistent damp, earthy smell isn't just "old house smell." It's often the first clue you have hidden mold or mildew growing in your ceiling assembly.
- Visible Mold or Mildew: Any fuzzy spots—black, green, or white—are a five-alarm fire. This isn't just a stain; it’s an active colony that demands immediate attention.
Best Practices for Builders and Contractors
For new builds here in South Florida, we have to think bigger than just one component. Simply slapping a vapor barrier in ceiling assemblies and calling it a day is a recipe for failure. The real goal is a complete air-sealing strategy for the entire building.
This means being obsessive about sealing every single penetration. Every plumbing vent, electrical box, and recessed light is a potential highway for humid indoor air to sneak into your attic and find a cool surface to condense on.
Local building codes are finally catching up to the science. A continuous air barrier isn’t just a nice idea anymore; it's a requirement for building a home that’s durable and efficient enough to handle our humidity.
Long-Term Maintenance for Property Managers
If you’re managing multiple properties, prevention is everything. You can't afford to wait for a tenant to call about a leak. Regular inspections are your best friend.
Make it a habit to do a thorough visual check of all ceilings and attics at least twice a year. Before and after our brutal summer is the perfect time.
Your checklist should be simple but consistent:
- Check for any sign of leaks around roof penetrations like plumbing stacks, vents, and chimneys.
- Make sure attic ventilation isn't blocked by insulation that’s been piled up or shifted around.
- Look for damp or compressed insulation. If it looks flat and sad, it's likely been wet.
By turning these technical ideas into practical actions, you can stop moisture before it causes thousands in damage. For a deeper dive into how all the layers in your ceiling should work together, check out our guide to vapor barriers and insulation. Being proactive is the only way to win the war against moisture down here.
When to Trust the Professionals for Installation
Let's be blunt: managing moisture in your ceiling, especially with South Florida's brutal humidity, is not a weekend DIY job. The building science is crystal clear on this—the single most effective way to stop condensation and the damage it causes is to control air leakage. While you can buy materials like faced insulation at a big-box store, getting that flawless, continuous seal they need to actually work is next to impossible without professional gear and experience.
Think of it this way: a poorly installed vapor barrier in a ceiling can actually do more damage than having none at all. It can trap moisture instead of blocking it, creating a perfect breeding ground for mold and rot. Even the smallest tear, gap, or unsealed seam completely defeats the purpose, turning your well-intentioned fix into the source of a much bigger, more expensive headache.
This is exactly why professional installation isn’t just a nice-to-have; it's essential for getting the job done right.
Beyond Installation: A Building Science Approach
When you hire a real pro, you're getting more than just a guy with a spray hose. You're bringing in an expert who truly understands the physics of how air and moisture move through a home in our specific climate. At Airtight Spray Foam Insulation, we don't just sell spray foam; we diagnose your home as a complete system.
Our approach is different because it's thorough. It includes:
- A deep dive evaluation of your attic and ceiling to hunt down every last potential air leak.
- Honest, practical recommendations on whether open-cell or closed-cell spray foam is the right solution for your home's specific needs.
- Meticulous prep and application to create a single, solid, seamless barrier that works exactly as intended from day one.
This building science-backed strategy ensures your home isn't just insulated, but truly sealed and protected against the oppressive humidity and heat that define life in South Florida. It’s about building a healthier, more efficient, and more durable home from the top down.
At the end of the day, the long-term integrity of your home depends on getting this critical detail right. We believe in educating homeowners so they can make the best possible decision for their property. If you’re ready to put an end to your moisture and energy problems for good, request a free evaluation and quote from our team today.
Your Top Questions About Ceiling Vapor Barriers, Answered
We've gone through a lot of the science, but you probably still have some practical questions. Let's tackle the most common ones we hear from homeowners.
Do I Really Need a Vapor Barrier in My Ceiling in Florida?
This is the big one, and the answer is usually no—at least not in the traditional sense. Here in Florida's hot, humid climate, our main battle is stopping humid outdoor air from sneaking into our cooler, air-conditioned attics and ceilings. When it does, it can condense and cause all sorts of problems.
That’s why a top-notch air barrier is far more important than a dedicated vapor barrier in ceiling assemblies. Something like closed-cell spray foam is perfect because it does both jobs in one shot—it stops air leaks cold and acts as a vapor retarder. Adding a separate plastic sheet in this scenario can actually do more harm than good by trapping moisture where you don't want it.
What’s the Real Difference Between a Vapor Barrier and an Air Barrier?
It's easy to get these two confused. Think about it this way: an air barrier is like a windbreaker jacket—it stops the bulk air from blowing through. A vapor barrier is more like a raincoat—it stops the moisture within that air (the vapor or humidity) from passing through the material itself.
The key takeaway is that moving air carries a huge amount of moisture with it. If you stop the air leaks, you stop most of the moisture problem right there.
Some materials are superstars because they do both. Closed-cell spray foam, for example, is a fantastic air barrier and a vapor retarder, giving you a complete moisture control solution in a single step.
Can I Just Install a Vapor Barrier Myself?
Honestly, this is one of those jobs where DIY can backfire, badly. While you can technically buy products like faced insulation at a home improvement store, getting it to work correctly is another story. A vapor barrier needs to be a continuous, perfectly sealed system.
Even tiny gaps, un-taped seams, or small tears completely defeat the purpose. Worse, a botched installation can trap moisture inside your ceiling, creating a perfect environment for mold and rot. It can cause the very problem you were trying to prevent.
For anything advanced like spray foam, professional installation isn't just a suggestion—it's a must for safety, performance, and keeping your home up to code. My advice? Always bring in a certified professional who understands our local climate.
Ready to stop worrying about moisture and start enjoying a more comfortable, energy-efficient home? The team at Airtight Spray Foam Insulation are experts in building science and know exactly what South Florida homes need. We can give you a clear, honest assessment and a professional solution. Get your free, no-obligation quote today!