Blog
how to insulate garage walls: Quick DIY Guide

Insulating your garage is one of the smartest upgrades you can make to your home. It’s about more than just comfort—it’s about turning a space you probably overlook into a valuable, functional part of your house. This single project creates a thermal buffer that slashes energy bills, protects your belongings, and can seriously improve your home’s resale value.
Why Insulating Your Garage Is a Game Changer

Most people just see their garage as a place to park the car and store junk. But if that garage is attached to your house and uninsulated, it’s basically a giant thermal hole. It’s constantly leaking expensive conditioned air out and letting extreme temperatures seep in, making your HVAC system work way harder than it needs to.
Learning how to properly insulate your garage walls solves this problem for good. The benefits go way beyond just feeling warmer in the winter or cooler in the summer—you’re creating a stable environment year-round.
More Than Just Temperature Control
A stable environment isn’t just about your comfort; it’s about protection. Wild temperature swings can ruin things you store in the garage, from classic cars and power tools to paint and electronics. Good insulation puts a stop to that.
Plus, once your garage is a comfortable space, you can actually use it. Think about the possibilities:
- A Year-Round Workshop: No more putting off projects because it’s freezing or scorching outside.
- A Home Gym: Finally, a workout space you’ll actually want to spend time in.
- A Bonus Room: It could easily become a playroom for the kids or a quiet home office.
A lot of people think garage insulation is just for cold climates. That couldn’t be more wrong. Here in South Florida, it’s absolutely critical for blocking the intense solar heat that hammers our homes all year, keeping your house cooler and giving your AC a much-needed break.
The Financial Upside of Insulation
The numbers don’t lie. A properly insulated home can save the average U.S. household up to 15% on annual energy bills. It’s an investment that pays for itself in lower utility costs, and it’s a huge selling point that can boost your property value. With the U.S. insulation market expected to hit 10.4 billion pounds by 2025, it’s clear that energy efficiency is on everyone’s mind.
And it’s not just about temperature. Insulation is also a fantastic sound dampener. It can dramatically cut down on noise from the street or from power tools running in the garage. If you’re looking for a quieter home, check out our guide on how insulation acts as a sound barrier.
Choosing the Right Insulation for Your Garage Walls
Picking the right insulation for your garage walls can feel like a huge task, but it’s hands-down the most important decision you’ll make for the project. The best material really comes down to your goals, your budget, and where you live—especially in a humid climate like we have here in South Florida. Let’s walk through the most common options so you can figure out exactly how you want to insulate your garage.
It’s no surprise that the demand for good insulation is growing. The market hit USD 58.7 billion in 2024, and it’s only going up. With energy costs on the rise and building codes getting stricter, making a smart choice here pays off. In fact, properly insulating your garage can slash heat transfer by up to 45%. That means real savings on your energy bills. You can dig into the numbers and see why this market is expanding by reading the full insulation market research.
The Power of Spray Foam Insulation
When it comes to performance, spray polyurethane foam (SPF) is in a class of its own for garage walls. Why? Because it does two jobs at once: it insulates and creates a powerful air barrier. The foam expands right after it’s applied, filling every single crack and gap to stop drafts that other types of insulation just can’t touch.
There are two main types of spray foam, and each has its own strengths.
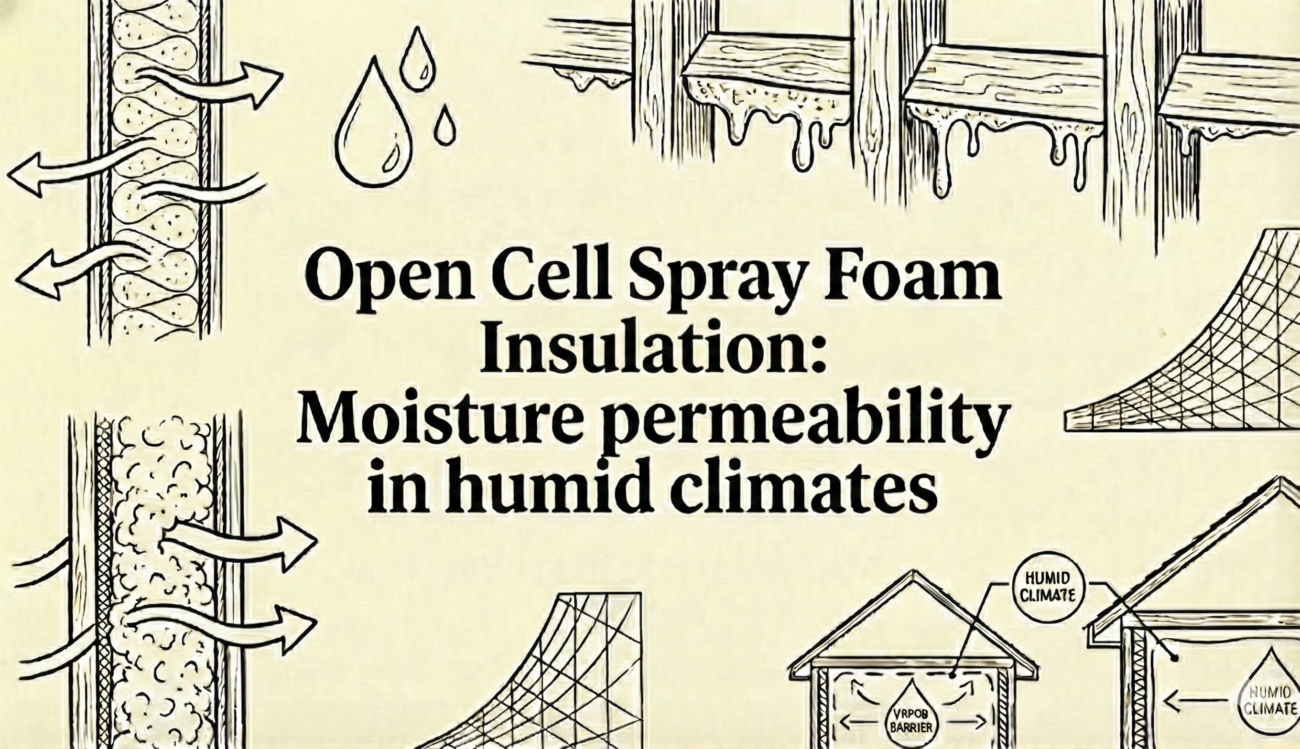
Open-Cell Spray Foam
Think of open-cell foam like a soft, flexible sponge. It’s less dense, which makes it an incredible air sealer and a fantastic sound dampener. If you’re planning to turn your garage into a home gym, a workshop, or even a music room, the noise reduction you get from open-cell foam is a serious perk.
The trade-off is that its sponge-like structure is vapor-permeable, meaning it can hold onto water. In a damp area, you’d need to install a separate vapor barrier, making it a less-than-ideal choice for South Florida garages on its own.
Closed-Cell Spray Foam
Now this is the heavy-hitter. Closed-cell spray foam is dense and rigid. The gas bubbles trapped inside give it a much higher R-value per inch, typically around R-6 to R-7. Not only that, but its rigid structure actually adds a bit of structural strength to the wall.
Most importantly, it’s a vapor barrier all on its own.
For our humid South Florida climate, closed-cell spray foam is the undisputed champion. It completely blocks moisture from passing through, which prevents the condensation and mold growth that can wreak havoc on garages in our region. It’s not just insulation; it’s an investment in the long-term health of your home.
Traditional Insulation Options
While spray foam delivers top-tier performance, traditional materials are still out there, mostly because they’re easy to find and have a lower upfront cost.
- Fiberglass Batts: This is that classic pink stuff you see at the home improvement store. It’s cheap and pretty easy for a confident DIYer to install between wall studs. The catch? If you compress it, it loses R-value. It’s also a magnet for mold if it gets wet.
- Rigid Foam Boards: These sheets of expanded (EPS) or extruded (XPS) polystyrene offer a solid R-value and are a great solution for insulating concrete block walls. They create a continuous layer of insulation that’s often more effective than batts, which leave gaps at every stud. If you have masonry walls, understanding the insulation value of concrete blocks is key to getting this right.
- Cellulose Insulation: Made from recycled paper, cellulose is a greener option that can be blown into wall cavities. It gives you good thermal protection and soundproofing, but it requires special equipment to install and can settle over time, leaving you with uninsulated gaps at the top of your walls.
Comparing Garage Wall Insulation Types
To make this a little easier, here’s a quick breakdown of how these materials stack up. Matching the right product to your specific needs is what separates a successful project from a waste of time and money.
| Insulation Type | Average R-Value per Inch | Moisture Resistance | Best For |
|---|---|---|---|
| Open-Cell Spray Foam | R-3.5 – R-3.8 | Low | Sound dampening and filling irregular cavities in dry climates. |
| Closed-Cell Spray Foam | R-6.0 – R-7.0 | High | Ultimate moisture control, high thermal resistance, and structural reinforcement. |
| Fiberglass Batts | R-3.1 – R-3.4 | Low | Budget-friendly DIY projects in garages with standard wood framing. |
| Rigid Foam Board | R-3.8 – R-5.0 | High | Insulating concrete block walls or creating a continuous thermal break. |
At the end of the day, deciding how to insulate your garage walls means balancing performance, your budget, and your local climate. For the best, longest-lasting results in a demanding environment like South Florida, nothing beats closed-cell spray foam. If you’re on a tight budget in a drier climate, fiberglass or rigid foam can still get the job done.
Your Hands-On Garage Insulation Process
Alright, this is where the planning turns into real work. Choosing the right material is half the battle, but getting the installation right is everything. A sloppy job can kill the performance of even the best insulation, but a methodical, clean process ensures you get every ounce of comfort and savings you paid for. Let’s walk through the hands-on steps, focusing on the pro-level prep that makes all the difference.
This all starts way before you pick up a tool. It’s about careful assessment and selection first. This visual guide breaks down that core decision-making workflow.

As you can see, a solid plan starts with understanding your needs, comparing your options, and then making a confident choice. Getting this foundation right prevents expensive headaches during the actual installation.
The Prep Work Professionals Swear By
Before a single ounce of insulation goes in, those wall cavities have to be spotless. This isn’t just about being neat; it’s about performance and preventing future disasters. Any dirt, debris, or lingering moisture is a breeding ground for mold and will absolutely compromise the insulation’s ability to do its job.
First things first, clear everything away from the walls. If you have old drywall up, it’s coming down. Once the studs are exposed, get a shop vac and clean out every single stud bay. I mean thoroughly—get rid of all the sawdust, dirt, and whatever else has collected in there over the years.
Next, you play detective. Inspect every inch of the exposed framing. Look for water stains, active moisture, mold, or signs of pests. You have to fix these problems before you insulate. Sealing up a wall with hidden issues is just asking for trouble.
Air Sealing: Your First Line of Defense
Insulation works by trapping air, but that’s pointless if drafts are just blowing right past it. This is why air sealing isn’t an optional step—it’s essential. You’d be amazed how much energy loss comes from tiny, seemingly insignificant gaps.
Here are your main targets for sealing up:
- Around Windows and Doors: Check the framing around any windows and doors in your garage. Fill the gaps between the frame and the studs with a low-expansion spray foam sealant.
- Electrical Boxes: Outlets and switches are notorious air leak spots. Carefully apply caulk or foam sealant around the outside of the boxes where they meet the sheathing.
- Pipes and Wires: See where plumbing or wiring runs through a stud or the wall plates? Each one of those little holes is a potential air leak. Seal them up with a good, flexible caulk that won’t crack over time.
This obsessive approach to air sealing is what separates a basic DIY job from a high-performance one. It’s the secret to creating a truly airtight thermal barrier. For us at Airtight Spray Foam, this isn’t just a prep step—it’s a core part of our process that guarantees the final result.
Installing Your Chosen Insulation
With the prep work handled, you’re ready to get the insulation in place. The method changes completely depending on the material you’ve chosen. Let’s focus on the two options that deliver the best performance for garage walls.
Applying Spray Foam Insulation
Let’s be clear: spray foam is a job for the pros. It requires specialized equipment and serious safety gear. The process involves mixing two chemical components that create an exothermic reaction, expanding instantly as they’re applied.
Our technicians suit up in full protective gear, including a respirator, and then systematically spray the foam mixture into each wall cavity. The real skill is in applying a perfectly even layer that expands to fill every nook and cranny without bowing out your future drywall. It creates a seamless, monolithic barrier that glues itself directly to the studs and sheathing.
This is how you completely eliminate the gaps and seams you get with other insulation types, giving you top-tier thermal resistance and air sealing in a single step.
Fitting Rigid Foam Boards
If you’re tackling this yourself with rigid foam boards, precision is the name of the game. These boards offer a fantastic R-value and are great against moisture, especially if you have concrete block walls.
Start by measuring the width between your studs. And don’t just measure once—check the top, middle, and bottom. Studs are almost never perfectly parallel.
Transfer those measurements to your foam board, but subtract about a quarter-inch from the width. This gives you just enough wiggle room. Use a straightedge and a sharp utility knife to score the board, then snap it for a clean cut.
Fit the board into the cavity, pushing it flush against the exterior sheathing. That quarter-inch gap you left? You’re going to fill it with canned spray foam. This final step is crucial—it seals the edges and stops air from sneaking around the board.
Navigating Wiring and Obstacles
No wall is just an empty box. You’re going to have wires, pipes, and outlet boxes to deal with. How you handle them makes a big difference.
- For Rigid Foam: You’ll need to carefully cut notches or holes in the foam board to fit around obstacles. Make your cuts as tight as possible to minimize gaps. Then, seal any remaining cracks around the wire or box with caulk or canned foam.
- For Spray Foam: This is where spray foam really shines. It just flows around wires and pipes, encasing them completely. It seals every penetration point automatically. No extra cutting, fitting, or sealing needed.
No matter which insulation you use, never, ever compress it to fit into a tight space. Shoving and cramming insulation (especially fiberglass) crushes the air pockets that give it its R-value, making it almost useless. Always cut the material to fit snugly, not forced.
Battling Humidity in a South Florida Garage

Insulating a garage in South Florida isn’t like insulating one up north. Down here, our number one enemy isn’t the cold—it’s the oppressive, year-round humidity. More than just making you uncomfortable, high humidity is a direct threat to your home. It’s the perfect breeding ground for mold, mildew, and eventually, rot.
The problem starts with condensation. When warm, moisture-heavy air comes into contact with a cooler surface (like a wall next to your air-conditioned living space), that moisture turns from vapor back into liquid. If this happens inside your wall cavity, you’re setting yourself up for disaster. This is why slapping up some insulation without a solid moisture control plan is one of the biggest mistakes we see Florida homeowners make.
Why a Vapor Barrier Is Non-Negotiable
This is where a vapor barrier (or vapor retarder) becomes critical. Its job is simple: stop water vapor before it can get inside your wall assembly and condense. Without one, moisture will eventually find its way into your insulation, making it useless and turning your wall studs into a moldy mess.
For our hot, humid climate, the vapor barrier has to be installed on the exterior side of the insulation, right behind the outer sheathing. This keeps that soupy, humid outdoor air from ever reaching the wall cavity in the first place.
Here’s an easy way to think about it:
- Insulation is like your coat—it stops heat from moving.
- A vapor barrier is like a raincoat—it stops moisture.
You wouldn’t go out in a downpour wearing just a wool sweater, and the same logic applies to your garage walls. Proper insulation is just part of the equation.
The Best Insulation Choices for High Humidity
While traditional materials like fiberglass can work, they require a separate, perfectly installed vapor barrier. The reality is that any tiny tear, unsealed seam, or gap in that barrier creates a pathway for moisture to get in and get trapped, leading to major damage you won’t see until it’s too late.
This is exactly why closed-cell spray foam is the go-to recommendation in our region. Its dense, rigid structure is inherently waterproof—it doesn’t just resist moisture, it completely blocks it. This makes it a far superior choice when figuring out how to insulate garage walls in a coastal environment. To see how it stacks up against other methods, it’s helpful to compare spray foam vs. blown-in insulation and understand the huge differences in moisture management.
For South Florida garages, closed-cell spray foam is the gold standard. It acts as both a high-performance insulator and a seamless vapor barrier in a single application. It creates an airtight, monolithic seal that water vapor simply can’t get through, making it the most reliable solution for our climate.
More Strategies for a Bone-Dry Garage
Insulation is your primary line of defense, but you can back it up with a few other moisture-fighting tactics. A combined approach is the best way to guarantee your garage stays dry and healthy all year long.
Consider adding these to your plan:
- Get the Air Moving: Good ventilation is key to preventing stagnant, humid air from building up. If you have an attached garage, check that your attic has proper soffit and ridge vents to let humid air escape.
- Bring in a Dehumidifier: If you use your garage as a workshop, home gym, or for storing anything valuable, a quality dehumidifier is a must-have. Keep it set to maintain a relative humidity between 30% and 50%.
- Seal the Concrete Floor: Many people don’t realize that an unsealed concrete slab is porous and will actually pull moisture up from the ground. Applying an epoxy sealant to your garage floor creates a waterproof barrier, stopping vapor transmission right at the source.
Budgeting Your Project: DIY vs. Professional Help
Let’s get straight to the numbers. The decision to insulate your garage walls almost always comes down to one big question: What’s the budget? The cost for a standard two-car garage can swing from a few hundred dollars for a weekend DIY job to several thousand for a professional crew, so it’s critical to know where your money is going.
https://www.youtube.com/embed/l5yeGNxABug
The final price tag really depends on your garage’s size, the type of insulation you pick, and the going labor rates in our area. The materials alone have a huge price range. For instance, classic fiberglass batts are easy on the wallet, typically running between $0.30 and $1.50 per square foot. But if you’re looking for top-tier performance, professionally installed closed-cell spray foam is the answer, and that usually costs between $1.65 and $3.80 per square foot.
Breaking Down the Costs
Looking at these numbers, you can start to see the trade-offs. Sure, spray foam has a higher upfront cost, but what you’re really buying is an all-in-one thermal, air, and moisture barrier. Over time, it pays for itself in lower energy bills and by protecting your property from the humid South Florida air.
To give you a clearer picture, here’s a quick breakdown of what you can expect to pay for different materials. Remember, the “Professional Installation” cost isn’t just for labor—it includes specialized equipment, safety gear, and the expertise needed to get the job done right, which is absolutely essential for materials like spray foam.
Estimated Cost for Garage Wall Insulation
This table provides a side-by-side look at the estimated material costs versus the all-in price for a professional installation.
| Insulation Type | DIY Material Cost (per sq. ft.) | Professional Installation Cost (per sq. ft.) |
|---|---|---|
| Fiberglass Batts | $0.30 – $1.50 | $1.00 – $2.50 |
| Rigid Foam Board | $0.60 – $2.00 | $1.50 – $3.50 |
| Spray Foam | Not Recommended for DIY | $1.65 – $3.80 |
As you can see, the DIY route looks tempting on paper. But before you start loading up your cart at the home improvement store, it’s vital to weigh those savings against the potential headaches and your own skill level.
The Big Decision: DIY or Go Pro?
Deciding between doing it yourself and hiring a professional is about more than just the money. It’s an honest gut-check on your skills, how much time you really have, and what level of performance you expect from your investment.
A DIY install with fiberglass or rigid foam is definitely doable for a handy homeowner. The big wins are saving on labor costs and the satisfaction of a job you did yourself. But the risks are very real. An installation with gaps, compressed insulation, or a poorly sealed vapor barrier can trap moisture, invite mold, and leave you with a garage that’s barely more comfortable than when you started.
Hiring a professional is an investment in peace of mind. For a complex material like spray foam, it’s non-negotiable. A pro brings the specialized rig, safety training, and hands-on experience to create a perfect, seamless seal that a DIY kit from a box store simply can’t match. You aren’t just paying for foam; you’re paying for guaranteed performance.
Can You Really Tackle This Yourself?
Before you commit your weekends to a DIY garage insulation project, ask yourself these tough questions:
- Do I have the right tools? You’ll need more than a utility knife. We’re talking staple guns, full protective gear, and the right saws for cutting perfectly around outlets and pipes.
- Am I comfortable with the safety risks? Fiberglass fibers can wreak havoc on your skin and lungs. You absolutely must wear proper personal protective equipment (PPE)—gloves, goggles, and a good respirator are non-negotiable.
- Do I really understand moisture control? This is the big one, especially in South Florida. Do you know exactly where a vapor barrier should go for our humid climate and how to seal every single seam perfectly?
- What is my time worth? A job that takes a professional crew a single day could easily eat up two or three of your weekends. Is that a trade-off you’re willing to make?
If you hesitate on any of these points, calling in a professional is the smarter, safer move. Trust me, a botched insulation job is far more expensive to fix than getting it done right the first time.
Common Questions About Insulating Garage Walls
Even the best-laid plans run into questions. When you’re figuring out how to insulate your garage walls, a few key uncertainties can bring the whole project to a screeching halt. We get these questions all the time, so let’s clear them up and give you the confidence to get the job done right.
What R-Value Do I Need for My Garage Walls?
Choosing the right R-value isn’t a one-size-fits-all situation—it’s completely tied to where you live. For most moderate climates, an R-value of R-13 to R-15 gives you a solid thermal barrier for garage walls.
But if you’re up north dealing with harsh, cold winters, you’ll need to aim higher. In those colder zones, targeting R-19 to R-21 (or even more) is a smart move to really fight off heat loss and keep your garage from feeling like an icebox.
Here in South Florida, the game is a little different. A high R-value is still critical for blocking that intense solar heat, but it shares the spotlight with moisture control. Always double-check your local building codes, as they set the minimum R-value required for any new construction or major renovation.
Do I Need a Vapor Barrier When Insulating My Garage?
Yes, in almost every case, a vapor barrier (or vapor retarder) is an essential part of a quality insulation job. This is especially true here in humid South Florida or in any area with big temperature swings between inside and out.
A vapor barrier’s only job is to stop moisture from sneaking through your insulation and condensing on the colder side of the wall. Without it, you’re basically creating a perfect breeding ground for mold, mildew, and rot, which can cause serious structural damage down the road.
Think of it this way: insulation is like a warm winter coat, but the vapor barrier is the waterproof shell you wear over it. One without the other just doesn’t work when the weather gets bad.
Some materials make this easier. Closed-cell spray foam, for instance, is so dense that it acts as its own all-in-one insulation, air barrier, and vapor barrier. If you’re using traditional fiberglass batts or mineral wool, you’ll have to install separate polyethylene sheeting over the insulation before you even think about hanging drywall.
Can I Insulate Garage Walls That Are Already Drywalled?
Absolutely. It’s definitely possible to insulate existing, closed-off walls, though your options are a bit different than working with open studs. You can add insulation without tearing everything down.
The most common method is using blown-in insulation, which is typically either cellulose or fiberglass. Here’s a quick look at how that works:
- Small, strategically-placed holes are drilled into the drywall in each stud bay.
- A specialized hose is fed into the hole, and insulation is blown into the wall cavity until it’s densely packed.
- Once filled, the holes are patched, sanded, and painted, leaving virtually no sign of the work.
Another great option is injection foam, which follows a similar process but fills the cavity with a slow-expanding foam product. While it’s more involved than insulating open walls, retrofitting is a fantastic way to upgrade an uncomfortable garage without the mess and cost of a complete demolition. It’s a true game-changer for older homes.
Ready to stop worrying about humidity and high energy bills? The experts at Airtight Spray Foam Insulation provide the ultimate solution for South Florida garages, delivering a seamless, high-performance barrier against heat and moisture. Request your free, no-obligation quote today!