Blog
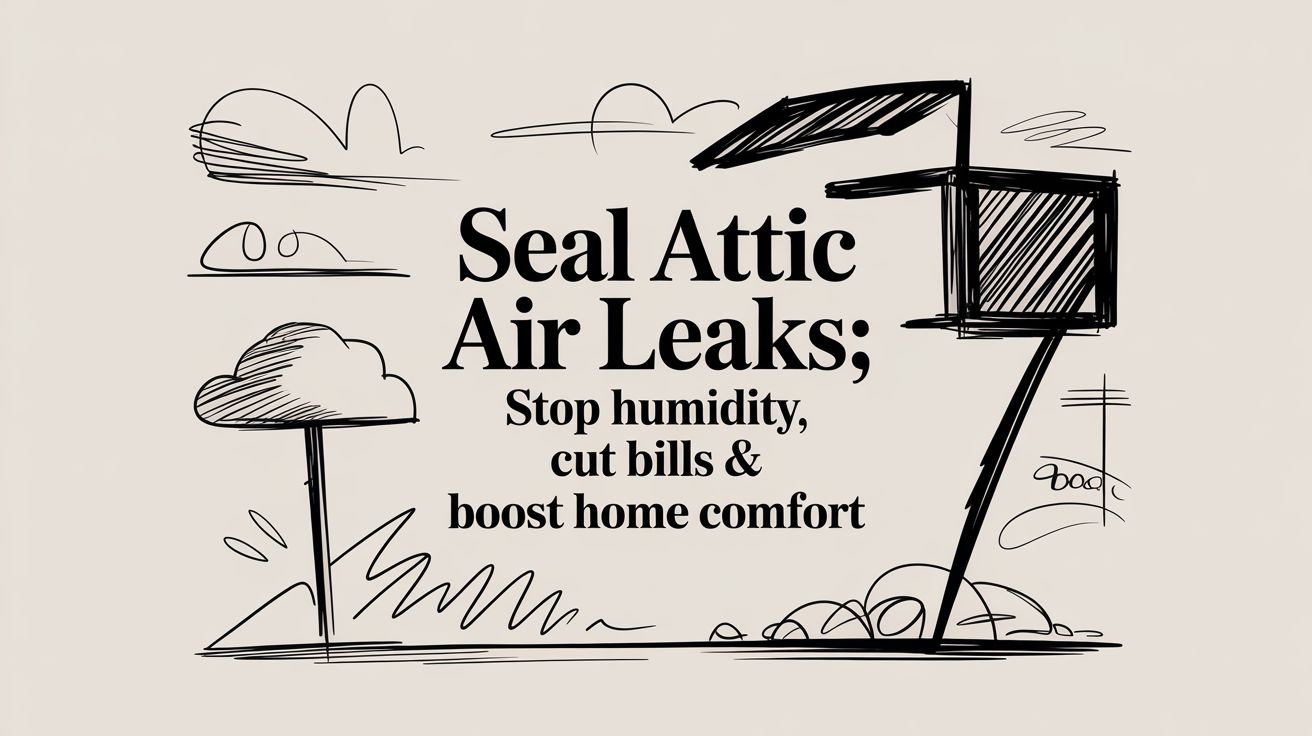
Seal Attic Air Leaks: Stop Humidity, Cut Bills & Boost Home Comfort
To really get a handle on your home's energy use, you need to go straight to the source: the attic. The goal is to seal attic air leaks by closing up all the little gaps and cracks where air moves between your living space and the attic. We're talking about the openings around plumbing pipes, electrical wiring, recessed lights, and especially the attic hatch.
For anyone living in Florida, this isn't just a good idea—it's one of the most important things you can do to lower cooling bills and finally get control over that indoor stickiness.
Why Sealing Attic Leaks Is a Non-Negotiable in Florida

Here in South Florida, an unsealed attic is more than a small oversight; it's a constant drain on your wallet and your comfort. Many homeowners simply don't realize their attic is actively working against their air conditioner, creating a frustrating cycle of high energy bills and a home that never feels quite cool enough.
It all comes down to something we in the industry call the "stack effect." In our hot, humid climate, it's a real problem. Think of it this way: the super-heated, heavy, and moisture-filled air from your attic is constantly being pushed down into your home through all those unsealed cracks and gaps. Your cool, conditioned air is escaping right up into the attic at the same time.
The Real Cost of Doing Nothing
This continuous exchange means your air conditioner is forced to run almost constantly just to keep up. It's a battle your HVAC system can never truly win, and it shows up on your monthly FPL bill.
In fact, those unsealed attic air leaks can be responsible for up to 30-40% of your home's total air leakage. This can drive up your cooling costs by as much as 25% every single year. For homeowners in places like Jupiter and Palm Beach Gardens, where humidity is a year-round battle, this is a massive, unnecessary expense.
It's simple math: for every dollar you spend on cooling your home, a quarter of it could be leaking right through your ceiling. Over a year, that adds up to hundreds of dollars completely wasted.
More Than Just High Energy Bills
High energy bills are just the beginning. The constant stream of humid attic air being pulled into your home creates that sticky, damp feeling, even when the AC is blasting. This excessive moisture causes a whole host of other problems.
- You'll feel less comfortable. A humid house just feels warmer, which makes you want to crank the thermostat down even lower.
- Your air quality suffers. High humidity is the perfect environment for mold and mildew to thrive, which can be a nightmare for allergies and respiratory health.
- It strains your AC unit. Your air conditioner has to do double duty—cooling the air and removing all that extra moisture—which leads to more wear and tear and a shorter lifespan for the system.
Effectively sealing your attic is the first line of defense to reduce indoor humidity and create a true barrier between your comfortable home and the harsh Florida environment just above your head. It's a critical component in how a proper moisture barrier insulation system should function.
Your Blueprint for Finding Hidden Attic Air Leaks

Now that you know why sealing these leaks is so important, it’s time to get to work. Hunting down the gaps in your attic isn't guesswork; it's a methodical process. Forget wandering around aimlessly. With the right approach, you can pinpoint the exact spots where your cool, conditioned air is escaping and that hot, humid Florida air is getting in.
The goal here is to create a detailed "leak map" of your attic floor. This map will be your guide when it's time to seal attic air leaks, making sure you don't miss a single costly opening. A thorough inspection is the foundation of a successful project, plain and simple.
Start With a Visual Inspection
Your own two eyes are the best place to start. A careful visual sweep of the attic floor can uncover the biggest—and often most significant—air leak sources. All you need is a good flashlight or a headlamp. Just make sure you can move around safely before you begin.
So, what are you looking for? Air movement carries dust. As air leaks through a gap day after day, it leaves a trail. Look for areas where the insulation is dirty, discolored, or just looks darker than the material around it. This is a classic tell-tale sign of an air leak. Your insulation is essentially acting like a filter, catching airborne particles as air passes right through it.
Focus your search on any spot where something penetrates the attic floor from your living space below. This means plumbing stacks, electrical wires, and especially the housings for recessed can lights. In my experience, these are always prime suspects.
Making Invisible Leaks Visible
Not all leaks leave a dirty trail. Smaller gaps can be just as problematic, but they're much harder to spot with a simple visual check. This is where a simple trick comes in handy to make that air movement visible: a DIY smoke test.
You don't need any fancy equipment. A single incense stick or a smoke pen works perfectly. The best time to do this is on a cooler, breezy day to maximize the pressure difference between your house and the attic (what we call the stack effect). Safely light your incense stick and hold it near any spots you think might be leaking.
- Around Plumbing Pipes: Watch the smoke trail where PVC pipes come through the attic floor. If the smoke wavers, gets pulled down, or vanishes into a gap, you've found a leak.
- Near Electrical Wires: Check where wiring for ceiling fans and light fixtures enters the attic. Even tiny holes add up to a lot of air transfer.
- At Wall Top Plates: The junction where your interior walls meet the attic floor is a huge source of leakage. Move the smoke source slowly along these long joints and watch what it does.
Important Safety Note: Never use a smoke test near flammable materials or insulation. Be extremely cautious and keep a fire extinguisher nearby. This is about creating a small, controlled wisp of smoke, not filling your attic.
This simple diagnostic turns an invisible problem into a visible one. It allows you to mark each leak’s location with a small flag or a piece of tape so you can come back and seal it later.
Identifying the Usual Suspects
After more than 25 years of working in homes across South Florida, I can tell you that certain spots are almost always guilty of harboring air leaks. As you do your inspection, pay special attention to these common hotspots. Knowing where to look first saves a ton of time and ensures you find the most impactful leaks right away.
This quick reference table will help you zero in on the most common trouble spots during your visual inspection.
Common Attic Air Leak Hotspots and How to Spot Them
| Leak Location | What to Look For | Severity Level |
|---|---|---|
| Recessed "Can" Lights | Dirty insulation around the housing. These are notorious for large, unsealed gaps. | High |
| Plumbing Vents/Stacks | Wide gaps around PVC or cast iron pipes that go through the attic to the roof. | High |
| Attic Hatch or Door | Drafts around the edges. Look for light coming through when the attic is dark. | High |
| Wall Top Plates | The long, unsealed joints where interior walls meet the attic floor. | High |
| Chimney Chase | The large, open cavity surrounding a metal flue or masonry chimney. | Medium |
| Electrical Wiring | Small holes drilled for wires leading to ceiling fixtures add up to significant leakage. | Medium |
Focusing on these key areas will give you a solid plan. Of course, for a definitive, measurable assessment of your home's airtightness, nothing beats a professional diagnostic. You can learn more about this in our guide that asks, "What is a blower door test?," which explains exactly how we use this equipment to pinpoint every single leak.
Even without professional tools, by methodically working through a visual inspection, using smoke to confirm your findings, and focusing on these known culprits, you’ll have a comprehensive blueprint for your project. This prep work is the key to successfully seal attic air leaks and achieve real energy savings and comfort.
Picking Your Sealing Materials: The Tools That Actually Work
Once you've hunted down all the air leaks in your attic, the real work begins. You have to pick the right materials to seal them up for good. This is where a lot of DIY projects go wrong. Not all gaps are the same, and using the wrong sealant is like trying to patch a tire with a band-aid—it's just not going to hold.
Think of it like this: you need a specific tool for a specific job. You wouldn’t use caulk to fill a giant hole, and you wouldn't use expanding foam for a hairline crack. Using the wrong product can lead to a seal that fails in a few months, wastes your money, or, in the worst-case scenario, even creates a fire hazard.
Matching the Material to the Gap
Let's walk through the materials I keep in my own toolkit. Getting this right is the secret to a long-lasting, effective air seal. It’s what separates a quick fix from a real solution.
A common mistake I see homeowners make is grabbing a single can of spray foam and trying to use it for everything. While it's a fantastic product for certain applications, it’s definitely not a one-size-fits-all answer. Knowing your options will save you a lot of mess and frustration.
For Small Cracks and Gaps (Up to 1/4 Inch)
For the small stuff, your go-to is acrylic latex caulk. It’s perfect for sealing those long, thin cracks along the tops of your interior walls (the top plates) or around the trim of your attic hatch. It applies easily with a standard caulking gun, cleans up with water, and stays flexible, which is important as your house settles.
When you're at the hardware store, grab a tube that's labeled "paintable" and rated for interior/exterior use. This gives you a durable seal that you can paint over for a clean finish, especially if it's around a visible area like the attic hatch frame.
Here’s a pro tip: Keep a small cup of water and a rag handy. After you lay down a bead of caulk, dip your finger in the water and run it smoothly along the bead. This "tools" the joint, giving you a clean, professional-looking seal that’s perfectly airtight.
For Medium Gaps and Penetrations (1/4 Inch to 3 Inches)
This is where expanding spray foam becomes your best friend. It’s made for those bigger, awkwardly shaped gaps around plumbing vents, electrical wires, and AC lines. A single can of this stuff can expand to completely fill those irregular openings, creating an excellent air barrier.
You’ll generally find two types on the shelf:
- Minimal-Expanding Foam: This is what you want for sealing around things that could be warped by pressure, like a window or door frame in a finished attic.
- Triple-Expanding Foam: This is the heavy-hitter for most attic air sealing. It’s designed to fill larger voids around pipes and wires. Be careful, though—a little goes a very long way.
Always wear gloves, long sleeves, and eye protection. Trust me, this stuff is incredibly sticky and a nightmare to get off your skin or anything else it touches. I always recommend practicing on a scrap piece of cardboard first to get a feel for how fast it expands before you point it at a hole in your ceiling.
For Large Openings and Chases (Over 3 Inches)
When you're faced with a big hole, like a plumbing chase or an old, decommissioned vent, don't waste your money trying to fill it with can after can of spray foam. The professional approach is to use a combination of materials.
First, cut a piece of rigid foam board to fit snugly inside the opening. A little construction adhesive can help hold it in place. Then, use your expanding spray foam to seal around the edges of the board, creating a permanent, airtight plug between the board and the wood framing. It's a rock-solid, insulated fix.
Special Cases That Demand the Right Solution
Some spots in your attic have non-negotiable safety requirements. Getting this wrong is not an option.
- Heat-Producing Fixtures: For any gaps around a metal chimney flue, a furnace vent, or an old recessed "can" light that isn't IC-rated (Insulation Contact), you must use fire-rated caulk or a similar high-temperature sealant. Standard caulk or spray foam can melt or even ignite.
- Recessed Lights: Even if your modern recessed lights are IC-rated and safe to cover with insulation, they are still a major source of air leakage. The best solution is a pre-fabricated gasketed cover. You place this box over the light fixture from the attic side and seal its edges to the drywall with caulk or foam. It completely stops airflow.
- The Attic Hatch: This is often the single biggest leak in the whole house. Start by applying high-quality foam weatherstripping to the top edge of the hatch opening, where the door panel rests. You can also build a "dam" around the opening using rigid foam board to keep your attic insulation from falling out every time you open it.
While these DIY materials are great for tackling individual leaks, the undisputed champion for creating a truly complete air barrier is professional-grade spray foam. Unlike the canned variety, a professional application creates a single, seamless layer that expands into every last crack and cavity. It acts as both a perfect air seal and a powerful thermal insulator in one go. If you're weighing your options, it's worth understanding the difference between open-cell versus closed-cell spray foam insulation and how each choice can affect your home’s long-term performance and comfort.
The Sealing Process: From Prep to a Perfect Seal
You've found the leaks. Now for the part that separates a pro job from a DIY headache: the actual sealing. After more than 25 years in this business, I can tell you that a clean, effective seal comes down to two things: good prep and the right technique.
This isn't about just plugging holes as fast as you can. It’s a methodical process. Rushing leads to messy work and seals that just don’t last. Let’s walk through the prep work we never skip and the application tricks that avoid those common frustrations.
Safety and Preparation First
Before you even think about picking up a caulk gun, you need to set up a safe workspace. Attics are tough environments—hot, cramped, and dark. A few minutes of proper prep makes the entire job go smoother and keeps you out of harm's way.
Your first move is always personal protective equipment (PPE). I know it feels like a hassle for a home project, but this is non-negotiable.
- Dust Mask or Respirator: You do not want to breathe in decades of dust, old insulation fibers, or sealant fumes. An N95 mask is the bare minimum.
- Safety Glasses: Debris, dust, and stray sealant have no business being in your eyes. Protect them.
- Gloves: Put on a pair of disposable nitrile or latex gloves. If you get spray foam on your skin, you'll be wearing it for days.
- Long Sleeves and Pants: This is your best defense against itchy insulation fibers and stray sealant.
With your gear on, it’s time to prep the surfaces. Use a shop vac to clean all the dust and debris from around the gaps you plan to seal. Sealants can't stick to dirt; trying to caulk a dusty top plate is a waste of time and material. Make sure you have stable footing, too. Lay down a few sturdy plywood boards across the joists to create a safe platform to work from.
A prepped attic is a safe attic. Always tell someone you’re heading up to work, and keep your fully charged phone in your pocket in case you need help.
Mastering Application Techniques
Now for the hands-on work. Applying sealant seems simple, but there's a real technique to getting a perfect, airtight seal without making a huge mess. The goal isn't just to cover the gap—it's to fill it completely.
This visual shows you the basic workflow, moving from the smallest gaps to the largest openings with the right material for each.
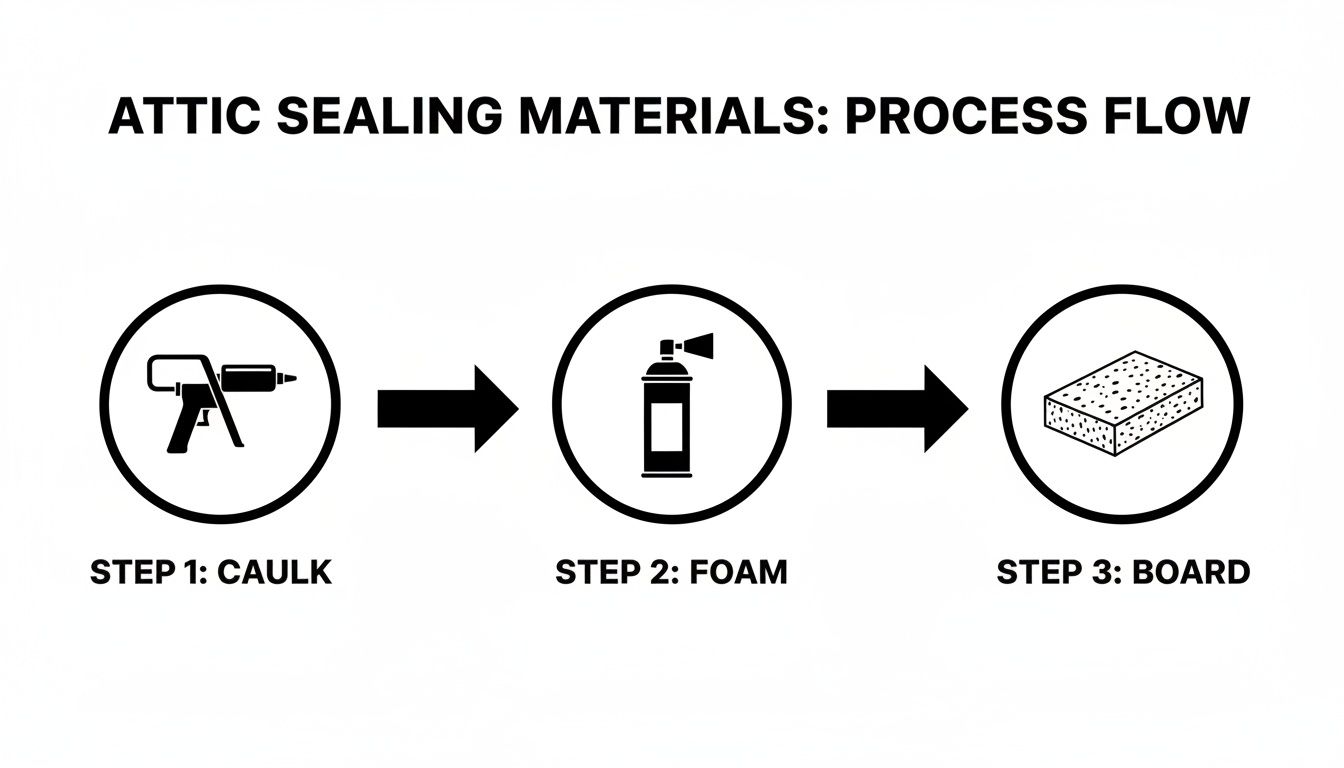
Think of it as a progression: caulk for hairline cracks, spray foam for bigger penetrations, and rigid foam board for the major gaps.
Applying Caulk with Precision
For those narrow gaps along wall top plates, you want a clean, continuous bead of caulk. Start by cutting the tube’s tip at a 45-degree angle, keeping the opening small for better control.
Puncture the inner seal, then apply steady pressure as you move the gun along the crack. The trick is to push the caulk into the gap, not drag it over the top. This forces the material deep into the joint for a solid bond. For that clean, professional look, you can smooth the bead with a damp finger.
Controlling Spray Foam
Spray foam is an amazing product, but it’s notorious for getting out of control. The secret is to respect the expansion. Before you start on a real gap, do a quick test spray on a piece of cardboard to get a feel for how fast and how much it expands.
When you're ready, place the straw deep inside the gap. Here's the key: only fill the gap about 50% of the way full. The foam will handle the rest. Overfilling is the number one mistake people make, and it creates a sticky, permanent mess.
A Step-by-Step Guide to Sealing Common Leaks
Let's put this all together. Here’s a quick-hit guide for sealing the most common culprits using the right materials and techniques.
- Wall Top Plates: Run a solid bead of acrylic latex caulk along the seam where the drywall meets the wood framing of the attic floor.
- Wiring Penetrations: A simple dab of caulk is all it takes to seal attic air leaks around small holes drilled for electrical wires.
- Plumbing Stacks: That big, ugly gap around your PVC vent pipes is a job for expanding spray foam. Get the nozzle deep into the cavity to ensure a complete fill.
- Large Openings: For a big chase or access hole, cut a piece of rigid foam board to size. Use construction adhesive to secure it, then seal the edges against the framing with spray foam.
- The Attic Hatch: This is a huge source of air loss. Apply foam weatherstripping tape around the frame where the hatch door rests. To guarantee a tight closure, install a couple of hook-and-eye latches to pull the door down snugly.
To DIY or Call a Pro? Making the Right Call
Alright, you’ve done the detective work, found the leaks, and have a good idea of what materials you’ll need. Now for the million-dollar question: is this a job you can handle yourself over a weekend, or is it time to bring in the pros?
There's no single right answer here. It really comes down to the scale of the problem and your own comfort level with this kind of work.
Let’s start with an honest look at your attic. If your inspection turned up just a handful of small, easy-to-reach gaps around some pipes or wiring, a DIY approach is a fantastic option. You can make a real difference in your home's comfort and energy costs with a couple hundred bucks in supplies and a Saturday.
When a DIY Approach Makes Sense
Going it alone is a great fit for homeowners who are comfortable crawling around in tight spaces and who take safety seriously. It's the perfect project if you’re only dealing with a manageable number of leaks.
I’d say you’re in good shape for a DIY if:
- You found fewer than 10-15 separate air leaks that are simple to get to.
- Your attic has a straightforward layout you can navigate safely.
- The leaks are mostly small cracks or medium-sized gaps around plumbing and vents.
- You have the patience to do the prep work right and apply materials carefully.
When to Bring in a Professional
But what if your inspection felt more like a horror movie? If you uncovered widespread problems, complex issues, or hard-to-reach spots, calling a professional is the smarter investment. Trust me, I've seen homes where the leaks are so extensive that a DIY fix would just be a drop in the bucket.
Hiring an expert is the way to go when you’re facing:
- Widespread air leakage across the entire attic floor.
- A complicated, low-clearance attic that’s a nightmare to move around in.
- Large, tricky gaps like an open chimney chase or recessed lighting that isn’t IC-rated.
- You simply want a guaranteed, warrantied result without the headache and hassle.
A professional service isn't just about paying for labor. It's an investment in certainty. It's the peace of mind knowing every single leak was found—even the hidden ones—and sealed perfectly with the right materials.
This push for true airtightness is why the air leakage testing equipment market is set to explode, growing from $1.48 billion in 2025 to $2.85 billion by 2035. Here in North America, we hold a 36.8% market share, largely because building codes are getting stricter. Contractors in South Florida, for instance, are now required to seal every gap. You can get a deeper look into this trend by reading the full market research on Makda Insights.
When you partner with a company like Airtight Spray Foam Insulation, you’re hiring a team that uses diagnostic tools like blower doors to pinpoint every leak a visual inspection would miss. We use professional-grade spray foam that creates a seamless air barrier and adds insulation—something canned foam just can't do. It’s a comprehensive solution that maximizes your energy savings and ensures the job is done right, the first time.
Frequently Asked Questions About Sealing a Florida Attic
After walking hundreds of homeowners through this process, a few questions always come up. It's completely normal. Here are the straight answers to the most common concerns we hear, based on our years of experience working in attics right here in South Florida.
Will Sealing My Attic Cause Mold?
This is the number one concern we hear, and for good reason in our climate. The fear is that by sealing things up, you’ll trap moisture and create a bigger problem.
In reality, the opposite is true when the job is done right. The key is understanding that air sealing and attic ventilation are two different systems. Sealing stops conditioned air from leaking out of your living space. Ventilation—your soffit and ridge vents—is what allows the attic itself to breathe, pushing out hot, moist air.
A properly sealed attic envelope works with your ventilation system, not against it. We’re stopping the bad airflow (leaks) while preserving the good airflow (ventilation), which is the absolute best way to prevent moisture issues.
How Much Money Can I Realistically Save?
While every home has its own quirks, it's common for homeowners to see a 15-25% drop in cooling costs after a professional air sealing job. For a typical family in our area, that can easily add up to hundreds of dollars a year.
The U.S. Department of Energy consistently ranks air sealing as one of the most cost-effective energy upgrades you can make. When you pair it with the right insulation, the savings multiply.
Think of it this way: you’re plugging the holes that your AC has been fighting against for years. The savings are real, and they start showing up on your very next FPL bill.
What Is the Difference Between Open-Cell and Closed-Cell Spray Foam?
This question comes up a lot, and it's a good one. They look similar but do very different jobs. I like to think of them as two distinct tools in our toolbox.
Open-Cell Foam: This stuff is light, soft, and spongy, and it expands like crazy. It’s absolutely fantastic for filling every tiny nook and cranny to create a perfect air seal. It’s also a great sound dampener.
Closed-Cell Foam: This foam is dense, hard, and incredibly strong. It’s an all-in-one air, moisture, and vapor barrier, which makes it a powerful tool where moisture control is the top priority. It also packs more insulating R-value into every inch.
Choosing the right one isn't just a matter of preference; it depends entirely on your attic’s specific conditions and what we’re trying to achieve—whether that's maximum air blockage, total moisture defense, or the highest insulation value in a tight space.
What Is the Typical Cost and Timeframe for This Project?
For a serious DIYer tackling minor leaks, you might spend a weekend and a few hundred dollars on materials. A professional air sealing project, however, is usually completed in just one day. Beyond air sealing, some homeowners in Florida also consider various ventilation solutions, so you might be interested in exploring common questions about attic fan installation costs.
While a professional job is a bigger investment—especially a full spray foam application—you're paying for a guaranteed, warrantied result that maximizes energy savings from day one. It's simply the fastest and most effective way to get a perfectly sealed, comfortable home.
Ready to find out exactly what a professional, comprehensive sealing solution would look like for your home? The team at Airtight Spray Foam Insulation provides tailored recommendations to make your space quieter, healthier, and more energy efficient. Request a free, no-obligation quote today to see how our Airtight Comfort System can transform your property.