Blog
How to Insulate Rim Joists A Florida Homeowner’s Guide
The first step is air-sealing the gaps and cavities where your home’s foundation meets the floor system, followed by installing insulation like spray foam or rigid foam board. For a South Florida home, this simple project is one of the highest-impact energy upgrades you can make, drastically cutting cooling costs and heading off moisture issues before they start.
Why Insulating Your Rim Joists Is a Non-Negotiable in Florida
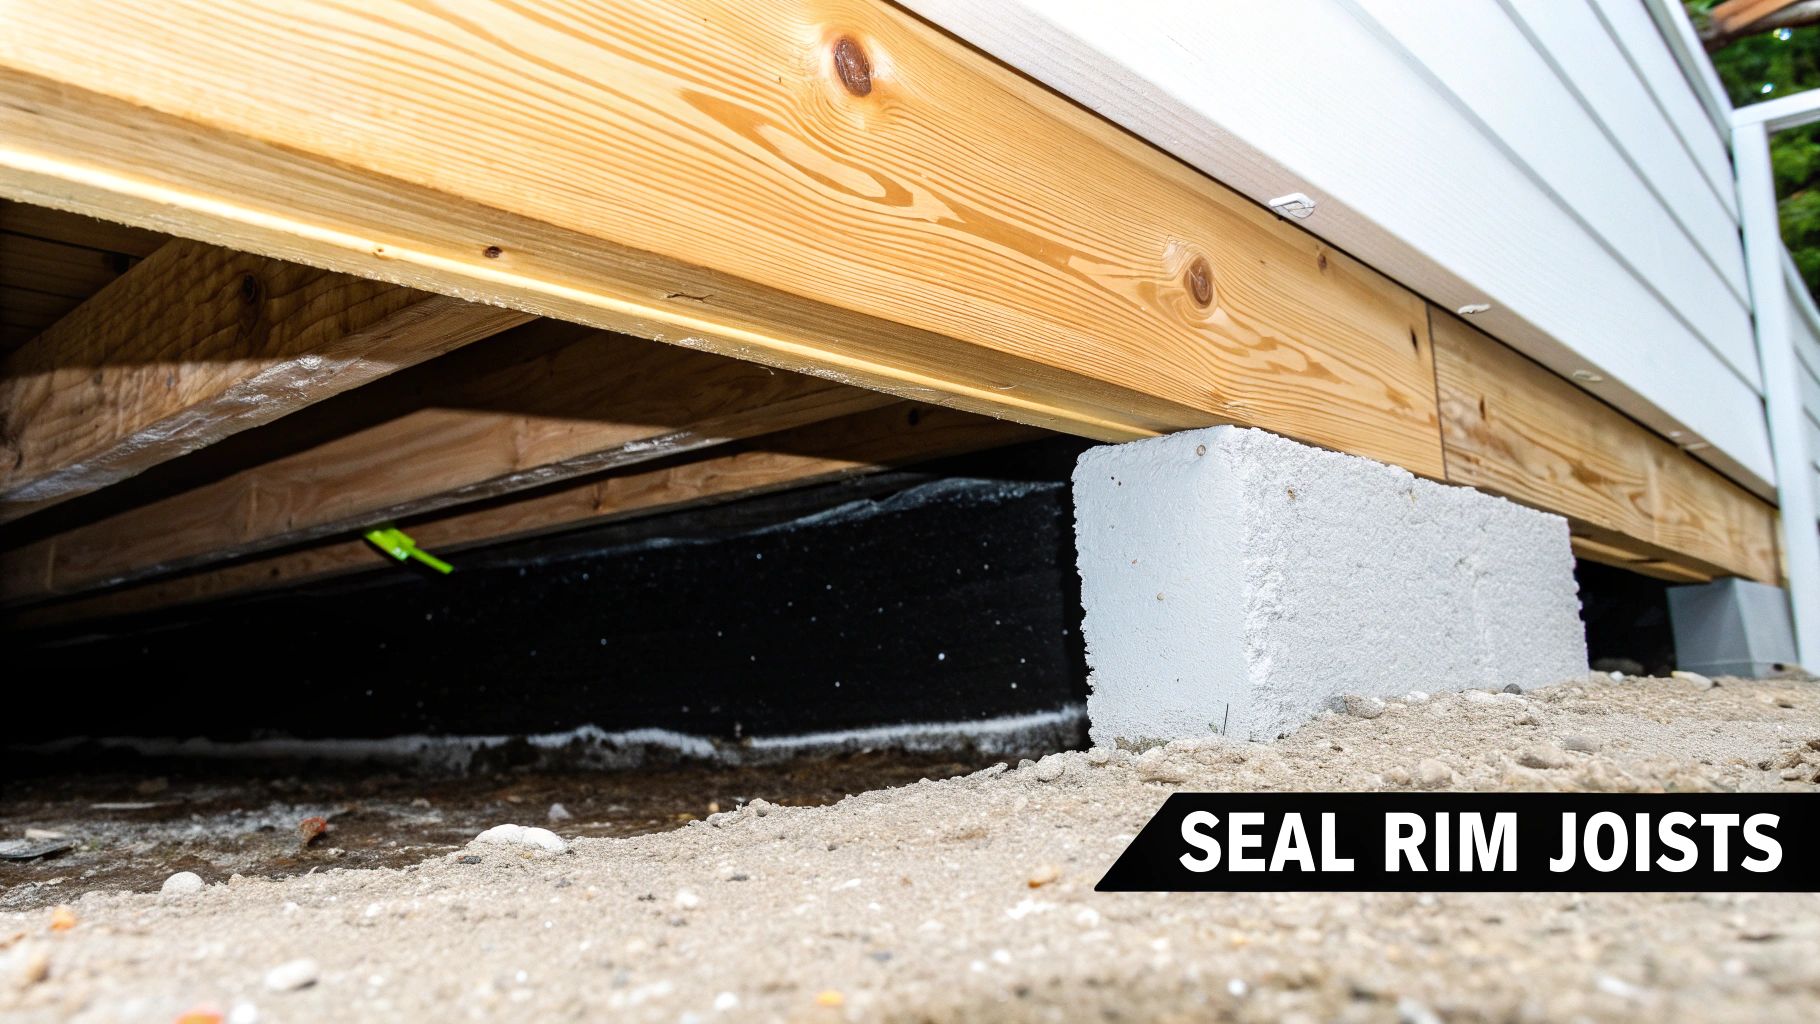
See that small, often-ignored wooden band where your home's foundation meets the floor joists? That's the rim joist, and it's one of the biggest weak points in your home's entire thermal envelope. In places like Jupiter and West Palm Beach, leaving it uninsulated is just asking for trouble.
Think of it as a superhighway for humid air, pests, and energy loss.
This thin strip of wood acts as a giant thermal bridge, letting all that cool, conditioned air you paid for escape while inviting hot, humid outdoor air inside. Here in South Florida, where humidity is a year-round battle, this constant leakage creates the perfect conditions for condensation. That moisture eventually leads to mold, wood rot, and sky-high AC bills.
Your HVAC unit is already working overtime. Don't make it fight leaks from this one small area, too.
The Hidden Costs of an Unsealed Home
From my experience doing energy audits all over Wellington and Stuart, I can tell you that uninsulated rim joists can account for a whopping 15-20% of a home's total energy loss. That's hundreds of dollars flying out the window every single year from this one point of failure.
Sealing this up isn't just an energy upgrade; it’s a critical step toward protecting your home from moisture damage and cleaning up your indoor air.
By stopping uncontrolled air infiltration right at the foundation, you’re not just saving money. You're creating a healthier, more comfortable place to live by blocking a primary entry point for moisture, allergens, and pests.
A Project with Huge Payback
Few home improvement projects offer this kind of return on investment. The benefits go way beyond a lower electric bill. When you properly seal and insulate your rim joists, you will:
- Drastically Cut Humidity: Creating an airtight seal stops that sticky outdoor air from seeping into your crawlspace or basement. This is ground zero for controlling indoor moisture.
- Improve Air Quality: Those unsealed gaps pull in damp, musty air from below, along with dust, mold spores, and whatever else is down there. Sealing them cuts off this source of contamination for good.
- Boost Your Comfort: You’ll immediately notice fewer drafts and more stable temperatures, especially on the first floor.
- Deter Pests: The gaps around rim joists are a welcome mat for insects and rodents. A material like closed-cell spray foam creates a solid barrier they can't chew through.
While tackling the rim joists is a huge first step, it's just one part of a total home strategy. Learning how to reduce humidity in your home will give you a bigger playbook for protecting your property in our unique climate.
Choosing the Right Insulation for Your Climate
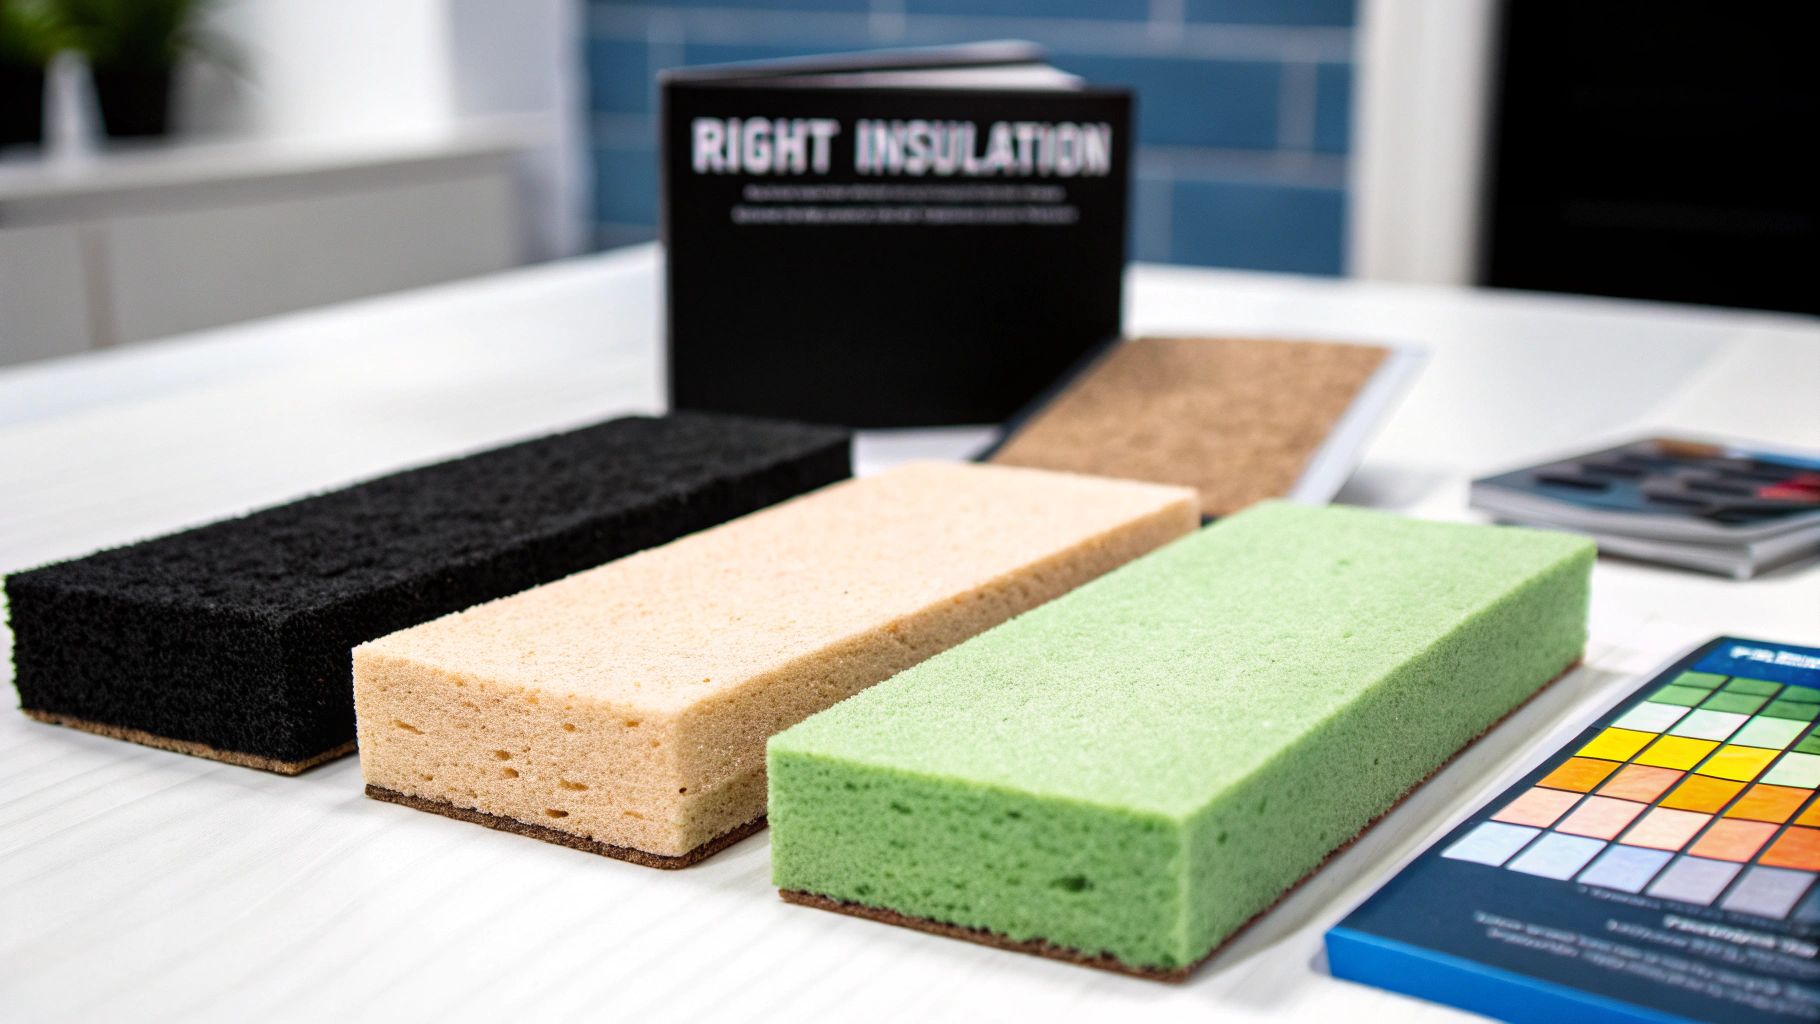
When you're figuring out how to insulate rim joists, especially here in South Florida, the material you pick is everything. Our intense humidity means that old-school insulation like fiberglass batts isn't just a poor choice—it's a genuine liability. It can actually trap moisture right up against the wood, inviting rot.
You need insulation that does more than just slow down heat. It has to create a bulletproof barrier against both air and moisture.
A high R-value is meaningless if humid air can just sneak around it, hit the cool rim joist, and condense. That's how rot and mold get started. Your decision has to be about moisture resistance and air-sealing first, with thermal performance as a close second.
The real contenders for this job are spray foam (both closed-cell and open-cell) and rigid foam board. Let's break down how they stack up in our climate.
Closed-Cell Spray Foam: The Premium Choice
In my experience, closed-cell spray polyurethane foam (SPF) is the gold standard for insulating rim joists in humid climates, period. When we apply it, the foam expands to fill every single crack and seam, creating a seamless, monolithic barrier that is completely impermeable to both air and moisture.
Think of it this way: closed-cell foam does three critical jobs with one material.
- High R-Value: It packs a powerful thermal punch, typically R-6 to R-7 per inch.
- Air Barrier: Its dense, rigid structure stops air leakage cold.
- Vapor Barrier: This is the game-changer for Florida. It's a true vapor barrier, which means moisture can't get through to the wood surface of the rim joist.
This all-in-one performance is what makes it so incredibly effective. It also hardens into a dense plastic that pests can't chew through, adding a nice layer of pest control at a very common entry point.
Open-Cell Spray Foam: A Riskier Option Here
Open-cell spray foam is also fantastic at sealing air leaks, expanding like crazy to fill gaps around pipes and wires. It's a great thermal insulator and even dampens sound. But there's one huge difference that really matters down here: it’s vapor-permeable.
This means that while it stops air, it lets water vapor pass right through. In a South Florida crawlspace where humidity can sit at 70-90%, that's a problem. Moisture can slowly work its way through the foam and condense on the cooler rim joist behind it.
While it’s worlds better than fiberglass, its sponge-like nature makes it a gamble for this specific job. We dive deeper into this in our guide on the differences between open-cell and closed-cell foam. For rim joists, moisture control is always priority number one.
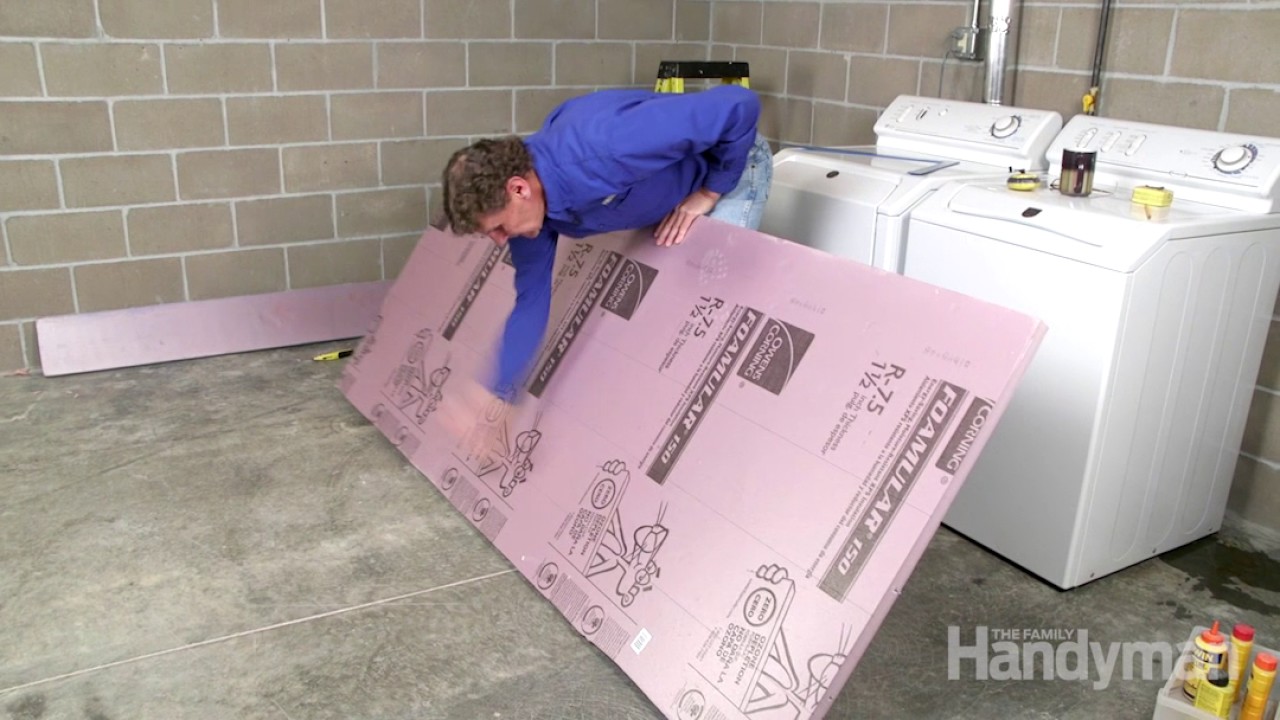
Rigid Foam Board: The DIY-Friendly Method
For the handy homeowner, rigid foam board—like extruded polystyrene (XPS) or polyisocyanurate (polyiso)—is a very solid option. This is what we call the "cut-and-cobble" method. You cut pieces of foam to fit tightly into each joist cavity, then use canned spray foam to seal all the edges.
This approach can create an excellent air and vapor barrier, but its success depends entirely on how carefully it’s installed.
- Precision is Everything: If you leave even a tiny gap around the edge of a board, you've created an air leak that undermines the whole project. You have to be meticulous.
- Pick the Right Material: XPS (the pink or blue stuff) is more moisture-resistant and better suited for this than polyiso, which can lose some R-value if it gets damp over time.
This method takes more time and patience than having a pro spray foam, but if you're detail-oriented, you can get great results. The combination of the rigid board and the expanding foam sealant is what creates that critical barrier.
To help you decide, here’s a quick head-to-head comparison of your options.
Insulation Comparison for South Florida Rim Joists
| Feature | Closed-Cell Spray Foam | Open-Cell Spray Foam | Rigid Foam Board (XPS/Polyiso) |
|---|---|---|---|
| R-Value per Inch | R-6 to R-7 (Highest) | R-3.5 to R-4 (Moderate) | R-5 to R-6.5 (High) |
| Air Barrier? | Excellent. Creates a monolithic, seamless seal. | Excellent. Expands to fill all gaps. | Good, but relies on perfect sealant application. |
| Vapor Barrier? | Yes. Impermeable to moisture. | No. Vapor-permeable, risky in high humidity. | Yes, when properly taped and sealed. |
| DIY Friendliness | Professional install only. Requires special equipment. | Professional install only. | High. The "cut-and-cobble" method is labor-intensive but doable. |
| Pest Resistance | Excellent. Cures to a hard, inedible plastic. | Poor. Pests can tunnel through the soft foam. | Good. Pests can't eat it but may tunnel through it. |
Ultimately, for most South Florida homes, closed-cell spray foam delivers the most reliable, long-lasting, and complete solution for insulating rim joists. It takes human error out of the equation and provides a perfect, seamless barrier that can stand up to our relentless humidity year after year.
Getting Your Rim Joists Ready for a Perfect Seal
Before a single bit of insulation goes in, the real work begins. A successful rim joist project is all about the prep work. If you skip this part, it's like painting over a dirty wall—it just won't last. This is the critical groundwork that ensures your new insulation forms a permanent, airtight bond that will perform for decades.
Think of it as setting the stage for a perfect performance. You need a clean, dry, and solid surface for any sealant or foam to grab onto. Old insulation, dust, cobwebs, and especially any hint of moisture are the enemies of a good seal.
Taking the time to properly inspect and clean out every single joist bay is what separates a quick, temporary fix from a long-term solution that actually protects your home.
Initial Inspection: What to Look For
First thing's first: grab a good flashlight and get up close and personal with each joist cavity. You're basically a detective at this point, hunting for clues that could point to bigger issues that absolutely must be addressed before you seal everything up.
Here’s what you need to be on the lookout for:
- Signs of Moisture: Look for any dark water stains, discolored wood, or those fuzzy white or black spots that scream mold or mildew.
- Rot or Decay: Gently poke the rim joist and the sill plate underneath it with a screwdriver. The wood should feel solid. If it’s soft, spongy, or crumbles away, you’ve got wood rot that has to be repaired.
- Pest Activity: Keep an eye out for insect frass (which looks like fine sawdust), discarded wings, the mud tubes termites leave behind, or any rodent droppings. Unsealed rim joists are a superhighway for pests.
- Existing Air Gaps: Use your hand to feel for drafts and look for obvious gaps where the foundation meets the sill plate, or where the rim joist meets the subfloor above. These are your primary targets for air sealing.
Get yourself a moisture meter and check the wood. You want to see a moisture content below 20%. If you insulate over damp wood, you’re just trapping that moisture, which will fast-track rot and create a five-star resort for mold.
If you find significant rot or an active pest infestation, stop right there. Sealing over these problems will only make them worse and could lead to some serious structural damage down the line. Call in a professional.
Clearing and Cleaning the Joist Bays
Once you've given the wood a clean bill of health, it's time to yank out that old, useless insulation. Most likely, you'll find some sad, compressed fiberglass batts just stuffed in there. That stuff does next to nothing to stop air leaks and is notorious for holding moisture right up against the wood.
For this job, you'll need a respirator mask (N95 or better), safety glasses, and gloves. Pull out all that old insulation and bag it up immediately for disposal. Then, grab a shop vacuum with a brush attachment and go to town, cleaning every surface inside the bay—the rim joist itself, the top of the foundation wall, and the underside of the subfloor.
The goal here is a completely clean slate. All dust, debris, and cobwebs have to go. This step is non-negotiable if you want the new sealant or spray foam to adhere properly and create that truly airtight bond.
Working Around Obstructions
It’s almost a guarantee you'll find pipes, wires, and ducts running through the rim joist area. These penetrations are prime spots for air leaks, so they need to be handled with care.
Never try to bend or force wiring and plumbing out of the way. The goal is to seal around them, not relocate them. If you’re going the "cut-and-cobble" route with rigid foam, this means meticulously cutting the foam board to fit snugly around every single pipe or wire.
This is actually one of the biggest advantages of professional spray foam. The foam flows into every nook and cranny, expanding around these obstacles to create a perfect, monolithic seal with zero effort. As you deal with how insulation interacts with these systems, it’s helpful to understand the principles behind a proper vapor barrier and its role in insulation to avoid creating any unintended moisture problems.
Pro-Level Application and Air Sealing Techniques
Alright, with the prep work done—a clean, dry, and inspected rim joist area—it's time for the main event. We're moving from prep to application, and this is where we turn those leaky, inefficient joist bays into a solid part of your home's thermal boundary. How you insulate at this stage is what makes or breaks the entire project.
We're going to walk through the two best methods from a professional's viewpoint. The goal here isn't just to jam some R-value in the cavity; it's to create a truly airtight seal that locks out that thick, moisture-heavy Florida air for good.
The Spray Foam Advantage: A Seamless, Monolithic Seal
When my team applies closed-cell spray foam, it’s all about precision. We don't just blast foam until the cavity is full. We apply it in controlled layers, or "lifts," usually building it up to a depth of 2 to 3 inches. This is the sweet spot—it gives you an R-value between R-14 and R-21 and, just as important, creates a powerful Class II vapor retarder.
The liquid foam hits the wood and expands almost instantly, bonding aggressively to the rim joist, the top of the foundation wall, and the subfloor. That rapid expansion is where the magic happens. It forces the foam into every tiny crack, seam, and imperfection, forming one continuous, solid barrier.
Pipes, wires, and ducts aren't obstacles for spray foam; they're just part of the surface it seals. The foam flows around them and locks them in, a feat that’s next to impossible to get right with any other material.
The simple diagram below shows the prep work that makes this perfect seal possible.

This inspect-clear-clean workflow is the non-negotiable first step. It’s the foundation for getting a professional-grade, airtight seal that will actually last.
What you're left with is a rigid, dense layer of plastic insulation that’s fully fused to the structure. No seams. No gaps. No chance for air to wiggle its way behind it. This is exactly why a pro spray foam job is the gold standard for air sealing. If you're wondering how we prove it works, learning what a blower door test is will show you exactly how we measure a home's airtightness down to a science.
Mastering the "Cut-and-Cobble" Method with Rigid Foam
For the serious DIYer, using rigid foam board—what we call the "cut-and-cobble" method—is a solid alternative. But I've seen it go wrong too many times. Its success lives or dies on one critical detail: you have to meticulously seal every single edge.
Just cutting a piece of foam to size and wedging it in there does almost nothing. Air is like water; it will find the easiest path. Even a tiny, hairline gap around the foam board is a superhighway for humid air to sneak past, hit the cool rim joist, and start a condensation party. You’ll end up with the very moisture problems you were trying to fix.
The air seal in a cut-and-cobble system isn't the foam board itself. It’s the continuous bead of canned spray foam you apply around the board's entire perimeter. Think of the board as the brick and the canned foam as the airtight mortar holding it all together.
Here’s how to do it the right way:
Measure and Cut with a Gap: Measure each joist bay one by one—they’re never the same size. Cut your rigid foam board (XPS is a great choice here for its moisture resistance) so you have a consistent 1/4-inch to 1/2-inch gap around all four sides. This space is deliberate; it's where your real sealant goes.
Set the Board: Place the cut foam board into the cavity, pressing it firmly against the rim joist. You want zero air space between the back of the board and the wood. Some pros will even use a couple of shims or tension wires to hold it tight while the sealant cures.
Seal the Perimeter: Grab a can of low-expansion spray foam sealant. Carefully apply a continuous bead into that gap around the entire perimeter of the board. The foam will expand just enough to fill the void, creating a tough, flexible, and completely airtight seal.
Here's a pro tip: bevel the edges of the foam board with your utility knife before you install it. This creates a little V-shaped channel when the board is in place, giving the expanding foam a perfect groove to fill. It also helps the foam push the board even tighter against the rim joist as it cures. Taking your time on this sealing step is what separates an amateur job from a professional-quality installation that will actually protect your home.
Calculating Your Costs and Return on Investment
Let's get down to the brass tacks: what does this project actually cost, and what’s the payback? It's crucial to see rim joist insulation not as a simple expense, but as a smart, long-term investment in your home. The money you put in upfront starts coming back to you immediately, especially on your cooling bills here in the South Florida heat.
When you frame it this way, you realize you're not just spending money. You're plugging a leak where your cash is already escaping and redirecting it into an asset that makes your home more comfortable and valuable.
Professional Installation vs. DIY Costs
The biggest factor in your initial outlay is whether you hire a pro or tackle the job yourself. There’s no single right answer, but the costs—and frankly, the results—can be worlds apart.
Professional Spray Foam: For a typical South Florida home, bringing in a certified crew to apply closed-cell spray foam usually runs between $1,200 and $1,500. That price tag covers the specialized equipment, crucial safety protocols, and the high-performance material that creates a perfect, monolithic air and vapor barrier. You’re paying for a flawless, professional seal.
DIY Rigid Foam: If you're hands-on, the "cut-and-cobble" method is much easier on the wallet initially. You can expect to spend around $400 to $600 on materials for the same house. This includes XPS rigid foam boards, cans of spray foam sealant for the edges, and proper safety gear. Just remember, the main cost here is your own time and the patience required to get it right.
To get a solid handle on your budget, understanding how to estimate construction costs is a critical first step. It helps you account for everything before you even start.
Your Return on Investment
This is where the project really starts to make sense. Insulating your rim joists offers one of the fastest paybacks of any home energy upgrade out there. The savings start showing up on your utility bill from the very first month.
According to the EPA's ENERGY STAR program, properly air sealing and insulating this one area can save a homeowner an average of 15% on heating and cooling. Think about a typical South Florida summer electric bill of $300. That's $45 back in your pocket every single month. Over the course of a year, you’ve saved more than $500 just by fixing this one weak spot.
With a professional installation costing around $1,300, the payback period is often less than three years. After that, it’s pure savings, year after year, all while you enjoy a more comfortable, less humid home.
And the benefits don't stop with your bank account. A properly sealed rim joist can cut down on outdoor noise by up to 6 decibels. It also creates a formidable barrier against common Florida pests like roaches and rodents looking for a way in.
When you add in the enhanced durability from preventing moisture damage, the return becomes undeniable. This isn't just an optional upgrade; it's essential home maintenance that pays you back.
Still Have Questions About Insulating Your Rim Joists?
Even when you know the steps, it's totally normal to have a few questions pop up, especially when you're dealing with a project in South Florida. Let's run through some of the most common things we hear from homeowners around Jupiter and Wellington to clear things up.
Do I Need a Vapor Barrier on Rim Joists in Florida?
Yes, but it's not what you might think. The insulation is the vapor barrier.
Here in our humid climate, the whole game is about stopping warm, moist air from hitting the cooler rim joist and turning into condensation. Getting this right is non-negotiable if you want to prevent mold and rot.
This is why closed-cell spray foam is our go-to solution. It’s a single product that creates a perfect air, vapor, and thermal barrier—it's completely impermeable to moisture.
If you go the rigid foam board route, the boards themselves and the canned foam you use to meticulously seal every last edge and seam work together to create that crucial barrier. We strongly advise against using permeable insulation like fiberglass or rockwool here. It’s a recipe for disaster in Florida, as it can trap moisture right against the wood, causing the very damage you’re trying to prevent.
Can I Do This Myself, or Should I Hire a Pro?
This really comes down to the insulation you choose and your own patience and skill.
A truly meticulous DIYer can get great results with the rigid foam "cut-and-cobble" method. But I mean meticulous. It demands real precision. Even the tiniest gaps around those foam boards will let humid air sneak in, completely undermining all your hard work.
When it comes to spray foam, this is a job for certified professionals, period. It's not a DIY-friendly project. The process requires specialized, high-pressure equipment and involves handling chemicals that demand strict safety protocols and professional-grade protective gear.
A professional spray foam installation guarantees you get a complete, seamless seal. It also ensures all safety measures are handled correctly and usually comes with a warranty, giving you a level of peace of mind and long-term performance that's nearly impossible to replicate on your own.
Will Insulating My Rim Joists Help with Pests?
It absolutely will. That little gap between your concrete foundation and the wooden framing of your house is a superhighway for pests like roaches, ants, and even rodents.
Sealing this vulnerable area—either with closed-cell spray foam or perfectly sealed rigid foam—creates a tough physical blockade they can't get through.
Closed-cell spray foam is especially good for this. It cures into a dense, hard plastic that pests simply can't chew or tunnel through. It essentially adds a permanent layer of integrated pest management around the entire perimeter of your home.
How Does This Affect My Home's Air Quality?
It makes a huge difference. An unsealed rim joist is like having a dozen tiny, dirty vents open all the time, constantly pulling in damp, unfiltered air from your crawlspace or the ground outside. That air is loaded with dust, mold spores, pollen, and other gunk.
By creating a truly airtight seal, you shut off this major source of indoor pollution.
Your HVAC system doesn't have to work as hard, its filter stays cleaner longer, and your family gets to breathe healthier air. For homeowners with crawlspaces, the change is often dramatic—that musty, earthy smell that seems to permeate everything finally disappears. It’s an improvement you can often feel and smell right away.
Ready to finally seal your home from Florida's humidity and high energy bills? The experts at Airtight Spray Foam Insulation provide professional, high-performance spray foam solutions that deliver lasting comfort and savings. Request your free, no-obligation quote today and discover the Airtight Comfort System.