Blog
A Homeowner’s Guide to Insulate Basement Rim Joist in Florida
You've got to treat your basement rim joist like a fortress wall. That means creating a completely airtight and moisture-proof barrier. From my experience, the only two ways to do this right, especially down here in South Florida, are with closed-cell spray foam or rigid foam board that's been painstakingly cut and sealed into place.
A lot of people think they can just stuff some fiberglass batts in there and call it a day. That’s probably the biggest mistake you can make. All you're doing is creating a damp sponge that traps moisture against the wood, which is a perfect recipe for mold and rot.
Why Your Rim Joist Is a Critical Weak Point in Your Home
Look at the top of your basement's foundation wall, and you'll see a wooden band running along the perimeter. That’s the rim joist. It doesn't look like much, but it's one of the biggest thermal weak spots in your entire house. Think of it as a poorly sealed window frame that wraps around your whole foundation—a superhighway for air, moisture, and pests to get inside.
Here in South Florida, that vulnerability gets dialed up to eleven. Our air is thick with humidity, and when that warm, wet air sneaks through the tiny gaps in the rim joist, it collides with the cooler, air-conditioned surfaces inside. That temperature clash creates instant condensation, turning your home’s wooden frame into a five-star resort for mold and mildew.
The Hidden Costs of an Unsealed Rim Joist
An uninsulated and unsealed rim joist is a hole in your pocket. It’s constantly letting your expensive cool air escape while inviting hot, humid air in. Your HVAC system has to run nonstop just to keep up, which means higher energy bills month after month. It's the equivalent of leaving a door cracked open 24/7.
But the financial bleeding doesn't stop with your utility bills. The moisture it lets in can cause problems that are far more expensive and damaging to your home's health.
- Structural Damage: Constant dampness is wood's worst enemy. It leads to rot that can seriously weaken the floor system above.
- Pest Infestations: Damp, soft wood is basically an open invitation for pests. It's not just about energy loss; this area is a prime target for wood-destroying insects. Understanding the early signs of termites and their structural damage is something every homeowner should be on top of.
- Poor Indoor Air Quality: Mold spores and musty smells from a damp rim joist don't stay in the basement. They get pulled into your HVAC system and circulated all through your house, which can trigger allergies and other respiratory problems.
When you properly seal and insulate this one area, you're knocking out multiple problems with a single fix. You’re not just cutting your energy bills; you're building a healthier, stronger, and more comfortable home from the ground up.
Why It's a Top Home Improvement Project
Tackling your rim joist is one of the most cost-effective, high-impact upgrades you can make to your home. Forget massive, disruptive renovations. This is a surgical strike that targets a small but hugely problematic area.
It’s a smart investment that delivers immediate and long-term benefits, from more stable indoor temperatures to preventing thousands of dollars in moisture-related repairs down the road. For any homeowner in South Florida, sealing up this weak point isn't just a "nice-to-have"—it's an essential move to protect your home.
Choosing the Right Insulation for Florida's Humid Climate
When you're insulating a basement rim joist in South Florida, you're not just fighting heat—you’re going to war with humidity. Picking the wrong material isn't just a waste of money; it can actively trap moisture against the wooden frame of your home, causing serious damage. This is one job where your choice of material truly matters.
The conditions here demand an insulation that can do three things flawlessly: stop air, block moisture, and insulate. That’s why closed-cell spray foam is, without a doubt, the best tool for the job. It expands to fill every last crack and gap, creating a solid, impermeable barrier.
This all-in-one performance is what really sets it apart. It’s not just insulation; it’s a complete air and moisture seal applied in one shot, making it the most durable solution for our climate.
Why Common Insulation Types Fail in Florida
Many homeowners think of fiberglass batts or even rigid foam boards, but these options come with major drawbacks in a humid environment like ours. They might be fine in drier climates, but here, they can become a huge liability.
Take the classic pink fiberglass insulation. It’s meant to trap air, but it does absolutely nothing to stop air or moisture from moving through it. Humid South Florida air will drift right through the fiberglass, hit the cooler surface of the rim joist, and condense into water. The fiberglass then acts like a sponge, holding that water against the wood—a perfect recipe for rot and mold.
Expert Insight: Never, ever use fiberglass batts by themselves in a rim joist in a humid climate. You're essentially building a terrarium for mold right inside your home's foundation. It’s one of the most common and damaging DIY mistakes we see out in the field.
Rigid foam board is a step up, but it demands absolute perfection. You have to meticulously cut each piece to fit snugly, then go back and seal every single seam and edge with canned foam or a high-quality sealant. If you miss even a tiny gap, you’ve just created a superhighway for humid air to get behind the board, where it will condense and get trapped.
This flowchart lays out the clear consequences of tackling this area correctly versus ignoring it.
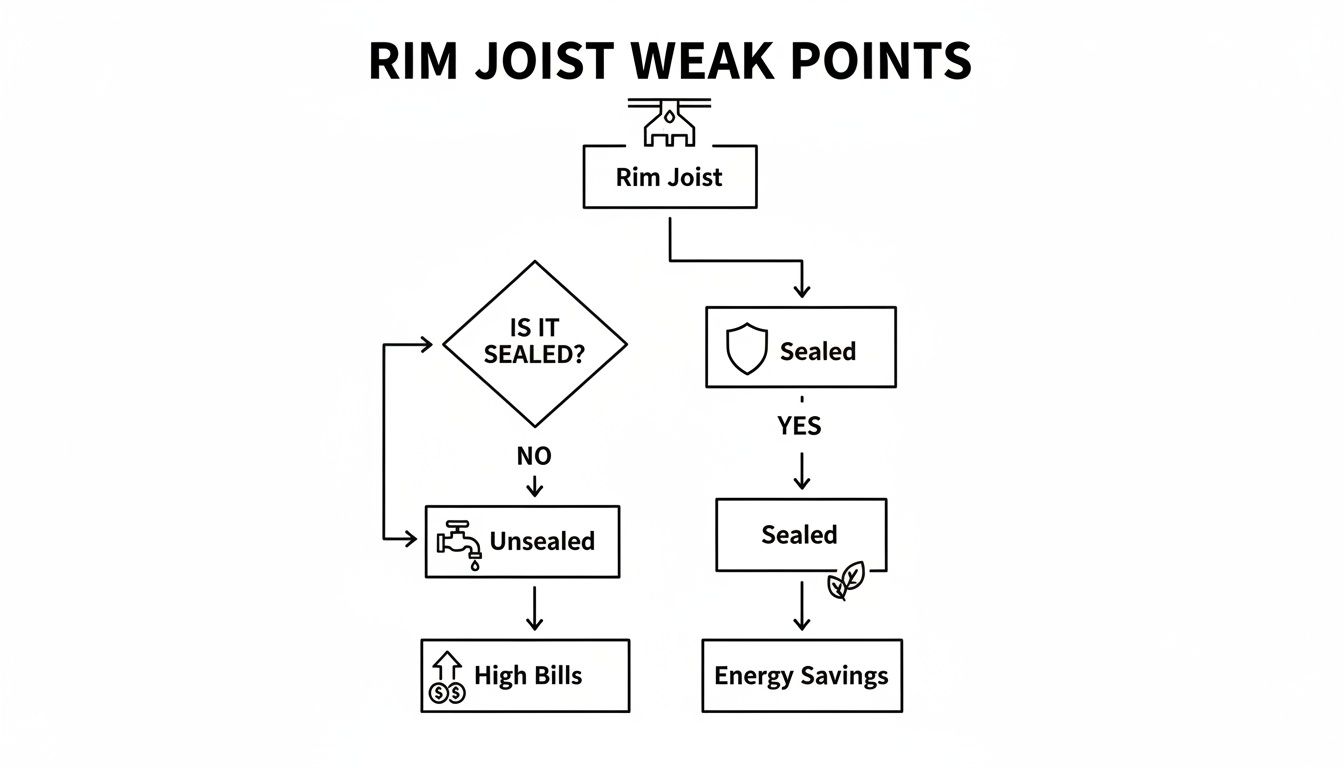
As you can see, properly sealing the rim joist is a direct line to energy savings. Leaving it unsealed is a guaranteed path to higher utility bills.
Closed-Cell vs Open-Cell Spray Foam
Even if you decide on spray foam, there's a critical difference between the two main types. Open-cell and closed-cell foam behave very differently, especially when moisture is involved.
- Open-Cell Spray Foam: This foam is softer and has a more sponge-like texture. While it's a great air sealant and provides decent thermal resistance, it is vapor-permeable. That means moisture can pass right through it, which is the last thing you want for a rim joist in South Florida.
- Closed-Cell Spray Foam: This type is rigid and dense. Its cells are completely sealed off from one another, making it impermeable to both air and water vapor. With an R-value of around R-6 to R-7 per inch, it provides fantastic insulation and acts as a true vapor barrier—something that’s non-negotiable in our climate.
For a deeper look at how these materials stack up, our comparison of spray foam vs. blown-in insulation gives more context. While open-cell has its place, when you're up against relentless humidity at the foundation, closed-cell is the only choice a professional would make.
Here's a quick cheat sheet to help you compare the top contenders for this job.
Insulation Material Comparison for South Florida Rim Joists
| Material Type | R-Value per Inch | Moisture Resistance | Air Sealing Ability | Best Use Case in South Florida |
|---|---|---|---|---|
| Closed-Cell Spray Foam | R-6 to R-7 | Excellent (Vapor Barrier) | Excellent (Monolithic Seal) | The ideal, all-in-one solution for rim joists. |
| Rigid Foam Board | R-4 to R-6.5 | Good (Vapor Retarder) | Good (If Meticulously Sealed) | A decent DIY option, but requires perfect sealing at all seams. |
| Open-Cell Spray Foam | R-3.5 to R-4 | Poor (Vapor Permeable) | Excellent (Air Seal Only) | Not recommended for rim joists due to moisture risks. |
| Fiberglass Batts | R-3 to R-4 | Very Poor (Absorbs Moisture) | Poor (Allows Airflow) | Should be avoided entirely for this application in this climate. |
Ultimately, the table makes it clear why closed-cell spray foam stands out. It's the only material that provides top-tier insulation, air sealing, and moisture protection in a single application, which is exactly what a South Florida home needs to stay dry and efficient.
Prepping Your Rim Joist for a Perfect Seal
Before you even think about grabbing a can of spray foam or cutting a piece of rigid board, the most crucial work has to happen. Proper prep is the bedrock of a successful rim joist insulation project. Skipping these steps is like slapping paint over rusty metal—you’re just hiding a problem that’s guaranteed to get worse.
The goal here isn't just to cover things up. It's to create a clean, dry, and totally sealed surface that the insulation can bond to permanently. This is what guarantees the insulation performs at its best and protects the very structure of your home for the long haul.
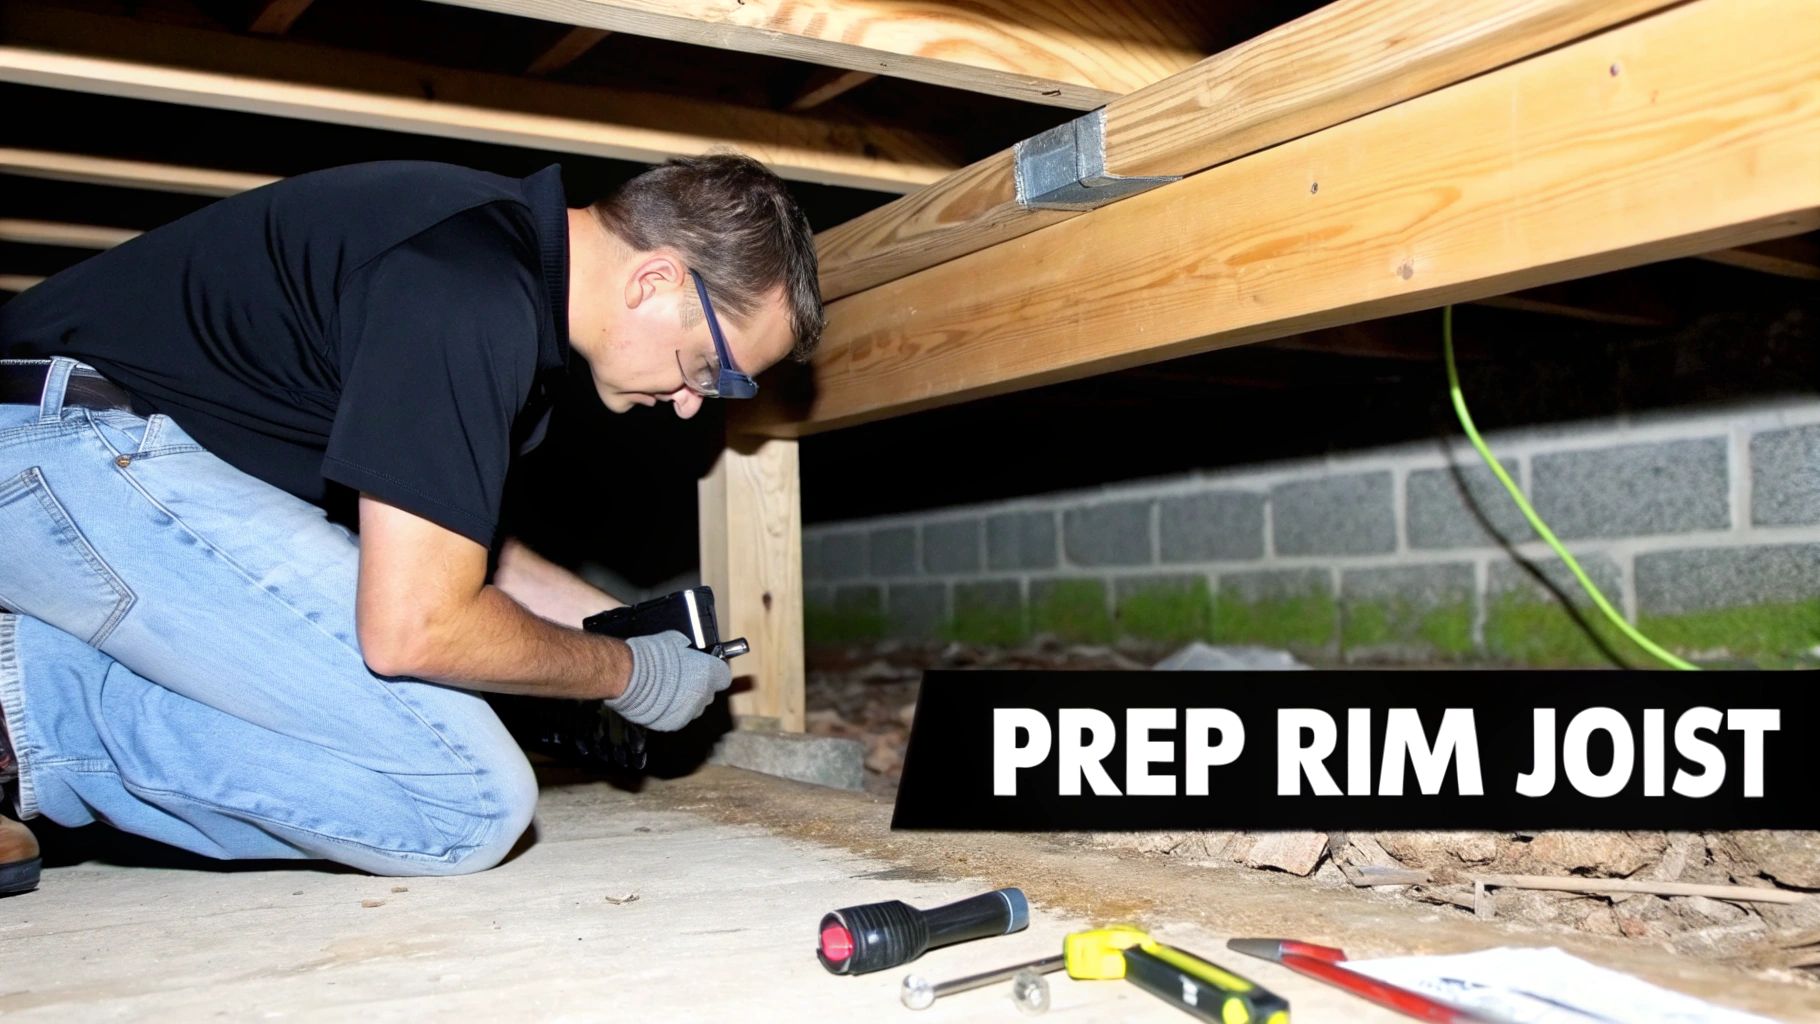
The Initial Clean-Out and Inspection
First thing's first: you need to see exactly what you're dealing with. That means pulling out any old, failing insulation that’s been crammed into those joist bays. In countless South Florida homes, this is where we find nasty, compressed fiberglass batts, damp and sagging—a perfect home for mold.
With the old stuff gone, grab a shop vac and a brush attachment and get to work. Every surface needs to be cleaned of dust, cobwebs, and any loose junk. This isn't just about being tidy; spray foam and sealants need a clean, solid surface to grab onto.
Now, with the area cleared, it’s time for a close-up inspection. Get a bright flashlight and a screwdriver and start methodically checking the wood—both the rim joist itself and the sill plate it rests on.
- Spotting Moisture: Look for any dark stains, black speckling, or white, fuzzy growth. These are classic red flags for moisture intrusion and mold.
- Probing for Rot: Gently push the tip of your screwdriver into the wood, paying special attention to corners and where the wood meets the foundation. If it feels soft or punky, you’ve found rot.
- Checking for Pests: Keep an eye out for tell-tale signs of termites or other wood-destroying bugs, like fine sawdust (frass) or tiny mud tubes.
Finding damp or rotted wood is incredibly common down here, thanks to our humidity. Don’t ignore it. This damage must be professionally repaired before any insulation goes in. Sealing over rot just traps the moisture, supercharging the decay and leading to serious structural issues down the road.
The Art of Meticulous Air Sealing
Air sealing is, without a doubt, the most important step in this entire process. Insulation slows heat down, but it’s nearly useless if humid, outside air can just flow right around it. Your job is to become a detective and hunt down every single crack, gap, and hole.
You have to think like air—where can it sneak in? The usual suspects are always the same:
- The Sill Plate Gap: The seam where the wood sill plate rests on the concrete foundation is almost always a major air highway.
- Joist Intersections: Check the little gaps where the floor joists butt up against the rim joist.
- Utility Penetrations: Every spot where a pipe, wire, or vent punches through the rim joist is a hole that needs to be plugged.
For this job, a quality sealant is non-negotiable. Use a low-expansion canned spray foam or a heavy-duty acoustic or caulk sealant made for air sealing. Take your time and be methodical, laying down a continuous bead to leave no path for air.
A Pro Tip from the Field: One of the most overlooked air leaks we find is behind pipes and wires running tight against the rim joist. It's a pain to see and reach, but air finds it easily. Use the thin straw that comes with your foam can to get sealant deep into that hidden gap.
Why This Prep Work Is So Critical
I get it. It’s tempting to rush this part and get to the main event. But trust me, every minute you spend on prep pays off tenfold. A perfectly cleaned, repaired, and sealed rim joist bay is the only way your new insulation can do its job.
Think of it this way: installing high-end insulation without air sealing first is like buying a great winter coat but leaving it wide open. The coat itself has a high R-value, but it’s not doing you much good with all that cold air blowing in.
By cleaning, inspecting, and sealing everything up tight, you’re creating a true air and moisture barrier. This prep work elevates the project from a simple upgrade to a lasting improvement that makes your home more durable, improves your air quality, and actually delivers the energy savings you expect when you insulate a basement rim joist.
How the Pros Tackle Rim Joist Insulation

Once all the prep work is squared away, it's time to actually apply the insulation. This is where a vulnerable part of your home’s frame gets transformed into a solid, high-performance barrier. When a professional team handles this, especially with something as powerful as closed-cell spray foam, it's all about precision. We're not just filling a gap; we're creating a seamless, monolithic seal.
The first thing our crew does on-site is set up a clean, contained work zone. We lay down heavy-duty plastic sheeting over floors, shelving, or any equipment in the vicinity. While we're pretty surgical with the spray gun, this step is a non-negotiable for us. It guarantees that the only thing getting insulated is the rim joist, leaving your space spotless.
Setting Up for a Safe Application
Safety is everything when you’re dealing with two-part spray foam. The chemical reaction that makes the magic happen also releases vapors that you absolutely don’t want to be breathing. Before we even think about spraying, our crew gets decked out in full personal protective equipment (PPE).
This is our standard, no-excuses safety gear:
- Full-Body Protective Suits: Keeps the chemicals off our skin.
- Gloves and Eye Protection: Guards against any accidental spray or splashes.
- Supplied-Air Respirators: This is the big one. It provides a source of clean, fresh air, which is critical during application.
We also bring in powerful, industrial-grade fans to create serious ventilation, pulling air out of the basement and exhausting it outside. This clears out any off-gassing quickly and safely. It’s this professional-grade safety protocol that really sets a pro job apart from a DIY project.
The Art of Applying Spray Foam
Applying spray foam is more of an art form than you might think. You don't just point and shoot until the cavity is full. The proper technique involves applying the foam in controlled "lifts," or layers, usually about an inch at a time. We let each layer set up for a moment before adding the next one.
This layered approach is crucial for a couple of reasons. First, it lets the foam cure properly, ensuring it hits its target density and R-value. Blasting too much foam in at once traps the heat from the chemical reaction and can compromise the foam’s structure. Second, building it up in layers lets our applicator get the exact thickness needed, perfectly sealing around every pipe, wire, and imperfection in the wood.
From the Field: No two rim joist bays are the same. We run into some that are extra deep, while others are a hornet’s nest of wiring and plumbing. A good applicator knows how to adjust their spray pattern on the fly, using short bursts to work around obstacles and get into tight corners without leaving any voids. It’s that kind of experience that makes all the difference.
Hitting the Sweet Spot for Thickness and R-Value
Here in South Florida, we’re fighting both heat and humidity, so the goal is a robust thermal and moisture barrier. For rim joists, we typically apply 2 to 3 inches of closed-cell spray foam. That gives us a final R-value between R-13 and R-19, which is more than enough for this small but critical area.
Even more importantly, that thickness creates the bulletproof air and moisture seal we need in this climate. At 2 to 3 inches, the rigid structure of closed-cell foam becomes a true vapor barrier. It stops humid, outside air dead in its tracks, preventing any condensation from forming against the wooden structure.
To see how this material holds up in our unique environment, you can read more about using closed-cell spray foam insulation in Palm Beach and why it’s a game-changer for local homes.
After the last joist bay is sprayed, we do a final walkthrough. We inspect every cavity to make sure the coverage is consistent and that we have a perfect seal. If we see any minor imperfections, we touch them up right then and there. Then, we pull up all the protective gear, clean the area, and leave your space just as we found it—only now, it’s sealed, protected, and a whole lot more efficient.
The Real Costs and Savings of Rim Joist Insulation

Alright, let's talk about the bottom line. Any time you invest in your home, you need to know what it’s going to cost and what you’re getting back. Insulating your rim joist is more than just a comfort upgrade—it’s a smart financial move that pays dividends for years.
When you look at professional installation with closed-cell spray foam, most homeowners in South Florida can expect an investment between $2,000 to $2,600. That number isn't arbitrary; it's a reflection of the specific factors at play in your home.
What Shapes the Final Cost
No two basements are exactly alike, so the final quote isn't a one-size-fits-all number. Here’s what we look at when we put together an estimate:
- Linear Footage: This is the big one. The total length of the rim joist around your foundation determines how much material and time are needed. A bigger home simply has more ground to cover.
- Accessibility: Is the rim joist wide open and easy to get to? Or is it a maze of ductwork, plumbing, and Christmas decorations? If we have to spend significant time clearing the area just to get to the joist, that adds to the labor.
- Condition of the Area: If we find old, saggy fiberglass insulation that’s full of dust and critters, it has to come out first. That removal and disposal is an extra step. Likewise, a really dirty or grimy surface needs more prep to ensure the foam gets a perfect bond.
It's a classic case of time and materials. The more straightforward the access and the cleaner the space, the more efficient the job becomes, which is reflected in the final cost.
The Real Story: Your Return on Investment
While you’ll pay for the job once, the savings keep rolling in month after month. This project has a surprisingly quick payback period. In fact, sealing and insulating the rim joist is one of the most effective energy improvements you can make.
The U.S. Department of Energy and the EPA consistently point to this as a high-impact upgrade, with homeowners often seeing average energy savings of 15% on cooling and heating. It's a direct result of shutting down that constant, invisible air leak that’s been fighting your AC all year.
And the savings aren't just on your utility bill. By blocking moisture at the source, you're also dodging a bullet on potential future repairs for mold or wood rot. To really get a sense of the numbers, it’s worth understanding how energy-efficient features can save on utility bills.
DIY Foam Board vs. Professional Spray Foam
So, can you do this yourself with rigid foam board from a big-box store? Sure, if you have the patience of a saint and the precision of a surgeon. For a small, simple section of rim joist, a DIY approach can save you some money on labor. But you have to cut every single piece perfectly and then meticulously seal every edge and seam. Even a tiny gap defeats the purpose.
For most homes, especially ones with a lot of pipes, wires, and other obstacles along the rim joist, professional spray foam is the only way to get a truly monolithic seal. The foam expands into every nook, cranny, and crevice, creating a seamless, airtight barrier that’s impossible to match with cut-and-paste boards. This is especially critical when you consider the junction with the insulation value of concrete block walls and the all-important sill plate.
Ultimately, the investment to properly insulate your basement rim joist is one of the smartest you can make for your home's health, your family's comfort, and your wallet's efficiency.
Answering Your Top Rim Joist Insulation Questions
You've got the steps, but I know there are always those lingering questions. It’s smart to get all the details straight before you tackle a critical part of your home's structure like the rim joist.
Let's walk through some of the most common questions we get from homeowners right here in our community.
Do I Really Need a Vapor Barrier on My Rim Joist in Florida?
Yes. One hundred percent. In a place like South Florida, with our relentless humidity, a vapor barrier isn't just a good idea—it's absolutely critical. It's your frontline defense against warm, moisture-heavy air condensing on the cooler surfaces inside your home's foundation.
This is precisely why closed-cell spray foam is the go-to solution for this job. It acts as your insulation, your air seal, and a rock-solid vapor barrier all in one shot. If you go the route of rigid foam board, you have to be meticulous about sealing every single seam and edge to even come close to creating that same unbroken shield.
Key Takeaway: A proper vapor barrier is your primary defense against moisture damage in South Florida. Skipping this step or doing it improperly will lead to condensation, which invites mold and rot into your home’s wooden frame.
Is It Okay to Just Use Fiberglass Batts in the Rim Joist Cavity?
This is probably the most common—and most damaging—mistake I see. Fiberglass insulation is air-permeable, meaning it doesn't stop airflow at all. Humid Florida air will breeze right through it, hit that cooler rim joist, and turn into water.
What happens next? The fiberglass batt soaks up that moisture like a sponge, holding it directly against the wood framing of your house. It’s the perfect recipe for mold, mildew, and eventually, structural rot. You absolutely need an air-impermeable solution like spray foam or a perfectly sealed rigid foam board.
What R-Value Is Best for My Rim Joist?
Here’s something that surprises a lot of people: for rim joists, especially in our climate, getting a perfect air and moisture seal is far more important than chasing a specific R-value. An airtight seal prevents more energy loss and stops more moisture than a super high R-value full of tiny gaps.
That said, aiming for an R-value between R-13 and R-19 is a great target for South Florida. You can hit that easily with about 2-3 inches of closed-cell spray foam. That thickness gives you fantastic thermal resistance while ensuring the bulletproof air and vapor control that truly makes the difference in your home's comfort and energy bills.
Ready to finally seal the deal on your home's comfort and efficiency? At Airtight Spray Foam Insulation, we specialize in creating a perfect, lasting barrier against South Florida's heat and humidity. Request your free, no-obligation quote today and discover how the Airtight Comfort System can transform your property. Get Your Free Estimate Now.