Blog
Fix the room above garage cold with these simple steps
If you’ve ever noticed the room above your garage feels more like an icebox than a livable space, you’re not imagining things. It’s a classic home design problem, and it all boils down to one simple fact: that big, unheated garage is constantly sucking the warmth right out of the floor.
It’s not just a minor annoyance; it’s a sign of a major thermal weak spot in your home. We’re going to break down exactly why this happens and what you can do about it.
Decoding the Chill: Why That Bonus Room Gets So Cold
Think of your garage as an attached, open-air porch. It’s not conditioned space. The thin layer of drywall and (often) poorly installed insulation in the garage ceiling offer almost zero resistance against the cold.
This creates a constant battle for your HVAC system. Warm air naturally wants to rise, but the cold air from the garage is continuously chilling the floor from below. This is a classic case of conduction—heat is transferring directly from your warm floor joists into the frigid garage air. Your heating system is fighting a battle it can’t win.
The Main Culprits Behind the Cold
It’s usually not just one thing but a combination of factors that turn your bonus room into the coldest spot in the house:
- Inadequate Ceiling Insulation: Builders often throw in standard fiberglass batts, which are prone to sagging over time. This creates gaps and voids, letting cold air bypass the insulation completely and render it useless.
- Massive Air Leakage: Garages are notoriously drafty. Cold air pours in around the garage door, through unsealed windows, and any penetrations in the walls. This turns the entire garage into a cold air reservoir sitting right under your feet.
- More Exposed Surfaces: A room over the garage is exposed to the elements on more sides than almost any other room. You’ve got the floor, multiple exterior walls, and the roof all losing heat to the outdoors.
This isn’t just about feeling a draft. The numbers tell the real story. A 2021 survey from the U.S. Department of Energy found that nearly 65% of homes with a room over the garage reported it was at least 10°F colder than the rest of the house. Fixing these core issues can slash heating bills by up to 20%. You can find more home energy-saving tips directly from the Department of Energy’s findings.
The bottom line is there’s no “thermal break.” A proper thermal break is a continuous barrier that separates your heated living space from the unconditioned garage. Without it, you’re just paying to heat the great outdoors.
This constant heat loss doesn’t just make you uncomfortable; it hits your wallet hard. Your HVAC system works overtime trying to keep up, driving up energy bills. Interestingly, the same gaps that let cold air in also let noise travel through. Fixing the insulation can dramatically quiet the room, too, which you can learn more about in our guide on how insulation doubles as a sound barrier.
To make it simple, here are the most common reasons that bonus room is always freezing.
Top 5 Reasons Your Bonus Room Is Cold
This table breaks down the most common problem areas we see in homes and how they directly contribute to that chilly feeling.
| Problem Area | Common Cause | Impact on Room Temperature |
|---|---|---|
| Garage Ceiling | Insufficient or sagging insulation | Direct cold transfer to the floor, making the entire room feel frigid. |
| Garage Door | Uninsulated, poor weatherstripping | Allows constant drafts of cold air into the garage, lowering ambient temps. |
| Rim Joists | Unsealed gaps between the foundation and framing | Creates a direct path for cold air to infiltrate the floor structure. |
| HVAC Ductwork | Uninsulated ducts running through the garage | Warm air cools down significantly before it even reaches the room’s vents. |
| Knee Walls | Poorly insulated walls in adjacent attic spaces | Exposes the room’s side walls to cold attic temperatures, compounding heat loss. |
Each of these issues on its own is a problem. But when they’re all happening at once—which is often the case—it’s no wonder the room is impossible to keep warm.
Your Practical Plan to Pinpoint the Problem
Before you spend a single dollar on insulation or call a contractor, you need to play detective. Fixing a cold room above the garage isn’t about guesswork; it’s about gathering real evidence to find the exact culprits. This hands-on approach is the only way to make sure you invest in solutions that actually work.
Your first move is a simple visual inspection. Grab a good flashlight and head down to the garage. Look up at the ceiling—if it’s unfinished drywall or exposed joists, you’ve got a front-row seat to the potential problems.
Look closely at the insulation between the floor joists of the room above. Is it sagging? Compressed? Missing in spots? Over time, gravity and moisture can cause standard fiberglass batts to pull away from the subfloor, creating huge air gaps that make the insulation almost worthless. Also, scan for any pipes, wires, or ductwork running through the ceiling. See any gaps around them? Those little openings are superhighways for cold air.
This flowchart breaks down exactly how heat loss from your bonus room combines with the cold garage air to create that constant, uncomfortable chill.
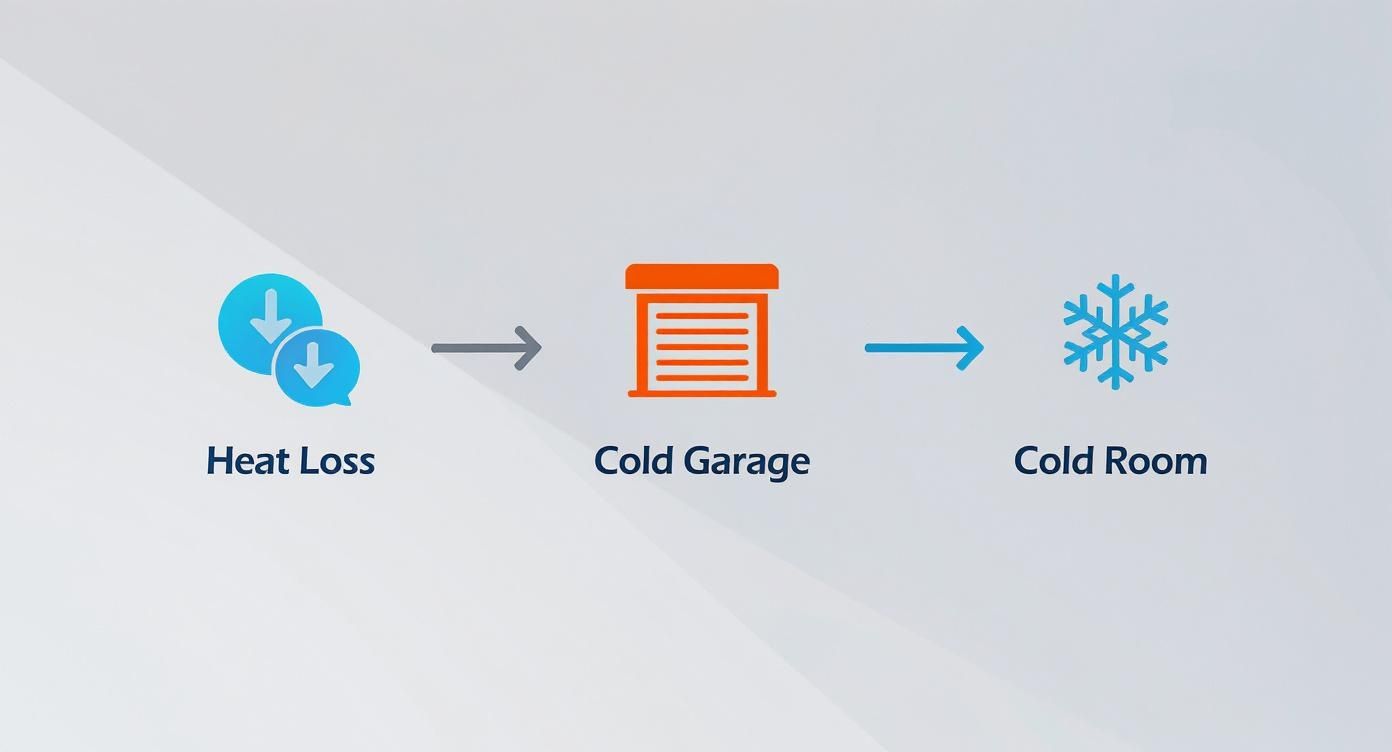
As you can see, the unconditioned garage basically acts as a massive cold sink, pulling warmth right through the floorboards and creating a cycle of discomfort you can’t seem to break.
Uncovering Hidden Air Leaks
Visible gaps are one thing, but the real comfort killers are often the drafts you can’t see. This is where a simple DIY draft test comes in handy. It’s low-tech, but it’s one of the most effective ways to find exactly where cold air is sneaking in.
All you need is an incense stick or a smoke pen. On a cool, slightly windy day, close all the windows and doors in the house and turn off your AC system to stop the air from circulating. Then, light the incense stick and carefully hold it near the usual suspects in the room.
- Electrical Outlets: Especially on the exterior walls.
- Window and Door Frames: Trace the smoke around the entire perimeter.
- Baseboards: Slowly move the stick right where the wall meets the floor.
- Recessed Lighting: Check the trim around any can lights in the ceiling.
If you see the smoke get sucked into a gap or blown sideways, you’ve found an air leak. Mark each spot with a small piece of painter’s tape. You’ll probably be shocked by how many of these tiny drafts add up to make the room above garage cold.
Inspecting the Garage Door Perimeter
That massive garage door is often the single biggest source of cold air in the entire garage. Even a tiny gap along the bottom or sides can create a constant flow of frigid air, tanking the garage’s ambient temperature.
A poorly sealed garage door can have the same effect as leaving a window wide open all winter. It completely undermines any insulation efforts by constantly introducing new cold air into the space directly beneath your room.
Use this quick checklist to see how well your garage door is sealed:
- Check the Bottom Seal: With the garage door closed, get down on the floor and look for daylight peeking through. That rubber gasket should be creating a firm, even seal with the concrete. If it’s cracked, brittle, or flattened, it’s time for a new one.
- Examine the Side and Top Weatherstripping: Run your hand along the vinyl or rubber stripping on the sides and top of the door frame. Feel any drafts? Look for spots where it’s torn, warped, or pulling away from the frame.
- The Panel Test: If you have a sectional garage door, take a look at the seals between each panel. Over time, these can wear out and create small but significant gaps for air to get through.
By completing these simple diagnostic steps, you’re no longer just guessing. You now have a clear, evidence-based map of your room’s weaknesses. This is the critical information you need to choose the most effective solutions, whether you plan to DIY the fixes or bring in a pro.
Creating a Thermal Barrier to Stop the Cold
Alright, you’ve pinpointed the problem areas. Now it’s time to build a real defense against the cold. The goal here is to create a complete, unbroken thermal barrier between that unconditioned garage and your living space.
Think of it like a high-tech winter coat for that room. A proper barrier doesn’t just stuff in some insulation; it has to stop cold air from moving (convection) and prevent heat from escaping through the floor (conduction). This is a multi-step process that addresses insulation, air leaks, and even the garage door itself.
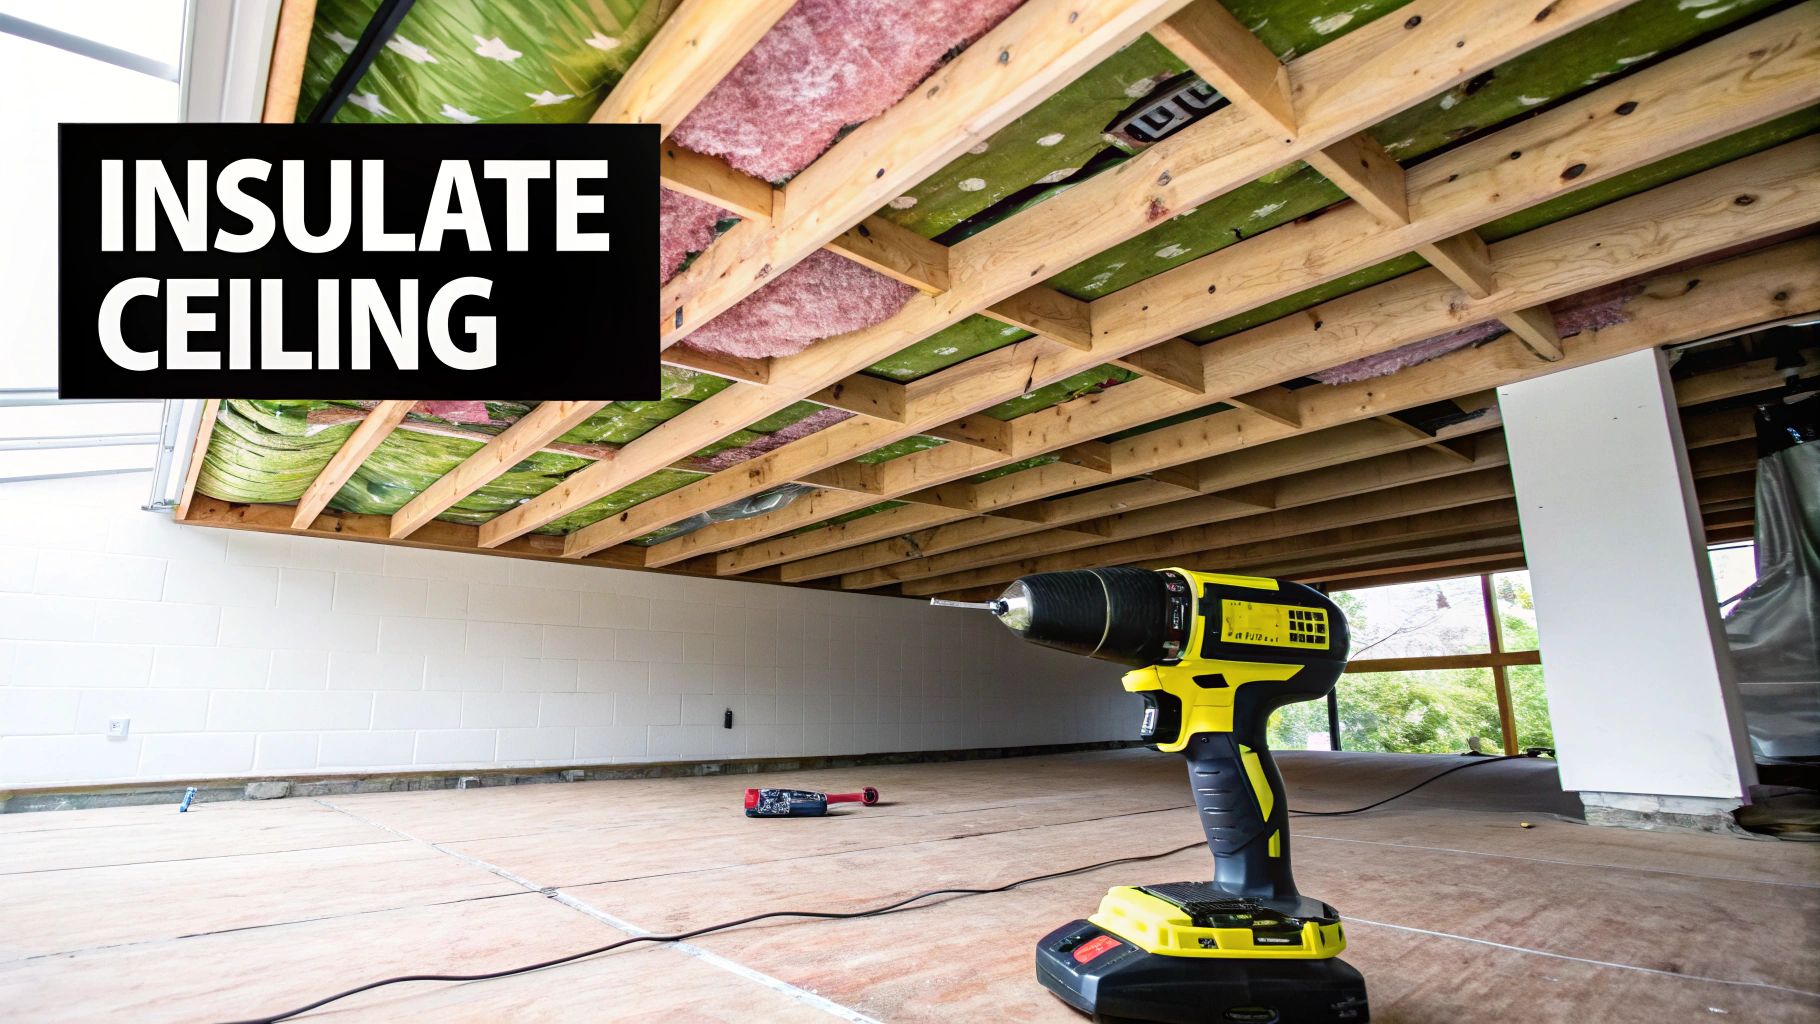
Choosing the Right Insulation for the Job
The garage ceiling—which is the floor of your bonus room—is the single most important part of this entire project. The insulation here has to work harder than almost anywhere else in your home. Let’s look at the options.
Fiberglass Batts
This is the classic pink or yellow stuff everyone recognizes. It’s cheap and easy to find, making it a go-to for DIYers. But for a garage ceiling, it’s a poor choice. Fiberglass batts are notorious for sagging over time, creating gaps that let cold air right through. If they get damp or compressed, their insulating power plummets.
Blown-In Cellulose
Made from treated, recycled paper, blown-in cellulose is a definite step up. It’s much denser than fiberglass and does a better job filling in the odd-shaped spaces around wiring and pipes. While it slows air movement, it doesn’t stop it completely. It can also settle over time, though not as badly as fiberglass.
Spray Foam Insulation
When you’re serious about fixing a room above garage cold problem, spray foam is the undisputed champion. It comes in two main flavors:
- Open-Cell Spray Foam: This is a light, spongy foam that expands aggressively to fill every last crack and void. It creates an incredible air seal and is great for dampening sound from the garage.
- Closed-Cell Spray Foam: This stuff is dense, rigid, and packs the highest R-value per inch. It’s an air barrier and a vapor barrier, which is a massive advantage in humid places like South Florida. It stops moisture from getting into the subfloor.
For a garage ceiling, closed-cell spray foam is the most effective solution, period. It creates a solid, airtight, and moisture-proof shield that bonds directly to the subfloor, eliminating the air gaps that make other insulation types fail.
Spray foam is a job for the pros because of the specialized equipment and safety gear, but the performance is in a different league. To see how it stacks up, check out our deep dive into spray foam vs. blown-in insulation.
Understanding R-Value and Why It Really Matters Here
Insulation is rated by its R-value, which is just a measure of how well it resists heat flow. The higher the number, the better the insulation. Because your room’s floor is sitting right on top of a cold garage, you need to aim for a much higher R-value than you would for a standard wall.
- Fiberglass Batts: R-3.1 to R-3.4 per inch
- Blown-In Cellulose: R-3.2 to R-3.8 per inch
- Open-Cell Spray Foam: R-3.5 to R-3.6 per inch
- Closed-Cell Spray Foam: R-6.0 to R-7.0 per inch
That massive jump with closed-cell foam means you can get an extremely high total R-value (like R-30 or more) without having to build a super-thick ceiling in the garage.
Don’t Forget the Garage Door
An uninsulated metal garage door is basically a giant radiator for cold. It chills the entire space and lets drafts pour in around the edges, making the insulation in your ceiling work overtime. Upgrading to an insulated door or adding a retrofit kit is a game-changer.
The data backs this up. A 2019 study found that rooms over garages were, on average, a shocking 12°F colder than other rooms in the house. More importantly, the study showed that simply installing an insulated garage door led to a 10–12°F temperature improvement in that upstairs room. It’s one of the most impactful upgrades you can make.
The Final Step: Air Seal Every Single Gap
Insulation slows heat down, but it doesn’t stop air leaks. That’s why air sealing is absolutely critical to creating your thermal barrier. Cold air will find any crack it can to get into the garage and up into the floor joists.
Get yourself a good caulk gun and a few tubes of fire-rated or acoustic sealant. Here’s your hit list:
- The Rim Joist: This is the wood framing that sits right on top of the garage’s foundation wall. Seal the seam where the concrete meets the wood.
- Penetrations: Get obsessive here. Seal around every single wire, pipe, or duct that runs through the garage ceiling. Tiny gaps add up to big drafts.
- Wall and Ceiling Seams: Seal any gaps where drywall panels meet in the corners or on the ceiling.
For bigger openings, a can of expanding foam sealant works wonders. The goal is to make the garage as airtight as possible from the outside. When you combine that with high-performance ceiling insulation and an insulated door, you finally build the robust barrier that will keep your bonus room comfortable for good.
Optimizing HVAC for Consistent Warmth
Fixing the insulation and sealing air leaks is a huge victory, but it’s only half the battle. If your HVAC system isn’t designed to get enough warm air to that bonus room in the first place, it’s always going to feel chilly.
Often, the ductwork running to a room over the garage was an afterthought in the original home design. This means the warm air from your furnace has a long, inefficient journey, usually through a frigid, unconditioned garage. By the time it reaches the vent, it’s lost a ton of heat along the way. This weak airflow is a classic reason the room above garage cold problem sticks around even after you’ve beefed up the insulation.
Inspecting Your Ductwork
The first thing to do is play detective with the ducts themselves. Head into your garage and physically trace the ductwork that supplies the bonus room. You’re looking for obvious signs of energy loss.
Pay close attention to the joints and connections. Over time, the metallic tape or mastic used to seal them can crack and peel, creating small gaps. It might not look like much, but these tiny leaks collectively bleed a huge amount of warm air into the garage before it ever gets upstairs.
Also, take a look at the ducts themselves. Are they insulated? In many homes, especially older ones, the ducts running through the garage are just bare metal. That’s a massive source of heat loss, radiating warmth right into the cold garage air. It’s like trying to carry hot coffee in a thin metal cup on a winter day—it’s not going to stay hot for long.
Sealing and Insulating for Maximum Efficiency
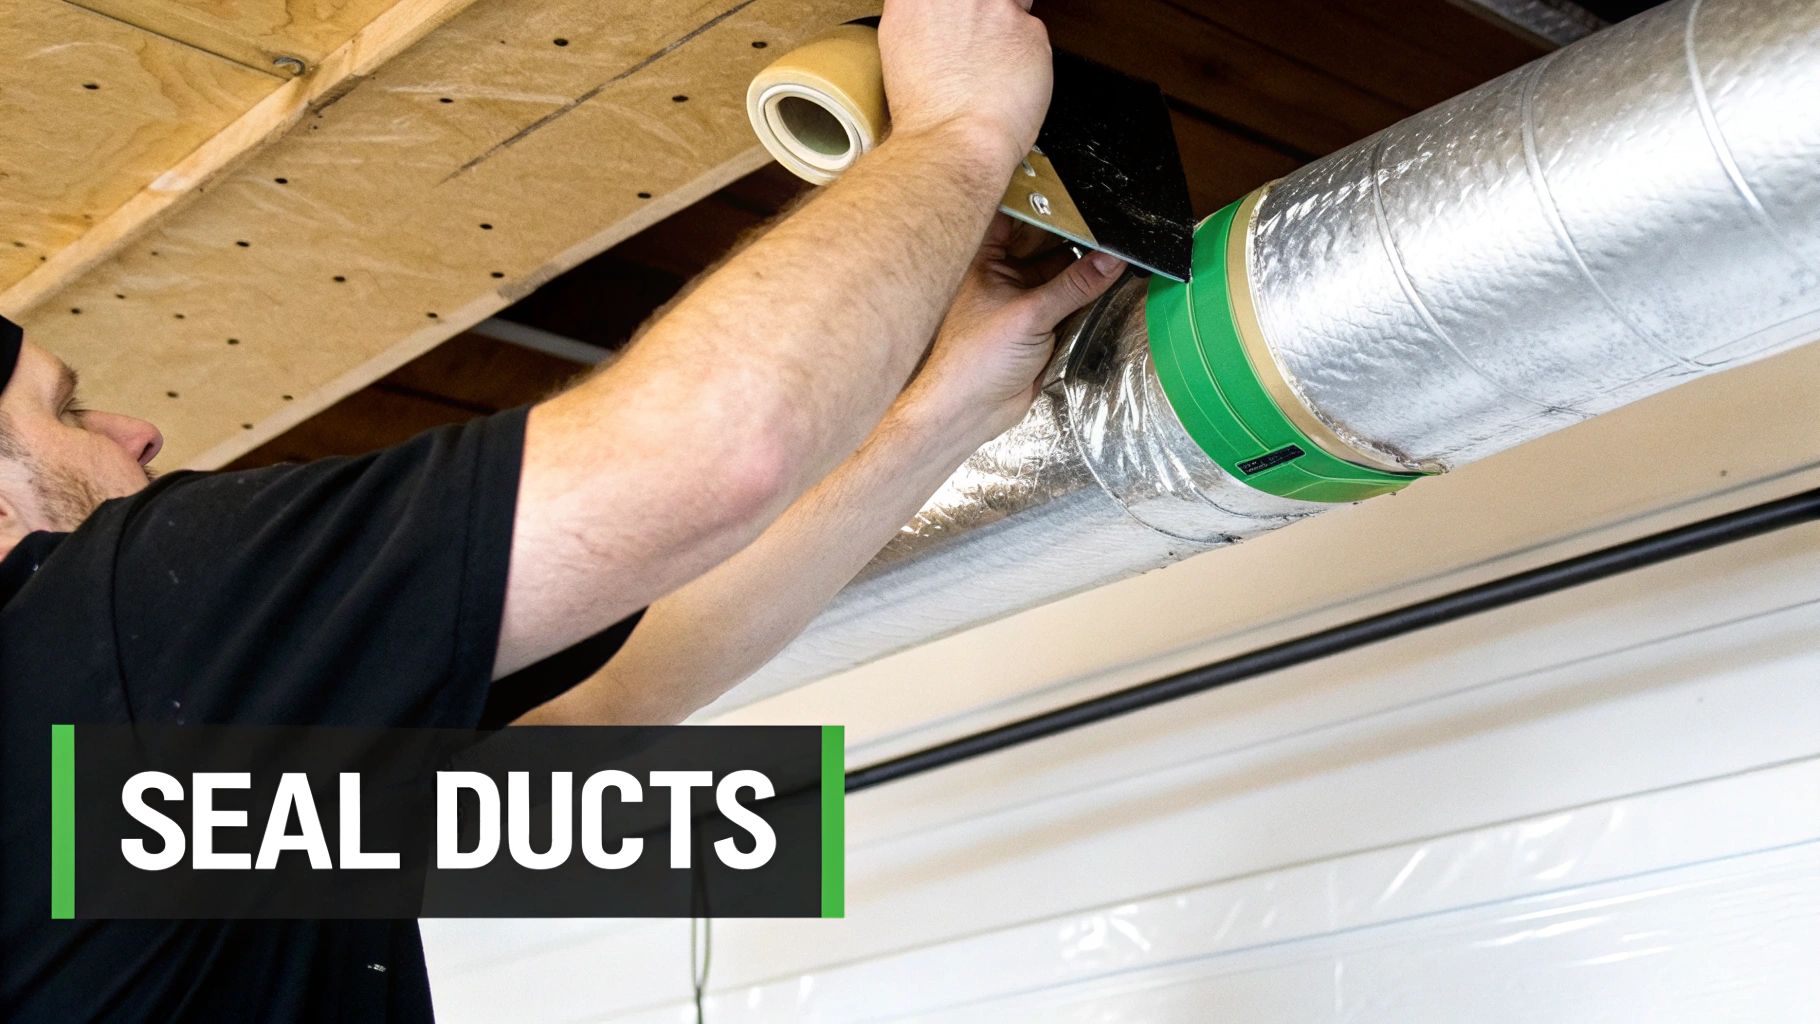
Once you’ve found the weak spots, the fix is pretty straightforward but absolutely critical. Sealing and wrapping these ducts can make a night-and-day difference in the temperature of the air arriving in your bonus room.
- Seal Every Seam: Use a high-quality foil tape to cover every joint and connection. For a truly bulletproof seal, I recommend using a paint-on mastic sealant. It creates a flexible, durable, and airtight barrier that outlasts tape every time.
- Wrap the Ducts: After sealing everything up, wrap the entire length of the ductwork in the garage with duct insulation. This stuff looks like a foil-faced bubble wrap or a fiberglass blanket, and it creates a thermal barrier that keeps the heat inside the duct, where it belongs.
These two steps are a relatively low-cost project that can deliver a big payoff in comfort, ensuring the warm air you’re paying for actually makes it to its destination.
Balancing the Airflow in Your Home
Sometimes the issue isn’t just lost heat, but poor air distribution. Your HVAC system might be blasting warm air into rooms that don’t need it while starving the one that does. This is where HVAC balancing comes in.
Most duct systems have small levers on the main trunk lines called dampers. They work like little valves, letting you control how much air goes down each branch. By slightly closing the dampers to rooms that get too warm, you can force more conditioned air to travel down the path of least resistance—hopefully, to your room over the garage.
Think of it like managing water pressure in your home. If you turn a few faucets down, you increase the flow to the one that’s wide open. Adjusting dampers simply redirects your home’s airflow to where it’s needed most.
Make small adjustments, maybe a quarter-turn at a time, and then give the system a few hours to stabilize before you check the results. This simple tuning process can often solve airflow problems without any expensive modifications.
When to Consider Supplemental Heating Solutions
What if you’ve sealed the ducts, wrapped them, and balanced the system, but the room is still cold? It happens. Sometimes, the original duct run is just too long or undersized to ever deliver enough heat. At this point, it’s time to look at supplemental solutions.
- Duct Booster Fans: These are small fans installed right inside the ductwork. They kick on automatically with your furnace, giving the airflow an extra “push” to help it complete the long journey to the room.
- Ductless Mini-Splits: For a permanent, powerful fix, a ductless mini-split is an excellent choice. This is a separate system with an outdoor unit and an indoor head that provides dedicated heating (and cooling) for that one space. It’s incredibly efficient and gives you precise temperature control, solving the “room above garage cold” problem for good.
Should You DIY This or Hire a Pro?
You’ve found the air leaks and you know you need better insulation. Now for the million-dollar question every homeowner asks: can I fix this myself, or is it time to call in a professional? Making the right call here saves you from wasted weekends, surprise costs, and the frustration of a job that doesn’t quite work.
Honestly, a lot of the fixes for a cold room over a garage are perfect for a determined DIYer. We’re talking low-risk, high-impact tasks you can knock out with basic tools and a bit of patience. Sealing small air gaps with caulk is a fantastic starting point. You can spend a Saturday methodically going through the garage, sealing every little penetration around pipes and wires in the ceiling. It costs next to nothing but pays off immediately in comfort.
Another easy win is upgrading the weatherstripping on your garage door. This is a simple, inexpensive project that directly tackles one of the biggest entry points for cold air. Jobs like these give you a real sense of accomplishment—and you’ll actually feel the difference.
When DIY Is the Smart Move
Some projects just feel made for a hands-on approach. If you’re not afraid of a ladder and have a free weekend, you can seriously reduce your home’s energy loss without breaking the bank. The trick is to be honest about your skills and the size of the job.
Here are a few projects that are perfect for the weekend warrior:
- Air Sealing with Caulk and Foam: This should be your first step. Grab some quality caulk and a can of spray foam from the hardware store and hunt down every visible gap in the garage ceiling and around the rim joists. It’s tedious but incredibly effective.
- Replacing Weatherstripping: Installing new gaskets around the garage door frame and a new seal at the bottom is a straightforward task that only needs a few basic tools.
- Adding Insulation Batts (with a big “but”): If you already have some fiberglass insulation that’s sagging or thin, you can add supports or carefully lay another layer on top. But this only works if you’ve already sealed the air leaks. If you don’t, you’re just putting a wool blanket over a screen door.
A quick word of warning from someone who’s seen it all: Just stuffing more fiberglass batts into a drafty garage ceiling is a waste of time and money. It’s like wearing a windbreaker full of holes. You absolutely must air seal first.
Why Some Jobs Demand a Professional
While it’s tempting to do everything yourself, some jobs require specialized equipment, deep training, and safety protocols that are non-negotiable. This is especially true for anything involving spray foam insulation. It’s not just a fancy caulk; it’s a chemical reaction that has to be done perfectly. If it’s done wrong, it can be totally ineffective or, even worse, hazardous.
Certified spray foam installers go through extensive training for a reason. They know the exact temperatures and pressures needed for the foam to expand and cure properly to hit its stated R-value. More importantly, they use professional-grade breathing gear and ventilation systems to handle the chemical off-gassing during application—something you simply can’t replicate with a hardware store mask.
A pro can also spot underlying issues you might miss, like hidden moisture problems or structural oddities that could ruin the insulation’s performance. When you hire a licensed and insured contractor like Airtight Spray Foam Insulation, you’re not just paying for foam; you’re paying for peace of mind, a job done to code, and a guarantee that your investment will work as promised for decades.
DIY vs. Professional Cost and Effort Comparison
Making the right choice often comes down to balancing your budget, time, and how critical a perfect result is. This table breaks down the most common solutions to give you a clearer picture of what to expect, whether you tackle it yourself or bring in an expert.
| Solution | DIY Approach (Cost/Effort) | Professional Approach (Cost/Effort) | Best For |
|---|---|---|---|
| Air Sealing | Low Cost / Medium Effort: A perfect weekend project. Requires caulk, foam, and a keen eye. | Medium Cost / Low Effort: A pro is faster, more thorough, and uses diagnostic tools. | DIY for basic gaps; Pro for a comprehensive, guaranteed air-tight seal. |
| Insulating Garage Ceiling | Medium Cost / High Effort: Installing batts is hard physical work and far less effective. | High Cost / Low Effort: Spray foam gives superior results and must be done by pros. | Professionals. Spray foam is the only way to create a true air and thermal barrier. |
| Upgrading Garage Door | Medium Cost / Medium Effort: An insulation kit for your existing door is a manageable DIY. | High Cost / Low Effort: A new, factory-insulated door installed by a pro ensures a perfect fit. | DIY for a simple retrofit kit; Pro for a full door replacement and seal. |
Ultimately, a combination of both approaches often works best. You can handle the straightforward air sealing to save some money, then bring in a professional for the high-stakes spray foam job to ensure the thermal barrier is flawless and built to last.
Long-Term Solutions For Lasting Comfort
Even the best attic insulation and air sealing can still leave a room above your garage feeling like an icebox.
When gaps persist and standard fixes fall short, it’s time to explore options built to last.
These upgrades don’t just mask the chill—they tackle the two biggest culprits: a freezing floor and a lack of ambient warmth.
You’ll transform that underused space into one of the coziest corners of your home.
Heating the floor itself is the most direct path to comfort.
Radiant heat beneath your feet delivers steady, even warmth that ordinary systems can’t match.
Upgrading Your Flooring System
Here are two proven strategies to warm your floor from the ground up:
- Electric Radiant Floor Heating
Thin mats or cables slide right under carpet, laminate, or tile. Once wired, they turn your entire floor into a quiet, efficient radiator—perfect for banishing cold spots. - Insulated Subfloor
Adding a layer of insulation beneath your finish flooring creates a thermal break between your living space and the garage below. This barrier cuts heat loss at the source. In South Florida, it’s especially important to check the insulation value needed for concrete block structures to choose the right R-value.
By focusing on the floor, you block the main escape route for heat. It’s a foundational fix that pays dividends for years.
Investing In A Dedicated Heating System
If the ductwork feeding that bonus room is too long or too narrow, your central HVAC might never deliver enough warmth. In those situations, adding a standalone unit is a smart move.
A ductless mini-split system pairs a small outdoor compressor with a slim indoor head. It installs without ducts and offers:
- Targeted Comfort: Control heat (and cooling) for just that room with its own thermostat.
- Extreme Efficiency: Costs less to run than forcing your main system to overcompensate.
- Easy Installation: No extensive ductwork means less disruption and lower labor costs.
Installing a mini-split provides consistent performance, year after year. It’s an upfront investment that solves the “cold room above the garage” problem once and for all—and even boosts your home’s resale appeal.
Common Questions About Fixing a Cold Bonus Room
Even with a solid plan, you’re bound to have some questions when tackling a project like this. We get it. Here are some of the most common ones we hear from homeowners trying to solve that frustrating cold room issue for good.
Will Insulating the Garage Door Solve the Problem?
Insulating the garage door is a great first step, and we definitely recommend it. It makes a big difference in the garage’s ambient temperature, which means less heat gets sucked out of the floor above. A good insulated door can turn that frigid garage into a much more stable buffer zone.
But on its own, it’s almost never a complete fix. The real culprit is usually heat loss straight through the floor. For the best results, you need to combine an insulated door with serious air sealing and high-quality insulation—like spray foam—in the garage ceiling. That two-pronged attack handles both drafts and direct heat transfer.
What Is the Best Insulation for a Garage Ceiling?
Hands down, closed-cell spray foam insulation is the best solution for a garage ceiling. It gives you the highest R-value per inch, so you get maximum insulating power without eating up a ton of headroom.
Even more important, it creates a single, seamless air and moisture barrier. One application seals all those little gaps and cracks that let cold air sneak through, making other types of insulation far less effective. It’s a professional-only job and costs more upfront, but its performance is unmatched for fixing a stubborn room above garage cold problem.
If you’re looking for a DIY alternative, you could try using rigid foam board against the subfloor to air seal, then packing the space with dense mineral wool or fiberglass batts. Just make sure they’re held up securely.
The bottom line: Spray foam is the most effective choice because it tackles insulation (R-value) and air leakage at the same time. It creates a truly airtight thermal barrier that other materials just can’t match.
Can Adding a Bigger Vent Help the Room?
Probably not. Just swapping your vent register for a bigger one won’t solve anything if the ductwork feeding it is the real problem. A larger vent can’t pull more air if there isn’t more air to pull.
The issue is almost always further down the line. The duct run to that bonus room is often too long, too small, or—most commonly—completely uninsulated as it snakes through the cold garage or attic. Before you even think about the register, you need to inspect that entire duct. Sealing the leaks with mastic and wrapping it with proper duct insulation is key. That ensures the warm air from your furnace actually arrives hot, which makes a world of difference.
Ready to permanently solve your cold room problem with the most effective insulation on the market? The team at Airtight Spray Foam Insulation has the experience and equipment to create a perfect thermal barrier in your garage ceiling, guaranteeing a comfortable space for years to come. Request your free, no-obligation quote today!
For homeowners in Stuart, upgrading to spray foam insulation can greatly enhance comfort, efficiency, and moisture control.