Blog
How to Lower Your Electric Bill in Summer: how to lower electric bill in summer

Ready to slash your summer electric bills? It's simpler than you think. Start with two things right now: bump your thermostat up to 78°F and turn on your ceiling fans. Just those two, zero-cost adjustments can cut your cooling expenses by up to 10% and give you some immediate breathing room while you tackle bigger projects.
Your Action Plan for Immediate Summer Savings
When that South Florida sun really starts beating down, your air conditioner can quickly become the most expensive thing you run all day. The high electric bills that follow are no joke. But here’s the good news: you can fight back with a clear, prioritized game plan. This isn't just generic advice you'd find anywhere; this roadmap is built for our hot, humid climate, starting with easy wins and moving toward smart, long-term investments that truly pay off.
This process gives you a visual for how to tackle high energy costs, starting with simple tweaks and building up to major upgrades for lasting results.

The path to a lower bill starts with adjusting daily habits, then moves to sealing your home against the heat, and finally, upgrading key components like insulation for the biggest impact.
To make it even easier, here are some quick wins you can implement this week. These are the low-hanging fruit—the things you can do right away to see a difference in your next bill.
Summer Energy Savings Quick Wins
| Action | Estimated Monthly Savings | Upfront Cost | Time to Implement |
|---|---|---|---|
| Raise Thermostat to 78°F & Use Fans | 5-10% | $0 | < 1 minute |
| Block Sun with Blinds/Curtains | 3-5% | $0 | < 5 minutes/day |
| Run Appliances at Night | 1-2% | $0 | Requires habit change |
| Seal Obvious Air Leaks | 5-10% | $20 – $50 | 1-3 hours |
| Use Bathroom/Kitchen Exhaust Fans | 1-3% | $0 | < 1 minute/use |
These are your starting points. Master these, and you're already well on your way to a more comfortable and affordable summer.
Start with No-Cost Behavior Changes
Your first line of defense against sky-high bills costs absolutely nothing. Since heating and cooling can make up more than 55% of a typical electric bill, even small changes to how you manage your home's temperature can make a massive difference. The name of the game is reducing the workload on your AC.
Start by setting that thermostat to 78°F when you're home. Every single degree you raise it above 72°F can trim cooling costs by up to 3%. Pair this with ceiling fans running counter-clockwise. That breeze creates a wind-chill effect that can make a room feel up to four degrees cooler, so you stay comfortable even with the AC taking a bit of a break.
Beyond that, use your home’s built-in defenses:
- Block the Sun: On windows facing the sun, close your blinds, shades, and curtains during the hottest parts of the day. If you have light-colored coverings, even better—they reflect heat away.
- Ventilate Smartly: After cooking or showering, run the kitchen and bathroom exhaust fans to pull all that hot, humid air straight outside. This simple move stops moisture from spreading and making your AC work overtime.
- Time Your Chores: Hold off on running heat-producers like the dishwasher, clothes dryer, and oven until the cooler evening hours. You don't want to add extra heat to your home when the AC is already battling the afternoon sun.
Low-Cost, High-Impact Upgrades
Once you've got those free strategies down, it's time for some small investments that deliver a big return. These next steps are all about stopping the air you paid to cool from escaping and preventing hot air from sneaking in.
Air leakage is a huge energy waster. Sealing cracks around your windows, doors, and ductwork is a fantastic, low-cost DIY project that keeps your conditioned air right where it belongs—inside.
Think of it like patching a leaky bucket. Weatherstripping for your doors and a tube of caulk for window frames are cheap and easy to apply. You can even find the leaks yourself on a windy day; just hold an incense stick near windows and doors and watch where the smoke wavers. For an even deeper dive into this, check out this excellent guide on how to lower your electric bill in summer. It’s packed with actionable strategies you can start using today.
Cooling Your Home Smarter, Not Harder

During a South Florida summer, your air conditioner is easily the biggest energy hog in your home. Just bumping the thermostat up a few degrees is a start, but if you really want to lower your electric bill, you need a smarter strategy for your HVAC system.
Let’s get beyond the typical advice. The real goal is to get your system to work smarter, not just harder. This is all about optimizing its performance so you stay comfortable without that gut-punch feeling when the utility bill shows up.
Find Your Ideal Thermostat Setting
In a climate as humid as ours, finding the right temperature is a delicate balancing act. We've found 78°F is a fantastic starting point, but the real magic comes from consistency and managing humidity. A smart or programmable thermostat is your best friend here.
Instead of constantly fiddling with the temperature—which just makes your AC work overtime—the "set it and forget it" approach is way more efficient. Your air conditioner doesn't just cool the air; it also pulls out a ton of moisture. When you let it run in longer, more consistent cycles, it does a much better job of dehumidifying your home compared to short, frequent bursts. This makes the air feel more comfortable, even at a higher temperature.
A smart thermostat takes this to another level by learning your daily routine. It can raise the temperature after you leave for work and start cooling the house down right before you get home. You get all the comfort without paying to cool an empty house.
Complete Your DIY HVAC Maintenance Checklist
A well-maintained AC is an efficient AC. Before the summer heat really settles in, running through a few simple checks can help you avoid a sky-high bill or a costly breakdown. A neglected system can easily use 10-25% more energy than one that's properly cared for.
Essential DIY Tune-Up Tasks:
- Change Your Air Filter: This is the easiest and most important thing you can do. A clogged filter is like trying to breathe through a straw—it suffocates your system, restricting airflow and forcing it to run longer and harder. Check it every month and swap it out as soon as it looks dirty.
- Clear the Condensate Line: With Florida's humidity, your AC produces a lot of water that drains outside through a PVC pipe. If that line gets clogged with algae or gunk, water can back up, shut down your system, or cause serious water damage inside. Just pour a cup of distilled vinegar down the line every few months to keep it clear.
- Keep the Outdoor Unit Clean: That big unit outside needs to breathe. Make sure there are at least two feet of clear space around it. Trim back bushes and vines, and gently hose off the fins to get rid of any built-up dirt, pollen, and grass clippings.
A clean outdoor condenser can improve your system's efficiency by up to 10%. Think of it like trying to run with a stuffy nose—clearing the obstruction lets everything work better with a lot less effort.
When to Call a Professional
While DIY maintenance is a huge help, some problems are a clear signal that you need an expert. Ignoring these warning signs will just make your unit struggle, driving up your electric bill before it finally gives out.
Keep an eye out for these red flags:
- Your AC Runs Constantly: If your system never seems to shut off, even on milder days, it might be low on refrigerant, have a failing part, or simply be undersized for your home.
- Warm Air from Vents: This is a big one. It could mean anything from a refrigerant leak to a major issue with the compressor. Don't wait on this.
- Unusual Noises or Odors: Any banging, clanking, or musty smells point to internal problems that need to be diagnosed by a pro right away.
An annual professional tune-up is one of the smartest investments you can make. A technician can check refrigerant levels, deep clean the coils, and inspect all the electrical parts to make sure your system is ready for the brutal summer ahead. And as you think about reducing the load on your HVAC system, researching the best window tint for heat reduction is another great strategy for keeping that intense Florida sun from heating up your home in the first place.
Using Shade and Airflow to Your Advantage
That relentless Florida sun is the number one reason your AC runs nonstop. It bakes your home right through the windows and radiates a staggering amount of heat down from the roof. If you’re serious about lowering your summer electric bill, you have to get serious about battling this solar heat gain.
The strategy is actually pretty simple. First, block the sun before it gets a chance to heat up your house. Second, push out any hot, humid air that sneaks inside. This two-pronged attack takes a massive load off your HVAC system, and that translates directly into energy savings you can see.
Master Your Windows to Block Solar Heat
Think of your windows as giant entry points for heat. On a hot summer afternoon, a single square foot of sun-drenched glass can pump more heat into a room than a small space heater. Getting this under control is a must.
Start with what you already have. During the hottest parts of the day—usually from late morning through the afternoon—close the blinds and curtains on any windows getting direct sun. It’s a small habit that makes a real difference. Light-colored or reflective coverings are best because they bounce the sun’s energy back outside instead of absorbing it and turning it into heat.
Ready for a bigger impact? Consider these upgrades:
- Blackout Curtains: These are fantastic, especially for bedrooms. Their thick, layered fabric is a powerful thermal barrier, capable of blocking up to 33% of heat transfer.
- Reflective Window Films: This is a nearly invisible upgrade I recommend all the time. A quality film can reject up to 78% of the sun's heat without making your rooms dark, so you keep the natural light without the unwanted BTUs.
A little pro tip: Focus your efforts on the east-facing windows in the morning and the west-facing windows in the afternoon. Being strategic like this blocks the most intense sun right when it's hammering those sides of your home.
Use Landscaping as a Long-Term Cooling Strategy
Don't underestimate your own yard. It can be one of your most powerful tools in the fight against summer heat, providing natural shade that only gets better with time. A well-placed tree is like having a giant, free umbrella for your house.
Planting a deciduous tree on the west side of your home is a brilliant long-term play. In the summer, its full canopy will shade your walls and windows from that brutal afternoon sun, easily dropping a room’s temperature by several degrees. Then in the winter, the bare branches let the welcome sunlight through to help warm your home naturally.
And don't forget about the AC unit itself. Planting some shrubs or building a simple slatted fence to shade your outdoor condenser helps it run more efficiently. Just make sure you leave at least two to three feet of clearance all the way around for proper airflow. A shaded AC unit can operate up to 10% more efficiently than one baking in the open sun.
Leverage Ventilation to Expel Hot, Humid Air
Blocking the sun is half the battle. The other half is dealing with the heat and humidity that inevitably build up inside. Smart ventilation is all about pushing that warm, moist air out before your AC has to work overtime to remove it.
Get in the habit of using your bathroom and kitchen exhaust fans every single time you shower or cook. These fans are designed to pull hot, humid air straight outside. Just running them for 15-20 minutes prevents all that sticky moisture from spreading through the house, which is what forces your AC to work harder as a dehumidifier.
Proper attic ventilation is just as critical. On a hot Florida day, your attic can easily hit 150°F or more, basically acting like a giant radiator sitting on top of your living space. That heat seeps right through your ceiling. Good ventilation, using a system of soffit and ridge vents, creates a constant airflow that pushes this superheated air out. When you combine this with a strong thermal barrier, you can dramatically cut down on attic temperatures. You can learn more about how a radiant barrier insulation in your attic works to reflect heat and keep your entire home cooler.
Finding and Sealing Hidden Air Leaks
Trying to keep a leaky house cool is like trying to fill a bucket with holes—a frustrating and incredibly expensive exercise. You’re paying good money for conditioned air, only to have it sneak out through dozens of hidden gaps you might not even know exist. Taking the time to seal up your home is one of the most powerful, yet often overlooked, ways to lower your summer electric bill.
These leaks aren't always obvious. While poorly sealed windows and doors are common culprits, the real energy vampires are often hiding in plain sight. Think about the small gaps around plumbing pipes under your sinks, unsealed electrical outlets on exterior walls, and especially the recessed lighting fixtures that connect directly to your sweltering attic.
Each of these tiny gaps acts like a straw, constantly pulling your cool air out and letting hot, humid Florida air in. Individually, they seem insignificant. But when you add them all up, the combined impact on your comfort and your wallet is massive.
Where to Find the Worst Air Leaks
Before you can seal anything, you have to play detective and find where your conditioned air is escaping. On a windy day, you can use a simple trick with an incense stick. Carefully hold it near common leak points—if the smoke wavers or gets sucked out, you’ve found a leak.
Start your search in these common problem areas:
- Around Windows and Doors: Look for worn-out weatherstripping or cracked caulk along the frames.
- Electrical Outlets and Switch Plates: Air easily travels through the walls and out of these openings.
- Recessed Lighting: Older "can" lights are notoriously leaky, creating a direct pathway to your attic.
- Plumbing and Ductwork Penetrations: Check where pipes and ducts go through walls, floors, and ceilings.
An easy DIY fix for outlets and switches is to install inexpensive foam gaskets behind the cover plates. This simple, five-minute task can significantly reduce air leakage through your walls.
Once you’ve identified these smaller leaks, you can easily seal them with caulk for stationary gaps and weatherstripping for moving parts like doors and windows. This is a low-cost project that offers an immediate return in both comfort and energy savings. For a more thorough approach, you can have a professional conduct a blower door test. We explain how this pinpoints every single leak in our guide on what a blower door test is.
Your Attic: The Fifth Wall of Energy Waste
While sealing gaps around your home is important, the single biggest source of energy loss is almost always found right above your head. Your attic is the "fifth wall" separating your comfortable living space from the blistering heat of a South Florida summer. If it’s not properly sealed and insulated, it acts like a giant heat trap.
Think about it: on a sunny day, your roof absorbs an enormous amount of solar radiation, heating your attic to temperatures of 150°F or higher. That intense heat relentlessly pushes down on your ceilings, forcing your AC to run nonstop just to keep up.
This is where the concept of air sealing becomes so critical. Before you even think about adding more insulation, you must seal all the air leaks between your living space and the attic. This includes gaps around light fixtures, the attic access hatch, and any holes where wiring or pipes penetrate the ceiling. An unsealed attic doesn't just let heat in; it lets your expensive, cooled air out.
The consequences are significant. Air leakage can account for 25% to 40% of the energy used for heating and cooling. If your summer cooling costs are $200 a month, that means up to $80 of it could be from conditioned air escaping through unsealed cracks. This is why solutions like spray foam insulation are so effective—they create a seamless, airtight barrier that directly minimizes this wasteful air infiltration.
Creating a Complete Air Seal
The ultimate goal is to create a complete and continuous air barrier around your entire home. This stops uncontrolled air movement, finally giving you total command over your indoor environment.
When your home is properly sealed, your AC can finally do its job efficiently. It no longer has to fight a constant battle against an influx of hot, humid outdoor air.
This is the foundational step for anyone serious about lowering their summer electric bill. Without a proper air seal, any other energy-saving measures you take—like installing a high-efficiency AC or new windows—will be far less effective. You’d just be cooling the outdoors more efficiently. By sealing your home's envelope first, you ensure that every dollar you spend on cooling stays inside, right where it belongs.
Why Spray Foam Is a Game-Changer for Florida Homes

So, you’ve sealed up the obvious air leaks around your windows and doors. That’s a great start. But if you're serious about slashing your summer electric bills, it’s time to look at the real culprit: your attic and wall cavities. This is where spray foam insulation completely changes the game.
Unlike traditional insulation like fiberglass batts that are just placed between studs, spray polyurethane foam (SPF) starts as a liquid. We apply it directly to the surface, and it expands instantly, filling every microscopic crack and gap. The result is a solid, seamless air barrier that's far more effective than anything else on the market. It’s not just insulation; it’s an air and moisture shield custom-molded to your home.
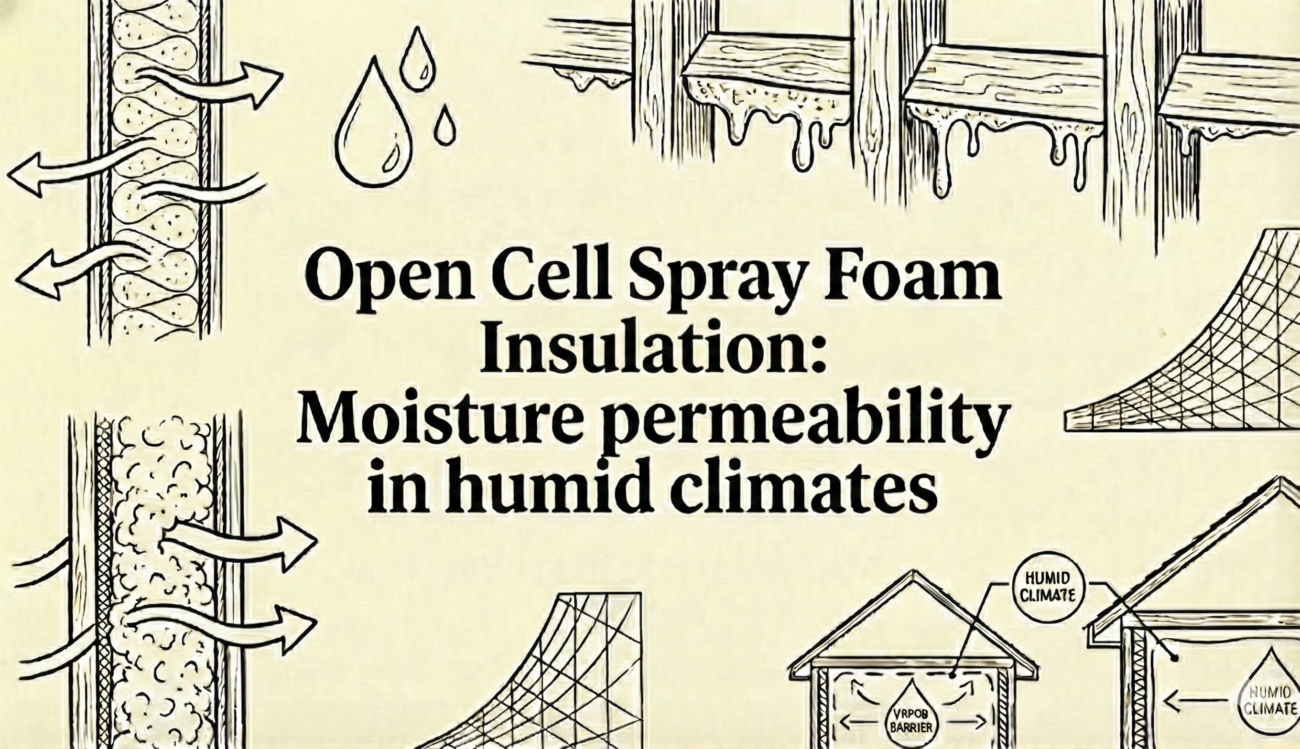
Open-Cell vs. Closed-Cell: What's the Difference?
You’ll hear two terms thrown around with spray foam: open-cell and closed-cell. They’re not interchangeable, and picking the right one for the right spot is crucial for getting the results you want, especially here in South Florida.
Open-Cell Spray Foam:
- This stuff is soft and almost spongy to the touch. It's less dense.
- It’s an incredible air barrier and does a fantastic job of dampening sound.
- Because its cells are "open," it allows water vapor to pass through it, so the structure can breathe.
- This makes it perfect for sealing the underside of your attic roof deck or interior walls.
Closed-Cell Spray Foam:
- This type is rigid, dense, and packs a much higher R-value (insulating power) per inch.
- The "closed" cell structure makes it a true vapor barrier—it blocks air and moisture completely.
- Its rigidity even adds a bit of structural strength to whatever it’s applied to.
- We use this in crawl spaces, on exterior block walls, and anywhere we need to stop moisture in its tracks to combat Florida's oppressive humidity.
For most homes from Jupiter down to West Palm, we often end up using both. A hybrid approach—using open-cell on the attic roof deck to create a sealed, unvented attic and closed-cell on foundation walls—gives you the best of both worlds.
In a climate as hot and humid as ours, controlling moisture is just as important as controlling temperature. The ability of closed-cell foam to act as a vapor barrier is a massive advantage in preventing mold and mildew.
The Real-World Benefits You’ll Feel and See
Switching from old-school insulation to spray foam is more than just an upgrade. It truly transforms how your home performs and feels day-to-day.
Imagine your AC actually cycling off for a while. Picture your upstairs being just as cool as the ground floor, without any of those stubborn hot spots. That’s what living in an air-sealed home is like.
Here's what our customers consistently tell us they notice:
- Drastically Better Humidity Control: By stopping humid, sticky air from seeping into your home, spray foam lets your AC focus on cooling, not just constantly dehumidifying. The air just feels crisper and more comfortable.
- Cleaner Indoor Air: Sealing up your home's envelope means you're also blocking dust, pollen, and other outdoor pollutants from sneaking in through gaps in the attic and walls.
- A Much Quieter Home: The sound-deadening quality of spray foam, particularly open-cell, is something that often surprises people. It significantly cuts down on noise from traffic, neighbors, and even rainstorms.
We dive deeper into these improvements in our guide on the benefits of spray foam insulation, explaining how it improves your home’s overall health and comfort.
Breaking Down the Return on Your Investment
Let’s be direct: the upfront cost of spray foam is higher than fiberglass. But viewing it as an expense is the wrong way to look at it. This is a permanent investment in your home’s performance and value, and the payback starts on day one with a dramatically lower energy bill.
Don't just take our word for it. A 2023 ASHRAE report found that buildings with spray foam insulation cut their annual HVAC energy use by 25-40% compared to those with traditional fiberglass. Other studies focused on homes show that homeowners can see a 20% to 50% reduction in their cooling and heating costs.
When your air conditioner is your biggest energy hog for most of the year, those savings add up incredibly fast. For many of our South Florida clients, the investment in spray foam pays for itself in just a handful of years. After that, the money you save every month is pure profit, making those summer electric bills something you no longer have to dread.
Your Top Questions About Summer Energy Savings, Answered
When you're serious about figuring out how to lower your electric bill in summer, plenty of questions pop up. We hear them all the time from homeowners across South Florida, so we've put together straight answers to the most common ones we get. Our goal is to give you the clear, practical info you need to make smart decisions for your home and your wallet.
What's the Single Biggest Thing I Can Do to Lower My Summer Electric Bill?
While small habits definitely add up, the single most effective, long-term strategy is beefing up your home's thermal envelope. This means professional air sealing and high-performance insulation, especially in your attic. Here in our region, heat gain through the roof and constant air leaks are the real culprits behind sky-high cooling costs.
Installing spray foam insulation tackles both of these critical issues at once. It creates a seamless, airtight barrier that can slash cooling costs by 20-50%. That’s a far more substantial and permanent impact than just bumping up the thermostat or closing the blinds.
Is Spray Foam Insulation Really Worth the Cost in Florida?
Absolutely. The return on investment for spray foam insulation in a hot, humid climate like South Florida is one of the best you can make. Think about it—we rely on our air conditioning for most of the year, so those significant energy savings start paying you back immediately.
For many homeowners, the system pays for itself in just a few years through lower utility bills. But the financial return is only part of the story. It also:
- Adds significant value to your property.
- Dramatically improves indoor comfort by getting rid of drafts and hot spots.
- Provides a superior moisture barrier to fight our relentless humidity and prevent mold growth—a massive benefit here.
How Can I Tell if My Current Insulation Isn't Working?
There are a few tell-tale signs that your insulation is failing. The most obvious one is a quick visual check. If you head up to your attic and can see the tops of your ceiling joists, you almost certainly don't have enough insulation. It's as simple as that.
Other red flags to watch out for include:
- Noticeable temperature swings between different rooms or between floors.
- Your AC running nonstop on hot days but never quite hitting the temperature you set.
- High indoor humidity that feels sticky and damp, even when the air conditioner is on full blast.
These are all strong indicators that your home’s envelope is compromised. Your expensive cool air is escaping, and hot, moist air is sneaking in.
Besides Insulation, What Other Upgrades Have the Best ROI?
Once you've properly sealed and insulated your home's envelope, the next best investments are upgrading to a high-efficiency HVAC system and installing energy-efficient windows or high-quality window films. A modern AC unit with a high SEER2 (Seasonal Energy Efficiency Ratio) rating is miles ahead of an older system in terms of efficiency.
But—and this is critical—those expensive upgrades will never deliver their full potential if your home is still leaky. You’ll just be cooling the outdoors more efficiently. To get the best possible return on your investment, you have to start with the foundation: sealing and insulating your home's envelope first.
Ready to stop fighting high summer bills and transform your home's comfort and efficiency? The Airtight Spray Foam Insulation team has over 25 years of experience helping homeowners in Jupiter, Palm Beach Gardens, and across South Florida. Request your free, no-obligation quote today and discover how the Airtight Comfort System can make your home quieter, healthier, and more affordable.